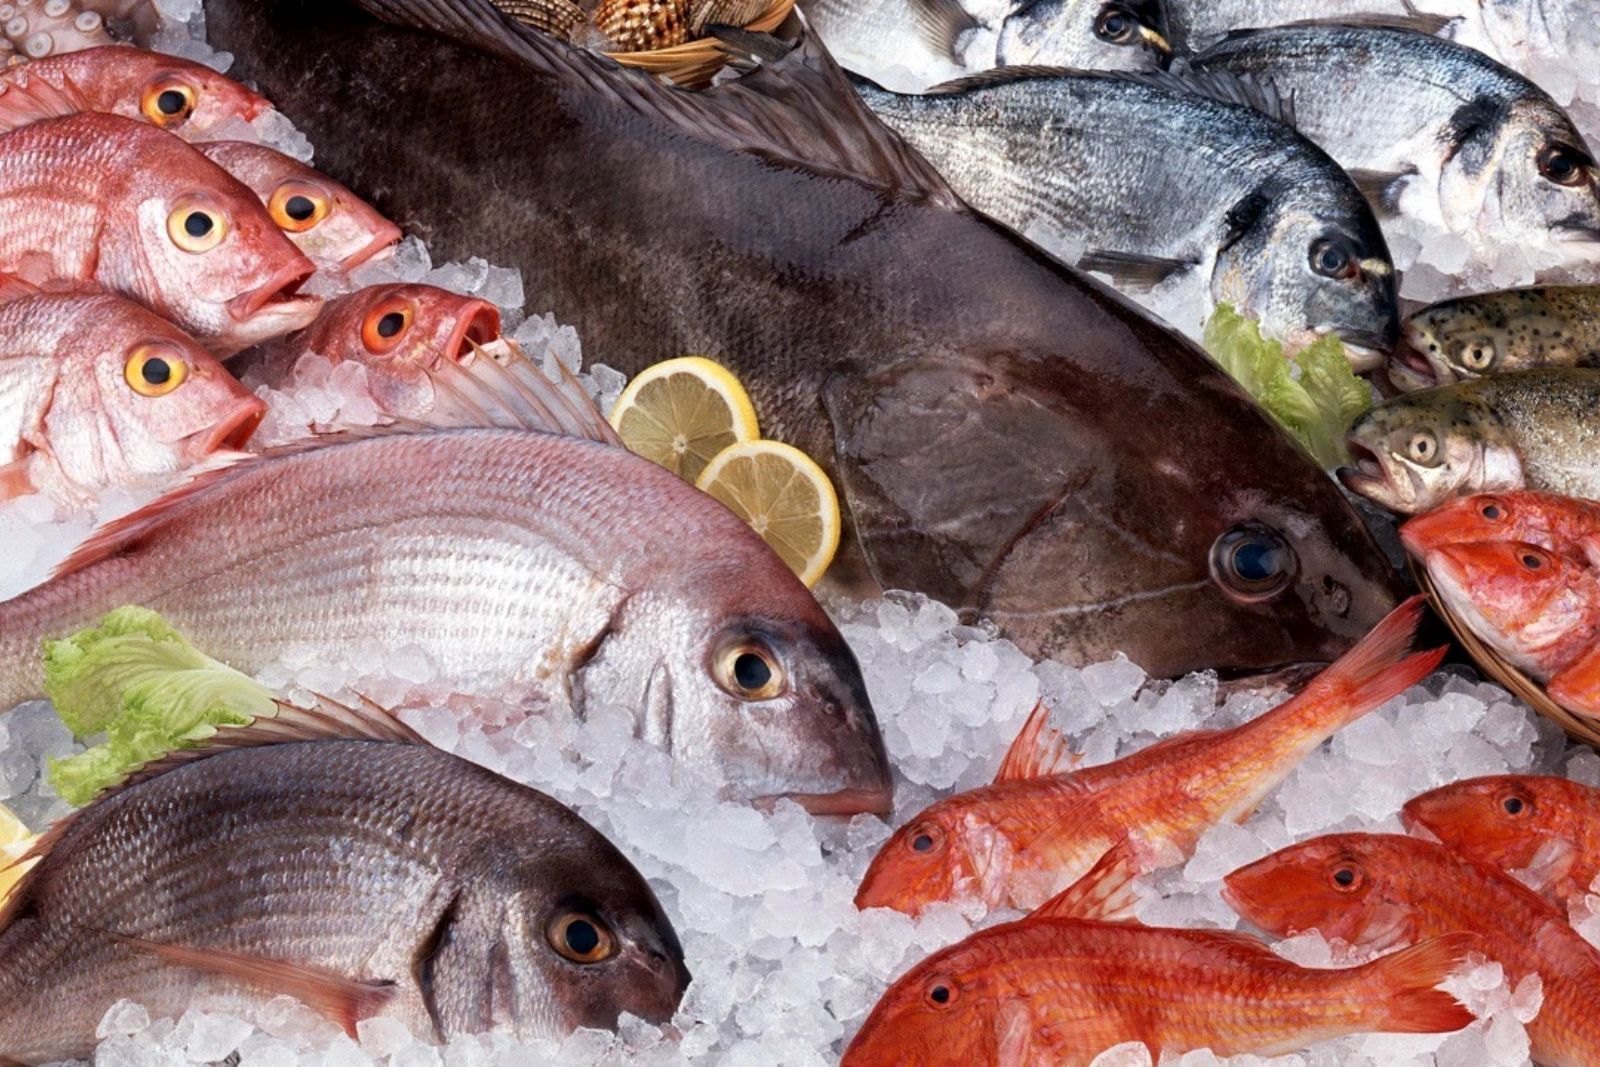
Fish is a delectable source of lean protein, rich in essential nutrients, and enjoyed by people around the world. Whether you’ve caught a fresh catch or want to stock up during a sale, knowing how to freeze fish properly is a valuable skill. Freezing fish preserves its flavor and texture, allowing you to enjoy it even when it’s not in season. In this article, we’ll walk you through the step-by-step process of freezing fish to maintain its quality and taste for future meals.
Here are the simple steps to freeze fish:
Step 1: Choose Fresh Fish
Selecting fresh fish is the cornerstone of ensuring your frozen fish maintains its quality and flavor. This initial step sets the foundation for a successful freezing process. Here’s an explanation of why it’s so important:
When you’re at the fish market or the seafood section of your local grocery store, it’s essential to keep a keen eye out for certain characteristics that indicate the freshness of the fish you’re considering. These characteristics serve as telltale signs of the fish’s overall quality and taste.
- Clear, Bright Eyes: Fresh fish should have eyes that are clear and bright, almost like they’re glistening. Cloudy or sunken eyes are signs of older or less fresh fish. Clear eyes are a visual cue that the fish was caught relatively recently.
- Shiny Skin: The skin of fresh fish should appear moist and shiny. Dull, dry, or discolored skin can be indicative of fish that’s been sitting around for a while. The skin’s shine is a sign of the fish’s natural oils, which contribute to its flavor and texture.
- Mild Oceanic Aroma: When you bring the fish close to your nose, it should have a mild, clean, and somewhat briny oceanic aroma. Avoid fish with a strong, unpleasant, or “fishy” smell, as it’s likely past its prime. The scent should evoke the sea but not overwhelm your senses.
- Flesh Resilience: Gently press your finger against the fish’s flesh. Fresh fish will bounce back and feel firm. If the flesh leaves an indentation or feels mushy, it’s a sign that the fish has started to deteriorate, and freezing it may not yield the best results.
The freshness of the fish you choose is crucial because freezing doesn’t reverse the aging process; it merely preserves the current state. Therefore, starting with high-quality, fresh fish ensures that your frozen fish will taste as close to freshly caught as possible.
Additionally, consider your preference and intended use when selecting fish. Whether you choose whole fish or fillets depends on your culinary plans. Whole fish is excellent for presentation and can be prepared in various ways, such as grilling or baking. Fillets, on the other hand, are convenient for quick cooking methods like pan-searing or broiling.
Step 2: Clean and Gut (if needed)
Cleaning and gutting a whole fish is a vital step in the fish-freezing process, and it becomes particularly important if you’ve chosen to freeze the fish as a whole. Here’s a detailed explanation of why this step is essential:
- Removal of Scales, Slime, and Debris: When fish are caught, they often still have scales, slime, and potentially other debris on their skin. Scales are hard, often overlapping plates that cover the fish’s body. They not only add an undesirable texture to the fish when cooked but can also trap dirt and contaminants. Slime, while natural, can be a breeding ground for bacteria if not cleaned properly. Debris can include bits of seaweed, sand, or other foreign matter that might adhere to the fish while it’s in the water. Removing these elements is crucial for ensuring that your fish is not only safe but also appetizing when you eventually prepare and consume it.
- Gutting for Freshness: Gutting the fish involves opening its belly and removing its internal organs, which include the stomach and intestines. This step is essential for preserving the fish’s overall quality during freezing. When fish are caught, their internal organs can start to break down and release enzymes that can affect the flesh’s texture and flavor. By removing the innards promptly, you prevent this deterioration and ensure that the fish’s flavor remains fresh.
- Thorough Rinsing: After gutting, it’s crucial to rinse the fish thoroughly under cold running water. This rinsing process removes any remaining blood, lingering bits of innards, and other impurities. It also helps to wash away any lingering fishy odors and maintains the fish’s clean, fresh taste.
By cleaning and gutting the fish, you’re essentially starting the freezing process with a clean slate. This preparation not only ensures that the fish’s natural flavors remain intact but also minimizes the risk of bacterial growth and spoilage during freezing and thawing. It’s an essential step in maintaining the fish’s quality and safety, making sure that when you do decide to prepare your frozen fish, it’s as delicious and wholesome as possible. Whether you’re an experienced angler or simply someone who appreciates a good seafood dish, taking the time to clean and gut the fish properly is a small effort that pays off in the end with a superior culinary experience.
Step 3: Fillet (if desired)
Fillet, or filleting, refers to the process of removing the flesh of a fish from its bones. This step is optional, but it offers several advantages, particularly in terms of convenience and culinary versatility. Here’s an explanation of why filleting may be a practical choice:
- Convenience and Portion Control: Filleting the fish before freezing can make your future cooking endeavors more convenient. Fillets are typically uniform in size and thickness, making them easier to handle and cook evenly. This is especially useful if you plan to prepare individual servings. Moreover, fillets can be portioned according to your specific needs, whether you’re cooking for a family dinner or just for yourself.
- Bone Removal: One of the primary benefits of filleting is the removal of bones. While some people enjoy the flavor and texture of fish cooked with bones, many prefer boneless fillets for a smoother dining experience. Bones can affect both the texture and flavor of the fish during freezing and cooking. By filleting, you can ensure that there are no bones left in the fish, reducing the risk of unpleasant surprises when you’re enjoying your meal.
- Culinary Versatility: Fillets are incredibly versatile in the kitchen. They can be used in a wide range of recipes, from pan-searing and grilling to baking and frying. Filleted fish is often more adaptable to different cooking methods compared to whole fish, which may require specific preparations.
- Even Freezing: Fillets freeze more quickly and evenly than whole fish due to their smaller size and uniform thickness. This can help preserve the fish’s quality during freezing, as rapid freezing minimizes the formation of large ice crystals that can affect texture.
However, it’s important to note that filleting requires some skill and a sharp fillet knife. If you’re not confident in your filleting abilities, you can choose to freeze the fish as a whole or have it filleted by a professional fishmonger. Additionally, some fish are better suited for filleting than others, so consider the type of fish you’re working with and your culinary preferences.
Should I remove the skin before freezing fish?
Removing the skin from fish before freezing is a matter of preference. While the skin can protect the fish and help maintain its moisture during freezing, some individuals prefer to remove it for culinary reasons, as skinless fillets can be more versatile in various recipes. If you choose to keep the skin, ensure it is properly cleaned, wrapped, and sealed to prevent freezer burn and maintain the fish’s quality. Ultimately, the decision to remove or retain the skin should align with your specific culinary preferences and intended use.
What are the differences between freezing whole fish and fillets?
Freezing whole fish preserves the fish’s natural appearance, including head, tail, and skin, while fillets are boneless and skinless, offering a cleaner presentation. Whole fish may require more storage space and preparation, including cleaning and gutting. Fillets are more convenient for cooking, versatile in various recipes, and easier to portion.
Step 4: Portion the Fish
Portioning your fish is a crucial step in the fish-freezing process, as it directly impacts your future cooking convenience and helps minimize food waste. Here’s an explanation of why it’s essential and how it can benefit you:
- Convenience in Meal Preparation: By portioning the fish before freezing, you’re essentially prepping it for future meals. This step allows you to have readily available serving sizes that match your typical cooking needs. For example, you can create individual portions for single servings or divide the fish into larger fillets for family dinners. Having pre-portioned fish in your freezer streamlines meal preparation, making it faster and more convenient.
- Minimizing Food Waste: Portioning your fish helps reduce food waste. When you freeze an entire fish or a large fillet, you may find yourself defrosting more than you actually need for a particular meal. This can lead to unused portions that might go to waste. By dividing the fish into manageable portions, you can thaw only what you intend to use, minimizing leftovers and food waste.
- Versatility in Meal Planning: Portioning also provides you with flexibility in meal planning. You can mix and match different portions of fish with various recipes and side dishes, adapting your meals to suit your mood and dietary preferences. Whether you’re in the mood for a solo fish dinner or a family fish feast, portioned fish allows you to tailor your meals accordingly.
- Faster Thawing: Smaller portions of fish generally thaw more quickly than larger ones. This means you can take out only the amount you need from the freezer, reducing the time it takes to prepare your meal. Rapid thawing can be particularly helpful on busy weeknights when you want a quick and easy dinner.
When portioning your fish, it’s essential to use appropriate packaging materials to maintain freshness and prevent freezer burn. You can use plastic wrap, aluminum foil, or freezer-safe containers for individual portions, ensuring they’re airtight and well-sealed to protect the fish from moisture and air.
Step 5: Wrap and Seal
The process of wrapping and sealing your fish portions is a critical step in preserving their quality during freezing. Proper wrapping and sealing help prevent freezer burn and maintain the freshness of the fish. Here’s an explanation of why this step is essential and how it works:
- Protecting Against Freezer Burn: Freezer burn occurs when air comes into contact with the fish’s surface, causing moisture to evaporate. This process can lead to the formation of ice crystals on the fish, resulting in a dry, discolored appearance and potential changes in flavor and texture. Wrapping and sealing the fish create a barrier that prevents air from reaching the fish, thus safeguarding it against freezer burn.
- Minimal Exposure to Air: When you tightly wrap the fish portions in plastic wrap or aluminum foil, you’re essentially creating a protective shield. The goal is to minimize the amount of air trapped within the packaging. Even small amounts of air can contribute to freezer burn, so it’s essential to ensure a snug fit around the fish.
- Vacuum Sealing for Optimal Preservation: If you have a vacuum sealer, it’s an excellent tool for fish preservation. Vacuum sealers remove virtually all the air from the packaging, creating an airtight environment. This level of sealing is particularly effective in preventing freezer burn and preserving the fish’s freshness. It also helps maintain the fish’s original taste and texture over an extended period.
- Preventing Flavor Transfer: Properly wrapped and sealed fish portions also prevent flavor transfer. Fish can easily absorb odors from the surrounding environment in the freezer. By sealing the fish tightly, you reduce the risk of it taking on unwanted flavors from other foods in your freezer.
Step 6: Double-Bag for Extra Protection
Double-bagging your wrapped fish portions with resealable freezer bags is an extra layer of protection that goes a long way in preserving the quality of your frozen fish. Here’s an explanation of why this step is valuable and how it enhances the preservation process:
- Enhanced Freezer Burn Protection: Freezer burn is a common issue in freezing, and it occurs when air reaches the surface of the food. Double-bagging acts as an additional barrier against freezer burn. By placing your already wrapped fish portions into a resealable freezer bag, you create an extra layer of insulation that minimizes air exposure. This added protection significantly reduces the risk of freezer burn, ensuring that your fish remains moist and flavorful.
- Odor Isolation: Fish, like other foods, can emit strong odors that might permeate other items in your freezer. Double-bagging helps isolate these odors. The resealable freezer bag acts as a seal to contain any fish odors within, preventing them from spreading to other foods and affecting their flavors. This is particularly important if you have a variety of foods stored in the same freezer.
- Moisture Control: Double-bagging also assists in moisture control. In the freezing process, moisture can escape from the fish, leading to freezer burn. The extra layer of protection helps retain moisture within the fish, preserving its natural juiciness and texture.
- Easy Organization: Using resealable freezer bags for double-bagging provides an added advantage of easy organization. You can neatly stack and arrange the bags in your freezer, making it more efficient to locate specific portions when you need them. Additionally, the clear bags allow you to see what’s inside, eliminating the need to open multiple packages to find the fish you want.
- Tight Seal: Resealable freezer bags are designed to create a tight seal. After placing your wrapped fish portions inside, you can squeeze out excess air before sealing the bag securely. This tight seal helps maintain the integrity of the fish’s packaging and prevents air infiltration.
Step 7: Label and Date
Labeling and dating each package of frozen fish is a crucial organizational step that helps you keep track of your freezer contents, maintain freshness, and prevent confusion. Here’s an explanation of why this step is essential and how it benefits your overall freezer management:
- Identification of Fish Type: Labeling each package with the type of fish is essential, especially if you have various types of seafood stored in your freezer. Different types of fish may require different cooking methods or have varying shelf lives. By clearly identifying the fish type on the package, you avoid any mix-ups and ensure that you can select the specific fish you desire for a particular meal.
- Date of Freezing: Adding the date of freezing to the label provides a critical piece of information about the fish’s freshness. It allows you to determine how long the fish has been in the freezer, helping you prioritize which packages to use first. This practice ensures that you consume your fish within a reasonable timeframe to enjoy it at its best quality.
- Prevention of Confusion: A well-organized freezer is essential for efficient meal planning and reducing food waste. When you label and date your packages, you minimize the chances of confusion. You won’t have to guess the age or type of fish in each package, and you can avoid accidentally using fish that may have been stored for too long.
- Quality Assurance: Knowing the type and age of your frozen fish enables you to make informed decisions about how to prepare it. For example, you might choose to use the oldest fish first to ensure it’s consumed before its quality declines. This practice helps you maintain a high standard of quality in your meals.
- Inventory Management: Labeling and dating your fish packages is part of effective inventory management. It allows you to keep track of your stock, plan your meals, and avoid the risk of over-purchasing or over-stocking fish. This can help you reduce food waste and optimize your grocery shopping.
To label your packages, you can use a waterproof marker or a label specifically designed for freezer use. Write down the fish type and the date of freezing clearly on each package. If you’re storing multiple packages in the same container or drawer, consider using a removable label that you can easily transfer from one package to another as you use them.
Step 8: Freeze Properly
Proper freezing is a critical step in the fish preservation process. It directly impacts the quality and safety of your frozen fish. Here’s an explanation of why it’s essential and how to go about it:
- Maintaining Quality and Safety: Freezing fish at the correct temperature is crucial for preserving its quality and safety. At temperatures below 0°F (-18°C), the growth of microorganisms, including bacteria and parasites, is significantly slowed down or halted altogether. This helps prevent spoilage and ensures that the fish remains safe to eat for an extended period.
- Minimizing Freezer Burn: Proper freezing minimizes the risk of freezer burn, which occurs when moisture on the fish’s surface evaporates and forms ice crystals. Freezer burn can lead to changes in texture, color, and flavor. Storing fish at the recommended temperature helps maintain the fish’s moisture content and prevents freezer burn.
- Quick and Even Freezing: Rapid freezing is essential to maintain the quality of the fish. When you place the packaged fish portions in the coldest part of your freezer, they freeze quickly and evenly. This quick freezing process minimizes the formation of large ice crystals within the fish, which can damage its cellular structure and texture.
- Proper Airflow: Adequate airflow around the fish packages is necessary to ensure uniform freezing. Proper spacing between packages allows cold air to circulate efficiently, helping to maintain consistent freezing temperatures and ensuring that the fish freezes evenly. Crowding the freezer can impede airflow, so avoid overloading it.
- Preventing Flavor Transfer: Properly frozen fish is less likely to absorb odors from other foods in the freezer. Keeping the fish well-sealed and in a separate section of the freezer helps prevent flavor transfer, ensuring that your fish retains its natural taste.
To achieve proper freezing:
- Set the Temperature: Ensure that your freezer is set to maintain a temperature at or below 0°F (-18°C).
- Choose the Coldest Zone: Place the packaged fish portions in the coldest zone of your freezer. Typically, this is towards the back and bottom of the freezer, as cold air tends to settle there.
- Allow Adequate Space: Leave enough space between the fish packages to allow for proper airflow. Avoid stacking or cramming packages together.
- Monitor Freezer Capacity: Avoid overloading your freezer with too much food at once. It’s essential to maintain proper air circulation for efficient freezing.
How long can I keep fish in the freezer before it goes bad?
Fish can typically be stored in the freezer for 3-12 months, depending on factors like the type of fish, packaging, and storage conditions. Lean fish generally has a longer freezer life than fatty fish. Proper packaging in airtight containers or vacuum-sealed bags and storage at or below 0°F (-18°C) are key to maximizing freezer life.
Step 9: Thaw Carefully
Thawing frozen fish is the final step in the process of preserving its quality. How you thaw the fish can significantly impact its texture and taste. Here’s an explanation of why careful thawing is essential and how to do it effectively:
- Texture and Moisture Preservation: Thawing fish slowly and gently helps preserve its texture and moisture content. Rapid thawing methods, such as using a microwave or placing the fish in warm water, can lead to uneven thawing and may result in partially cooked or dry fish. Thawing in the refrigerator, on the other hand, allows the fish to thaw uniformly and maintain its natural juiciness.
- Food Safety: Thawing fish at room temperature or using warm water can create conditions that promote bacterial growth. This can pose a food safety risk. Slow thawing in the refrigerator keeps the fish at a safe and consistent temperature, minimizing the risk of bacterial growth and foodborne illness.
- Flavor Preservation: Rapid thawing methods can leach out some of the fish’s natural flavors and aromas, resulting in a less flavorful dish. Slow thawing in the refrigerator allows the fish to retain its original taste.
Here’s how to thaw fish carefully:
- Transfer to the Refrigerator: Place the frozen fish in its sealed packaging on a plate or shallow dish to catch any potential drips. Then, transfer it to the refrigerator. Thawing in the refrigerator takes time, so plan ahead. As a general rule of thumb, allow approximately 24 hours of thawing time for every 1-2 pounds of fish.
- Maintain Proper Hygiene: Ensure that the fish is securely sealed in its packaging to prevent cross-contamination. Keep it separate from other foods in the refrigerator.
- Check for Full Thawing: After the recommended thawing time has passed, check the fish for full thawing. The flesh should be soft to the touch and the fish should be pliable. If there are any ice crystals left, it may need more time.
- Use Promptly: Once the fish is fully thawed, it’s best to use it promptly. Avoid refreezing thawed fish, as this can negatively impact its quality and safety.
- If you’re in a hurry and need to thaw fish more quickly, you can use the cold-water method. Place the sealed fish package in a large bowl of cold water and change the water every 30 minutes. This method is faster than refrigeration but still gentler than rapid thawing methods like the microwave.
Other related questions
Can I refreeze fish?
Refreezing fish is generally discouraged as it can lead to quality degradation. When fish thaw, ice crystals may form, damaging the texture. However, if fish is safely thawed in the refrigerator and remains cold, you can refreeze it once, but the quality may still diminish.
How do I know if the fish has gone bad after being frozen?
Frozen fish can go bad if improperly stored or frozen for an extended period. Signs of bad frozen fish include off-putting odors, freezer burn (dry or discolored patches), and a slimy or mushy texture. If you suspect spoilage, it’s safer to discard it to avoid potential foodborne illness.
Is it safe to freeze cooked fish?
Yes, it is safe to freeze cooked fish. Freezing cooked fish helps extend its shelf life while preserving its quality. Ensure the fish is completely cooled, wrap it tightly to prevent freezer burn, and store it at or below 0°F (-18°C) for optimal results.
Can I freeze fish that has been marinated or seasoned?
Yes, you can freeze fish that has been marinated or seasoned. Marinating or seasoning fish before freezing can enhance its flavor and make meal preparation more convenient. However, it’s essential to ensure that the fish is well-sealed in airtight packaging to prevent flavor transfer and freezer burn. Properly wrapped and sealed, marinated or seasoned fish can be frozen and stored until you’re ready to cook it.
Are there specific types of fish that freeze better than others?
Certain types of fish freeze better than others due to their lower oil content. Lean fish, such as cod, haddock, or tilapia, tend to freeze well because they have less fat. The lower oil content reduces the risk of fish becoming rancid or developing off-flavors during freezing and storage. Fatty fish, like salmon or mackerel, have a higher oil content and may be more prone to quality deterioration during freezing. However, with proper packaging and storage, even fatty fish can be successfully frozen.


