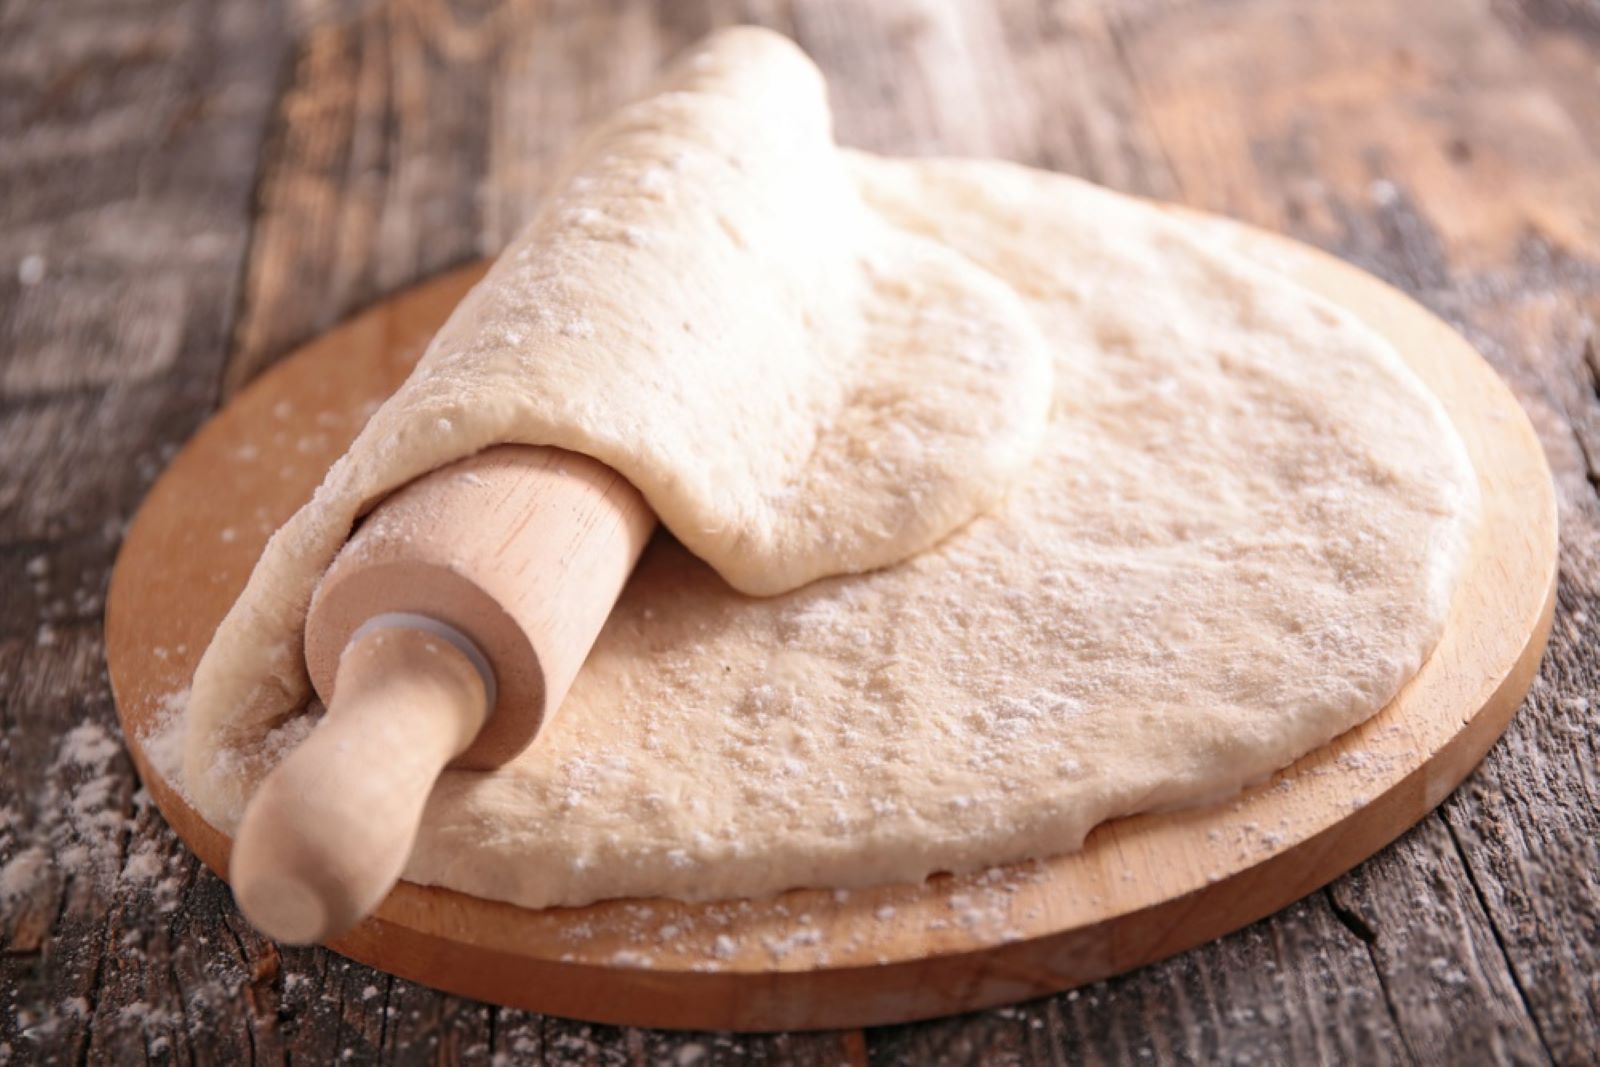
Yeast roll dough, the heart and soul of tender and pillowy rolls that grace dinner tables and gatherings, embodies the timeless tradition of homemade baking. This mixture of flour, water, yeast, and often a touch of sweetness holds the promise of becoming delectable rolls that bring comfort and warmth to any meal. The process of kneading and rising gives the dough its softness and flavor, as yeast ferments and leavens the mixture. However, when preparing yeast roll dough for special occasions or larger batches for convenience, it can be challenging to bake them all before the dough loses its optimal qualities.
Freezing yeast roll dough becomes a practical and efficient method to preserve its potential for golden perfection, ensuring that each roll captures the essence of homemade excellence and freshly baked delight, even when time constraints or unexpected events may not allow for immediate baking. In this guide, we will explore the best practices for freezing yeast roll dough, allowing you to savor the richness of this essential baking staple and elevate your culinary creations with the essence of perfectly preserved dough, without the need for immediate baking or concerns about dough quality.
Here are the simple steps to freeze yeast roll dough:
Step 1: Prepare the Yeast Roll Dough
When it comes to freezing yeast roll dough, the first step is to create the dough itself. This involves gathering the necessary ingredients and following your preferred yeast roll recipe. The dough is the foundation of the final baked product, and its quality greatly impacts the texture and taste of the rolls or baked goods.
Here’s a breakdown of this step:
- Gathering Ingredients: Before you begin, gather all the ingredients required for your yeast roll recipe. This usually includes items like flour, yeast, water, milk, sugar, salt, and any other optional flavorings or additives.
- Mixing the Dough: Follow the instructions in your recipe to combine the ingredients and create the dough. Mixing typically involves combining the dry ingredients and then adding the liquids. This step can be done by hand or with the help of a stand mixer.
- Kneading: After mixing, the dough needs to be kneaded. Kneading is a process of folding, pressing, and stretching the dough to develop gluten, which gives the dough its structure and elasticity. Proper kneading helps create a dough that rises well and produces fluffy rolls.
- Initial Rising: Once the dough is kneaded, it needs time to rise. Place the dough in a lightly oiled bowl, cover it with plastic wrap or a clean kitchen towel, and let it rest in a warm, draft-free place. During this rising phase, the yeast in the dough ferments the sugars, producing carbon dioxide gas that causes the dough to expand and become airy.
- Monitoring the Rise: The duration of the initial rise can vary depending on the recipe and the ambient temperature. It usually takes around 1 to 2 hours. The dough should double in size during this time.
The reason it’s important to go through the initial rising process before freezing the dough is to allow the yeast to activate, which contributes to the dough’s flavor and texture. Freezing dough before the initial rise may negatively impact the yeast’s activity and the overall quality of the baked goods. By preparing the dough and letting it rise first, you’re setting the foundation for successful baking results even after freezing.
After the dough has completed its initial rise, you’re ready to move on to the next steps in the freezing process. Properly preparing and allowing the dough to rise ensures that your yeast roll dough is well-developed and ready to be portioned, frozen, and eventually transformed into delicious baked goods whenever you choose.
Step 2: Portion the Dough
After you have prepared and allowed your yeast roll dough to go through its initial rising process, the next step in the process of freezing the dough is to portion it into individual servings. This step is essential for both practicality and convenience, as it allows you to freeze the dough in sizes that are ready to be transformed into specific types of baked goods whenever you’re ready to use them.
Here’s a closer look at this step:
- Dividing the Dough: Take the risen dough and gently deflate it by pressing down on it. This helps release excess air and prepares the dough for shaping. Decide on the size of rolls or baked goods you want to make. Common examples include dinner rolls, cinnamon rolls, or even larger loaves of bread.
- Shaping: With the dough deflated, begin by dividing it into equal portions based on the desired size of the finished product. You can use a bench scraper, knife, or your hands to divide the dough. Ensure that the portions are relatively uniform in size to ensure even baking.
- Forming Balls or Shapes: Take each portion of dough and shape it into the desired form. For rolls, you can shape the dough into small balls by tucking the edges underneath, creating a smooth top. If you’re making other baked goods, like cinnamon rolls, flatten the dough into a rectangular shape and spread fillings if necessary, then roll it up into a log before slicing.
- Uniformity: Consistency in portion size and shaping is crucial for even baking. This ensures that all the rolls or baked goods cook at the same rate and have a consistent texture.
By portioning the dough at this stage, you’re essentially prepping it for the freezing process and future baking endeavors. This step saves you time later on, as you won’t need to thaw and then divide a large portion of dough before baking. Instead, you can take out as many portions as you need from the freezer and proceed directly to the baking process.
Remember that the specifics of shaping and portioning may vary depending on the type of baked goods you intend to make. The key is to maintain consistency in size and shape so that the frozen dough portions are convenient to work with and yield uniform results when baked. Once you’ve portioned the dough, you’re ready to move on to the steps that involve the actual freezing of the portions for future use.
Step 3: First Freeze
The process of freezing yeast roll dough involves a careful sequence of steps to maintain the dough’s quality and structure. One crucial step is the “first freeze,” which involves partially freezing the shaped dough portions before final packaging. This preliminary freezing stage is essential for preventing the dough portions from sticking together when stored in a freezer bag, ensuring that they remain individually accessible for future baking.
Here’s a detailed breakdown of this step:
- Preparation for Freezing: After portioning and shaping the dough into individual rolls or desired shapes, it’s time to prepare the dough portions for their first freeze. Before placing them in the freezer, it’s important to ensure that they are not touching each other, as they could easily stick together during freezing.
- Using a Baking Sheet: Line a baking sheet with parchment paper. This prevents the dough from sticking to the surface of the baking sheet and makes it easier to remove the partially frozen dough portions later.
- Spacing the Dough Portions: Carefully place the shaped dough portions on the parchment paper, leaving some space between them. The spacing prevents the portions from freezing together, allowing you to remove individual portions without any hassle.
- Time Frame for Freezing: Place the baking sheet with the dough portions in the freezer for about 1 to 2 hours. The goal is to achieve a partial freeze where the dough is firm but not completely solid. This timeframe is usually sufficient to prevent the portions from merging together while also maintaining the dough’s quality.
- Monitoring and Flexibility: Keep an eye on the dough portions while they are in the freezer. Depending on the temperature of your freezer and the size of the portions, the partial freezing time might vary. The dough should be firm enough that it’s no longer sticky and can be handled easily.
- Why Partial Freeze Matters: Partially freezing the dough portions before storing them together in a freezer bag prevents them from sticking to each other. This step maintains their individual shapes and makes it simpler to remove the desired number of portions without thawing the entire batch.
By giving the dough its first freeze, you’re taking a proactive step to ensure the convenience of future baking. Properly frozen dough portions can be easily transferred to a freezer bag or another suitable container, and you won’t have to worry about them becoming one large, frozen mass. This preliminary freeze helps preserve the quality and structure of the dough, ultimately resulting in well-shaped and evenly baked rolls or baked goods whenever you choose to use them.
Step 4: Transfer to Freezer Bags
After the dough portions have undergone their initial partial freeze, the next step in the process of freezing yeast roll dough is to properly package and store them for long-term freezer storage. This step involves transferring the partially frozen dough portions into airtight freezer bags, which helps maintain the dough’s quality and prevents freezer burn. Alternatively, you can use plastic wrap to wrap individual portions before placing them in a freezer-safe container.
Here’s a detailed explanation of this step:
- Choosing Freezer Bags: Select sturdy, high-quality freezer bags specifically designed for long-term freezer storage. These bags are thicker and more durable than regular storage bags, helping to prevent moisture and air from affecting the dough.
- Partial Freezing: Before transferring the dough portions to the freezer bags, ensure they have undergone the initial partial freeze on the baking sheet. This step is crucial for preventing the dough from sticking together and losing its shape during storage.
- Air Removal: As you transfer the partially frozen dough portions into the freezer bags, press gently to remove any excess air from the bags. Excess air can contribute to freezer burn, which can affect the dough’s texture and taste over time. Removing air helps maintain the dough’s quality during its time in the freezer.
- Sealing the Bags: Once the dough portions are inside the freezer bags, seal them tightly to create an airtight barrier. Double-check that the seal is secure to prevent moisture from entering and affecting the dough’s consistency.
- Plastic Wrap Option: An alternative method is to wrap each individual partially frozen dough portion with plastic wrap. This provides an additional layer of protection against freezer burn and helps maintain the dough’s shape. After wrapping, place the wrapped portions in a suitable freezer-safe container.
- Labeling: Whether you use freezer bags or plastic wrap, don’t forget to label each package with the type of dough and the date it was frozen. Proper labeling makes it easy to identify and choose the right dough for your baking needs.
- Container Option: If you opt for wrapping each portion, you can also place them in airtight freezer-safe containers instead of bags. This method helps keep the dough portions separate and provides extra protection against moisture and air exposure.
By carefully transferring the partially frozen dough portions into airtight packaging, you’re ensuring that the dough maintains its quality throughout its time in the freezer. Proper packaging prevents freezer burn and preserves the dough’s texture and flavor. When it’s time to bake, you can easily retrieve the desired number of portions from the freezer without thawing the entire batch, allowing for convenient and fresh baking whenever you need it.
Step 5: Label and Date
After you’ve successfully transferred your partially frozen yeast roll dough portions into freezer bags, plastic wrap, or freezer-safe containers, the next crucial step is to label and date each package. Proper labeling ensures that you can easily identify the type of dough and its freezing date, which is essential for managing freshness and selecting the appropriate dough when you’re ready to bake.
Here’s an in-depth explanation of why labeling and dating are important:
- Identification: As you prepare and freeze different types of dough, it’s easy to forget their contents over time, especially if they look similar once frozen. By labeling each package, you eliminate the guesswork when it comes to identifying the type of dough you have stored.
- Type of Dough: Clearly state the type of dough on the label. This could be as simple as “Dinner Rolls,” “Cinnamon Rolls,” or any other descriptor that accurately represents the dough’s intended use.
- Freezing Date: Along with the type of dough, include the date on which you froze the dough. This date helps you keep track of how long the dough has been in the freezer, allowing you to prioritize using the older batches first. Yeast-based dough has a limited freezer lifespan before its quality starts to degrade.
- Rotation: Labeling and dating enable you to follow a first-in, first-out rotation system. When you’re ready to bake, you can easily select the oldest batch of dough to use, ensuring that none of your frozen dough goes to waste.
- Convenience: Having labeled and dated packages makes your freezer organization efficient. You won’t need to open every package to figure out what’s inside, saving you time and reducing the risk of exposing the dough to unnecessary temperature changes.
- Avoid Mistakes: Mistaking one type of dough for another can lead to unexpected flavor combinations and disappointing results. Proper labeling eliminates this risk by providing clear information about the dough’s contents.
- Preventing Waste: Without proper labeling, you might find yourself in a situation where you’re unsure about the freshness of the dough. You might end up discarding dough that’s still usable, or using dough that’s past its prime and affecting the quality of your baked goods.
By taking the time to label and date your frozen yeast roll dough packages, you’re implementing an organized and practical approach to managing your freezer inventory. This simple step ensures that your baking endeavors are always successful, as you’ll be using dough that’s both fresh and suited for the specific recipe you have in mind.
Step 6: Store in the Freezer
Once you’ve labeled and dated your yeast roll dough packages, the next crucial step is to store them properly in the freezer. Proper storage temperature is essential to maintain the quality of the frozen dough portions until you’re ready to bake. Ensuring that the freezer is set to the correct temperature helps prevent freezer burn and preserves the dough’s texture and taste.
Here’s an in-depth explanation of this step:
- Transfer to Freezer: After you’ve labeled and dated the dough packages, carefully place them inside the freezer. Ensure that they are stored on a flat and stable surface so that they maintain their shape.
- Optimal Freezer Temperature: Set your freezer to a temperature of 0°F (-18°C) or lower. This temperature range is ideal for freezing perishable items like yeast roll dough. It prevents bacterial growth and maintains the dough’s quality by slowing down chemical reactions that can affect texture and flavor over time.
- Freezer Burn Prevention: Freezer burn occurs when moisture in the dough’s surface sublimates (converts directly from ice to vapor) and then re-condenses into ice crystals on the surface. This process leads to a change in texture and flavor. The optimal freezer temperature helps minimize the risk of freezer burn.
- Frozen Storage Lifespan: Yeast roll dough can typically be stored in the freezer for about 2 to 3 months while still maintaining good quality. After this period, the dough’s flavor and texture might start to deteriorate. By adhering to the recommended temperature, you maximize the dough’s frozen storage lifespan.
- Uniform Cooling: Ensure that the freezer is not overcrowded, as this can hinder proper airflow and cooling. Proper spacing allows for even cooling and freezing of the dough portions.
- Avoid Temperature Fluctuations: Fluctuations in temperature, such as frequent opening and closing of the freezer door, can affect the dough’s quality. Try to minimize temperature changes by being organized and only opening the freezer when necessary.
By storing your labeled and dated yeast roll dough packages in a well-maintained freezer set at the right temperature, you’re taking measures to preserve the dough’s quality and ensure that it’s ready for future baking endeavors. Following proper freezer storage guidelines guarantees that your yeast roll dough maintains its fresh characteristics, allowing you to enjoy consistently delightful results whenever you decide to bake.
Step 7: Thaw the Frozen
The culmination of freezing yeast roll dough is the point when you’re ready to transform the frozen dough portions into freshly baked, delightful treats. The process involves carefully thawing the dough to bring it back to its workable state and then following the original recipe’s instructions to shape, proof, and bake the rolls or baked goods.
Here’s a comprehensive explanation of this final step:
- Thawing Process: When you’re ready to bake, remove the desired number of frozen dough portions from the freezer. To ensure a controlled thawing process and prevent rapid temperature changes that could affect the dough’s quality, place the portions in the refrigerator.
- Overnight Thawing: Thawing the dough in the refrigerator is a gentle method that allows the dough to slowly and evenly return to its workable state. Depending on the size of the dough portions, it usually takes overnight or approximately 8 to 12 hours for the dough to completely thaw.
- Avoid Quick Thawing: Avoid quick thawing methods like using the microwave, as they can lead to uneven thawing, unwanted heat exposure, and potential dough damage.
- Following the Original Recipe: Once the dough portions are thawed and soft to the touch, you can proceed to follow the original recipe’s instructions. This might involve shaping the rolls, allowing them to proof (rise), and finally, baking them in the oven.
- Proofing: During the proofing stage, the yeast in the dough becomes active again as it feeds on the available sugars. This process allows the dough to rise and develop its characteristic texture and flavor. Proofing times may vary depending on the recipe, room temperature, and other factors.
- Baking: Once the dough portions have sufficiently proofed, you can bake them according to the temperature and timing guidelines in the recipe. Baking times and temperatures will depend on the type of dough and the baked goods you’re making.
- Monitoring the Process: Keep a close eye on the dough as it proofs and bakes. Depending on the specifics of your recipe and your baking environment, adjustments might be needed to ensure the best results.
By following the proper thawing and baking process, you’re able to resurrect the frozen yeast roll dough into fresh, flavorful, and beautifully baked goods. The careful and patient approach to thawing helps maintain the dough’s texture and structure, ensuring that your rolls or baked goods turn out as intended. Whether you’re making dinner rolls, cinnamon rolls, or any other yeast-based treats, the result will be a delightful and satisfying culinary creation that’s well worth the effort.
Other related questions
Can you refreeze yeast roll dough?
Refreezing yeast roll dough is not recommended. Thawing and refreezing can affect dough quality, leading to texture and flavor changes. Once dough is thawed, it’s best to bake it promptly for optimal results.
How do I know if the yeast roll dough has gone bad after being frozen?
Inspect for signs of spoilage such as off odors, unusual colors, or excessive ice crystals. Dough may become discolored or develop an off taste if freezer burn occurs. Trust your senses; discard if there are notable changes in appearance, texture, or aroma.
Can you freeze dinner roll dough with butter or fats?
Yes, you can freeze dinner roll dough with butter or fats. Incorporate fats during mixing before freezing. Thaw, shape, proof, and bake for soft and flavorful dinner rolls.
Are there differences in freezing sweet roll vs. savory roll dough?
Freezing sweet and savory roll dough follows similar methods. However, consider flavor contrasts. Freeze both types securely wrapped; for sweet rolls, freeze separately and add fillings after thawing for optimal taste and texture.
Can you freeze yeast roll dough with nuts or glazes?
Yes, you can freeze yeast roll dough with nuts or glazes. Incorporate them before shaping and freezing, ensuring even distribution. Thaw, proof, and bake to enjoy flavorful rolls with integrated nuts or glazes.
Can you freeze yeast roll dough with cream cheese or other cheeses?
Freezing yeast roll dough with cream cheese or other cheeses is possible. Incorporate cheeses during mixing before freezing. Thaw, shape, proof, and bake for delicious rolls with melted, flavorful cheese.


