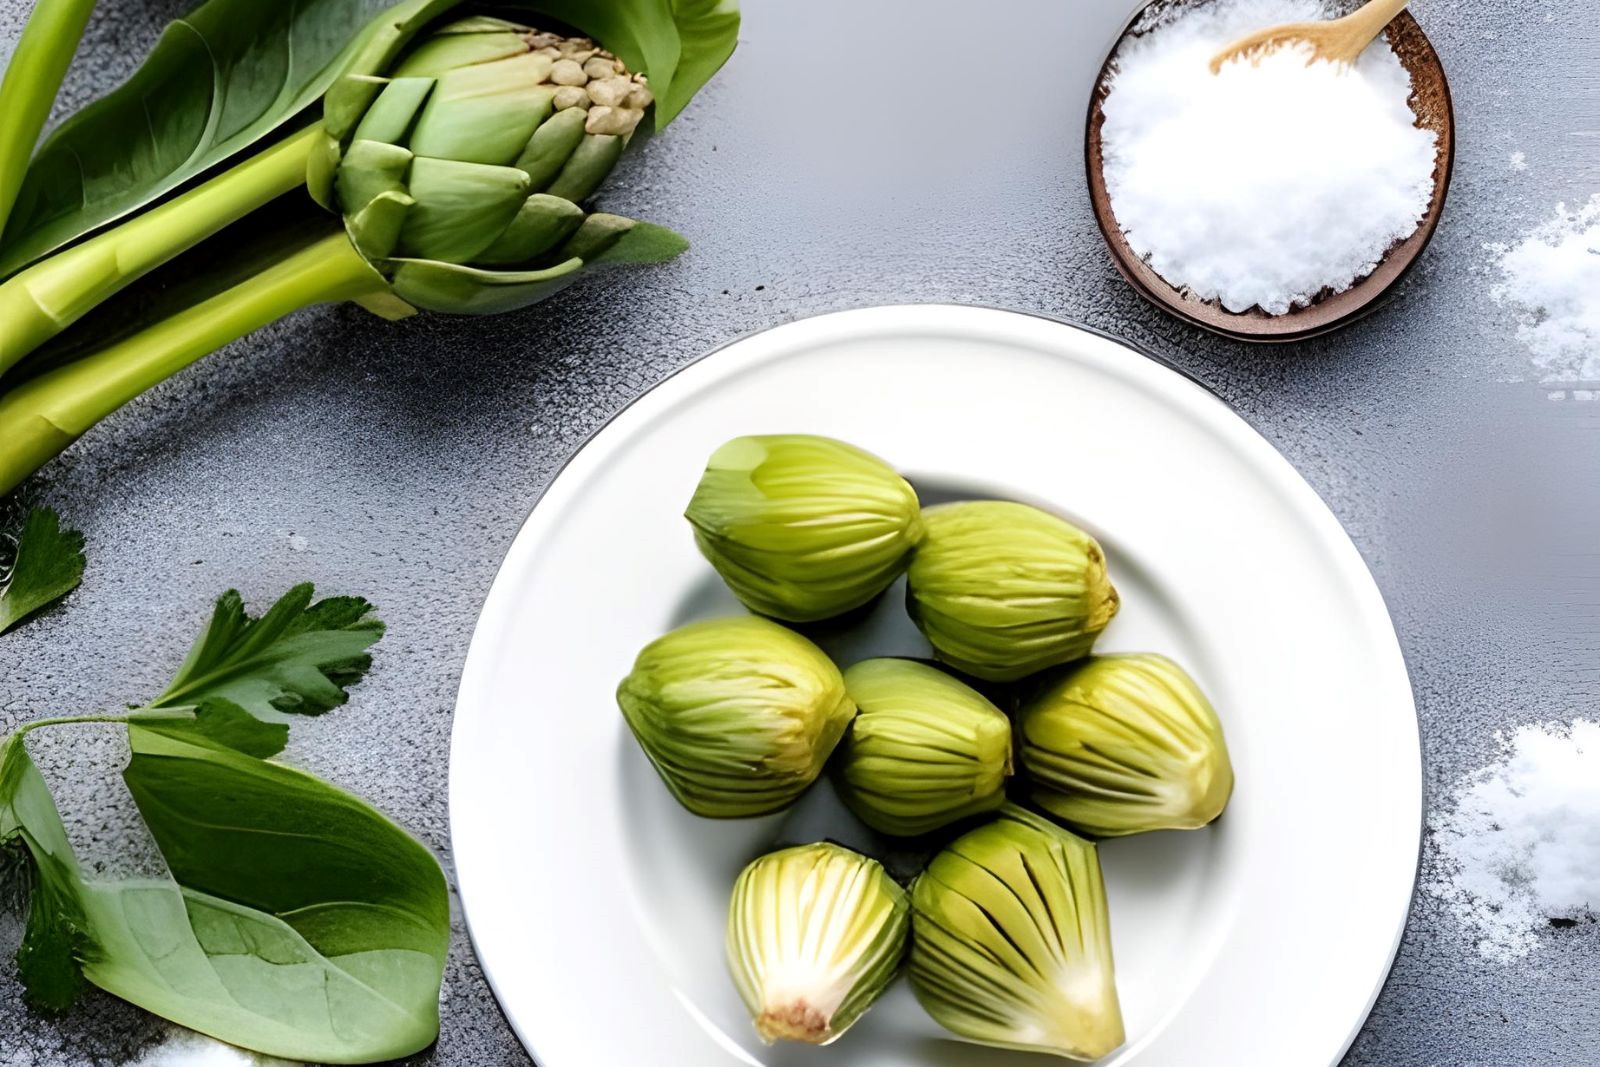
Artichokes are delightful vegetables known for their tender hearts and unique taste. Whether you’ve harvested fresh artichokes from your garden or found them at the local market, freezing them is a great way to enjoy their goodness all year round. Preserving the freshness of artichokes through freezing allows you to savor their flavor and versatility in various culinary creations. In this article, we’ll walk you through the steps to freeze artichokes properly, ensuring they maintain their quality for future use.
Here’s a step-by-step guide on how to freeze artichokes:
Step 1: Choose Fresh Artichokes
Selecting the right artichokes is a critical first step when it comes to freezing them effectively. The quality of the artichokes you choose will significantly impact their taste and texture after freezing. Here’s why choosing fresh artichokes is essential:
- Flavor Preservation: Fresh artichokes have a more vibrant and intense flavor compared to older or wilted ones. When you freeze fresh artichokes, their natural taste will be better preserved, allowing you to enjoy that delightful artichoke flavor in your dishes even after they’ve been stored in the freezer.
- Texture Retention: Fresh artichokes have firm and tender leaves. Freezing artichokes that are already past their prime can result in a mushy and unappetizing texture once they’re thawed and cooked. By selecting fresh artichokes, you ensure that the texture remains as close to fresh as possible.
- Color and Appearance: Fresh artichokes are characterized by their vibrant green or purple color and tightly closed leaves. These visual cues indicate that the artichokes are at their peak freshness. When you freeze fresh artichokes, they are more likely to maintain their appealing color and appearance, making them visually pleasing in your dishes.
- Nutritional Value: Fresh artichokes are rich in essential nutrients, including dietary fiber, vitamins, and minerals. Freezing them at their freshest state helps preserve their nutritional content, ensuring that you still benefit from their health advantages when you use them in future meals.
- Reduced Risk of Spoilage: Older or damaged artichokes may already be on the verge of spoilage, which can lead to unpleasant flavors and odors when frozen. Selecting fresh artichokes minimizes the risk of spoilage and ensures a better overall freezing experience.
Step 2: Prep and Trim
Once you’ve selected fresh artichokes, the next crucial step in the process of freezing them is preparation and trimming. Properly prepping and trimming artichokes ensures that they are clean, safe to consume, and will freeze effectively. Here’s a detailed explanation of this step:
- Washing Thoroughly: Artichokes, like many vegetables, can accumulate dirt, dust, and sometimes even tiny insects in their nooks and crannies. To remove any impurities, it’s essential to wash them thoroughly. This step not only guarantees the safety of your frozen artichokes but also ensures they maintain their fresh flavor.
- Trimming the Top: The top of an artichoke contains the inedible and prickly parts, such as the pointed tips of the leaves. To make the artichoke more user-friendly and less likely to cause any discomfort when handling or eating, trim about one inch off the top. This also helps create a more uniform appearance.
- Removing Tough or Spiky Outer Leaves: While artichoke leaves are delicious and edible towards the base, the outer leaves tend to be tough and sometimes have prickly ends. Removing these tough outer leaves not only enhances the overall eating experience but also eliminates any potential bitterness. Start by gently pulling the outer leaves away from the artichoke until you reach the tender, pale green inner leaves.
- Trimming the Stem: The stem of the artichoke is an extension of the heart and is entirely edible. However, it can be quite fibrous, so it’s a good idea to trim it as well. Leave about an inch of the stem attached to the base of the artichoke. This part can be peeled and cooked along with the artichoke heart, adding more flavor and nutrients to your dishes.
Step 3: Steam or Boil
Now that you’ve properly prepped and trimmed your artichokes, it’s time to blanch them before freezing. Blanching is a crucial step in the freezing process as it helps preserve the artichokes’ color, flavor, and texture. You have two main options for blanching: steaming and boiling. Each method has its advantages, so it’s essential to choose the one that best suits your preferences and needs. Here’s an explanation of both options:
Steaming:
Steaming is considered a gentler method for blanching artichokes. Here’s why it’s a popular choice:
- Flavor Preservation: Steaming artichokes helps retain their natural flavor and aroma. Since the artichokes are not submerged in water, there’s less leaching of their flavor into the blanching liquid.
- Nutrient Retention: Steaming is known for preserving the nutritional value of vegetables. It minimizes nutrient loss during blanching, ensuring that your frozen artichokes remain as nutritious as possible.
- Controlled Cooking: Steaming allows for precise control over the blanching time. You can monitor the artichokes closely to achieve the desired level of tenderness without overcooking them.
- Less Water Absorption: Steaming reduces the risk of waterlogged artichokes, which can occur when boiling. This helps maintain a firmer texture, especially important if you plan to use them in dishes with longer cooking times.
Boiling:
Boiling is a quicker blanching method and can be a suitable choice depending on your preferences:
- Speed: Boiling artichokes is faster than steaming, making it a convenient option when you’re short on time.
- Slightly Softer Texture: Boiling can result in slightly softer artichokes compared to steaming. This can be advantageous if you prefer your artichokes to be more tender for certain recipes.
- No Special Equipment: You don’t need a steamer basket or specialized equipment to boil artichokes, making it accessible for most home cooks.
When choosing between steaming and boiling, consider your cooking goals. If you prioritize preserving the artichokes’ natural flavor, maintaining their nutritional value, and having more control over the blanching process, steaming is the preferred method. On the other hand, if you’re looking for a faster option or prefer slightly softer artichokes, boiling can be the way to go. Regardless of your choice, both methods will prepare your artichokes for freezing, ensuring they remain high-quality for future culinary adventures.
Step 4: Blanch the Artichokes
Blanching is a crucial step in the process of freezing artichokes, as it helps preserve their color, texture, and flavor while extending their shelf life. You have two effective options for blanching: steaming and boiling. Here’s a detailed explanation of how to blanch your artichokes effectively using both methods:
Steaming Method:
- Prepare a Steamer: If you’re using a steaming method, set up a steamer basket over a pot of simmering water. Make sure the water doesn’t touch the artichokes during steaming.
- Place the Artichokes in the Steamer: Carefully arrange the prepared artichokes in the steamer basket. Ensure they are not overcrowded to allow for even steaming.
- Steam for the Appropriate Time: Steam the artichokes for approximately 20-25 minutes for medium-sized artichokes. Smaller artichokes may require less time, so adjust accordingly. The outer leaves should become tender enough to be easily pulled off.
Note: As with boiling, it’s essential not to overcook the artichokes when steaming. Over-steaming can lead to a loss of flavor, texture, and nutrients. The goal is to partially cook them to halt the enzymatic processes without making them fully tender.
Boiling Method:
- Prepare a Large Pot of Boiling Water: Start by bringing a large pot of water to a rolling boil. The pot should be big enough to comfortably accommodate all the artichokes you plan to blanch.
- Add the Artichokes: Carefully place the prepared artichokes into the boiling water. The boiling water is a crucial part of the blanching process, as it stops the enzymatic reactions that can cause the artichokes to deteriorate over time.
- Blanch for the Appropriate Time: The blanching time may vary depending on the size of your artichokes. For medium-sized artichokes, blanch them for approximately 4-5 minutes. During this time, the outer leaves should become tender enough to be easily pulled off. If you’re using smaller artichokes, reduce the blanching time accordingly.
Note: It’s essential not to overcook the artichokes when boiling. Over blanching can lead to a loss of flavor, texture, and nutrients. The goal is to partially cook them to halt the enzymatic processes without making them fully tender.
- Check for Readiness: To determine if the artichokes are ready to be removed from the boiling water, carefully pluck an outer leaf. It should yield to gentle pressure but not fall off entirely. The inner leaves and heart should remain slightly firm.
Step 5: Cool in Ice Water
Once you’ve blanched your artichokes to the desired level of tenderness, it’s essential to cool them rapidly in ice water. This step, known as “shocking,” serves several important purposes in the freezing process. Here’s an explanation of why cooling your blanched artichokes in ice water is crucial:
- Halting the Cooking Process: After blanching, the artichokes continue to cook from the residual heat within their tissues. If left to cool slowly, they may become overcooked, resulting in a mushy texture and loss of flavor. Plunging them into ice water immediately halts the cooking process, preserving the desired texture and flavor.
- Preserving Color and Appearance: Rapid cooling in ice water helps lock in the vibrant green or purple color of the artichokes. This ensures that they remain visually appealing even after freezing and thawing. Artichokes that are cooled slowly can turn brownish or dull in color.
- Retaining Nutrients: The quick cooling prevents the loss of vital nutrients that can occur if the artichokes are left to cool naturally. By preserving their nutritional value, you ensure that your frozen artichokes are as healthy as possible when used in future dishes.
Here’s how to properly cool your blanched artichokes in ice water:
- Fill a large bowl with cold water and add plenty of ice cubes. The water should be icy cold to rapidly lower the temperature of the artichokes.
- Carefully transfer the blanched artichokes from the pot using a slotted spoon or tongs and place them directly into the ice water bath.
- Allow the artichokes to cool in the ice water for a few minutes, ensuring that they are completely submerged.
- Gently agitate the artichokes in the ice water to ensure even cooling.
- Once the artichokes have cooled down, remove them from the ice water bath and drain them thoroughly. You can use a colander or place them on a clean kitchen towel to remove excess water.
The process of cooling blanched artichokes in ice water is a crucial step in preserving their quality for freezing. It ensures that your frozen artichokes maintain their texture, color, flavor, and nutritional value, making them a delightful addition to your future culinary creations.
Step 6: Slice or Keep Whole
As you progress in the process of freezing artichokes, you’ll come to a decision point: whether to freeze them whole or slice them. This choice depends on your preferences and how you plan to use the artichokes in your future culinary endeavors. Here’s an explanation of the options and their advantages:
Slicing:
Slicing artichokes before freezing them has several benefits:
- Convenience: Sliced artichokes are more convenient for certain recipes. They can be quickly added to salads, pasta dishes, and other recipes without the need for additional preparation.
- Even Cooking: Sliced artichokes cook more evenly than whole ones. This can be particularly important if you plan to use them in dishes that require uniform cooking, such as stir-fries or sautés.
- Faster Thawing: Sliced artichokes thaw more quickly than whole ones, making them a time-saving option when you’re in a hurry to prepare a meal.
Keeping Whole:
Keeping artichokes whole before freezing them has its advantages as well:
- Visual Appeal: Whole artichokes have a striking appearance and can be used as an elegant centerpiece in dishes or as an appetizing side dish. They retain their unique shape, which adds to the visual appeal of your culinary creations.
- Versatility: Whole artichokes provide versatility in how you use them. You can stuff them, roast them, or serve them as an impressive side dish. They’re a fantastic choice for special occasions and presentation-focused meals.
- Longer Storage: Whole artichokes tend to have a longer storage life in the freezer compared to sliced ones. The intact structure helps protect the inner layers from freezer burn.
Your choice between slicing and keeping artichokes whole should align with your culinary goals. If you prioritize convenience and plan to use artichokes in quick and easy recipes, slicing them is the way to go. On the other hand, if you want to preserve their visual appeal, versatility, or plan to use them in specific dishes, keeping them whole is the better option.
No matter which option you choose, properly freezing and packaging the artichokes is key to ensuring they maintain their quality and flavor in the freezer.
Step 7: Flash-Freeze
After deciding whether to slice your artichokes or keep them whole, the next step in freezing artichokes is known as “flash-freezing.” Flash-freezing is a crucial process that helps prevent the artichokes from sticking together when stored in the freezer. Here’s an explanation of why and how to flash-freeze your artichokes:
Why Flash-Freeze:
- Prevents Clumping: Flash-freezing ensures that individual artichoke pieces (whether sliced or whole) freeze separately. Without this step, the artichokes can freeze into a solid mass, making it challenging to remove only the amount you need when cooking.
- Preserves Quality: Flash-freezing helps maintain the texture and quality of the artichokes. It prevents ice crystals from forming inside the artichokes, which can cause them to become mushy or lose flavor over time.
- Facilitates Portioning: When artichokes are individually frozen, you can easily portion out the amount you require for a particular recipe without having to thaw the entire batch.
How to Flash-Freeze Artichokes:
- Prepare a Baking Sheet: Line a baking sheet with parchment paper or a silicone baking mat. This will prevent the artichokes from sticking to the surface during the freezing process.
- Arrange in a Single Layer: Lay the prepared artichokes in a single layer on the baking sheet. Ensure that they are not touching each other. This spacing allows for even and efficient freezing.
- Place in the Freezer: Transfer the baking sheet with the artichokes to the freezer. It’s essential to have enough space in your freezer to accommodate the baking sheet without crowding. Make sure the artichokes are placed on a flat surface to maintain their shape.
- Flash-Freeze: Leave the artichokes in the freezer for a few hours, typically 2-4 hours, or until they are completely firm. Flash-freezing time may vary slightly depending on the size of the artichoke pieces and the temperature of your freezer.
- Check for Firmness: To ensure that the artichokes are adequately frozen, gently press on one with your finger. It should feel firm and solid.
Once the artichokes are flash-frozen, they can be easily removed from the baking sheet and transferred to airtight freezer bags or containers for long-term storage. The flash-freezing step is critical for preserving the individuality and quality of your artichokes, making them easy to use in various recipes when you need them.
Step 8: Package and Seal
Now that your artichokes are flash-frozen and ready for long-term storage, it’s crucial to package and seal them properly to maintain their quality in the freezer. Here’s an explanation of why and how to package and seal flash-frozen artichokes:
Why Package and Seal:
- Prevents Freezer Burn: Freezer burn occurs when food is exposed to air in the freezer. It can lead to changes in flavor and texture, making the artichokes less enjoyable when you eventually use them in recipes. Proper packaging and sealing help create a barrier against air, reducing the risk of freezer burn.
- Maintains Freshness: Airtight packaging keeps the artichokes fresh by preventing moisture loss and the absorption of odors from the freezer. This ensures that the artichokes taste as close to fresh as possible when you decide to use them.
How to Package and Seal Artichokes:
- Choose Airtight Containers: Select airtight freezer bags or containers specifically designed for freezer use. These containers are durable and resistant to cold temperatures, making them ideal for long-term storage.
- Portion Control: Decide on the portion sizes that work best for your recipes. It’s often convenient to package artichokes in portions you typically use in a single dish.
- Transfer to Containers: Carefully transfer the flash-frozen artichokes into the chosen airtight containers or bags. Fill them to the desired portion size, leaving a small amount of space at the top to allow for any potential expansion during freezing.
- Remove Air: For bags, squeeze out as much air as possible before sealing them tightly. For containers, press a piece of plastic wrap directly onto the surface of the artichokes before sealing the container’s lid. This minimizes the air inside the container.
- Label and Date: It’s essential to label the containers or bags with the contents and the date of freezing. This helps you keep track of the age of your frozen artichokes and ensures you use the oldest ones first.
- Double Packaging (Optional): If you have concerns about preventing air exposure, you can opt for double packaging. Place the sealed bags or containers into a larger freezer bag, squeezing out excess air from the outer bag before sealing it.
Step 9: Label and Date
Labeling and dating the packages containing your frozen artichokes is a simple yet essential step in the freezing process. It serves several important purposes, helping you maintain an organized and efficient freezer system. Here’s an explanation of why labeling and dating are crucial:
Why Label and Date:
- Track Freshness: By labeling your packages, you can easily identify the contents and the date when the artichokes were frozen. This information helps you keep track of their freshness and ensures you use the oldest ones first.
- Prevent Food Waste: Keeping track of the freezing date allows you to prioritize using older batches of artichokes before moving on to newer ones. This reduces the risk of food waste by ensuring that no artichokes languish in the freezer for an extended period, potentially losing quality over time.
- Efficient Meal Planning: Knowing the quantity and age of your frozen artichokes helps with meal planning. You can incorporate them into your recipes strategically, making the most of your frozen stock.
- Convenience: When you’re searching for a specific ingredient in your freezer, having labeled packages makes the process more convenient. You can quickly locate what you need without the guesswork.
How to Label and Date:
- Use a Permanent Marker: Grab a permanent marker or a label specifically designed for freezer use. Regular markers may fade over time due to temperature fluctuations.
- Write Clearly: On each package, write the contents (e.g., “Artichokes”) and the date when they were frozen. Be sure to use legible handwriting or printing.
- Include Portion Sizes (Optional): If you’ve portioned your artichokes into specific sizes, you can also note the quantity in each package. This is particularly useful if you have varying portion sizes.
- Label on the Outside: Place the label on the outside of the package where it’s easy to see. If you’re using containers with removable lids, consider labeling both the container and the lid.
- Update as Needed: If you use some of the artichokes from a labeled package and return the rest to the freezer, update the label with the new freezing date to maintain accuracy.
Step 10: Store in the Freezer
Once you have carefully packaged, sealed, labeled, and dated your artichokes, the final step is to store them in the freezer. Proper freezer storage is essential to maintain the quality, flavor, and safety of your frozen artichokes. Here’s an explanation of why and how to store them in the freezer:
Why Store in the Freezer:
- Preservation: Freezing is a reliable method for preserving the freshness and flavor of artichokes for an extended period. When stored at freezing temperatures, the enzymatic processes that lead to spoilage are effectively halted.
- Long-Term Convenience: Freezer storage allows you to enjoy artichokes even when they are out of season or not readily available in the market. It provides you with a convenient supply for various recipes throughout the year.
How to Store in the Freezer:
- Select an Appropriate Freezer: Your artichokes should be stored in a freezer with a temperature of 0°F (-18°C) or lower. Check your freezer’s temperature to ensure it meets these guidelines.
- Arrange Packages Neatly: Place the labeled and dated artichoke packages neatly in your freezer. Keep them organized and avoid overcrowding to maintain proper air circulation.
- Avoid Temperature Fluctuations: To ensure consistent freezing, avoid frequently opening and closing the freezer door unnecessarily. Fluctuating temperatures can affect the quality of the frozen artichokes.
- Store Away from Odorous Foods: Try to store your artichokes away from strongly scented or odorous foods. Artichokes can absorb odors, which may affect their flavor.
- Use within Recommended Timeframe: While frozen artichokes can remain safe to eat indefinitely if stored properly, it’s recommended to use them within 8-12 months for optimal quality. Over time, there may be a slight deterioration in texture and flavor.
- Keep an Inventory: Consider keeping a list or freezer inventory of the contents and dates of items in your freezer. This helps you keep track of what you have and when you should use it.
Other related questions
How do I defrost artichokes?
To defrost artichokes, transfer the frozen artichokes from the freezer to the refrigerator and allow them to thaw overnight. Alternatively, for quicker thawing, you can use a microwave on a low power setting or place the frozen artichokes in a sealed plastic bag and submerge them in cold water. Once thawed, the artichokes can be used in various recipes, but it’s important to note that their texture may be slightly different from fresh artichokes.
Do I need to thaw frozen artichokes before using them in recipes?
While it’s not necessary to thaw frozen artichokes before use in some recipes like soups or stews, for dishes where texture matters (like salads or stir-fries), it’s best to thaw them in the refrigerator before incorporating them.
Can I refreeze artichokes?
It is generally not recommended to refreeze artichokes once they have been thawed, as this can lead to a loss of texture and flavor.Repeated freezing and thawing can cause ice crystals to form, affecting the artichokes’ quality. It is advisable to portion and freeze artichokes in amounts that you can use in one go to minimize the need for refreezing. To maintain optimal quality, it is best to plan your usage and thaw only the amount of artichokes needed for a particular recipe, avoiding the need to refreeze them.
How do I know if the artichokes have gone bad after being frozen?
To determine if frozen artichokes have gone bad, inspect them for signs of freezer burn, which can manifest as dried-out or discolored areas. Also, check for any unusual odors or off-putting smells, as spoiled artichokes may develop an unpleasant odor. If you notice any of these signs, it’s best to discard the frozen artichokes to ensure food safety and the quality of your dishes.
What are some recommended recipes for using frozen artichokes?
You can use frozen artichokes in a wide range of dishes, including pasta, salads, dips, and casseroles. Some popular recipes include spinach and artichoke dip, artichoke pasta, and Mediterranean-style salads.
Can I freeze artichokes that have been marinated or seasoned?
It’s recommended to freeze artichokes in their natural state without seasonings or marinades. You can season or marinate them after thawing, as freezing with seasonings can affect their texture.
Can I freeze artichoke hearts separately from the whole artichokes?
Yes, you can freeze artichoke hearts separately from whole artichokes. To do so, first remove the hearts and blanch them following the same blanching process as for whole artichokes. Once blanched, arrange the hearts on a baking sheet for flash-freezing, then transfer them to airtight freezer bags or containers for long-term storage.

