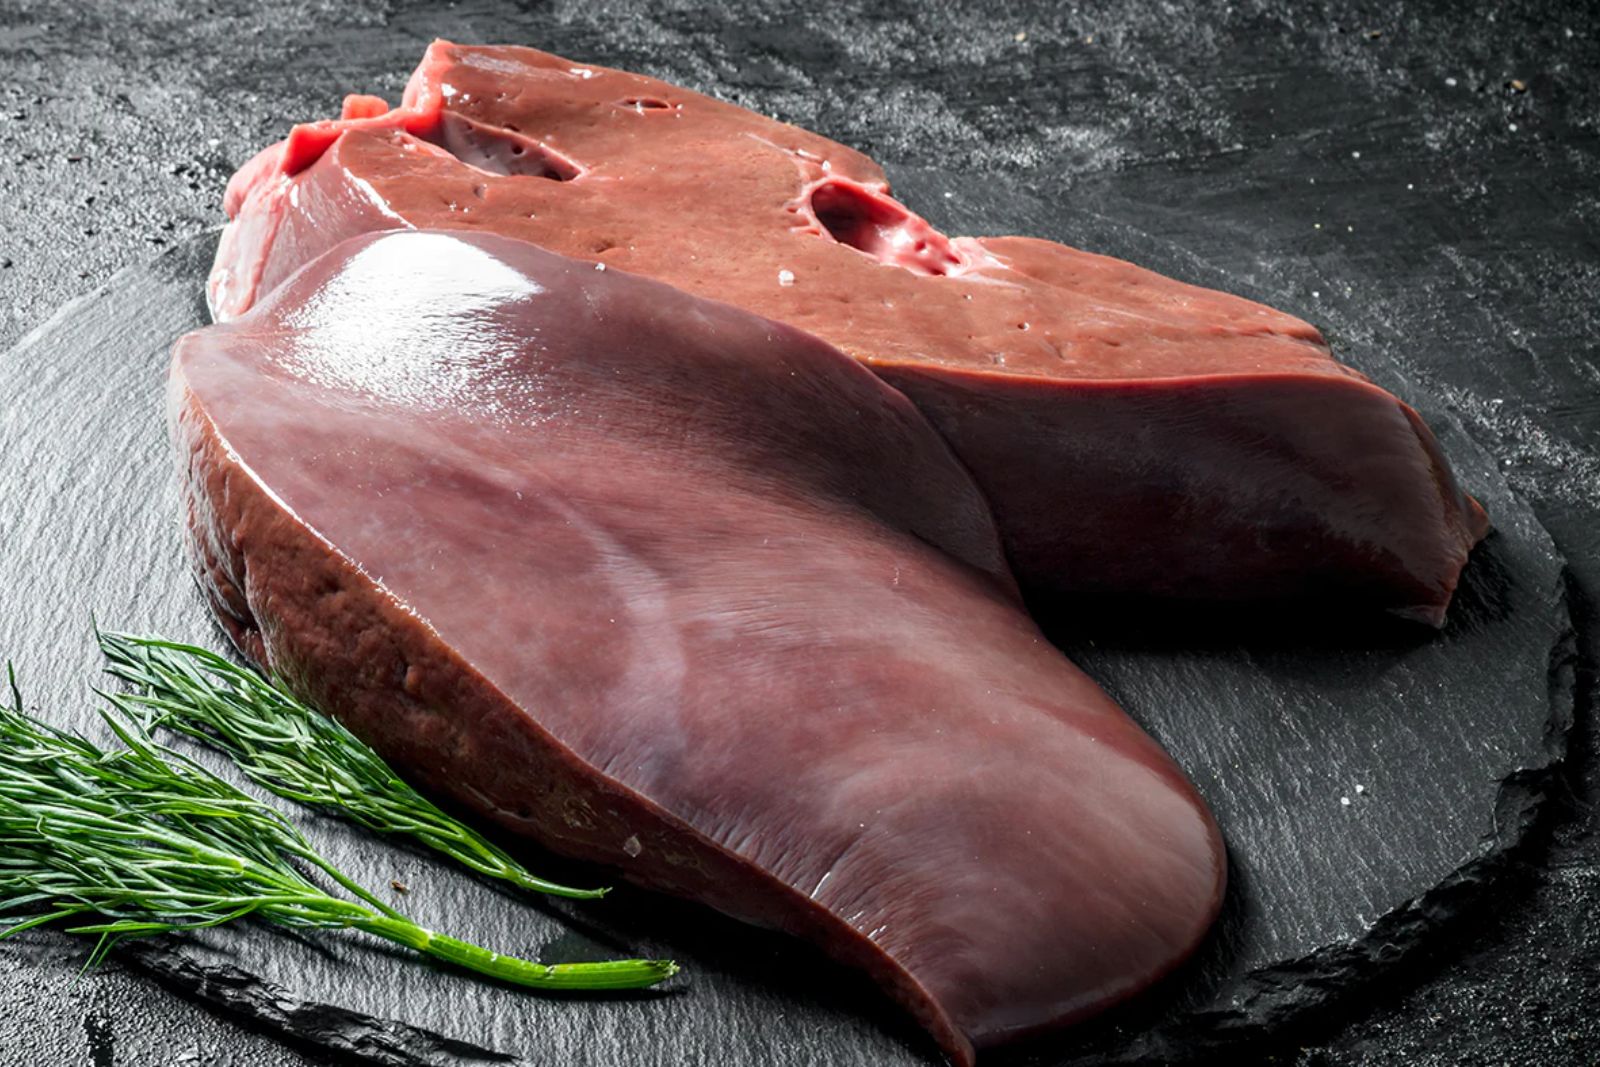
Beef liver is a nutrient-rich organ meat that has been consumed for centuries. It’s known for its distinct taste and high content of essential nutrients, including iron, vitamins, and protein. Freezing beef liver is an excellent way to extend its shelf life and ensure that you have a readily available source of this nutrient-packed food. By following a few simple steps, you can freeze beef liver while maintaining its texture and flavor. In this article, we’ll walk you through a comprehensive guide on how to freeze beef liver properly.
Here’s a step-by-step guide on how to freeze beef liver:
Step 1: Choose quality beef liver
When embarking on the journey of freezing beef liver, the first and foremost step is to meticulously select high-quality liver that forms the foundation of this process. The quality of the beef liver you choose plays a pivotal role in determining the ultimate taste and texture of the frozen product.
Opting for fresh beef liver is crucial; it should exude vibrancy with a deep red or brown hue, indicative of its freshness and robust nutrient content. A liver with a smooth texture, free from any sliminess or unusual odors, is a sign of its excellent condition. Be sure to inspect the liver for minimal blemishes or discolored spots as these can affect the overall quality post-freezing.
Why does quality matter? Quality liver not only contributes to better taste but also ensures that the nutrients and flavors are preserved during the freezing process. Inferior or compromised liver might lead to subpar results, with altered textures and potentially unpleasant flavors.
When selecting your beef liver, consider sourcing it from a reputable butcher or grocer known for their commitment to quality and freshness. If possible, opt for organic or pasture-raised liver, as these are often associated with higher nutritional content and better flavor.
Step 2: Clean and trim the liver
As you embark on the process of freezing beef liver, the second crucial step involves the careful cleaning and trimming of the liver before it makes its way into the freezer. This step not only contributes to the final texture and taste of the frozen product but also ensures the elimination of potential contaminants that could compromise the quality.
Begin by placing the beef liver under a gentle stream of cold running water. This simple yet effective technique helps remove surface dirt, debris, and any lingering impurities that might have accumulated during storage or transportation. Cleaning the liver in this manner is a cornerstone of food safety, ensuring that any potential harmful bacteria or particles are washed away.
Trimming the liver is equally important. This involves removing any excess fat, membranes, or connective tissue that might be present. Excessive fat or tough connective tissue can negatively impact the texture of the frozen liver and may even lead to an uneven freezing process. By meticulously trimming these unwanted components, you set the stage for a more consistent and appealing texture after thawing and cooking.
Beyond textural considerations, cleaning and trimming the liver also contribute to the overall taste experience. Eliminating excess fat and impurities ensures that the true flavors of the liver are highlighted when it comes time to prepare your dishes. This step also aligns with the principle of “less is more,” where a simpler, cleaner liver is more likely to shine in your culinary endeavors.
Step 3: Blanch the beef liver
In the journey to freezing beef liver, the pivotal third step involves blanching—an essential technique that goes beyond the initial cleaning and trimming. This step holds the key to preserving both the texture and color of the liver, safeguarding its overall quality during the freezing process.
Blanching is a culinary practice that involves briefly immersing food in boiling water, followed by rapid cooling in ice water. For beef liver, this process holds particular significance. As the liver is subjected to boiling water for a short span of 1-2 minutes, enzymes that are naturally present within the organ are inactivated. These enzymes, if left unchecked, can cause undesired degradation over time, potentially leading to texture changes and loss of flavor during freezing.
The blanching process serves as a preemptive measure against these enzymatic actions. By deactivating these enzymes through the application of heat, you effectively arrest their ability to cause unwanted alterations in the liver’s composition during storage in the freezer. This means that when you later thaw and prepare the beef liver for consumption, it will maintain a more appealing texture and a vibrant color.
Blanching is a delicate balance—a brief exposure to boiling water followed by immediate cooling ensures that the liver is not overcooked or damaged in the process. This step might seem minor, but its impact is profound as it lays the foundation for maintaining the liver’s optimal quality in its frozen state.
Can I freeze raw beef liver without blanching?
While blanching is recommended for optimal texture and preservation, you can freeze raw beef liver without blanching. However, blanching helps prevent enzyme activity and texture changes during freezing.
Step 4: Cool and pat dry
In the intricate choreography of freezing beef liver, the fourth step holds a vital role in maintaining its ultimate quality—cooling and patting dry. This seemingly simple process after blanching serves as a crucial defense against a common adversary in frozen foods: ice crystals.
After the blanching process, which safeguards the liver from enzymatic degradation, it’s imperative to swiftly cool it down. Placing the beef liver in a bowl of ice water achieves this rapid cooling. This step is pivotal in halting any residual cooking that might be occurring from the residual heat after blanching. This quick temperature drop not only prevents the liver from becoming overcooked but also helps to set its texture in a way that’s more conducive to the freezing process.
Once the beef liver is sufficiently cooled, gently patting it dry with paper towels comes into play. The rationale behind this step is twofold: moisture control and ice crystal prevention. Excess moisture on the surface of the liver can contribute to the formation of ice crystals during the freezing process. These ice crystals can disrupt the cell structure of the liver, leading to undesirable texture changes and potential loss of flavor upon thawing.
By removing excess moisture before freezing, you’re taking a proactive approach to prevent ice crystals from forming. Patting the liver dry with care ensures that it enters the freezer in a state that’s less likely to undergo the damaging effects of freezing and thawing. This is particularly important for maintaining the texture of the beef liver, as the presence of ice crystals can lead to a less desirable mouthfeel.
Step 5: Portion for freezing
As the journey of freezing beef liver continues, the fifth step is a pivotal strategic move that revolves around portioning. This step might seem straightforward, but its significance becomes apparent when you consider the convenience and practicality it brings to your culinary endeavors.
Once you’ve prepared and safeguarded the beef liver through blanching, cooling, and drying, the next logical step is to divide it into portions that suit your future needs. This portioning process might vary based on your preferences and intended use, but its advantages are universal.
Individual portions hold the promise of convenience. By dividing the beef liver into manageable portions, you’re essentially setting yourself up for future ease of use. Consider your culinary repertoire and the types of dishes you intend to prepare with the frozen liver. Whether it’s stews, pâtés, or stir-fries, having pre-measured portions at your disposal eliminates the need to thaw the entire batch when a smaller quantity suffices. This convenience translates into less time spent waiting for the liver to thaw and less potential wastage.
The practicality of portioning extends to the thawing process. Smaller portions thaw more quickly and evenly than a larger mass. This means that, when you’re ready to use the beef liver, you can opt to thaw only the amount you need for that particular meal, rather than defrosting the entire batch. This not only saves time but also helps maintain the quality of the liver by minimizing repeated freeze-thaw cycles.
Furthermore, individual portions enable you to better manage your overall inventory. You can keep track of how much beef liver you have on hand, ensuring that you utilize it efficiently and minimize the risk of it going to waste.
Step 6: Flash-freeze the liver
As the journey of freezing beef liver progresses, the sixth step involves a technique that ensures optimal preservation and convenience: flash-freezing. This step may sound sophisticated, but its essence lies in a simple yet powerful principle—individuality.
To embark on this process, start by arranging the pre-portioned beef liver on a baking sheet that’s been thoughtfully lined with parchment paper. The key here is to ensure that the liver portions are not touching one another. This seemingly meticulous arrangement sets the stage for the flash-freezing process and its subsequent benefits.
Flash-freezing is essentially the rapid freezing of individual items, and in this context, it’s your secret weapon against the bane of frozen foods: clumping. When food items, like your pre-portioned beef liver, freeze while touching or sticking together, they can become a formidable mass that’s difficult to separate when it comes time to use them. This results in unnecessary thawing and refreezing, which can compromise the quality and texture of the liver.
By laying out the beef liver portions with care and ensuring they remain distinct on the baking sheet, you’re promoting individual freezing. As the sheet goes into the freezer, the swift temperature drop ensures that each portion freezes quickly and separately. This prevents them from fusing together, allowing you to retrieve individual portions with ease whenever you’re ready to use them.
The flash-freezing process also has the added advantage of preserving the cellular structure of the beef liver. Rapid freezing leads to smaller ice crystals forming within the liver, which in turn helps maintain its texture and moisture content. This means that when you later thaw and cook the liver, you’ll be greeted with a more appealing and less waterlogged result.
Step 7: Package and seal
In the art of freezing beef liver, the seventh step holds the key to locking in the quality and flavor you’ve meticulously preserved thus far. Packaging and sealing the frozen liver portions may appear straightforward, but the rationale behind this process goes beyond the surface.
Once your beef liver portions have undergone the flash-freezing process and are solidly frozen, it’s time to transition them into their protective homes. These homes can take the form of airtight freezer-safe containers or vacuum-sealed bags, both of which serve as barriers against the elements that can affect the quality of frozen foods.
The concept of “airtight” plays a crucial role here. Airtight containers or vacuum-sealed bags help create an environment that minimizes exposure to air—the culprit behind freezer burn. Freezer burn occurs when moisture from the food’s surface evaporates and subsequently re-condenses on the food in the form of ice crystals. This can lead to changes in texture, flavor, and overall quality.
To prevent freezer burn, the removal of as much air as possible is paramount. This is where vacuum-sealed bags shine. By removing air before sealing, these bags effectively create a vacuum, reducing the potential for moisture to accumulate on the food. Airtight containers also minimize air exposure, providing a secure shield against freezer burn.
Why does this matter? By packaging and sealing the beef liver portions in a manner that limits air contact, you’re essentially preserving the integrity of your culinary investment. The texture, flavor, and nutritional value you’ve worked so hard to maintain will remain intact, ensuring that when you decide to use the frozen liver, it’s as close to its original state as possible.
Moreover, the act of packaging and sealing is a proactive measure that extends the shelf life of your frozen beef liver. It contributes to better long-term storage, meaning you can savor the benefits of your frozen liver portions over an extended period.
Step 8: Label and date
As your expedition of freezing beef liver nears completion, the eighth step offers a subtle yet crucial touch—a moment of organization that pays dividends in the realm of convenience, freshness, and overall culinary excellence.
This step involves labeling each container or bag that holds your frozen beef liver portions. The information you impart on these labels is twofold: the date of freezing and a concise description of the contents. While this might seem like a minor addition, its significance becomes evident as time goes on.
The date of freezing serves as a chronological marker—a gentle reminder of when you embarked on this preservation journey. This information plays a pivotal role in ensuring that you’re fully aware of how long the beef liver has been in the freezer. This knowledge is paramount in maintaining food safety and quality. Over time, frozen foods, even if well-preserved, can undergo changes in taste, texture, and nutrient content. By being aware of the date of freezing, you empower yourself to make informed decisions about when to use the beef liver to achieve the best results.
The description of the contents is equally important. While it might seem obvious at the moment, this detail can be incredibly useful down the line. Having a concise label that states what’s inside the container or bag saves you the guesswork later. It ensures that you can quickly identify the contents without needing to open and examine each package. This becomes particularly valuable when your freezer becomes a treasure trove of various frozen foods.
Why does this step matter? In the realm of culinary organization, knowledge is power. Being able to access and utilize your frozen beef liver with confidence, knowing how long it’s been frozen and exactly what it contains, sets the stage for culinary triumphs. Moreover, a well-organized freezer is a testament to your dedication to quality and excellence in your kitchen endeavors.
Step 9: Store in the freezer
As the culmination of your journey to freeze beef liver approaches, the ninth and final step brings your efforts full circle—finding a safe and optimal haven for your prepared portions. Storing the labeled containers or bags of beef liver in the right conditions ensures that the results of your meticulous preservation efforts are preserved with the utmost care.
The key to successful storage lies in the coldest part of your freezer. This is often the back or bottom shelf, where the temperature remains most constant. Why is temperature crucial? Freezing beef liver at temperatures of 0°F (-18°C) or lower is essential for maintaining its quality over time. At such temperatures, the water within the liver’s cells freezes and forms smaller ice crystals. These smaller crystals minimize the potential for cell rupture, which in turn helps preserve the texture and flavor of the liver.
A consistent low temperature is your ally in preventing the growth of microorganisms that can lead to spoilage. The cold environment puts a halt to enzymatic activity, inhibits bacterial growth, and keeps your beef liver portions in a state of suspended animation until you’re ready to defrost and use them.
The labeling step comes full circle here. By placing your labeled and dated containers or bags in the coldest part of the freezer, you’re furthering your commitment to organization. This arrangement allows you to easily access the beef liver when you need it, while also safeguarding it from temperature fluctuations that can arise from frequent opening and closing of the freezer door.
How long can beef liver last in the freezer?
Beef liver can last 3-4 months in a standard freezer at 0°F (-18°C). In a deep freezer at -4°F (-20°C) or below, it can extend to 6-12 months. Proper packaging and temperature maintenance are essential for optimal longevity.
Other related questions
How do I defrost beef liver?
To defrost beef liver, place it in the refrigerator for gradual thawing. Ensure it’s in a sealed container to prevent moisture loss and follow safe food handling practices. To thaw quickly, place the sealed package in a bowl of cold water, changing the water every 30 minutes. Use a microwave’s defrost setting if needed, but cook immediately after thawing to ensure safety.
Can I refreeze beef liver?
Refreezing beef liver is generally not recommended due to quality and safety concerns. Once thawed, the cellular structure can degrade, affecting texture and flavor. Additionally, repeated thawing and freezing can increase the risk of bacterial growth and spoilage.
How do I know if the beef liver has gone bad after being frozen?
Signs of frozen beef liver gone bad include changes in color, texture, and odor. If it appears gray or develops freezer burn (dry spots), discard it. A sour or off smell indicates spoilage. When in doubt, prioritize safety and dispose of suspicious beef liver.
Can I freeze cooked beef liver?
Yes, you can freeze cooked beef liver. Ensure it’s fully cooled, then portion and package it airtight to prevent freezer burn. While texture might change slightly after thawing, it’s a convenient way to preserve cooked liver.
Can I marinate beef liver before freezing?
Yes, marinating beef liver before freezing is possible but not recommended. Marination can affect texture and taste during freezing. For best results, freeze liver without marinade and add it after thawing.
Are there recipes specifically for frozen beef liver?
Recipes for frozen beef liver aren’t specific, but you can adapt regular liver recipes. Thaw frozen liver before cooking for best results. Adjust cooking times as needed due to potential texture changes.

