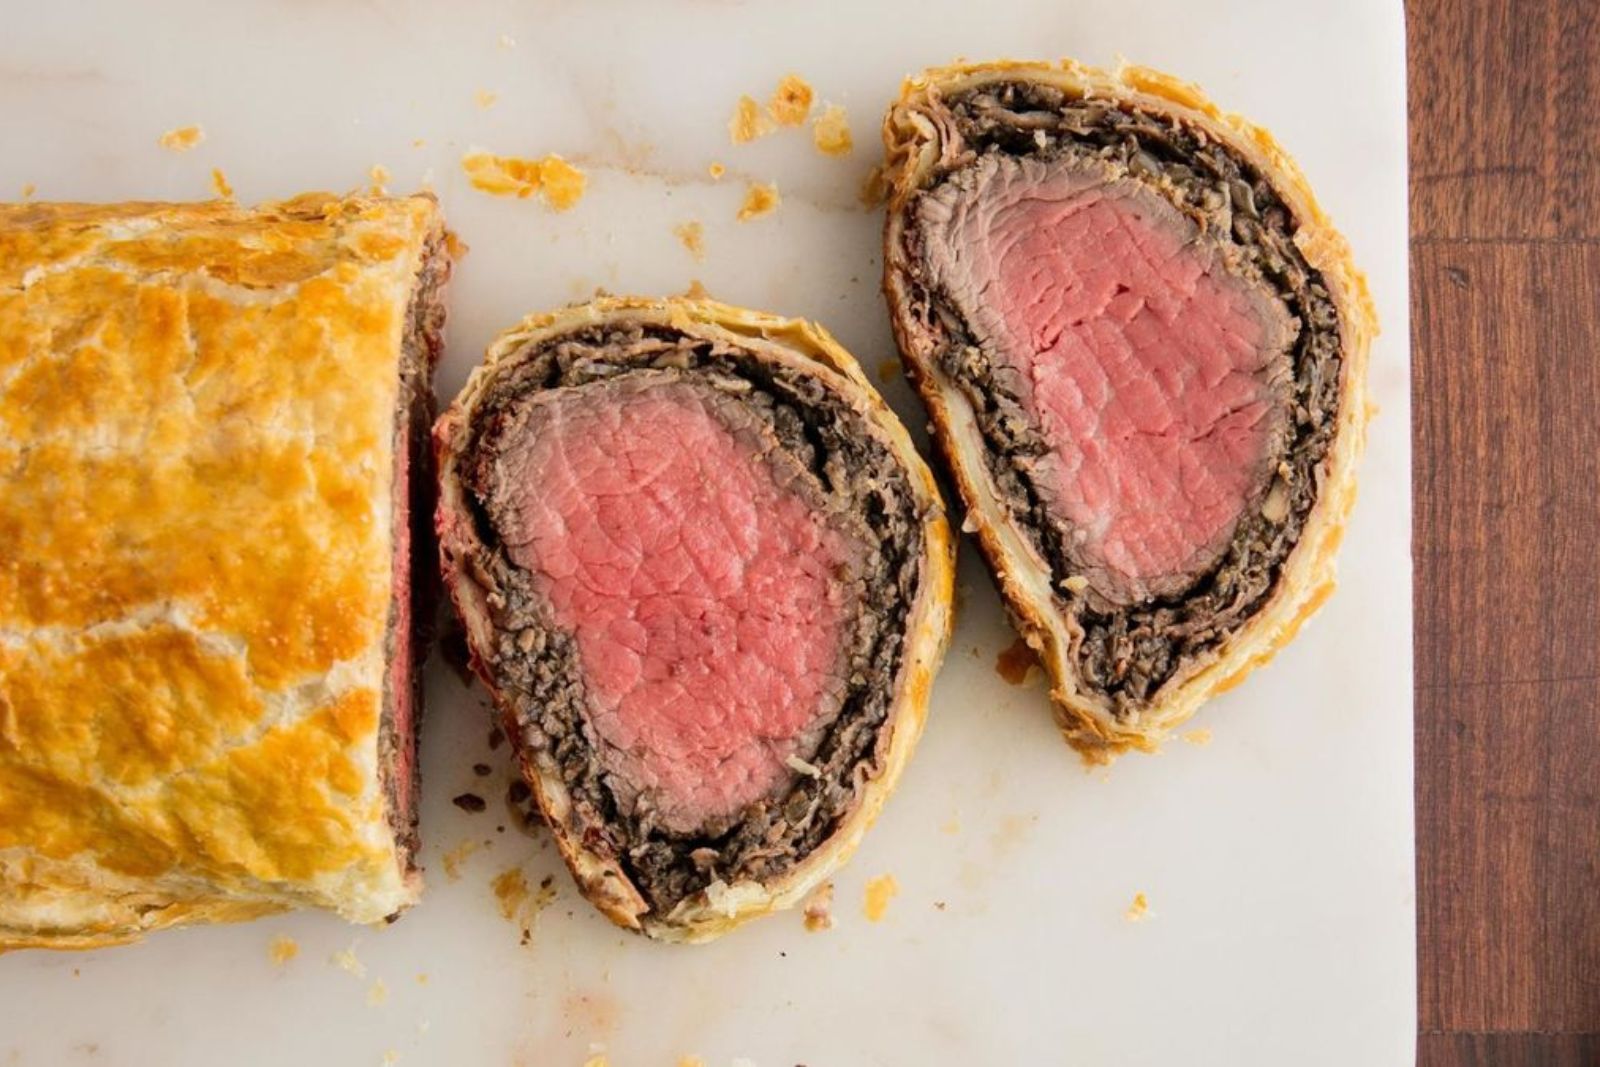
Welcome to the realm of culinary elegance with beef Wellington, a sumptuous and show-stopping dish that combines the richness of tender beef, earthy mushrooms, and delicate puff pastry. Beef Wellington is a true masterpiece of classic French cuisine, known for its impeccable presentation and exquisite flavors. The marriage of flavors and textures in this dish is simply unparalleled. With a perfectly seared beef fillet, a savory duxelles of mushrooms, and the golden flakiness of puff pastry, beef Wellington is a treat for both the eyes and the taste buds. If you wish to prepare this gastronomic delight in advance or have leftovers that you want to preserve, freezing beef Wellington is a fantastic option. In this guide, we’ll delve into the art of freezing beef Wellington, sharing expert tips and techniques to maintain its integrity, ensuring that you can enjoy this culinary masterpiece whenever you desire, whether it’s for a special occasion or a luxurious weeknight indulgence.
Here are the simple steps to freeze beef wellington:
Step 1: Prepare the Beef Wellington
Properly preparing the Beef Wellington is essential before freezing it. This step ensures that the flavors and textures are preserved during the freezing and reheating process. Here’s how you can prepare the Beef Wellington:
- Sear the beef fillet: Begin by searing the beef fillet in a hot skillet or frying pan. The purpose of searing is to lock in the juices and enhance the flavors of the meat. Heat a bit of oil in the pan and sear the fillet on all sides until it forms a brown crust. This process should only take a few minutes.
- Season the beef: Once seared, season the beef fillet with salt, pepper, and any additional herbs or spices of your choice. The seasoning adds depth and enhances the overall taste of the dish. You can experiment with various herbs and spices like thyme, rosemary, or garlic powder to complement the flavors.
- Prepare the mushroom duxelles: Mushroom duxelles is a finely chopped mixture of mushrooms, onions, and herbs. To make it, finely chop the mushrooms and sauté them with onions and herbs in a pan until they release their moisture and turn golden brown. This process helps intensify the mushroom flavor. Allow the mushroom duxelles to cool completely before using it in the Beef Wellington.
- Spread the mushroom duxelles over the seared beef: Once the mushroom duxelles has cooled down, spread it evenly over the seared beef fillet. Ensure that the mushroom mixture covers the entire surface of the beef. The duxelles add a rich and savory layer that pairs beautifully with the tender meat.
- Wrap in puff pastry: To complete the Beef Wellington, wrap the beef fillet and mushroom mixture in a layer of puff pastry. Roll out the puff pastry on a lightly floured surface to a thickness of about 1/4 inch. Carefully place the beef fillet in the center of the pastry and fold the pastry over the top, ensuring it encases the beef entirely. Trim off any excess pastry and seal the edges by pressing them together firmly. The sealed pastry helps lock in the moisture and flavors.
By perfectly prepared Beef Wellington ready to be frozen and enjoyed at a later time.
Step 2: Cool and Wrap
After preparing the Beef Wellington, it’s crucial to cool it down completely before freezing. This step helps maintain the quality and prevents moisture buildup, which can lead to freezer burn. Here’s how to cool and wrap the Beef Wellington properly:
- Allow the Beef Wellington to cool: Once you have assembled the Beef Wellington, let it cool completely at room temperature. This typically takes about 30 minutes to an hour, depending on the size of the Wellington. Cooling is important because it prevents steam and condensation from forming inside the wrapping, which can degrade the quality of the dish during freezing.
- Tightly wrap in plastic wrap: Once the Beef Wellington has cooled, tightly wrap it with plastic wrap. Start by placing the Wellington in the center of a large piece of plastic wrap. Pull the plastic wrap over the top of the Wellington and press it firmly against the pastry to create a snug seal. Continue wrapping the plastic wrap around the sides and bottom, making sure to cover the entire Wellington from all angles. This airtight seal helps prevent air and moisture from reaching the Beef Wellington.
- Wrap with aluminum foil: For an additional layer of protection against freezer burn and to maintain freshness, wrap the plastic-wrapped Beef Wellington with aluminum foil. The aluminum foil acts as a barrier, shielding the Wellington from temperature fluctuations and preventing any potential odors from permeating the dish.
By cooling the Beef Wellington completely and tightly wrapping it in plastic wrap followed by aluminum foil, you create a protective barrier that minimizes the risk of freezer burn and helps preserve the flavor and texture of the dish during freezing. Proper wrapping is crucial for maintaining the quality of the Wellington until you’re ready to thaw and cook it.
Step 3: Select the Right Freezer Container
Selecting the appropriate freezer container is an important step in freezing Beef Wellington. It ensures that the dish remains well-preserved, protected from moisture, and free from unwanted odors. Here’s how to choose the right freezer container for your Beef Wellington:
- Airtight and freezer-safe containers: Look for containers that are specifically designed for freezer storage. These containers are typically made from durable materials such as BPA-free plastic or glass, which can withstand low temperatures without cracking or warping. Ensure the container has a tight-fitting lid to create an airtight seal, preventing air and moisture from entering and affecting the quality of the Beef Wellington.
- Heavy-duty freezer bags: An alternative to using containers is to use heavy-duty freezer bags. These bags are made from thick, puncture-resistant plastic and are specifically designed for freezer storage. They are flexible, take up less space in the freezer, and allow for easy stacking. Opt for freezer bags that have a strong seal or zip lock closure to keep the Beef Wellington well-protected.
- Ample protection against moisture and odors: Regardless of the container or bag you choose, ensure it provides ample protection against moisture and freezer odors. Moisture can lead to freezer burn, which can affect the texture and taste of the Beef Wellington. Look for containers or bags that are leak-proof and have a reliable seal. This will help maintain the integrity of the dish while preventing any absorption of unwanted odors from other foods in the freezer.
By selecting a freezer container or bag that is airtight, freezer-safe, and provides adequate protection against moisture and odors, you can ensure that your Beef Wellington remains in optimal condition during its time in the freezer. Proper packaging is key to preserving the quality and flavor of the dish until you’re ready to thaw and enjoy it.
Step 4: Proper Storage and Label
Storing your wrapped Beef Wellington correctly and labeling it appropriately is crucial for easy identification and to ensure that it remains in optimal condition. Follow these steps for proper storage and labeling:
- Place in the freezer container or bag: Carefully transfer the tightly wrapped Beef Wellington into the chosen freezer container or bag. Make sure to position it in a way that minimizes excess air circulation. Removing as much air as possible helps prevent freezer burn and maintains the quality of the dish during storage.
- Container size considerations: If using a container, choose one that fits the size of the Beef Wellington without leaving too much empty space. Excess air in the container can lead to freezer burn and potential loss of quality. If there is extra space, you can use additional packaging materials like crumpled parchment paper or foil to fill the gaps and minimize air exposure.
- Labeling the container or bag: Clearly label the freezer container or bag with the current date and a description of its contents. Include details such as “Beef Wellington” and the date of freezing. This information is essential for keeping track of the storage time and ensuring you use the oldest items first. It also makes it easier to identify the contents at a glance when searching through your freezer.
Proper storage and labeling help maintain the freshness and quality of the Beef Wellington. Removing excess air, using appropriate container sizes, and labeling with relevant details ensure that you can easily identify and retrieve the dish when needed. This systematic approach helps you stay organized and ensures that your frozen Beef Wellington remains at its best until you’re ready to thaw and cook it.
Step 5: Freeze and Storage Duration
Once you have correctly wrapped your Beef Wellington, it’s time to freeze it. Correct freezing and maintaining the right storage duration are essential to preserving the flavor, texture, and overall quality of the dish. Follow these steps for freezing and storage:
- Transfer to the freezer: Carefully place the wrapped Beef Wellington in the freezer, making sure it is positioned securely. Choose a spot in the freezer where other items will not disturb or crush the Wellington. This ensures that the shape and integrity of the dish are maintained.
- Set the temperature to 0°F (-18°C) or below: It’s important to set the freezer temperature to 0°F (-18°C) or lower. This temperature range is optimal for freezing and helps preserve the quality of the Beef Wellington. Consistently maintaining this temperature throughout the freezing process is crucial to prevent the growth of harmful bacteria and maintain the taste and texture of the dish.
- Storage duration: When stored properly, Beef Wellington can typically last in the freezer for up to 3 months without significant loss in quality. This duration provides a good balance between preserving taste and texture while ensuring food safety. After 3 months, the Beef Wellington is still safe to consume, but it may experience a slight decrease in taste and texture. For the best culinary experience, it is recommended to consume Beef Wellington within this time frame.
By transferring the wrapped Beef Wellington to the freezer, setting the temperature to 0°F (-18°C) or below, and following the recommended storage duration, you can ensure that the dish maintains its flavor, texture, and quality. Proper freezing and adherence to storage guidelines allow you to enjoy a delicious Beef Wellington even after an extended period in the freezer.
Step 6: Thawing and Reheat
Thawing and reheating frozen Beef Wellington properly is crucial to ensure that it retains its flavors and textures. Follow these steps for thawing and reheating your frozen Beef Wellington:
- Thawing in the refrigerator: Remove the wrapped Beef Wellington from the freezer and place it on a plate or a shallow dish. Thaw the Wellington in the refrigerator overnight or for approximately 24 hours. Slow thawing in the refrigerator helps preserve the integrity of the ingredients and ensures even thawing throughout the dish. It is important to avoid thawing at room temperature or using a microwave, as these methods can lead to uneven thawing and compromise the quality of the Wellington.
- Preheating the oven: Once the Beef Wellington is completely thawed, preheat your oven to the recommended cooking temperature for Beef Wellington, which is typically around 400°F (200°C). Preheating the oven ensures that it reaches the desired temperature for cooking the Wellington evenly.
- Reheating the Beef Wellington: Remove the plastic wrap and aluminum foil from the thawed Beef Wellington. Place the unwrapped Wellington on a baking sheet lined with parchment paper or aluminum foil to prevent any potential sticking. The pastry should be golden brown and crisp, and the internal temperature of the beef should reach the desired level of doneness.
- Baking the Beef Wellington: Slide the baking sheet with the Wellington into the preheated oven. Bake it according to the recommended cooking time, which typically ranges from 25 to 40 minutes, depending on the size and thickness of the Wellington. It is essential to follow the cooking time guidelines to ensure that the beef is cooked to the desired level of doneness and the pastry is perfectly golden brown.
- Checking for doneness: To determine if the Beef Wellington is cooked to your preference, you can use a meat thermometer to check the internal temperature of the beef. For medium-rare, the temperature should be around 135°F (57°C), while medium should be around 145°F (63°C). Adjust the cooking time accordingly if you prefer a different level of doneness.
By thawing the Beef Wellington in the refrigerator, preheating the oven to the recommended temperature, and following the suggested cooking time, you can enjoy a perfectly reheated and delicious Beef Wellington with its tender beef, flavorful mushroom filling, and crispy pastry.
Other related questions
Can you refreeze beef wellington?
No, it is generally not recommended to refreeze Beef Wellington once it has been thawed. Refreezing can compromise the quality, flavor, and texture of the dish, as repeated freezing and thawing can lead to moisture loss and degradation of ingredients. It is best to consume the Beef Wellington after it has been thawed and reheated, rather than refreezing it.
How do I know if the beef wellington has gone bad after being frozen?
To determine if frozen Beef Wellington has gone bad, inspect it for signs of spoilage such as an off odor, mold growth, or discoloration. If the Wellington appears excessively freezer burned, with dry or discolored patches, it may have lost its quality. Additionally, if there are any changes in texture or taste, or if you have concerns about the safety of the dish, it is recommended to discard it to avoid the risk of foodborne illness.
How does freezing affect the taste and texture of beef wellington?
Freezing can affect the taste and texture of beef wellington to some extent. During the freezing process, moisture in the dish can form ice crystals, which can lead to changes in texture upon thawing. The pastry may become slightly softer and less crisp, and the beef may lose some of its juiciness. However, when properly wrapped and stored, beef wellington can still retain much of its flavor and overall appeal after freezing.
Are there any specific precautions for freezing beef wellington with foie gras?
When freezing beef wellington with foie gras, it is important to take certain precautions. Foie gras has a delicate texture and can become grainy or lose its smoothness when frozen. To maintain its quality, consider adding the foie gras after reheating the beef wellington, or use a high-quality foie gras that is specifically designed for freezing. Additionally, ensure proper wrapping and airtight packaging to minimize moisture loss and maintain the overall integrity of the dish.
Are there any special considerations for freezing beef wellington with a red wine reduction sauce?
When freezing beef wellington with a red wine reduction sauce, there are a few special considerations to keep in mind. The sauce may thicken or separate during freezing and thawing, potentially affecting its texture and consistency. To mitigate this, consider freezing the beef wellington without the sauce and add it separately after reheating. Alternatively, you can freeze the beef wellington with the sauce, but be prepared to adjust and potentially reheat the sauce to restore its desired consistency upon serving.
Can I freeze beef wellington that has been made with a gluten-free pastry?
Yes, it is possible to freeze beef wellington that has been made with a gluten-free pastry. However, it’s important to note that gluten-free pastries can sometimes be more delicate and prone to changes in texture when frozen and thawed. To minimize any potential issues, ensure that the beef wellington is properly wrapped and stored in airtight packaging to prevent freezer burn. When reheating, closely monitor the cooking time to prevent overcooking and maintain the desired texture of the gluten-free pastry.

