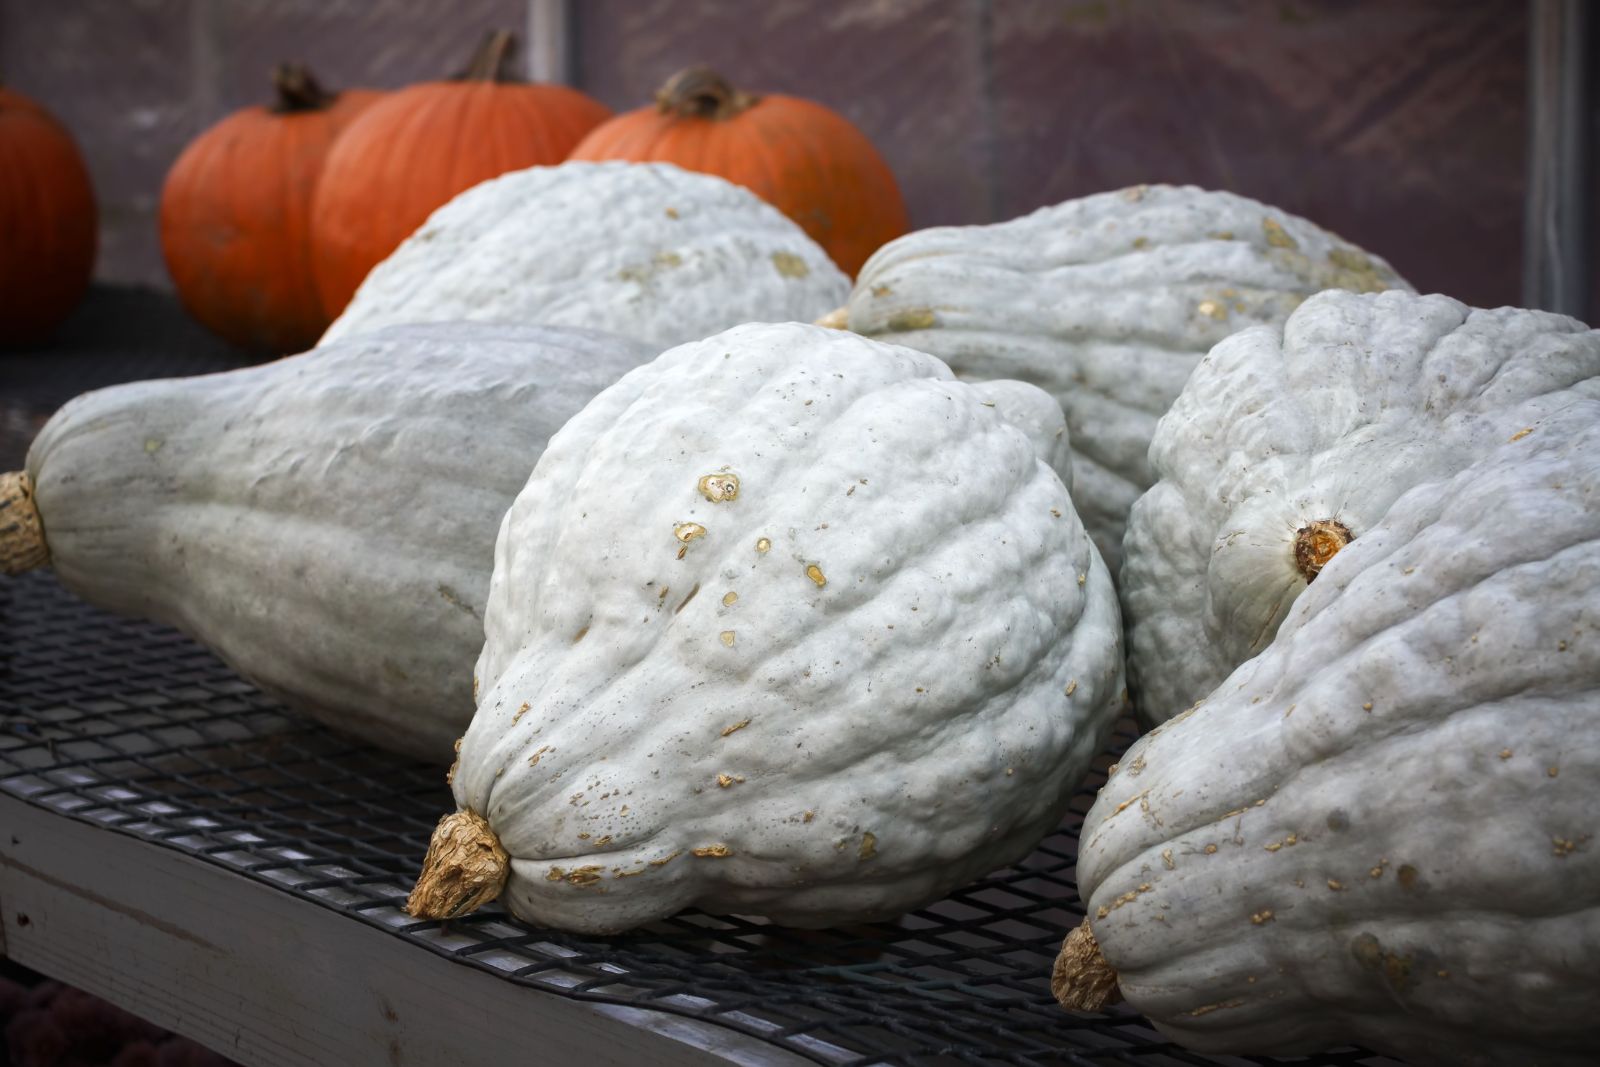
The winter squashes with the distinctive and flavorful blue hubbard squash, a beautiful and versatile vegetable that shines in autumn and winter recipes. Blue hubbard squash is known for its large, oblong shape and its striking blue-gray skin, which encases a vibrant orange flesh that is sweet, creamy, and nutty in flavor. Whether roasted, steamed, mashed, or used in soups and stews, blue hubbard squash adds a rich and hearty element to a variety of dishes. If you have an abundance of blue hubbard squash or want to extend its shelf life, freezing it is an excellent option. In this guide, we’ll explore the art of freezing blue hubbard squash, sharing expert tips and techniques to preserve its texture, flavor, and nutritional value, allowing you to enjoy the delightful taste and versatility of this winter squash whenever you desire, whether it’s for a comforting soup, a delicious side dish, or a hearty main course.
Here are the simple steps to freeze blue hubbard squash:
Step 1: Select and Prepare the Squash
The first step in freezing blue Hubbard squash is to carefully select and prepare the squash to ensure optimal taste and quality after freezing. Here’s how you can do it:
- Choose Fresh and Ripe Squash: When selecting blue Hubbard squash for freezing, opt for ones that are fresh and ripe. Look for squash that feels heavy for its size, indicating that it is dense and full of moisture. Avoid squash that feels light or has soft spots, as these may indicate spoilage.
- Inspect the Skin: Examine the skin of the squash for any blemishes or signs of damage. Ideally, the skin should be firm and unblemished. Avoid squash with cuts, bruises, or mold, as these can affect the quality of the frozen squash.
- Wash the Squash: Before beginning the preparation process, it’s essential to wash the squash thoroughly. Place the squash under cool, running water and gently rub the surface to remove any dirt or debris that may be present. This step helps ensure that you freeze a clean and hygienic product.
- Dry the Squash: After washing, use a clean towel to pat the squash dry. Removing excess moisture from the surface helps in maintaining the integrity of the squash during the freezing process. Place the dried squash on a clean cutting board, ready for the next steps.
By selecting and preparing your blue Hubbard squash, you can ensure that you start the freezing process with fresh and high-quality produce. This will contribute to better-tasting frozen squash and help preserve its texture and flavor for an extended period.
Step 2: Peel and Cut the Squash
After selecting and preparing the blue Hubbard squash, the next step is to peel and cut it into suitable pieces for freezing. Here’s how you can do it:
- Prepare the Squash: Begin by placing the blue Hubbard squash on a stable surface, such as a cutting board. Using a sharp knife, carefully cut off both ends of the squash. This will create flat and stable surfaces, making it easier to handle during the peeling and cutting process.
- Peel the Squash: Stand the squash upright on one of the flat ends. With a steady hand, use the knife to peel off the tough skin, working your way from the top to the bottom. Ensure that you remove all of the skin, as it can be tough and undesirable when frozen. Take your time and be cautious while peeling to avoid any accidents.
- Cut the Squash in Half: Once the squash is peeled, cut it in half lengthwise. This will expose the inner cavity, which contains the seeds and pulp. Use a strong and stable grip on the squash to safely make the cut. You can apply gentle pressure with the knife and use a rocking motion to guide the blade through the squash.
- Remove Seeds and Pulp: After cutting the squash in half, you’ll find a cavity filled with seeds and pulp. Take a spoon and scoop out the seeds and pulp, discarding them. Ensure that you remove all of the seeds and pulp, as they can affect the texture and taste of the frozen squash.
- Cut into Smaller Pieces or Slices: With the seeds and pulp removed, you can now proceed to cut the blue Hubbard squash into smaller, manageable pieces or slices. Consider the intended use of the squash when deciding on the size of the pieces. Some prefer larger chunks for roasting or mashing, while others may prefer smaller pieces for soups or stews.
By peeling and cutting the blue Hubbard squash, you’ll be able to prepare it in a way that is convenient for freezing and future use. Remember to exercise caution while handling the knife and take your time to ensure precise cuts and a safe kitchen environment.
Step 3: Blanch the Squash
Blanching is a crucial step in the process of freezing blue Hubbard squash. It helps to preserve the squash’s color, texture, and nutritional value. Follow these steps to blanch the squash properly:
- Prepare a Large Pot: Take a large pot and fill it with water, leaving enough room for the squash to be submerged. Place the pot on the stovetop and bring the water to a rolling boil over high heat. The pot should be large enough to accommodate the quantity of squash you are blanching.
- Add the Squash: Carefully place the blue Hubbard squash pieces or slices into the boiling water. Ensure that the squash is fully immersed in the water. You can use a slotted spoon or tongs to safely lower the squash into the pot.
- Blanching Time: Allow the squash to cook in the boiling water for 2-3 minutes. The exact blanching time may vary slightly depending on the size of the squash pieces or slices. Larger pieces may require slightly longer blanching, while smaller ones may be ready within 2 minutes. The goal is to partially cook the squash without fully softening it.
- Ice Bath Preparation: While the squash is blanching, prepare an ice bath by filling a large bowl or sink with cold water and adding ice cubes. This ice bath will be used to cool down the blanched squash quickly and halt the cooking process.
- Transfer to the Ice Bath: After the designated blanching time, use a slotted spoon or tongs to remove the blanched squash from the boiling water and immediately transfer them to the ice bath. Submerging the squash in the ice bath rapidly cools it down, preventing any further cooking and preserving its vibrant color and texture.
- Allow Cooling: Leave the squash in the ice bath for the same amount of time it was blanched. This ensures that the squash cools down completely and stops the cooking process. Stir the squash gently in the ice bath to ensure all pieces cool evenly.
- By blanching the blue Hubbard squash, you not only retain its appealing color and texture but also help to preserve its nutritional value. Blanching prevents enzyme activity and bacterial growth, which can affect the quality of the frozen squash.
By blanching the blue Hubbard squash, you not only retain its appealing color and texture but also help to preserve its nutritional value. Blanching prevents enzyme activity and bacterial growth, which can affect the quality of the frozen squash.
Step 4: Shock in an Ice Bath
After blanching blue Hubbard squash, the next crucial step is to shock it in an ice bath. Shocking the squash in an ice bath helps to rapidly cool it down, halting the cooking process and preserving its vibrant color and texture. Follow these steps to shock the blanched squash properly:
- Prepare an Ice Bath: Fill a large bowl or sink with cold water and add ice cubes to create an ice bath. Make sure there is enough water to fully submerge the blanched blue Hubbard squash.
- Remove from Boiling Water: Using a slotted spoon or tongs, carefully remove the blanched blue Hubbard squash pieces or slices from the boiling water. Allow any excess water to drain off before transferring them immediately to the ice bath.
- Submerge in Ice Bath: Place the blanched squash into the ice bath, ensuring that all pieces are fully submerged in the icy water. The ice bath rapidly cools down the squash, effectively stopping the cooking process. Stirring the squash gently in the ice bath helps to cool all pieces evenly.
- Cooling Time: Allow the blanched blue Hubbard squash to sit in the ice bath for the same amount of time it was blanched. This ensures that the squash cools down completely and maintains its desired texture and color.
- Drain Excess Water: After the cooling time is up, remove the blue Hubbard squash from the ice bath. Use a colander or strainer to drain any excess water from the squash. It is essential to remove excess moisture to prevent freezer burn during the freezing process.
By shocking the blanched blue Hubbard squash in an ice bath, you preserve its vibrant color and stop the cooking process. This step helps to maintain the squash’s texture and overall quality when it is eventually thawed and cooked. Ensure that the squash is fully cooled and drained before proceeding to the next steps of packaging and freezing.
Step 5: Drain and Pack
Once the blanched blue Hubbard squash has been shocked in an ice bath and cooled down, it is important to drain it thoroughly before packaging for freezing. Here’s how to drain and package the squash properly:
- Drain the Squash: Transfer the blanched blue Hubbard squash from the ice bath to a colander or strainer. Allow the squash to drain thoroughly to remove any excess water. Shaking the colander gently or lightly patting the squash with a clean kitchen towel can help expedite the draining process.
- Remove Excess Water: It is crucial to ensure that all excess water is removed from the blanched squash before freezing. Excess water can lead to the formation of ice crystals, which can cause freezer burn and affect the texture and flavor of the frozen squash.
- Choose Packaging Options: For freezing blue Hubbard squash, there are two popular packaging options: freezer bags or airtight containers. Choose the one that suits your preference and storage availability.
Freezer Bags:
If using freezer bags, place the drained blue Hubbard squash into the bags. Squeeze out as much air as possible from the bags before sealing them. Removing excess air helps prevent freezer burn and maintains the quality of the frozen squash. Label the bags with the date and contents for easy identification.
Airtight Containers:
If opting for airtight containers, ensure that they are freezer-safe. Place the drained blue Hubbard squash into the containers, leaving some headspace at the top to allow for expansion during freezing. Seal the containers tightly and label them with the date and contents.
- Portioning (Optional): If you prefer to freeze the squash in portioned amounts, divide it into smaller portions before packaging. This allows for easier thawing and use later on without having to defrost the entire batch.
- Freeze Immediately: Once the blue Hubbard squash is packaged, place it in the freezer immediately. Freezing the squash promptly helps maintain its freshness and flavor.
By draining the blanched blue Hubbard squash thoroughly and choosing the appropriate packaging method, you can ensure the squash is properly sealed and protected during freezing. Proper packaging minimizes the risk of freezer burn and maintains the quality of the frozen squash until you’re ready to use it.
Step 6: Freeze and Store
After properly packaging the blue Hubbard squash, the next step is to freeze and store it correctly. Follow these steps to ensure optimal storage and maintain the quality of the frozen squash:
- Label the Packaging: Before placing the freezer bags or airtight containers in the freezer, label them with the current date and the contents. This labeling practice helps you keep track of the storage time and easily identify the squash when needed in the future.
- Place in the Freezer: Carefully position the labeled freezer bags or airtight containers in the freezer. Ensure they are placed on a flat surface, allowing for efficient air circulation and consistent freezing.
- Maintain a Constant Freezer Temperature: Set your freezer to a temperature of 0°F (-18°C) or below. It is crucial to maintain a consistent and sufficiently low temperature to preserve the quality of the frozen squash. Fluctuations in temperature can lead to freezer burn and affect the texture and taste of the squash.
- Storage Duration: Blue Hubbard squash can be stored in the freezer for up to 12 months. However, for the best quality, it is recommended to consume the frozen squash within 8 to 10 months. Beyond this period, the squash may start to deteriorate in terms of taste and texture.
- Organize Your Freezer: To make it easier to locate the frozen blue Hubbard squash when needed, organize your freezer. Place the squash in a designated section or drawer, keeping similar items together. This organization method ensures that you can access the squash without having to dig through the entire freezer.
By freezing and storing blue Hubbard squash properly, ensuring its longevity and maintaining its quality. Proper labeling, consistent freezer temperature, and organized storage contribute to a convenient and enjoyable cooking experience when using the frozen squash in the future.
Other related questions
How do you defrost blue hubbard squash?
To defrost blue Hubbard squash, transfer the frozen squash from the freezer to the refrigerator. Allow it to thaw slowly in the refrigerator for several hours or overnight. Once fully thawed, the blue Hubbard squash can be used in various recipes or reheated according to your desired method.
Can you refreeze blue hubbard squash?
It is generally recommended not to refreeze blue Hubbard squash once it has been thawed. Refreezing can result in a loss of quality, texture, and flavor. It is best to plan your usage and thaw only the amount of squash needed for immediate use to ensure the best taste and texture.
How do I know if the blue hubbard squash has gone bad after being frozen?
To determine if frozen blue Hubbard squash has gone bad, check for signs of freezer burn, such as dry or discolored patches on the surface. If the squash exhibits a strong off-putting odor or develops mold, it is an indication of spoilage and should be discarded. Additionally, if the texture of the squash becomes mushy or excessively watery, it is likely past its prime and should not be consumed.
What should I do if I have excess water in the frozen blue Hubbard squash?
If you find excess water in frozen blue Hubbard squash, it is likely due to ice crystals melting and pooling during the freezing process. To address this, drain off the excess water before using the squash in recipes. You can do this by thawing the squash in a colander or strainer over a bowl, allowing the water to drain away. Pat the squash gently with a clean kitchen towel to remove any remaining moisture before incorporating it into your dishes.
What are some recipe ideas for using frozen blue Hubbard squash?
Frozen blue Hubbard squash can be used in various delicious recipes. It can be cooked and mashed to make flavorful squash puree, which serves as a versatile ingredient in baked goods like muffins and bread. You can also roast the thawed squash with herbs and spices, or incorporate it into casseroles, risottos, and savory pies for a comforting and nutritious meal. Experiment with different recipes to make the most of the frozen blue Hubbard squash’s natural sweetness and creamy texture.
Can I freeze blue Hubbard squash with seasoning or spices?
Yes, you can freeze blue Hubbard squash with seasoning or spices. Before freezing, it is recommended to cook or roast the squash with the desired seasoning or spices to enhance its flavor. Once cooked, allow the squash to cool, then package it in airtight containers or freezer bags, removing as much air as possible. Properly labeled and dated, the seasoned blue Hubbard squash can be stored in the freezer for future use, adding delicious flavors to your recipes.

