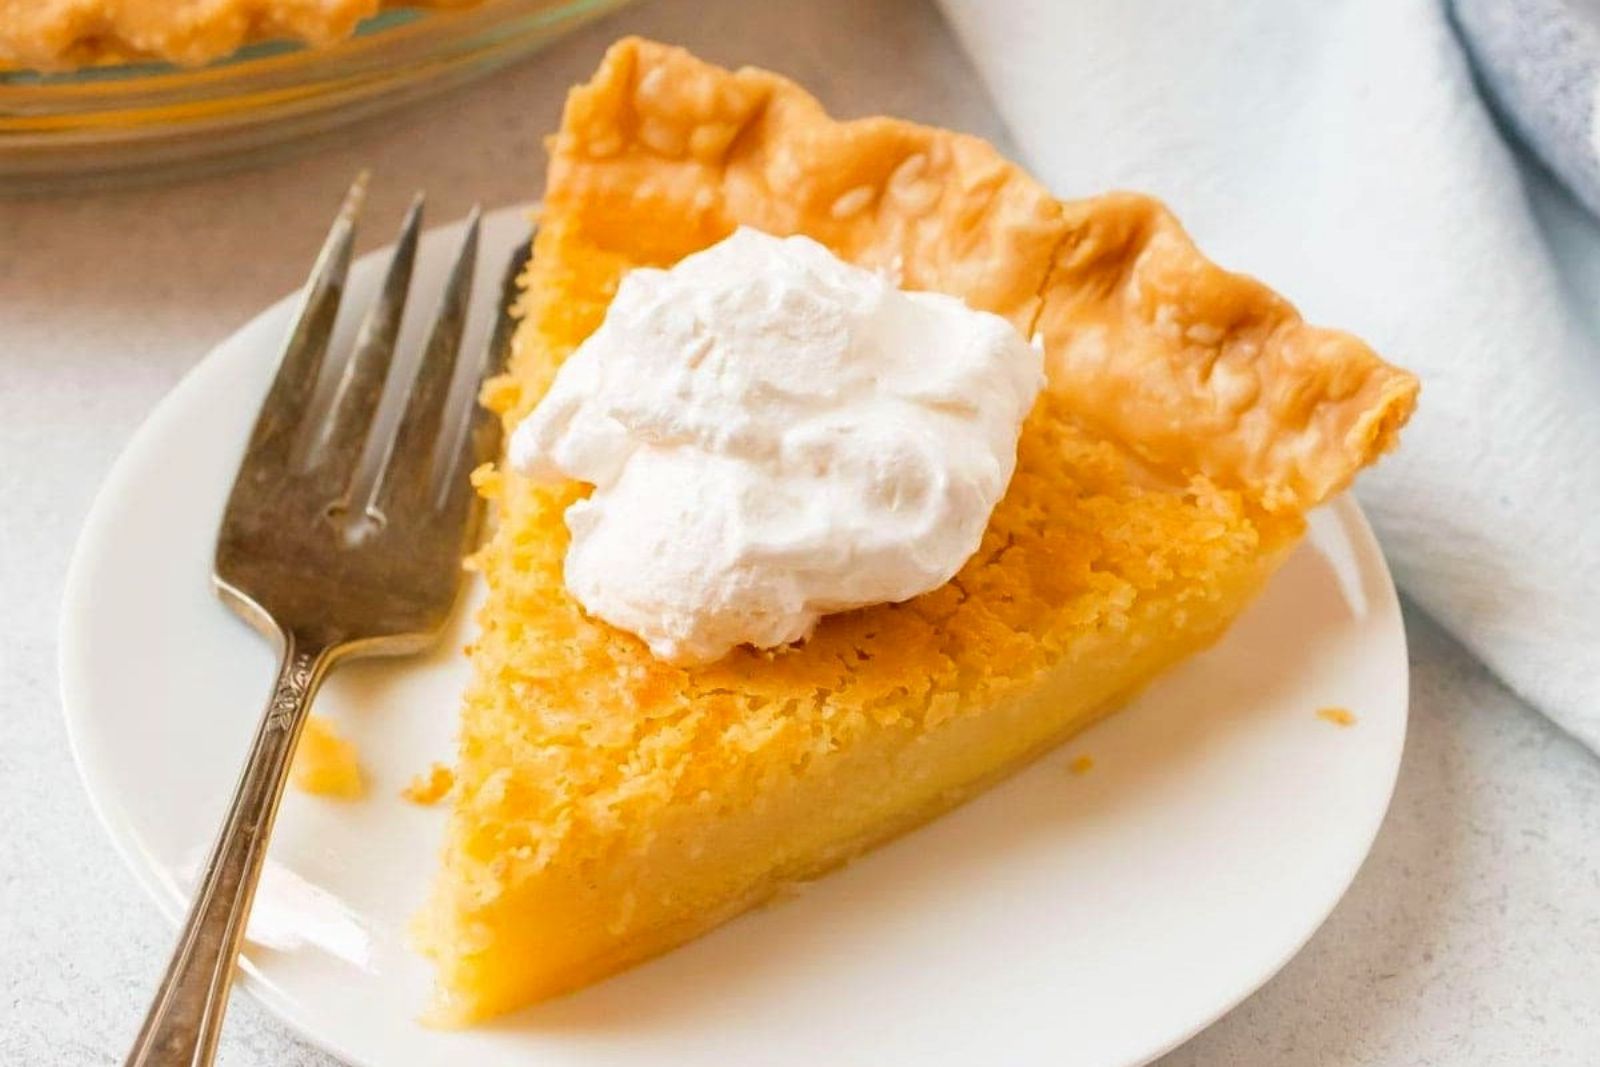
Indulge in the creamy and tangy goodness of buttermilk pie, a classic Southern dessert that is sure to delight your taste buds. With its velvety custard filling and flaky crust, buttermilk pie is a comforting and nostalgic treat that brings warmth to any gathering or celebration. The rich and slightly tangy flavor of buttermilk combined with the subtle sweetness of the custard makes each bite a heavenly experience. Whether you’re enjoying a slice on its own or pairing it with a dollop of whipped cream, buttermilk pie is a true delight. However, if you find yourself with leftover pie or want to prepare ahead of time, freezing it is a great option. Freezing buttermilk pie preserves its delightful taste and texture, allowing you to enjoy a slice of this delectable dessert whenever the craving strikes. In this guide, we will explore the process of freezing buttermilk pie, providing you with tips and techniques to ensure that your frozen pie maintains its deliciousness and can be enjoyed at a later date. So go ahead, bake a buttermilk pie and freeze some for later, because this timeless dessert is meant to be savored and shared with loved ones.
Here are the simple steps to freeze buttermilk pie:
Step 1: Allow the Pie to Cool
Allowing the buttermilk pie to cool completely before freezing is an important step in the process. When a hot pie is placed directly into the freezer, the drastic temperature change can lead to the formation of condensation and ice crystals inside the pie.
Condensation occurs when moisture in the warm air inside the pie comes into contact with the colder air in the freezer. This moisture can cause ice crystals to form on the surface of the pie or within its layers. These ice crystals can affect the texture and overall quality of the pie when it is thawed later on.
By allowing the pie to cool completely, you give it time to reach room temperature. This minimizes the temperature difference between the pie and the freezer, reducing the likelihood of condensation and ice crystal formation.
Furthermore, cooling the pie before freezing also helps to preserve its flavor. Allowing it to cool allows the flavors to develop and settle, ensuring that they are properly retained when the pie is frozen and thawed later.
Cooling the buttermilk pie before freezing is essential to prevent the formation of condensation and ice crystals. This step helps maintain the pie’s texture and flavor, ensuring a delicious and enjoyable dessert when it is eventually thawed and served.
Step 2: Slice the Pie
When freezing a whole buttermilk pie, it is recommended to slice it into individual portions. This step allows for easier thawing and serving of the pie later on, as you can take out and thaw only the desired number of slices at a time.
Using a sharp knife, carefully cut the pie into even slices. The size of each slice will depend on personal preference, but it’s important to ensure that each piece is of a manageable size. Smaller slices may thaw more quickly and evenly.
By slicing the pie before freezing, you avoid the need to thaw and refreeze the entire pie whenever you want a serving. This way, you can conveniently take out and thaw only the number of slices you need, preserving the rest of the pie for future enjoyment.
Additionally, individually sliced portions make it easier to serve the buttermilk pie later on. You can simply take out the desired number of slices, thaw them, and serve them without the need to cut through a whole frozen pie.
Slicing the buttermilk pie into individual portions before freezing allows for easier thawing and serving. It provides convenience and flexibility, as you can take out and thaw only the desired number of slices at a time while preserving the rest of the pie for later.
Step 3: Wrap the Pie Slices
After slicing the buttermilk pie into individual portions, the next step is to wrap each slice individually. This helps to protect the pie slices from freezer burn and helps maintain their flavor and moisture during the freezing process.
There are two common materials you can use for wrapping: plastic wrap or aluminum foil. Both options are effective in creating a barrier that prevents air and moisture from reaching the pie slices.
When wrapping the pie slices, make sure to do so tightly. This ensures that there is minimal exposure to air, which can cause freezer burn. Freezer burn occurs when moisture in the food evaporates, leading to dry and discolored patches on the surface. Wrapping the slices tightly helps to maintain the pie’s moisture and texture.
If using plastic wrap, place the slice on a piece of plastic wrap and fold the wrap over the pie tightly, covering it completely. Be sure to press the wrap against the surface of the pie to eliminate any air pockets.
If using aluminum foil, place the pie slice on a sheet of foil and fold the foil over the slice, sealing the edges tightly. Again, make sure there are no gaps or openings where air can enter.
Proper wrapping also helps to preserve the flavor of the buttermilk pie. It prevents any odors from other foods in the freezer from permeating the pie, ensuring that it retains its delicious taste.
Individually wrapping each slice of buttermilk pie in plastic wrap or aluminum foil, and doing so tightly, is important to prevent freezer burn and maintain the pie’s flavor and moisture. This step ensures that the pie slices remain in excellent condition and are ready to be enjoyed when thawed.
Step 4: Place Slices in a Container
After individually wrapping each slice of buttermilk pie, the next step is to transfer them into a suitable freezer-safe container. This additional layer of protection helps to maintain the quality of the pie slices during freezing and storage.
When choosing a freezer-safe container, opt for a rigid plastic container or a freezer bag. Both options work well in preventing air and moisture from reaching the pie slices.
Here’s how to proceed:
- Select a rigid plastic container or a freezer bag that is appropriate in size to accommodate the wrapped pie slices without excessive empty space. This helps to minimize the potential for air exposure.
- If using a plastic container, place the wrapped pie slices neatly inside, ensuring they fit snugly. Leave a small gap between the slices and the lid to account for any slight expansion that may occur during freezing.
- If using a freezer bag, gently arrange the wrapped pie slices in a single layer, removing any excess air from the bag before sealing it. For added protection against freezer burn, you can place the bagged slices inside a second freezer bag.
- Ensure that the container or bag provides a good seal. This helps to prevent air from entering and compromising the quality of the pie slices.
By placing the individually wrapped slices in a freezer-safe container, you create an extra barrier against air and moisture, reducing the risk of freezer burn and maintaining the flavor and texture of the buttermilk pie.
Transferring the wrapped buttermilk pie slices into a freezer-safe container provides an additional layer of protection against air and moisture. This step helps preserve the quality of the pie slices during freezing and storage, ensuring that they remain delicious and ready for consumption when thawed.
Step 5: Label and Date
Labeling and dating the container that holds your frozen buttermilk pie slices is an essential step to maintain organization and keep track of the pie’s freshness. By following this step, you can easily identify the contents and ensure that you consume the pie within a reasonable timeframe.
Here’s how to label and date the container:
- Using a marker or a label, write the name “Buttermilk Pie” on the container. This will help you quickly identify the contents of the container without needing to open it.
- Indicate the date of freezing on the container as well. Write the month, day, and year when the pie slices were placed in the freezer. This information is important to ensure that you use the pie within a suitable time frame, as the quality of frozen pie can gradually degrade over time.
By labeling the container, you avoid confusion and the need to open multiple containers to find the desired pie slices. It saves time and makes it convenient to locate the frozen buttermilk pie slices when you’re ready to enjoy them.
Additionally, noting the date of freezing is crucial for food safety and quality purposes. It helps you keep track of how long the pie has been in the freezer, allowing you to consume it within a recommended time frame. While frozen buttermilk pie can generally be stored for several months, it’s best to consume it within 2-3 months for optimal taste and texture.
Labeling and dating the container that holds your frozen buttermilk pie slices helps with organization and ensures that you consume the pie within a reasonable timeframe. This step allows for easy identification of the pie slices and helps maintain food safety and quality.
Step 6: Store in the Freezer
After labeling and dating the container of buttermilk pie slices, it’s time to place it in the freezer for storage. Proper storage in the freezer is crucial to maintain the quality and freshness of the pie slices.
Here’s how to store the container in the freezer:
- Choose an appropriate section of the freezer: Find a section in your freezer where the container can be placed without being subjected to frequent temperature fluctuations. Avoid placing it near the freezer door or in areas that are frequently opened, as this can expose the pie slices to temperature variations.
- Prevent potential crushing: Ensure that the container is placed in a location where it won’t be crushed or damaged by other items in the freezer. Take care to arrange the freezer space in a way that protects the container and keeps it upright.
- Set the freezer temperature: Check and confirm that your freezer temperature is set to 0°F (-18°C) or below. This temperature range is recommended for optimal storage conditions, as it helps to maintain the quality and integrity of the frozen buttermilk pie slices.
By completing these storage guidelines, you create an ideal environment for the frozen buttermilk pie slices. The consistent low temperature and protection from potential damage ensure that the pie slices remain frozen properly, preserving their flavor and texture.
Storing the labeled container of buttermilk pie slices in the freezer involves placing it in a suitable section, avoiding temperature fluctuations and potential crushing by other items. Setting the freezer temperature or below provides optimal storage conditions. By following these steps, you can ensure that the frozen buttermilk pie slices maintain their quality and are ready to be enjoyed whenever you desire.
How long can buttermilk pie last in the freezer?
Buttermilk pie can last in the freezer for about 2 to 3 months without significant loss of quality. It’s important to note that while the pie may still be safe to eat beyond this timeframe, the texture and flavor may deteriorate over time. Proper storage in an airtight container or wrapping helps to maintain the pie’s freshness and prevent freezer burn.
Step 7: Thaw the Frozen Pie
When the time comes to indulge in a slice of your frozen buttermilk pie, it’s important to thaw the pie slices properly to preserve their texture and flavor. Thawing the slices slowly in the refrigerator is the recommended method, followed by serving them chilled or warming them up if desired.
Here’s how to thaw and serve the frozen buttermilk pie slices:
- Plan ahead: Remove the desired number of pie slices from the freezer and determine how many you want to thaw for serving. It’s best to thaw only the slices you intend to consume to avoid unnecessary refreezing.
- Transfer to the refrigerator: Place the wrapped pie slices in the refrigerator. Thawing them in the refrigerator overnight is the preferred method as it allows for a slow and even thawing process. Ensure that the slices are placed on a plate or a tray to catch any condensation as they thaw.
- Thawing time: The exact thawing time will depend on the thickness of the pie slices, but generally, they will require several hours or overnight to fully thaw in the refrigerator. It’s important to be patient and allow them enough time to thaw completely.
- Serve chilled or warm if desired: Once the pie slices are fully thawed, you can serve them chilled as they are, which maintains the creamy texture of the buttermilk pie. If you prefer a warm slice, you can gently warm it up in the oven for a few minutes at a low temperature (around 300°F or 150°C). Be cautious not to overheat, as it can cause the pie to become soggy or lose its structure.
To serve the frozen buttermilk pie slices, thaw them in the refrigerator overnight, ensuring a slow and even thawing process. Once fully thawed, you can enjoy them chilled or warm them up if desired. Remember not to refreeze the thawed slices and consume any leftovers within a few days. With proper thawing and serving, you can savor the deliciousness of the buttermilk pie at its best.
Other related questions
Can you refreeze buttermilk pie?
Refreezing buttermilk pie is generally not recommended. Once the pie has been thawed, it is best to consume it within a few days to ensure its quality and taste. Refreezing can result in a loss of texture and flavor, as well as potentially compromising the overall integrity of the pie. It is advisable to plan ahead and thaw only the amount of pie that you intend to consume to minimize the need for refreezing.
How do I know if the buttermilk pie has gone bad after being frozen?
To determine if buttermilk pie has gone bad after being frozen, consider several indicators. Look for any signs of freezer burn, such as discoloration or dry patches on the surface. Additionally, check for changes in texture, such as excessive sogginess or a grainy consistency. Lastly, trust your sense of smell and taste; if the pie exhibits an off odor or tastes noticeably different, it may indicate spoilage, and it’s best to discard it for safety reasons.
Can I freeze buttermilk pie filling separately from the crust?
Yes, you can freeze buttermilk pie filling separately from the crust. If you have leftover filling or prefer to freeze them separately, it’s recommended to pour the buttermilk pie filling into an airtight container or freezer bag. Make sure to leave some headspace for expansion during freezing. Label the container with the date and freeze the filling for up to 3 months. When ready to use, thaw the filling in the refrigerator and pair it with a fresh crust before baking.
Can I freeze an unbaked buttermilk pie?
Yes, you can freeze an unbaked buttermilk pie. To freeze an unbaked buttermilk pie, prepare the pie as you normally would but refrain from baking it. Place the unbaked pie in a freezer-safe dish or wrap it tightly with plastic wrap and aluminum foil to prevent freezer burn. Label the container with the date and freeze for up to 3 months. When ready to bake, remove the pie from the freezer, thaw it in the refrigerator overnight, and then follow the original baking instructions.

