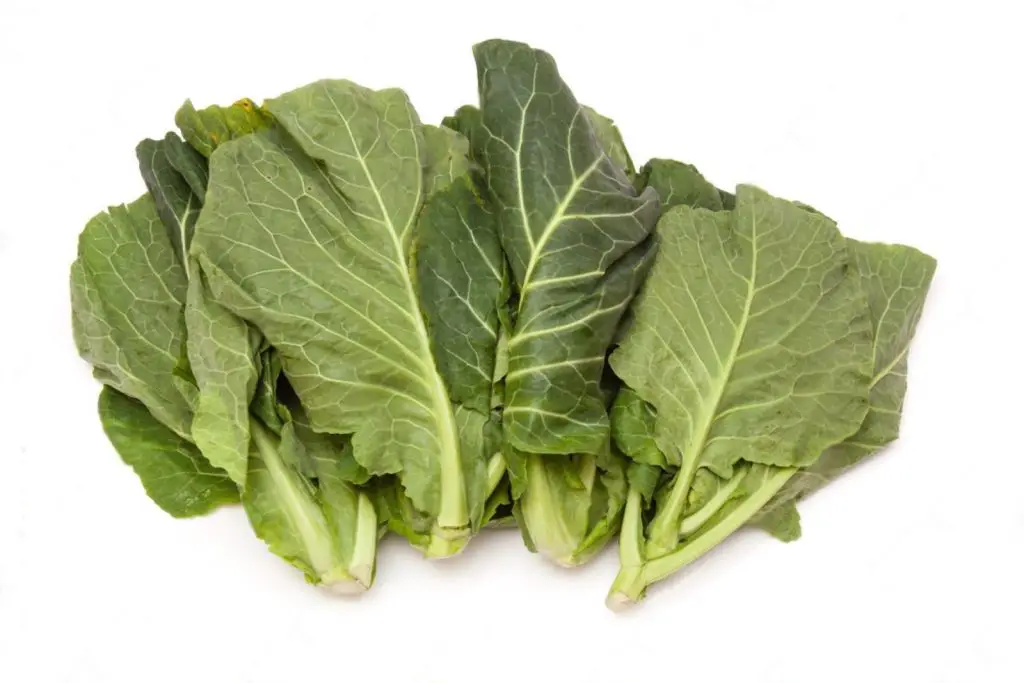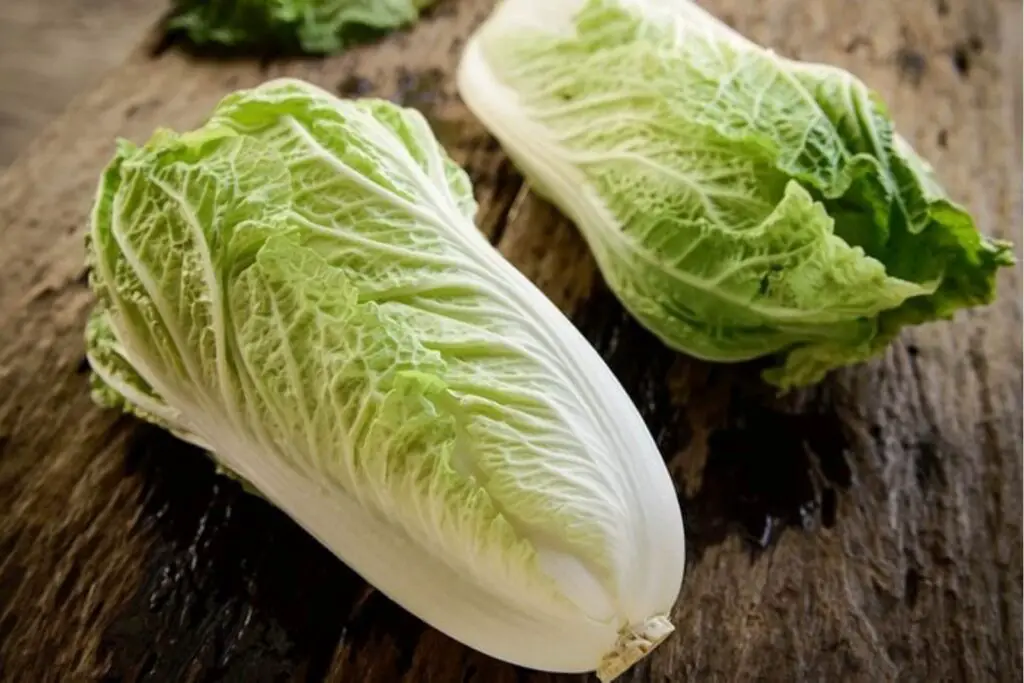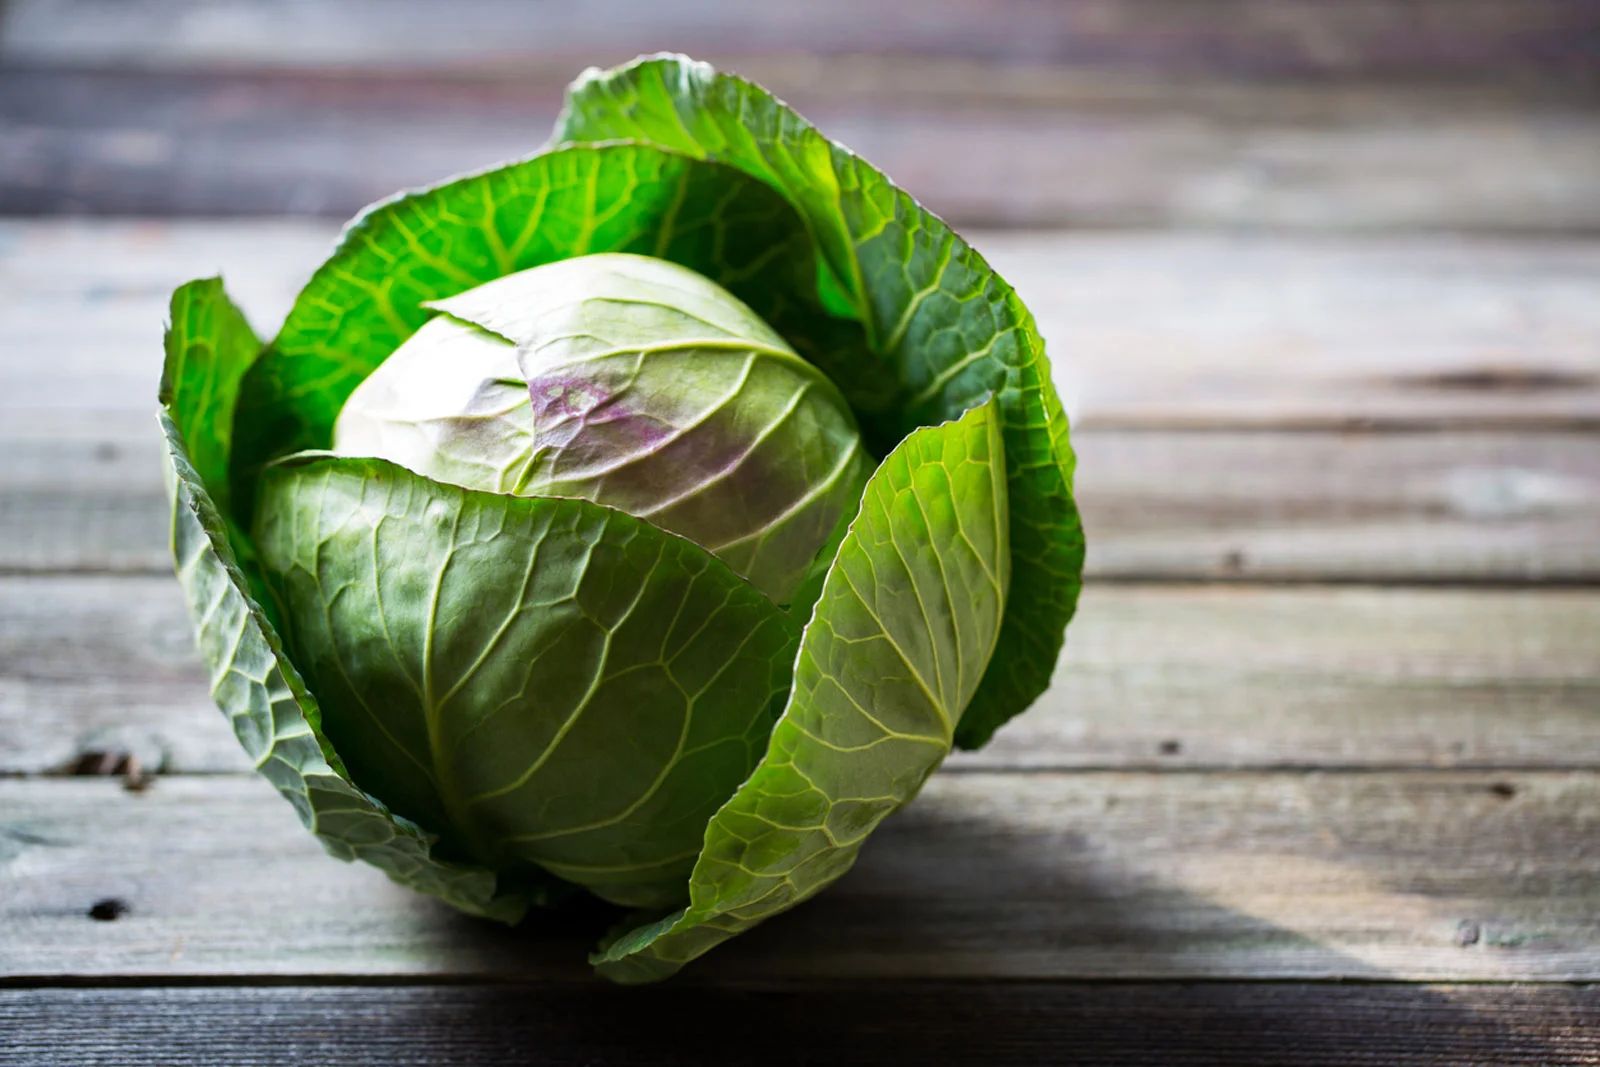
Cabbages, with their tightly packed leaves and crisp texture, are a versatile and nutritious vegetable widely used in various cuisines around the world. Whether you’re a home gardener with an abundant harvest or you’ve stumbled upon a great deal at the local market, freezing cabbages can be an excellent way to preserve their freshness for extended use. By following a few simple steps, you can ensure that your frozen cabbages maintain their flavor and quality. In this article, we’ll provide you with a step-by-step guide on how to freeze cabbages effectively.
Here’s a comprehensive approach to freezing cabbages:
Step 1: Choose the Right Cabbages
When it comes to successfully freezing cabbages, the process begins with making the right selection. Not all cabbages are created equal in terms of their suitability for freezing and their ability to retain quality during the freezing process. By opting for firm and fresh cabbages that are free from blemishes and damage, you set the foundation for preserving their taste, texture, and nutritional value.
Cabbages come in various types, each with its own unique characteristics and uses. Green and red cabbages, for instance, are particularly well-suited for freezing due to their sturdy leaves and robust flavor. These varieties can stand up to the blanching and freezing steps without losing their structural integrity.
When selecting cabbages for freezing, pay close attention to their overall appearance. Look for cabbages that feel heavy for their size and have compact, tightly packed leaves. Avoid cabbages with wilted, yellowed, or damaged leaves, as these signs can indicate a decrease in freshness and potential issues during freezing. Freshness is key to producing the best-frozen cabbage with the most appealing taste and texture after thawing.
Green and red cabbages are popular choices not only for their suitability to freezing but also for their vibrant colors and distinct flavors. Green cabbage, with its slightly sweet and mild taste, is often used in coleslaw, salads, and various cooked dishes. Red cabbage, on the other hand, boasts a more pronounced earthy flavor and a rich hue that can add a burst of color to your recipes. Both types of cabbage offer a range of culinary possibilities, making them versatile staples in the kitchen.
Step 2: Wash and Remove Outer Leaves
After you’ve chosen the right cabbages for freezing, the next step involves preparing them for the freezing process. Properly cleaning and trimming the cabbages not only ensures the quality of the final frozen product but also contributes to food safety and overall flavor.
Thoroughly washing the cabbages under cool running water is a fundamental practice that removes any surface dirt, dust, or potential contaminants that may have accumulated during transportation or storage. While cabbages have protective outer leaves, it’s essential to remove these layers as they might harbor impurities or insects. This step is especially crucial if you’re using homegrown cabbages or those purchased from local markets, as they might not have undergone the same level of commercial processing as store-bought ones.
As you wash the cabbages, pay attention to the areas where the leaves connect to the core. These crevices can often trap dirt or insects. Gently separate the leaves and rinse thoroughly, ensuring that all parts of the cabbage are clean.
Removing the outer leaves that appear wilted or damaged is another important aspect of this step. Wilted or bruised leaves might not freeze well and could negatively impact the overall quality of the frozen cabbage. By discarding these compromised leaves, you’re ensuring that only the freshest and most robust parts of the cabbage are preserved.
Step 3: Cut into Suitable Sizes
Once your cabbages have been thoroughly cleaned and the outer leaves removed, the next step in the cabbage freezing process involves cutting them into sizes that align with your culinary plans. This step allows you to customize the cabbage pieces to suit your intended dishes, ensuring that they’re ready for use straight from the freezer.
The cutting process is largely guided by how you envision using the frozen cabbage in your future recipes. The versatility of cabbages means that they can be prepared in a variety of ways to add flavor, texture, and nutrition to your meals.
One common approach is shredding the cabbage into fine strands. Finely shredded cabbage is ideal for dishes like coleslaw, salads, and garnishes. Its delicate texture and thin pieces make it a great choice for raw preparations, as it can easily absorb dressings and flavors while providing a satisfying crunch.
Alternatively, you can slice or chop the cabbage into larger pieces. These pieces are well-suited for dishes that involve cooking, such as stir-fries, soups, stews, and casseroles. The larger pieces can hold up well to heat without becoming overly soft, maintaining their structure and contributing a hearty element to your cooked dishes.
It’s worth considering the storage space available in your freezer when deciding on the size of cabbage pieces. Smaller pieces, like shredded cabbage, can be packed more densely in containers or bags, maximizing your freezer’s capacity. Larger pieces might require more space but can offer convenience when it comes to portioning them out for different recipes.
Step 4: Blanch the Cabbage
Blanching is a vital technique in the cabbage freezing process that serves multiple purposes in preserving the overall quality of the vegetable. This step involves briefly immersing the cabbage pieces in boiling water and then rapidly cooling them down in ice water. While it might seem like an extra effort, blanching plays a crucial role in ensuring that your frozen cabbage maintains its color, texture, and nutritional integrity.
The primary reason for blanching cabbage before freezing is enzyme inactivation. Cabbages naturally contain enzymes that can cause undesirable changes in flavor, texture, and color over time. By subjecting the cabbage to a quick blanching process, you deactivate these enzymes, which helps to halt any further degradation of the vegetable. This step is particularly important when freezing vegetables for long periods, as it helps preserve their original qualities.
Here’s how the blanching process works:
- Boiling Water: Start by bringing a large pot of water to a rolling boil. The pot should be big enough to comfortably accommodate the cabbage pieces without overcrowding.
- Ice Water Bath: While the water is boiling, prepare a bowl filled with ice water. This ice water bath is essential for rapidly cooling down the blanched cabbage and stopping the cooking process.
- Blanching the Cabbage: Carefully add the cabbage pieces to the boiling water. The boiling water serves to not only inactivate the enzymes but also to slightly soften the cabbage, making it more pliable and easier to handle during freezing. Let the cabbage blanch for a brief period, typically 1 to 2 minutes. Avoid overcooking, as the goal is to achieve a quick enzyme deactivation without cooking the cabbage through.
- Ice Water Bath: Once the blanching time is up, promptly transfer the cabbage pieces from the boiling water to the ice water bath. The cold water quickly cools down the cabbage, halting the cooking process. This step is crucial for preserving the crispness and color of the cabbage.
Can I freeze cabbage without blanching it first?
Blanching cabbage before freezing is advisable. Blanching inactivates enzymes that can affect quality during storage. It helps preserve color, texture, and flavor, enhancing frozen cabbage’s overall appeal.
Step 5: Drain and Dry
After the blanching process, the cabbage undergoes a transformation that requires careful attention to moisture management. Draining and drying the cabbage thoroughly is a pivotal step that helps ensure the quality of the frozen product by preventing the formation of ice crystals.
When you blanch cabbage, it undergoes a brief cooking process that softens the leaves and activates enzymes. While blanching is essential for preserving the cabbage’s color and nutritional value, it also introduces moisture to the vegetable. If this excess moisture is not properly dealt with before freezing, it can lead to the formation of ice crystals on the cabbage’s surface. These ice crystals can potentially compromise the cabbage’s texture and flavor over time.
Here’s why draining and drying are crucial:
- Preventing Freezer Burn: Excess moisture can contribute to freezer burn, which occurs when moisture on the surface of the food freezes and then sublimates (converts directly from ice to water vapor) back into the air. This process can lead to the drying out of the cabbage and negatively impact its quality. By draining and drying the cabbage, you reduce the chances of freezer burn occurring.
- Maintaining Texture: The presence of ice crystals on the cabbage’s surface can cause a loss of crispness and crunchiness. When water freezes and expands, it can break down cell walls within the cabbage leaves, leading to a softer texture upon thawing. By removing excess moisture, you help maintain the desired texture of the cabbage when it’s eventually used in your dishes.
- Preserving Flavor: Moisture can also contribute to the loss of flavor compounds within the cabbage. Draining and drying the cabbage ensures that the natural flavors are better preserved during the freezing process, resulting in a more flavorful end product.
To effectively drain and dry the blanched cabbage:
- Drain: After blanching, use a colander or strainer to drain the cabbage pieces. Allow them to sit in the colander for a few minutes to let excess water drip away.
- Pat Dry: Gently pat the cabbage pieces dry with a clean kitchen towel or paper towels. Avoid pressing too hard, as cabbage leaves can be delicate. The goal is to remove surface moisture without damaging the cabbage.
- Air Drying: For optimal results, consider allowing the cabbage pieces to air dry for a short while. You can spread them out on a clean towel or paper towels and let them sit at room temperature for about 10-15 minutes. This step further reduces residual moisture.
Step 6: Arrange for Freezing
As you progress in the cabbage freezing process, the next step involves arranging the blanched and dried cabbage pieces in a manner that ensures they freeze individually and maintain their integrity. This step is all about setting the stage for successful freezing by preventing the cabbage pieces from sticking together, which can make portioning and using them later on much more convenient.
When you blanch and dry the cabbage, you’ve taken steps to control excess moisture and preserve the cabbage’s texture. However, moisture can still be present, and if cabbage pieces freeze in clumps, they can become difficult to separate when it’s time to use them. This is where arranging the cabbage for freezing comes into play.
Here’s why arranging for freezing is important:
- Preventing Clumping: When cabbage pieces freeze together, they can become fused into a solid mass, making it challenging to remove only the amount you need for your recipes. By laying out the pieces in a single layer, you prevent them from touching and sticking to each other during freezing.
- Even Freezing: Individual pieces that are properly spaced on a baking sheet freeze more quickly and evenly. This rapid freezing helps maintain the cabbage’s quality, as it reduces the formation of large ice crystals that can damage the cellular structure.
- Easy Portioning: Once the cabbage pieces are individually frozen, you can transfer them into storage containers or bags without worrying about them clumping together. This makes it easy to take out just the desired amount when you’re ready to cook.
To arrange the cabbage for freezing:
- Use a Baking Sheet: Select a clean baking sheet and line it with parchment paper for convenience and to prevent sticking.
- Lay Out in a Single Layer: Spread out the blanched and dried cabbage pieces on the parchment-lined baking sheet. Make sure they’re in a single layer and not touching each other.
- Space Evenly: Arrange the pieces with a bit of space between them. This spacing ensures that they freeze individually and quickly.
- Avoid Overcrowding: If you have a large amount of cabbage, you might need to use multiple baking sheets or freeze in batches to prevent overcrowding.
Step 7: Flash-Freeze the Cabbage
Once you’ve meticulously arranged the blanched and dried cabbage pieces on a baking sheet, the next critical step in the freezing process is known as flash-freezing. Flash-freezing is a rapid freezing technique that preserves the individuality of each cabbage piece, ensuring they remain separate rather than sticking together. This technique is especially useful when dealing with small pieces or delicate items like cabbage, and it significantly contributes to the convenience and quality of your frozen cabbage.
Here’s why flash-freezing is an essential step:
- Preventing Clumping: Flash-freezing involves freezing each individual piece of cabbage quickly before it has a chance to come into contact with other pieces. This rapid freezing process prevents the formation of large ice crystals that can cause the cabbage to stick together and form clumps. When you remove the cabbage from the freezer later on, you can easily separate out the exact amount you need without defrosting the entire batch.
- Preserving Texture and Quality: Flash-freezing minimizes the amount of ice crystal formation within the cabbage leaves. This helps maintain the vegetable’s texture and quality upon thawing. When ice crystals are small and evenly distributed, they have less of an impact on the cellular structure of the cabbage, resulting in a better texture when it’s cooked.
- Efficient Freezing: Flash-freezing is a time-efficient method. Since the cabbage pieces freeze rapidly, you can move on to the packaging and storing steps sooner. This is particularly beneficial if you’re dealing with a large batch of cabbage or if you’re in a hurry to complete the freezing process.
To successfully flash-freeze the cabbage:
- Place in the Freezer: Carefully transfer the baking sheet with the arranged cabbage pieces into the freezer. Make sure the baking sheet sits flat and level.
- Monitor Freezing Time: The time required for flash-freezing depends on the size of the cabbage pieces and the temperature of your freezer. As a general guideline, small cabbage pieces might take about 1 to 2 hours to flash-freeze completely.
- Check for Frozenness: The cabbage pieces are ready to be removed from the freezer when they’re firm to the touch and fully frozen. You can perform a quick test by touching one of the pieces.
Step 8: Package and Seal
With your cabbage pieces flash-frozen and ready for long-term storage, the next step in the freezing process involves properly packaging and sealing them. This step is crucial for maintaining the quality of the cabbage over time by protecting it from air exposure and potential freezer burn.
Here’s why packaging and sealing are essential:
- Preventing Freezer Burn: Freezer burn occurs when moisture on the surface of frozen food turns into ice crystals and then sublimates back into the air. This process can lead to the dehydration of the food and result in changes in taste, texture, and quality. Proper packaging and sealing help prevent air exposure, reducing the likelihood of freezer burn.
- Maintaining Freshness: Airtight packaging ensures that the cabbage pieces are shielded from the external environment, including odors and temperature fluctuations. This preservation of a controlled environment helps maintain the freshness and natural flavor of the cabbage.
- Preventing Clumping: Even though you’ve taken steps to flash-freeze the cabbage individually, some pieces might still come into contact with each other during storage. Packaging them in separate portions can help prevent any slight clumping that might occur.
To package and seal your frozen cabbage effectively:
- Select Airtight Containers: Choose high-quality airtight freezer bags or containers specifically designed for freezing. These containers are made to resist moisture and are less prone to cracking at low temperatures.
- Portion Out the Cabbage: If you plan to use specific portions of cabbage in your recipes, divide the cabbage into appropriate portions before packaging. This way, you won’t need to defrost more than you need each time.
- Squeeze Out Air: Before sealing the bags or containers, try to remove as much air as possible. Air trapped inside the packaging can lead to freezer burn. A vacuum sealer can be particularly helpful for this purpose.
Step 9: Label and Date
As you near the completion of the cabbage freezing process, one last step is of paramount importance: labeling and dating the packaging. While it might seem like a minor detail, this practice holds significant value in terms of ensuring food safety, optimizing quality, and making informed choices about which batches of frozen cabbage to use first.
Here’s why labeling and dating are essential:
- Food Safety: By indicating the date of freezing on the packaging, you create a clear record of when the cabbage was preserved. This information is crucial for food safety, as frozen foods have a limited storage life before quality and safety could potentially be compromised.
- Rotating Inventory: Labeling and dating enable you to implement a first-in, first-out (FIFO) approach to using your frozen cabbage. As you accumulate multiple batches of frozen food, knowing the freezing dates helps you prioritize using the oldest batches before newer ones. This practice minimizes the risk of food wastage and ensures that you’re consuming the oldest cabbage to maintain the best quality.
- Optimizing Quality: While frozen cabbage can remain safe to eat for an extended period, its quality can gradually decline over time. By knowing the freezing dates, you can make informed decisions about when to use specific batches of cabbage to enjoy them at their peak quality.
- Meal Planning: The freezing date information empowers you in meal planning. When you’re aware of how long the cabbage has been in the freezer, you can incorporate it into your meal planning accordingly. For example, you might prioritize using older batches for soups and stews where texture changes are less noticeable, and save the fresher batches for salads or coleslaw.
To effectively label and date your cabbage packaging:
- Use Permanent Marker: Use a permanent marker to write the freezing date directly on the packaging. Make sure the label is clear and easily readable.
- Be Specific: Include the day, month, and year of freezing. This level of detail provides accurate information for determining storage time.
- Include Item Description: If you’re freezing multiple types of vegetables, it’s a good idea to include a brief description, such as “green cabbage,” to avoid confusion later.
- Place Labels Clearly: Ensure that the labels are placed where they can be easily seen without having to open the packaging.
Step 10: Store in the Freezer
As you wrap up the cabbage freezing process, the final step involves placing the meticulously prepared and packaged cabbage in the freezer for long-term storage. While this might seem straightforward, the way you store the frozen cabbage plays a crucial role in maintaining its quality, flavor, and overall appeal until the moment you’re ready to use it.
Here’s why proper freezer storage matters:
- Temperature Control: The freezer is designed to keep foods at sub-zero temperatures, effectively preserving their quality by slowing down enzymatic and microbial activity. Storing frozen cabbage at the correct temperature ensures that it remains safe to eat and maintains its taste and texture.
- Avoiding Temperature Fluctuations: Fluctuations in freezer temperature can lead to freezer burn, texture changes, and a degradation of overall quality. Properly storing the cabbage within the freezer minimizes exposure to temperature shifts and helps preserve its integrity.
- Optimal Flavor: While frozen cabbage can be stored for a substantial amount of time, its flavor and texture are best preserved when consumed within a reasonable period. The flavor compounds within cabbage can degrade over time, impacting the taste of the dishes you create with it.
To store your frozen cabbage effectively:
- Organize the Freezer: Designate a specific area in your freezer for your cabbage packages. This helps you find them easily and prevents them from being buried under other items.
- Avoid Overcrowding: While it’s tempting to fill the freezer to capacity, make sure not to overcrowd it. Adequate airflow around the cabbage packages ensures even freezing and maintains quality.
- Maintain Consistent Temperature: Set your freezer to the recommended temperature, typically around 0°F (-18°C) or lower. This temperature range prevents bacterial growth and maintains the cabbage’s quality.
- Follow FIFO: Keep in mind the labeling and dating you’ve done on the cabbage packages. Prioritize using the older batches first (first-in, first-out) to ensure freshness and reduce food wastage.
- Consume Within Time Frame: While frozen cabbage can remain safe to eat for longer periods, the best flavor and quality are generally maintained within 8 to 12 months. Adhering to this time frame allows you to enjoy the cabbage at its peak.
Other related questions
How do I defrost cabbages?
Defrosting cabbage is best achieved by transferring the frozen portions from the freezer to the refrigerator. Allow the cabbage to thaw slowly over several hours or overnight. Once thawed, use it promptly in your desired recipes to maintain its texture and flavor.
Can I refreeze cabbages?
Refreezing cabbage is generally discouraged due to quality loss. Once thawed, cabbage can undergo texture and flavor changes. It’s advisable to use thawed cabbage promptly or cook it before refreezing to mitigate potential issues.
How do I know if the cabbages have gone bad after being frozen?
Inspect frozen cabbage for signs of freezer burn, such as dry or discolored patches. Thawed cabbage with an off-putting odor or mushy texture indicates spoilage. Trust your senses and discard any frozen cabbage showing noticeable quality deterioration.
What’s the best way to use frozen cabbage?
Thawed cabbage is suitable for cooked dishes like soups, stews, casseroles, and stir-fries. Its texture changes when frozen, making it less suitable for raw preparations like salads. Incorporating it into hearty, warm dishes preserves its taste and maintains quality.
Can I freeze cabbage rolls or stuffed cabbage?
Freezing cabbage rolls or stuffed cabbage can alter their texture upon thawing due to moisture content. It’s recommended to freeze the filling and the cabbage separately. Assemble the rolls after thawing and cook them to maintain desired texture and flavor.
Can I freeze cabbage from a coleslaw mix?
Freezing cabbage from coleslaw mix may yield varied results due to the presence of other ingredients. It’s better to freeze fresh cabbage and create coleslaw when needed. This approach ensures optimal texture and flavor in both the cabbage and the coleslaw.
Can I use frozen cabbage in sauerkraut or kimchi?
Using frozen cabbage in sauerkraut or kimchi is not recommended. Freezing alters the cabbage’s texture, affecting fermentation. Opt for fresh cabbage for optimal results in these traditional fermented dishes.
Should I season the cabbage before freezing?
It’s advised not to season cabbage before freezing. Seasoning can intensify during freezing, affecting taste. Add spices and seasonings when cooking with thawed cabbage for best flavor.

