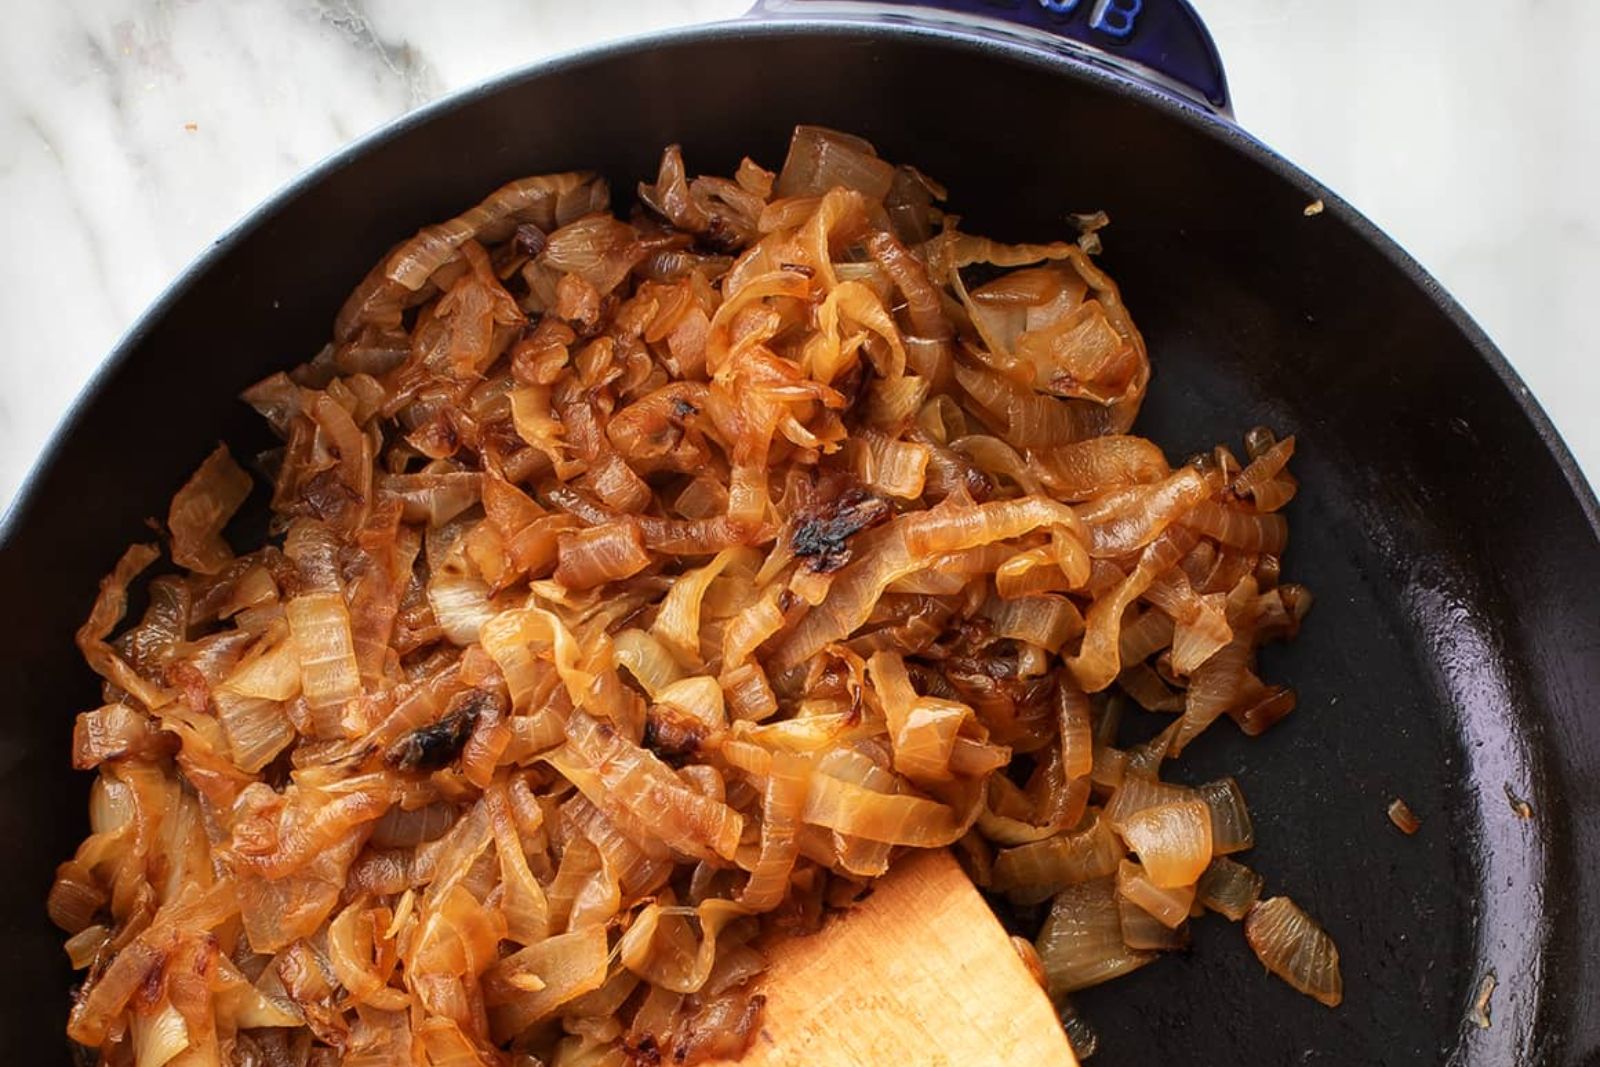
Experience the rich and savory flavors of caramelized onions, a culinary treasure that adds depth and sweetness to a wide range of dishes. Whether you’re adding them to burgers, sandwiches, soups, or even pizza, caramelized onions bring a delightful complexity to any recipe. These golden-brown onions are the result of slow cooking, which transforms their natural sugars into a caramelized, melt-in-your-mouth goodness. But what do you do when you have a surplus of caramelized onions or want to prepare them in advance? Freezing caramelized onions is a fantastic way to preserve their incredible taste and have them readily available whenever you need them. By properly freezing caramelized onions, you can ensure that their caramelized flavors remain intact, ready to enhance your future culinary creations. Let’s dive into the world of caramelized onions and discover the best methods to freeze and store them for long-lasting enjoyment.
Here are the simple steps to freeze caramelized onions:
Step 1: Prepare Fresh Caramelized Onions
To begin the process of freezing caramelized onions, you need to start with a batch of fresh onions. Caramelizing onions involves cooking them slowly over low heat until they turn soft, sweet, and develop a rich, golden-brown color. Here’s a breakdown of this step and why it is essential:
- Choose your onions: Select the type of onions you prefer for caramelizing. Common varieties like yellow, white, or sweet onions work well, but you can experiment with others to find your favorite flavor profile.
- Slice the onions: Peel the onions and slice them uniformly to ensure even cooking. You can cut them into thin half-moons or dice them, depending on your preference.
- Heat the cooking oil: In a large skillet or frying pan, heat a cooking oil with a high smoke point, such as vegetable oil or olive oil. The oil helps prevent the onions from sticking to the pan and aids in the caramelization process.
- Add the onions to the pan: Once the oil is heated, add the sliced onions to the pan. Stir them gently to coat them evenly with the oil. Spread them out in a single layer for more efficient cooking.
- Cook over low heat: Lower the heat to low or medium-low and allow the onions to cook slowly. The low heat helps break down the natural sugars in the onions, resulting in the sweet and caramelized flavor. Stir the onions occasionally to prevent them from burning or sticking to the pan.
- Be patient: Caramelizing onions is a gradual process that can take anywhere from 30 minutes to an hour or more, depending on the amount of onions and the desired level of caramelization. Don’t rush this step, as the slow cooking process is crucial for achieving the desired taste and texture.
- Observe the color change: As the onions cook, they will gradually change color. Initially, they will turn translucent, then become a light golden brown, and eventually deepen into a rich, dark caramel color. Aim for a deep golden brown color to ensure the onions have developed their sweet and savory flavors fully.
- Adjust the heat if needed: If you notice the onions browning too quickly or unevenly, you can adjust the heat slightly lower to prevent burning. Cooking them slowly allows for a more uniform caramelization.
Caramelized onions add a delightful depth of flavor to various dishes, from soups and stews to sandwiches and pasta. Taking the time to properly caramelize the onions ensures that they release their natural sweetness and develop the desired taste. Once you have caramelized your onions to perfection, you can proceed to the next steps in the freezing process to preserve their flavor and enjoy them in the future.
Step 2: Cool the Caramelized Onions
After you have finished caramelizing the onions, it’s important to allow them to cool completely at room temperature before proceeding with the freezing process. This step is crucial for maintaining the quality of the caramelized onions during freezing. Here’s why cooling the onions is necessary:
- Prevent condensation: Caramelized onions retain some moisture, and when they are still warm, placing them directly in the freezer can lead to the formation of condensation. Condensation occurs when warm air inside the container comes into contact with the cold air in the freezer, resulting in water droplets forming on the onions’ surface. This excess moisture can affect the texture and taste of the onions when they are thawed.
- Avoid ice crystal formation: If the caramelized onions are not cooled properly, moisture present in the onions can turn into ice crystals during freezing. These ice crystals can damage the cell structure of the onions, resulting in a mushy or watery texture upon thawing. By allowing the onions to cool completely, you reduce the likelihood of ice crystal formation and preserve their desired texture.
Maintain optimal flavor: Allowing the caramelized onions to cool at room temperature allows the flavors to settle and meld together. This resting period allows any residual cooking heat to dissipate and ensures that the onions retain their intended taste during freezing.
To cool the caramelized onions effectively, follow these steps:
- Remove from heat: Once the onions have reached the desired caramelization level, turn off the heat and remove the pan from the stove.
- Transfer to a cool surface: Carefully transfer the caramelized onions from the hot pan onto a cool surface. A heat-resistant plate or a clean baking sheet works well for this purpose.
- Spread them out: Use a spatula or spoon to spread the caramelized onions out in a thin layer. This helps speed up the cooling process by allowing the heat to dissipate more quickly.
- Let them cool naturally: Allow the caramelized onions to cool at room temperature without covering them. Avoid placing them in the refrigerator or freezer at this stage, as the residual heat can raise the temperature inside and lead to condensation.
- Check for complete cooling: Once the onions have cooled down completely, you can proceed to the next steps of the freezing process. They should no longer feel warm to the touch.
Step 3: Portion the Caramelized Onions
Once the caramelized onions have cooled down completely, the next step is to portion them into convenient sizes based on your needs. This step allows for easy handling and minimal wastage when thawing the onions later. Here’s why it’s important to portion the caramelized onions:
- Easy measurement for recipes: Portioning the caramelized onions allows you to measure and use the exact amount needed for your recipes without thawing more than necessary. This ensures accurate measurements and helps maintain the balance of flavors in your dishes.
- Minimize wastage: By portioning the caramelized onions according to the typical amount you use in your recipes, you can minimize wastage. Thawing only what you need reduces the chances of leftovers going to waste.
- Convenient storage and thawing: Dividing the caramelized onions into smaller portions makes them more manageable for storage. You can easily store individual portions and thaw only what you need for a particular meal, rather than thawing an entire bulk of onions.
To portion the caramelized onions effectively, follow these steps:
- Choose portion sizes: Consider the amount of caramelized onions typically used in your recipes. This could be based on tablespoons, cups, or any other convenient measurement. Determine the portion sizes that best suit your cooking needs.
- Use containers or bags: Prepare a set of airtight freezer-safe containers or resealable plastic bags for portioning. Ensure that the containers or bags are clean and in good condition.
- Scoop or spoon the onions: Using a spoon or scoop, transfer the cooled caramelized onions into the containers or bags. Distribute them evenly among the portions, ensuring a balanced amount in each container or bag.
- Flatten and seal: For containers, press down gently on the onions to remove any excess air and create a flat surface. This helps with stacking and efficient use of freezer space. For bags, squeeze out as much air as possible before sealing them tightly.
- Label the portions: Using a marker or adhesive labels, clearly mark each container or bag with the portion size and the date of freezing. This labeling will help you easily identify and use the desired amount when thawing.
- Optional: Consider double-bagging: If you anticipate a longer storage period or want to provide extra protection against freezer burn, you may opt to place the portioned bags into a larger resealable bag or wrap them with aluminum foil.
Step 4: Place in Freezer-Safe Containers
After portioning the caramelized onions, the next step is to transfer each portion into freezer-safe containers or resealable plastic bags for proper storage in the freezer. This step is essential to protect the onions from freezer burn and maintain their freshness. Here’s why using freezer-safe containers and removing air from bags is important:
- Prevent freezer burn: Freezer burn occurs when the surface of frozen food is exposed to air, causing dehydration and the development of off-flavors. By using freezer-safe containers or bags, you create a protective barrier that minimizes air exposure and reduces the risk of freezer burn on the caramelized onions.
- Maintain texture and flavor: Caramelized onions can lose their texture and flavor if they are not stored properly. Exposure to air and moisture in the freezer can cause them to become mushy or develop an unpleasant taste. Using appropriate containers and removing excess air helps preserve the texture and flavor of the caramelized onions.
To place the caramelized onions in freezer-safe containers and bags effectively, follow these steps:
- Select freezer-safe containers or bags: Choose containers or bags specifically designed for freezer storage. These should be made of materials that are resistant to low temperatures and can maintain an airtight seal.
- Transfer the caramelized onions: Carefully transfer each portion of caramelized onions into individual containers or bags. If using containers, leave some headspace to allow for expansion during freezing. If using bags, ensure they are sturdy and leak-proof.
- Remove excess air from bags: For resealable plastic bags, squeeze out as much air as possible before sealing them. Press the bags gently to remove air pockets and create a snug fit around the onions. This step helps prevent air exposure and potential freezer burn.
- Seal containers or bags tightly: Ensure that the containers are securely sealed, and lids are tightly fastened. For bags, use the zipper or seal them with a twist tie or rubber band. Double-check that all containers and bags are properly sealed to maintain an airtight environment.
- Optional: Label the containers or bags: To stay organized, label each container or bag with the portion size and the date of freezing. This labeling helps you easily identify and use the caramelized onions based on your needs and ensures you can keep track of their storage time.
Step 5: Label and Date
Once you have placed the portioned caramelized onions in freezer-safe containers or bags, it is important to label them with relevant information such as the contents and the date of freezing. This step helps you stay organized, track the storage time, and easily identify the caramelized onions in your freezer. Here’s why labeling and dating the containers is crucial:
- Easy identification: Labeling the containers or bags with the contents allows you to quickly identify the caramelized onions without having to open each one. This is especially useful if you have different types of frozen foods in your freezer.
- Tracking storage time: Knowing the date of freezing helps you keep track of how long the caramelized onions have been in the freezer. It ensures that you can prioritize using older batches and maintain their quality within recommended storage periods.
- Preventing waste: By labeling and dating the containers, you can easily see which portions of caramelized onions have been in the freezer for an extended period. This allows you to plan your meals accordingly and use the older batches before they exceed their recommended storage time, reducing the chances of waste.
To label and date the containers effectively, follow these steps:
- Choose appropriate labeling materials: Use a marker or adhesive labels that are freezer-safe and can withstand low temperatures without smudging or deteriorating. Waterproof labels or freezer tape work well for this purpose.
- Clearly write the contents: On each container or bag, write a clear description of the contents, such as “Caramelized Onions,” using a legible font size. This ensures easy identification when browsing through your freezer.
- Add the freezing date: Include the date when the caramelized onions were frozen. Write the month, day, and year to provide a specific reference point for storage time.
- Optional: Additional details: If desired, you can include additional information on the label, such as the portion size or any specific notes you might find helpful during meal planning or preparation.
- Attach the label securely: Place the label on the container or bag in a visible area that will not be easily damaged or covered during freezer storage. Make sure the label is firmly attached to prevent it from getting lost or detached.
Step 6: Freeze the Caramelized Onions
After you have properly labeled the containers or bags containing the caramelized onions, the next step is to freeze them. Freezing the onions will preserve their quality and extend their shelf life. Here’s why freezing the caramelized onions in a specific manner is important:
- Maintaining shape and texture: Placing the labeled containers or bags in a single layer during the initial freeze helps the caramelized onions maintain their shape and texture. It prevents them from clumping together or getting squished, which can make it difficult to separate and thaw individual portions later.
- Preventing sticking: By arranging the containers or bags in a single layer, you minimize the chances of the caramelized onions sticking together during freezing. This makes it easier to retrieve and thaw only the desired portion without having to thaw the entire batch.
- Proper air circulation: Leaving enough space between the containers or bags allows for proper air circulation in the freezer. Adequate airflow helps maintain consistent freezing temperatures and ensures that the caramelized onions freeze more quickly and evenly.
To freeze the caramelized onions effectively, follow these steps:
- Arrange in a single layer: Place the labeled containers or bags in a single layer on a flat surface in the freezer. Ensure that they are not stacked or crowded, allowing each container or bag to be in direct contact with the freezer surface.
- Create space between containers: Leave some space between the containers or bags to allow for proper air circulation. This spacing helps maintain a consistent freezing temperature and prevents the onions from freezing together.
- Level the surface: If the surface in your freezer is not flat, you can use a baking sheet or tray to create a level surface for arranging the containers or bags. This ensures stability and prevents any accidental spills or shifting during freezing.
- Close the freezer door: Once the containers or bags are arranged in a single layer with adequate spacing, close the freezer door gently but firmly to maintain the desired freezing temperature.
- Maintain freezing conditions: Keep the freezer temperature at or below 0°F (-18°C) to ensure proper freezing of the caramelized onions. Regularly check and adjust the temperature settings if necessary.
Step 7: Store in the Freezer
After you have arranged the labeled containers or bags of caramelized onions in a single layer for the initial freeze, the next step is to store them in the freezer for long-term preservation. Proper storage in the freezer helps maintain the quality, texture, and flavor of the caramelized onions. Here’s how to store the containers effectively:
- Stack containers for space-saving: Once the caramelized onions have frozen and are no longer in a liquid state, you can stack the containers to optimize freezer space. Place one container on top of another, ensuring they are stable and securely balanced. This stacking method allows you to utilize vertical space and maximize the available freezer area.
- Protect from crushing or disturbance: Ensure that the stacked containers are placed in a designated spot where they won’t be crushed or disturbed. Avoid storing them in areas where heavy items might fall or where they may get jostled frequently. This precaution helps prevent damage to the containers and maintains the integrity of the frozen caramelized onions.
- Avoid storing near the freezer door: It is advisable to avoid storing the caramelized onions near the freezer door. The area near the door is prone to temperature fluctuations as it is exposed to warmer air whenever the freezer is opened. Placing the containers away from the door helps maintain a more consistent temperature, reducing the risk of thawing and refreezing.
- Maintain proper freezer temperature: Keep the freezer temperature consistently at or below 0°F (-18°C) to ensure the optimal freezing and storage conditions for the caramelized onions. Fluctuations in temperature can compromise the quality and texture of the onions, leading to potential loss of flavor and texture.
By stacking the containers for efficient use of freezer space and selecting a designated spot that offers protection and stability, you can store the caramelized onions properly. Avoiding temperature fluctuations by placing them away from the freezer door helps maintain their frozen state and preserves their quality until you are ready to use them.
How long can caramelized onions last in the freezer?
Caramelized onions can last in the freezer for up to 3 months without significant loss in quality. Properly stored caramelized onions, sealed in airtight containers or freezer bags, can maintain their flavor, texture, and aroma for an extended period. However, it is best to consume them within the first 3 months for the best culinary experience.
Step 8: Thaw the Frozen Caramelized Onions
Once you have frozen the caramelized onions and they are properly stored in the freezer, the time will come when you want to use them in your recipes. Thawing the frozen caramelized onions properly is essential to preserve their quality and ensure they are ready for use. Here’s how to thaw and use the caramelized onions:
- Refrigerator thawing: The recommended method for thawing the caramelized onions is to transfer the desired portion from the freezer to the refrigerator. Place the container or bag in the refrigerator and allow it to thaw slowly overnight or for several hours. Thawing in the refrigerator maintains the texture and flavor of the onions while minimizing the risk of bacterial growth.
- Microwave thawing: If you need to thaw the caramelized onions quickly, you can use the microwave. Transfer the desired portion to a microwave-safe dish and thaw it using the defrost or low power setting. Follow the microwave manufacturer’s instructions and monitor the process closely to prevent overheating or partially cooking the onions.
By going through these thawing methods, you can easily incorporate the caramelized onions into your recipes, whether you prefer the slow thawing process in the refrigerator or need a quicker solution using the microwave or direct addition to cooked dishes.
Other related questions
Can you refreeze caramelized onions?
It is generally not recommended to refreeze caramelized onions. Once they have been thawed, the onions undergo changes in texture and moisture content, which can impact their quality. Refreezing can further degrade their texture and flavor, resulting in a less desirable culinary experience. It is best to use thawed caramelized onions within a few days and avoid refreezing to maintain their optimal taste and texture.
How do I know if the caramelized onions have gone bad after being frozen?
To determine if caramelized onions have gone bad after being frozen, several indicators can be observed. Look for signs such as changes in color, texture, and odor. If the onions appear discolored, have a slimy or mushy texture, or emit an unpleasant or rancid smell, it is likely that they have spoiled and should not be consumed. When in doubt, it is safer to discard frozen caramelized onions that show any of these signs of spoilage.
Can I freeze caramelized onions that have been seasoned with herbs and spices?
Yes, you can freeze caramelized onions that have been seasoned with herbs and spices. The herbs and spices will add additional flavor to the onions during the freezing process. However, keep in mind that the flavors may intensify slightly after freezing, so you may want to adjust the amount of seasoning accordingly. Properly storing the seasoned caramelized onions in airtight containers or freezer bags will help maintain their flavor and allow you to enjoy them in future dishes.
How can I use frozen caramelized onions in recipes?
Frozen caramelized onions can be used in various recipes to add flavor and convenience. When using them, there is no need to thaw completely; instead, you can add them directly to sautés, soups, stews, casseroles, or other cooked dishes. They will defrost and heat up quickly, infusing the recipe with their rich, sweet flavor.

