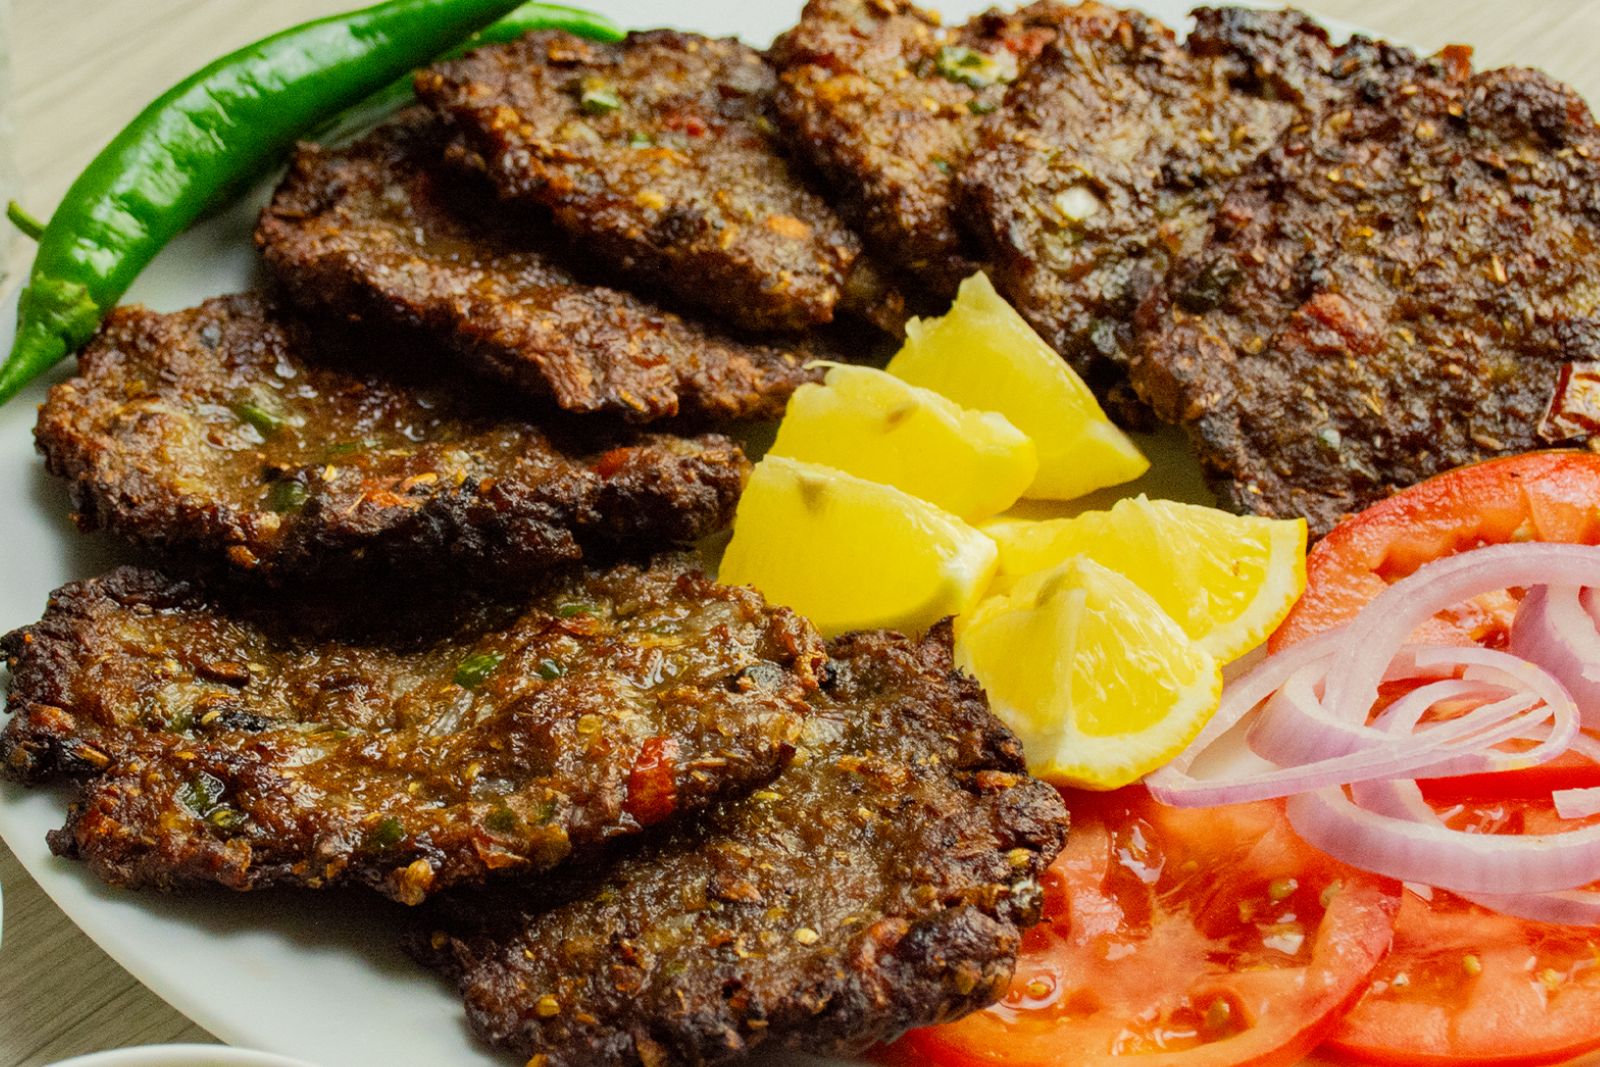
Chapli kabab, a flavorful and aromatic meat patty hailing from the culinary traditions of the Pashtun region, is renowned for its distinctive blend of spices and tender texture. This delectable dish, typically made with ground meat, onions, herbs, and a medley of spices, has gained popularity worldwide for its rich taste and cultural significance. However, if you find yourself with leftover chapli kababs or want to prepare them in advance for future meals, freezing can be a practical option. By freezing chapli kababs, you can preserve their flavors and conveniently enjoy these mouthwatering delights whenever you desire a quick and satisfying meal. In the following paragraphs, we will delve into the process of freezing and reheating chapli kababs to ensure that their taste and quality remain intact, even after freezing.
Here are the simple steps to freeze Chapli kabab:
Step 1: Prepare the Chapli Kababs
To begin the process of freezing chapli kababs, you need to prepare them according to your favorite recipe. Chapli kababs are traditionally made with minced meat, such as beef or lamb, combined with a variety of aromatic spices and ingredients. Here’s how you can prepare the kababs:
- Gather the ingredients: Collect all the necessary ingredients as per your recipe. This usually includes minced meat, such as beef or lamb, onions, garlic, ginger, coriander, cumin, chili powder, garam masala, salt, and any other spices or herbs you prefer.
- Mix the ingredients: In a large mixing bowl, combine the minced meat with finely chopped onions, minced garlic, grated ginger, and the assortment of spices and herbs. Mix them well, ensuring that all the ingredients are evenly distributed.
- Shape the mixture: Take a portion of the meat mixture and shape it into round patties or flat discs. It’s important to make sure that the kababs are of a uniform size, as this will help them freeze and cook evenly.
- Add flavor variations: If desired, you can further enhance the flavor of the chapli kababs by adding additional ingredients. Some popular options include chopped fresh coriander leaves, finely diced tomatoes, green chilies, or even a sprinkle of chaat masala. These additions can add a refreshing twist to the traditional recipe.
- Adjust the thickness: Depending on your preference, you can adjust the thickness of the kababs. Thinner kababs tend to cook faster, while thicker ones may require a longer cooking time. Keep in mind that thinner kababs are more suitable for freezing, as they will freeze and thaw more easily.
Step 2: Arrange the Kababs on a Baking Sheet
After preparing the chapli kababs, the next step in the freezing process is to arrange them on a baking sheet. Here’s why this step is important and how to do it correctly:
- Choose a baking sheet: Select a baking sheet that fits comfortably in your freezer and has a flat surface. You can use a regular baking sheet or line it with parchment paper or aluminum foil for easier cleanup.
- Proper spacing: Place the prepared chapli kababs on the baking sheet, ensuring that they are not touching each other. Leave some space between each kabab to prevent them from sticking together as they freeze. If the kababs are placed too closely, they might fuse together, making it difficult to separate them later.
- Single layer arrangement: It’s ideal to arrange the kababs in a single layer on the baking sheet. This allows for even freezing and prevents them from clumping together. If you have more kababs than can fit in a single layer, you can use multiple baking sheets or freeze them in batches.
- Uniform spacing: Maintain a consistent spacing between the kababs on the baking sheet. This will ensure that each kabab freezes individually, preventing them from becoming stuck together. Aim for approximately half an inch to an inch of space between each kabab.
- Flat side down: Place the chapli kababs on the baking sheet with their flat side down. This helps them maintain their shape during the freezing process.
Step 3: Pre-freeze the Kababs
Once you have arranged the chapli kababs on a baking sheet, the next step in the freezing process is pre-freezing them. This step is crucial for ensuring that the kababs retain their shape and integrity when packed together. Here’s why pre-freezing is important and how to do it:
- Stability and shape retention: Pre-freezing the kababs helps them firm up and hold their shape before they are packed together. This is especially important for delicate kababs that may lose their form if packed while still soft. Pre-freezing allows the surface of the kababs to solidify, making them less prone to deformation or sticking together during storage.
- Freezing time: Place the baking sheet with the arranged kababs in the freezer. Allow them to pre-freeze for about 1 to 2 hours. The exact freezing time may vary depending on the thickness and size of the kababs as well as the temperature of your freezer. The goal is to partially freeze the kababs so that they are firm but not completely frozen.
- Check for readiness: After the pre-freezing time, check the kababs by gently pressing on the surface. They should be partially frozen and feel firm to the touch. If the kababs are still too soft, leave them in the freezer for a little longer until they reach the desired consistency.
- Timing considerations: It’s important not to overfreeze the kababs during this step. If they are fully frozen, they may become brittle and lose their texture when thawed and cooked. Pre-freezing for 1 to 2 hours strikes a balance between firmness and maintainable texture.
Step 4: Package the Kababs
After the chapli kababs have undergone the pre-freezing stage and are firm to the touch, it’s time to package them for long-term storage. Proper packaging helps protect the kababs from freezer burn and ensures their quality remains intact. Here’s how to package the kababs effectively:
- Select freezer-safe containers or bags: Choose containers or resealable plastic bags specifically designed for freezer use. These materials are durable and resistant to low temperatures, preventing moisture loss and freezer burn.
- Transfer the kababs: Carefully remove the pre-frozen kababs from the baking sheet. Place them in the chosen containers or bags, ensuring they are arranged in a single layer to prevent them from sticking together. If using bags, it’s recommended to lay them flat to maximize space efficiency.
- Remove excess air: Before sealing the containers or bags, remove as much air as possible. Excess air can cause freezer burn and affect the quality of the kababs. One method is to gently press on the bags to release air while sealing. Another option is to use a straw to suck out the air before sealing the bags.
- Seal the containers or bags: Ensure a tight and secure seal to prevent air and moisture from entering the packaging. If using bags, use the zip-top closure or twist-tie to seal them tightly. If using containers, ensure the lids are properly sealed to create an airtight environment.
- Label the packages: Use a marker or labels to clearly indicate the contents and date of freezing on each package. This step is essential for keeping track of the kababs and using them in the proper order, as well as for identifying them easily in the freezer.
Step 5: Label and Date the Packages
After you have packaged the chapli kababs for freezing, it is crucial to label and date each package. This step helps you keep track of the storage time and ensures that you use the oldest kababs first, maintaining freshness and quality. Here’s why labeling and dating are important and how to do it effectively:
- Content identification: Using a marker or labels, clearly indicate the contents of each package. Write “Chapli Kababs” or a similar description on the package. This will help you quickly identify the contents without needing to open every package.
- Date of freezing: Write the date of freezing on each package. This is essential for monitoring the storage time and ensuring you consume the kababs within a reasonable timeframe. The date will serve as a reference point for determining the freshness and quality of the frozen kababs.
- First-in, first-out (FIFO): Labeling and dating the packages allow you to practice the “first-in, first-out” method. It means using the oldest frozen kababs before the newer ones. By adhering to this principle, you can prevent the kababs from staying in the freezer for an extended period and ensure they are consumed at their best quality.
- Easy organization: Properly labeled and dated packages help with organization in the freezer. You can stack the packages efficiently, knowing which ones to reach for when you want to use them. It minimizes the need for guessing or searching through multiple packages.
- Information reference: The labels and dates also serve as a reference point for any additional notes or instructions you might want to include. For example, you can write cooking times or specific thawing instructions on the package for quick and convenient reference later.
Step 6: Store in the Freezer
Once you have labeled and dated the packaged chapli kababs, the next step is to store them in the freezer. Proper storage is essential for maintaining the quality and flavor of the kababs throughout their frozen storage period. Here’s how to store them effectively:
- Freezer placement: Find a suitable spot in your freezer to store the chapli kababs. Choose an area that maintains a consistent freezing temperature, ideally at or below 0°F (-18°C). This ensures that the kababs freeze properly and remain safe for consumption.
- Single-layer arrangement: When placing the packaged kababs in the freezer, it is best to store them in a single layer. This prevents them from sticking together, making it easier to separate and use individual kababs when needed. If you have multiple packages, arrange them side by side in a single layer.
- Adequate spacing: Leave some space between each package, even if they are stacked, to allow for proper air circulation within the freezer. Sufficient airflow helps maintain a stable and uniform freezing temperature, ensuring that the kababs freeze and stay frozen consistently.
- Stack with caution: If you need to stack multiple packages of chapli kababs, ensure that there is enough space between each package. Avoid placing heavy items on top of the kababs, as this can cause them to become squished or deformed. Maintaining the shape of the kababs during storage is essential for their presentation and texture when cooked.
- Avoid overcrowding: It’s important not to overcrowd the freezer with too many items, including the chapli kababs. Overcrowding can lead to uneven freezing and increase the risk of freezer burn. Allow sufficient space for airflow and ensure the kababs have enough room for freezing without being squeezed or compressed.
How long can chapli kababs last in the freezer?
Chapli kababs can last in the freezer for up to 3 months without significant loss in quality. It is important to properly package and seal the kababs to prevent freezer burn. Beyond 3 months, the kababs may still be safe to consume, but their taste and texture may start to deteriorate.
Step 7: Thaw the Frozen Kababs
After storing the chapli kababs in the freezer, when you’re ready to enjoy them, it’s important to properly thaw and cook them to perfection. Here’s how to thaw and cook the frozen kababs:
- Thawing process: Remove the desired number of chapli kababs from the freezer. Thawing them in the refrigerator is the recommended method, as it allows for a gradual thawing process that maintains the quality and texture of the kababs. Place the packaged kababs in a container or on a plate to catch any condensation or juices as they thaw.
- Refrigerator thawing: Transfer the packaged kababs from the freezer to the refrigerator. Allow them to thaw overnight or for approximately 8-12 hours. Thawing times may vary depending on the thickness of the kababs. Thawing in the refrigerator ensures safe and even thawing without compromising the taste and texture of the kababs.
- Cooking options: Once the chapli kababs are thawed, there are various cooking methods you can choose from, depending on your preference and available equipment.
Here are a few common cooking methods:
Pan-frying:
Heat a skillet or frying pan over medium-high heat and add a small amount of oil. Cook the thawed kababs for a few minutes on each side until they are heated through and nicely browned.
Grilling:
Preheat a grill to medium-high heat. Place the thawed kababs on the grill grates and cook for several minutes on each side until they are cooked through and have grill marks.
Baking:
Preheat the oven to a moderate temperature, around 375°F (190°C). Place the thawed kababs on a baking sheet lined with parchment paper and bake for approximately 15-20 minutes or until they are fully cooked and browned.
Other related questions
Can you refreeze chapli kabab?
It is generally not recommended to refreeze chapli kababs once they have been thawed. Refreezing can negatively affect their texture and quality, leading to a loss of flavor and juiciness. To ensure the best taste and safety, it is advisable to consume thawed chapli kababs promptly or cook them before freezing again.
How do I know if the chapli kabab has gone bad after being frozen?
To determine if a chapli kabab has gone bad after being frozen, consider its appearance, smell, and texture. Look for signs of freezer burn, such as discoloration, dryness, or frost crystals. A sour or off-putting odor may indicate spoilage. Additionally, if the kabab feels slimy or has a significantly altered texture, it is best to discard it to ensure food safety.
Can you freeze chapli kabab patties without cooking them?
Yes, you can freeze chapli kabab patties without cooking them. Freezing the raw patties allows you to prepare them in advance and enjoy them at a later time. Properly package the uncooked patties, ensuring they are tightly sealed to prevent freezer burn. When ready to cook, thaw the frozen chapli kabab patties before following your preferred cooking method.
Is it necessary to blanch the chapli kabab before freezing?
Blanching chapli kabab before freezing is not necessary, but it can help preserve the quality and texture of the kababs. Blanching involves briefly boiling or steaming the kababs before freezing. This step helps to partially cook the kababs, reducing the enzyme activity that can cause loss of flavor and texture changes during freezing.

