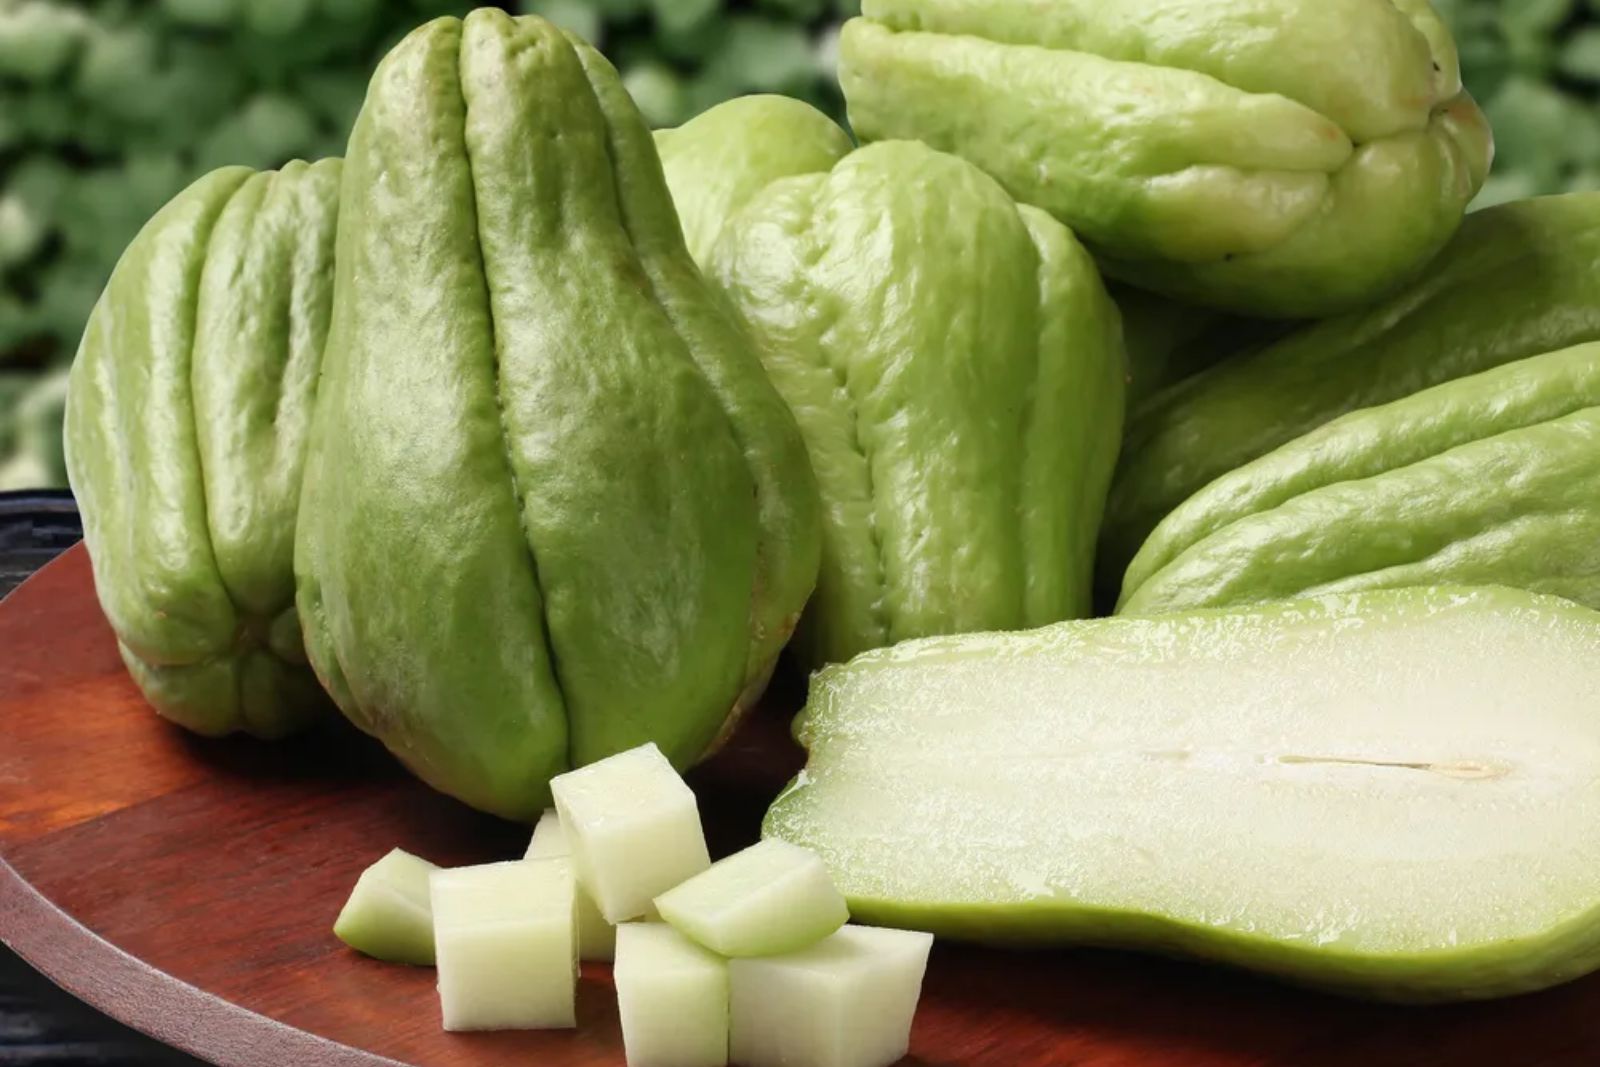
Chayote squash, a versatile and nutritious vegetable commonly used in various cuisines around the world. Also known as vegetable pear or mirliton, chayote squash has a mild flavor and a crisp, slightly crunchy texture. It can be enjoyed raw in salads, stir-fried, steamed, or even stuffed and baked. If you have a surplus of chayote squash or want to stock up during its peak season, freezing can be an excellent preservation method to extend its shelf life. Freezing chayote squash allows you to enjoy its goodness even when it’s out of season, providing a convenient option for adding it to your favorite recipes throughout the year. Join us as we explore the wonderful world of chayote squash, its culinary uses, and the proper techniques for freezing it to maintain its taste and quality.
Here are the simple steps to freeze chayote squash:
Step 1: Select Fresh Chayote Squash
Choosing fresh chayote squash is crucial when preparing it for freezing. Here’s why it’s important and what to look for:
Chayote squash that is firm and free from soft spots or blemishes is ideal for freezing. Soft spots can indicate rot or spoilage, and blemishes may affect the quality of the squash during freezing. By selecting firm squash, you ensure that it will maintain its texture and flavor after thawing.
In terms of color, vibrant green chayote squash is a good indicator of freshness. Avoid squash that appears dull or discolored, as it may be past its prime. The vibrant green color is a sign that the squash is still at its peak quality.
Another aspect to consider is the weight of the chayote squash. When you hold it in your hand, it should feel heavy for its size. Heavier squash generally indicates higher water content and freshness. A lightweight squash may be dehydrated or less fresh, which can affect its taste and texture when frozen.
Choosing fresher chayote squash not only ensures better freezing results but also helps retain the flavor and texture of the squash. Fresh squash will freeze more effectively, maintaining its crispness and taste. So, take the time to carefully select firm, vibrant green chayote squash that feels heavy, and you’ll be on your way to freezing a high-quality product.
Step 2: Wash and Peel the Squash
When preparing chayote squash for freezing, it’s important to wash and peel it properly. Here’s why this step is necessary and how to do it:
Thoroughly washing the chayote squash under cool running water is essential to remove any dirt, debris, or residue that may be present on the skin. Washing helps eliminate potential contaminants and ensures that the squash is clean before freezing.
After washing, the next step is peeling the squash. Using a vegetable peeler, gently remove the outer skin. Peeling the squash provides a smoother texture and removes any tough or fibrous parts of the skin. However, if you prefer to keep the skin on, it is entirely optional. Chayote squash skin is edible and can add extra texture and nutrients to your dishes. Just make sure to wash it thoroughly if you decide to leave the skin intact.
Peeling the chayote squash can also enhance the appearance of your frozen product, as the peeled squash will have a more uniform and aesthetically pleasing appearance.
Washing the squash and peeling it are important steps in the freezing process. They help ensure cleanliness and remove any undesirable elements that may affect the quality of the frozen chayote squash. Whether you choose to peel the squash or leave the skin on, this step contributes to the overall success of your freezing endeavors.
Step 3: Cut and Remove the Seed
In order to prepare chayote squash for freezing, it is necessary to cut it and remove the seed. Here’s why this step is important and how to do it:
Start by slicing the chayote squash in half lengthwise using a sharp knife. This will give you two equal halves. Cutting the squash in half makes it easier to access the seed and ensures uniformity in the freezing process.
Next, take a spoon and gently scoop out the seed from the center of each squash half. The seed is usually located in the cavity of the squash, and removing it is crucial for a couple of reasons. First, the seed can have a slightly different texture and taste compared to the flesh of the squash, and it may affect the overall quality of the frozen product. Second, removing the seed helps prevent any potential bitterness that it might impart to the squash when frozen.
Once you have removed the seeds, discard them and proceed with the remaining squash. Depending on the size and intended use of the chayote squash, you can further cut it into smaller pieces or leave it in halves for freezing.
By cutting and removing the seed from the chayote squash, you ensure that the final frozen product consists of the desirable flesh only, without any unwanted seeds. This step helps maintain the quality, flavor, and texture of the squash during freezing, resulting in a more enjoyable culinary experience when you thaw and use it later.
Step 4: Blanch the Chayote Squash
Blanching is a crucial step in the freezing process of chayote squash. Here’s why blanching is important and how to do it:
Blanching serves several purposes in preserving the color, texture, and flavor of the chayote squash. It helps to deactivate enzymes present in the squash that could cause discoloration and deterioration over time. Additionally, blanching can help remove any dirt or bacteria on the surface of the squash, ensuring a cleaner and safer final product.
To blanch chayote squash, start by bringing a pot of water to a rolling boil. The pot should be large enough to accommodate the squash halves comfortably. Once the water is boiling, carefully add the chayote squash halves to the pot.
Allow the chayote squash to boil in the water for 2-3 minutes. The exact blanching time may vary slightly depending on the size and thickness of the squash halves. Blanching for too short a time may not sufficiently deactivate the enzymes, while blanching for too long can result in an overly soft texture.
After the blanching time has elapsed, promptly remove the chayote squash halves from the boiling water. Immediately transfer them to an ice bath, which is a bowl or basin filled with ice and cold water. The ice bath rapidly cools down the squash and halts the cooking process. This step is crucial to ensure that the squash retains its crispness and does not overcook during blanching.
Blanching chayote squash helps maintain its vibrant color, texture, and flavor, making it more visually appealing and appetizing when thawed and used in recipes. It is an important step in preserving the quality of the squash and ensuring an enjoyable culinary experience after freezing.
Step 5: Drain and Cool the Squash
After blanching chayote squash, it is important to drain and cool them properly before proceeding with the freezing process. Here’s why this step is necessary and how to do it:
Once you have removed the chayote squash halves from the ice bath, carefully drain them to remove any excess water. Excess moisture can lead to ice crystal formation and potential freezer burn during freezing. Properly draining the squash ensures a better quality frozen product.
After draining, it is crucial to allow the chayote squash to cool completely. Cooling is necessary to prevent the squash from becoming mushy or overcooked during the freezing process. If the squash is not cooled down sufficiently, the heat trapped inside the flesh can continue to cook it, resulting in a softer texture.
To cool the chayote squash, you can place them on a clean kitchen towel or a cooling rack. Make sure they are spread out in a single layer, allowing air to circulate around them. It is important to let them cool at room temperature before proceeding with the next steps.
The cooling process may take anywhere from 15 to 30 minutes, depending on the size and thickness of the squash halves. Be patient and avoid rushing this step, as proper cooling is crucial for maintaining the desired texture of the chayote squash when frozen.
Step 6: Cut or Slice the Squash
When freezing chayote squash, you have the option to freeze the halves as they are or cut them into smaller pieces. Here’s why this step is important and how to approach it:
First, decide whether you want to freeze the chayote squash halves or cut them into smaller portions. Freezing the halves is suitable if you plan to use them as a whole in recipes. This is a convenient option if you have specific recipes in mind that require intact squash halves.
Alternatively, you can choose to cut the chayote squash into cubes or slices. This option offers flexibility in portioning and allows for easier usage in various dishes. Cubes or slices can be used in stir-fries, soups, stews, or any other recipes that call for smaller pieces of chayote squash.
To cut the chayote squash, use a sharp knife and a cutting board. If you decide to cut the squash into smaller pieces, consider the desired thickness or size based on your recipe needs. You can cube them into bite-sized pieces or slice them into thin rounds, depending on your preference.
Once you have cut the chayote squash, you can proceed to place them into freezer-safe containers or bags. For halves, simply place them in containers or bags, ensuring they fit properly and leaving some room for expansion during freezing. If you have cut the squash into smaller pieces, arrange them in a single layer to prevent them from sticking together during freezing.
By deciding whether to freeze the chayote squash halves or cut them into smaller portions, you can tailor the freezing process to your specific needs and recipe preferences. This step allows for greater versatility in using the chayote squash after thawing and ensures that it is conveniently portioned for different culinary purposes.
Step 7: Package and Seal
Proper packaging and sealing are essential when freezing chayote squash to maintain its quality and prevent freezer burn. Here’s why this step is crucial and how to effectively package and seal the squash:
Start by placing the prepared chayote squash, whether in halves, cubes, or slices, into freezer-safe containers or bags. Freezer-safe containers are a great option for protecting the squash and maintaining its shape during freezing. Alternatively, you can use sturdy freezer bags designed to withstand low temperatures.
When placing the chayote squash into containers or bags, leave some room for expansion. Freezing causes liquids to expand, and allowing space ensures that the containers or bags won’t burst or deform. It’s generally recommended to leave about ½ to 1 inch of headspace at the top.
If you’re using bags, remove as much air as possible before sealing them. Excess air in the bag can lead to freezer burn and deteriorate the quality of the squash. One effective way to remove air is by using the “water displacement” method. Partially seal the bag, leaving a small opening. Slowly submerge the bag into a basin or sink filled with water, allowing the water pressure to push out the air. Seal the bag completely once the air has been expelled.
For containers, ensure that the lids are securely closed to prevent air exposure and maintain a proper seal. Check that the lids fit tightly and provide a secure closure. If using containers with snap-on lids, double-check that they are firmly in place.
Proper packaging and sealing are crucial for maintaining the quality, texture, and flavor of the chayote squash during freezing. It helps to protect the squash from freezer burn and prevents moisture loss, preserving its overall freshness. By following these steps, you can ensure that your frozen chayote squash retains its optimal quality until it’s ready to be used in your favorite recipes.
Step 8: Label and Date
Labeling and dating the packages of frozen chayote squash is an important step to ensure organization and keep track of the freshness of your frozen produce. Here’s why this step is crucial and how to effectively label and date your packages:
Take a permanent marker or freezer-safe labels and clearly write the contents of the package. In this case, indicate that it contains chayote squash. This labeling is particularly helpful if you have multiple items stored in your freezer, as it allows you to quickly identify the package you need.
In addition to labeling the contents, it is equally important to include the date of freezing. Write down the date when you froze the chayote squash. This will help you keep track of how long it has been stored and ensure that you prioritize using the older packages first to maintain their optimal quality.
Including the date is especially important for perishable items like chayote squash, as it can help you determine their freshness and shelf life. It serves as a reference point to ensure that you consume the frozen squash within a reasonable timeframe.
Step 9: Store in the Freezer
Once the chayote squash is properly packaged and labeled, it’s time to store them in the freezer. Here’s why this step is important and how to effectively store the packages:
Place the packaged chayote squash in the freezer, ensuring they are arranged in a flat position. This helps prevent them from sticking together and allows for easier stacking and organization. By keeping the packages flat, you ensure that they freeze evenly and maintain their individual shapes.
When choosing a location in the freezer, opt for the coldest part, such as the back or bottom shelf. These areas tend to have a more consistent temperature and provide better insulation from temperature fluctuations when the freezer door is opened and closed. Storing the chayote squash in the coldest part helps maintain their quality and extends their shelf life.
If possible, try to create some space around the packages, allowing for better air circulation within the freezer. Good airflow helps maintain a more stable temperature and prevents any potential freezer burn.
Organize your freezer by placing similar items together and keeping the packages of chayote squash in one designated area. This way, you can easily locate them when needed without having to search through the entire freezer.
How long can chayote squash last in the freezer?
Chayote squash can last in the freezer for up to 10 to 12 months if properly stored. Freezing helps to preserve the quality and freshness of the squash. However, it’s recommended to use the frozen chayote squash within the first 6 to 8 months for the best flavor and texture.
Other related questions
How do you defrost chayote squash?
To defrost chayote squash, transfer the frozen packages from the freezer to the refrigerator. Allow the squash to thaw slowly in the refrigerator for several hours or overnight. Once thawed, the chayote squash can be used in various recipes or cooked according to your preference.
Can you refreeze chayote squash?
It is generally not recommended to refreeze chayote squash once it has been thawed. Refreezing can negatively affect the quality, texture, and flavor of the squash. It is best to use the thawed chayote squash within a reasonable time frame to ensure optimal taste and avoid food safety concerns.
How do I know if the chayote squash has gone bad after being frozen?
To determine if frozen chayote squash has gone bad, look for signs such as a change in color, texture, or odor. If the squash appears discolored, mushy, or develops an off-putting smell, it may have deteriorated. Additionally, freezer burn, indicated by dry, white or grayish patches on the surface, can also be a sign of decreased quality. When in doubt, it is advisable to err on the side of caution and discard the chayote squash if you suspect it has gone bad.
Can frozen chayote squash be used in both cooked and raw preparations?
Yes, frozen chayote squash can be used in both cooked and raw preparations. When cooked, the frozen chayote squash retains its flavor and texture, making it suitable for soups, stews, stir-fries, and casseroles. Additionally, when thawed, it can be thinly sliced or grated for use in salads or as a crunchy topping.

