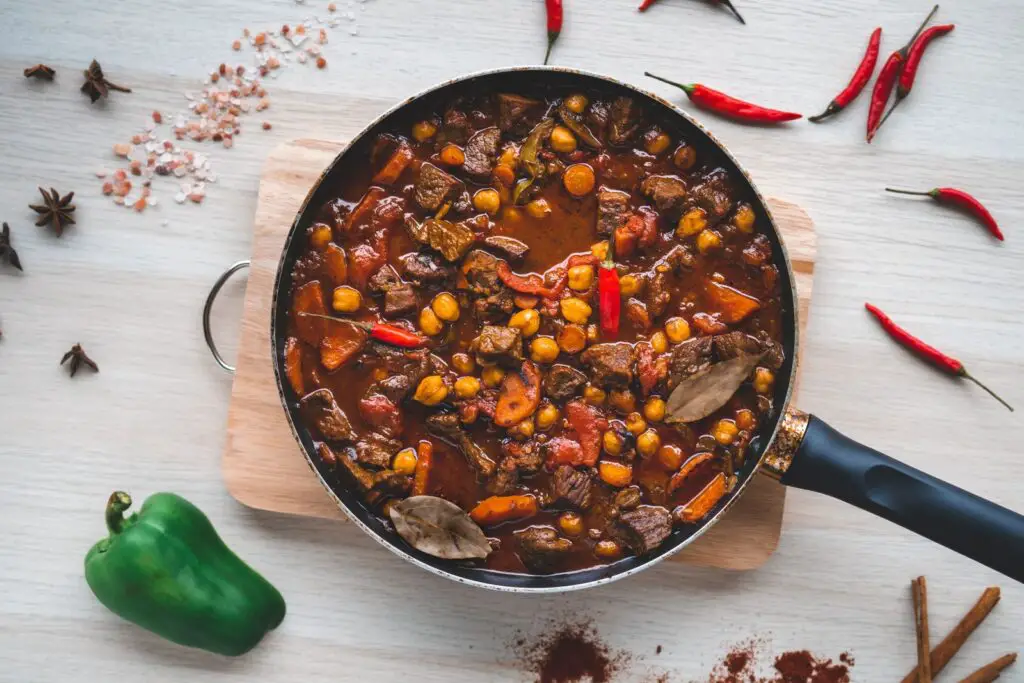
Chili con carne, a spicy and flavorful stew made with ground beef, beans, and a blend of aromatic spices, is a beloved dish that packs a punch of taste and warmth. This hearty chili is perfect for chilly days or gatherings with friends and family. Whether enjoyed on its own, served over rice, or used as a topping for hot dogs and baked potatoes, chili con carne is a crowd-pleaser. If you find yourself with a large batch of chili or want to prepare it in advance for future meals, freezing is a convenient option. Freezing chili con carne allows you to preserve its robust flavors and delicious combination of ingredients, ensuring that you can savor this comforting dish whenever you desire. In this guide, we will explore the steps and techniques for freezing chili con carne, from proper portioning to storage methods, so you can have a ready-to-heat bowl of chili on hand whenever you need a quick and satisfying meal. Join us as we delve into the world of freezing chili con carne and discover the convenience of having this flavorful stew.
Here are the simple steps to freeze chili con carne:
Step 1: Prepare the Chili Con Carne
Before you freeze your chili con carne, it’s important to ensure that it is cooked and seasoned to your satisfaction. This step ensures that the flavors are well-developed and will be preserved during the freezing process. Follow these guidelines to prepare your chili con carne for freezing:
- Cook the chili con carne: Start by cooking the chili con carne according to your preferred recipe. This usually involves browning the ground meat (typically beef) with onions, garlic, and spices, and then simmering it with tomatoes, beans, peppers, and other ingredients. Cook the chili until the meat is fully cooked and the flavors have melded together.
- Season to taste: Taste the chili con carne and adjust the seasoning as needed. Add more spices, salt, or pepper according to your preference. Keep in mind that flavors may slightly mellow during freezing, so you may want to slightly intensify the seasonings at this stage.
- Allow the chili to cool: Once the chili con carne is cooked, remove it from the heat and allow it to cool down completely. It’s essential to let it cool before freezing to prevent the formation of condensation inside the containers, which can affect the quality of the chili and lead to freezer burn.
- Consider portion sizes: If you plan to freeze individual servings or specific amounts, divide the chili con carne into suitable portion sizes. This will make it easier to thaw and use only what you need later on without having to defrost the entire batch.
Taking the time to properly cook and season your chili con carne before freezing ensures that it will taste delicious even after being stored in the freezer. Allowing it to cool down fully before proceeding to the next steps helps maintain the integrity of the dish and prevents potential issues that may arise from freezing hot foods.
Step 2: Portion the Chili Con Carne
After preparing and cooling down your chili con carne, the next step is to divide it into portion sizes that are convenient for your future use. Portioning the chili con carne before freezing allows you to thaw and use only the amount you need without having to defrost the entire batch. Here’s how to effectively portion your chili con carne:
- Choose suitable containers: Select resealable freezer bags or airtight containers that are appropriate for freezing. These containers should be made of freezer-safe materials to prevent freezer burn and maintain the quality of the chili con carne.
- Determine portion sizes: Decide on the portion sizes that will work best for you. Consider factors such as the number of servings you typically require and how you plan to use the chili con carne in the future. It’s helpful to portion the chili con carne into individual servings for easy meal planning and quick thawing.
- Fill the containers: Scoop the chili con carne into the chosen containers, leaving some space at the top to allow for expansion during freezing. Be sure to distribute the meat, sauce, and other ingredients evenly among the portions.
- Remove air and seal: For freezer bags, squeeze out as much air as possible before sealing them tightly. If using airtight containers, ensure they are securely closed to prevent any air from entering and affecting the quality of the chili con carne.
- Consider labeling: It’s important to label each container with the contents and date of freezing. This will help you keep track of what you have in your freezer and ensure you use the oldest portions first. Use a waterproof marker or adhesive labels that won’t come off during freezing.
By portioning your chili con carne before freezing, you can conveniently thaw and use only the amount you need for each meal, minimizing waste and preserving the quality of the remaining portions. Whether you’re planning to use the chili con carne for individual servings or larger portions, using suitable containers and proper labeling will help you stay organized and ensure a hassle-free freezing and thawing process.
Step 3: Seal and Label the Containers
Once you have portioned your chili con carne into suitable containers, the next step is to properly seal them and label each container. This ensures that the chili con carne remains fresh, avoids freezer burn, and allows you to easily identify and track your frozen portions. Follow these guidelines for sealing and labeling your containers:
- Squeeze out air from freezer bags: If you are using resealable freezer bags, it’s important to remove as much air as possible before sealing them. Air can lead to freezer burn and affect the texture and quality of the chili con carne. Press the bag gently to push out any excess air while keeping the chili con carne inside.
- Ensure tight seals for containers: If you are using airtight containers, make sure they are tightly sealed to prevent air from entering and freezer burn from occurring. Check that the lids or covers are securely in place, creating a tight seal. This helps maintain the flavor and texture of the chili con carne during freezing.
- Label containers with date and contents: Use a waterproof marker or adhesive labels to clearly mark each container with the date of freezing and the contents. This labeling practice helps you keep track of how long the chili con carne has been in the freezer and enables you to use the oldest portions first. Additionally, labeling the containers with the contents avoids confusion when selecting which portion to thaw.
- Consider additional labeling information: If desired, you can add any additional information to the labels, such as the serving size or any special variations of the chili con carne (e.g., spiciness level or added ingredients). This can be helpful when planning meals or accommodating specific dietary needs.
Properly sealing and labeling your containers is crucial for maintaining the quality and organization of your frozen chili con carne. Removing excess air from freezer bags and ensuring tight seals for containers helps prevent freezer burn and preserves the flavors of the dish. Clearly labeling each container with the date and contents allows for efficient tracking and easy selection when it’s time to thaw and use the chili con carne.
Step 4: Freeze the Chili Con Carne
After sealing and labeling your containers of chili con carne, it’s time to place them in the freezer for long-term storage. Proper freezing is crucial to maintain the quality, taste, and texture of the chili con carne. Follow these steps to ensure the best freezing conditions for your chili con carne:
- Choose a flat position: Place the sealed containers in the freezer in a flat position. This allows for more efficient freezing and helps save space. Flat containers are easier to stack and organize, preventing them from toppling over or taking up unnecessary space.
- Optimize freezer space: Arrange the containers in a way that maximizes the use of the available freezer space. If you have multiple containers, stack them neatly, ensuring stability and proper balance. Leave some space between the containers to allow cold air to circulate and promote even freezing.
- Maintain a consistent temperature: Ensure that your freezer is set to a consistent and appropriate temperature for freezing. Ideally, the freezer temperature should be set at 0°F (-18°C) or below. This low temperature helps to preserve the quality of the chili con carne and inhibits the growth of bacteria.
- Avoid overcrowding: It’s important not to overcrowd the freezer with too many containers at once. Overcrowding can hinder the circulation of cold air, leading to uneven freezing and potential temperature fluctuations. If you have a large batch of chili con carne to freeze, you may need to freeze it in batches or consider using multiple freezers if available.
- Freeze for the recommended time: The freezing time will depend on the thickness and size of the containers, as well as the temperature and efficiency of your freezer. Generally, chili con carne can be safely stored in the freezer for up to 3 months without significant loss in quality. However, it’s recommended to consume it within 1 to 2 months for the best taste and texture.
By placing the sealed containers of chili con carne in a flat position in the freezer, you ensure efficient freezing and effective utilization of space. Keeping a consistent freezing temperature and avoiding overcrowding will help preserve the quality of the chili con carne and maintain its flavors. Remember to adhere to recommended freezing times and guidelines for optimal results when it’s time to thaw and enjoy your frozen chili con carne.
Step 5: Thaw and Reheat
When the time comes to enjoy your frozen chili con carne, it’s important to thaw it properly and then reheat it to a safe and enjoyable temperature. Thawing in the refrigerator and reheating on the stovetop or in the microwave are reliable methods that help maintain the quality and taste of the dish. Here’s how to thaw and reheat your chili con carne:
- Thawing in the refrigerator: Remove the desired portion of chili con carne from the freezer and place it in the refrigerator. Thawing in the refrigerator is the recommended method as it allows for a gradual thawing process, minimizing the risk of bacterial growth. Leave the chili con carne to thaw overnight or for several hours until it is completely thawed.
- Reheating on the stovetop: Once the chili con carne is thawed, transfer it to a saucepan or skillet. Heat it over medium heat, stirring occasionally to ensure even heating. Cook until the chili con carne is heated through, reaching a safe internal temperature of 165°F (74°C). Stirring helps to prevent any hot spots and ensures that the chili con carne heats uniformly.
- Reheating in the microwave: Alternatively, you can reheat the thawed chili con carne in the microwave. Transfer the chili con carne to a microwave-safe dish and cover it to retain moisture. Heat on medium power, pausing and stirring at regular intervals to promote even heating. Continue reheating until the chili con carne reaches a safe internal temperature of 165°F (74°C).
By thawing the chili con carne in the refrigerator and reheating it on the stovetop or in the microwave, you can ensure that it reaches a safe temperature and retains its quality. Stirring occasionally during reheating helps prevent uneven heating, and checking the temperature with a food thermometer ensures that the chili con carne is safe to consume. With these steps, you can enjoy your thawed and reheated chili con carne with confidence, knowing that it is delicious, flavorful, and safe to eat.
Step 6: Check for Quality
Before serving your thawed and reheated chili con carne, it’s important to assess its quality to ensure that the flavors have been well-preserved during the freezing and reheating process. Freezing can sometimes affect the taste and texture of food, so a quick taste test allows you to make any necessary adjustments to enhance the flavor. Here’s how to check the quality of your chili con carne before serving:
- Take a small spoonful: Use a spoon to take a small portion of the reheated chili con carne. Make sure to include some of the sauce and any other ingredients.
- Assess the flavor: Pay attention to the taste and flavor profile of the chili con carne. Take note of the intensity of the spices, the balance of flavors, and whether the dish has retained its original deliciousness.
- Adjust seasoning if needed: If you find that the flavors have been slightly affected or diminished during freezing and reheating, you have the opportunity to adjust the seasoning to your preference. Add more spices, salt, pepper, or other seasonings to enhance the taste. Remember to start with small amounts and adjust gradually to avoid overpowering the dish.
- Stir and incorporate seasonings: After making any seasoning adjustments, thoroughly stir the chili con carne to evenly distribute the added flavors. Allow the dish to simmer for a few minutes to allow the seasonings to meld with the other ingredients.
- Repeat if necessary: If the taste is not satisfactory after the initial adjustments, you can repeat the process of tasting, adjusting, and stirring until you achieve the desired flavor profile.
By checking the quality of your chili con carne before serving, you can ensure that the flavors have been well-preserved and make any necessary seasoning adjustments to enhance the taste. Adjusting the seasoning to your preference helps to bring out the best flavors in the dish, compensating for any potential flavor loss during freezing and reheating. With these steps, you can confidently serve your thawed and seasoned chili con carne, knowing that it will be flavorful and enjoyable.
Other related questions
Can you refreeze chili con carne?
No, it is generally not recommended to refreeze chili con carne once it has been thawed. Each time you freeze and thaw the dish, it can lead to a decrease in quality, taste, and texture. It is best to portion the chili con carne appropriately before freezing and thaw only the amount you intend to consume.
How do I know if the chili con carne has gone bad after being frozen?
After being frozen, if the chili con carne develops an off smell, unusual texture, or shows signs of freezer burn, it may have gone bad and should be discarded. Additionally, if there is any mold growth, discoloration, or a sour or rancid taste, it is an indication of spoilage. It is important to trust your senses and use caution when consuming frozen chili con carne that exhibits any of these signs.
Can you freeze chili con carne with beans and vegetables?
Yes, you can freeze chili con carne with beans and vegetables. The beans and vegetables may undergo slight texture changes upon freezing and thawing, but they can still be included in the chili con carne. To maintain the best quality, it is recommended to slightly undercook the beans and vegetables before adding them to the chili.
Are there any differences in freezing techniques for different types of chili con carne (e.g., beef vs. turkey)?
The freezing techniques for different types of chili con carne, such as beef vs. turkey, are generally similar. However, there may be some differences to consider. Turkey chili con carne tends to have a lower fat content than beef chili, so it may be more prone to drying out during freezing. To help prevent this, you can ensure that the turkey chili has enough liquid or sauce before freezing. Additionally, the cooking times and temperatures for the respective meats may vary, so it’s important to follow the specific recipe instructions for each type of chili con carne.
Can frozen chili con carne be used for meal prepping or quick dinners?
Yes, frozen chili con carne can be a convenient option for meal prepping or quick dinners. By freezing chili con carne in individual portions, you can easily reheat and enjoy a hearty meal without the need for extensive preparation or cooking time. It provides a flavorful and nutritious option that can be quickly thawed and reheated, making it a time-saving solution for busy days or when you’re looking for a satisfying meal on short notice.

