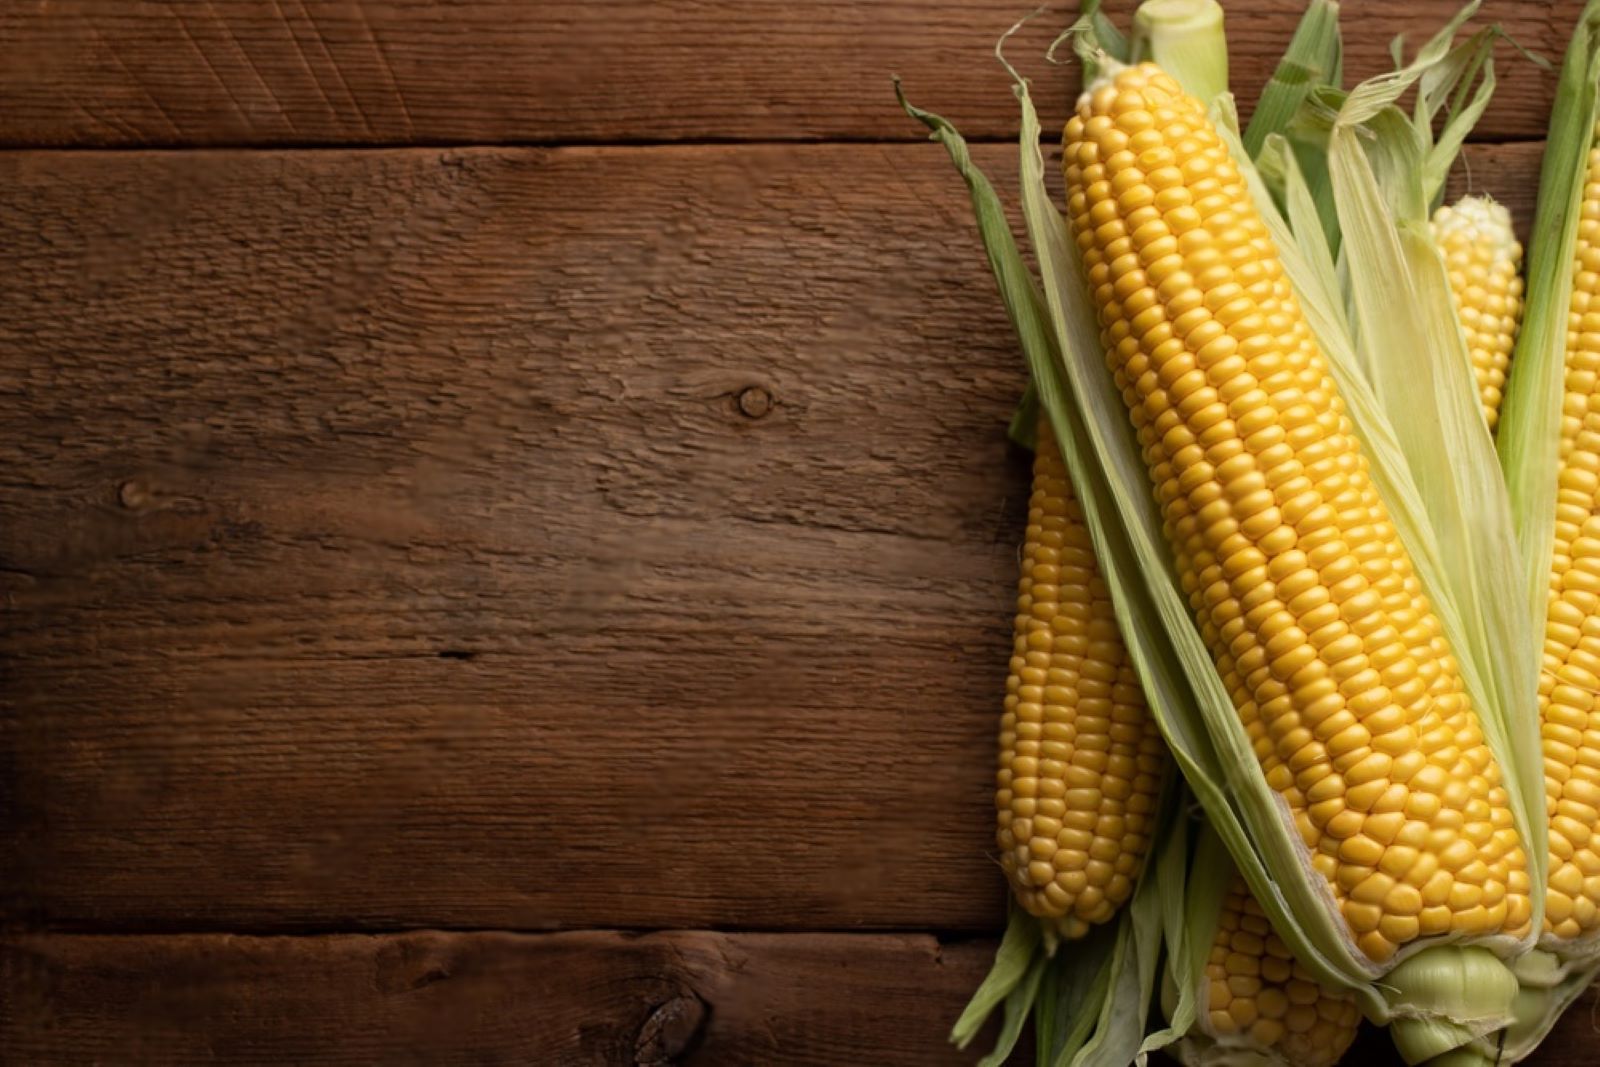
Corn, with its sweet and juicy kernels, is a beloved summer vegetable enjoyed by many. Whether you’ve harvested corn from your own garden or bought it fresh from the market, freezing it allows you to enjoy its delicious flavor all year round. Freezing corn is a simple process that helps preserve its taste and texture. In this article, we’ll provide you with a step-by-step guide on how to freeze corn properly, ensuring that you can savor its goodness even when it’s out of season.
Follow these steps to freeze corn:
Step 1: Select fresh corn
When freezing corn, it’s essential to start with fresh and high-quality corn. Choosing the right corn will ensure that the frozen product retains its flavor and texture. Here’s why selecting fresh corn is important:
- Bright green husks: Look for ears of corn with vibrant, bright green husks. The color indicates that the corn is still fresh and hasn’t started to deteriorate. Avoid corn with wilted, yellowing, or brown husks, as this may indicate that it’s past its prime.
- Plump kernels: Gently squeeze the corn through the husk to feel the kernels. Fresh corn will have plump and firm kernels that yield slightly to pressure. Avoid corn with shriveled or dented kernels, as they may be dry or past their peak freshness.
- Tightly wrapped husks: The husks should be tightly wrapped around the corn, protecting it from external elements and helping to maintain its moisture. Loose or partially opened husks may indicate that the corn has been exposed to air for a longer time, leading to a loss of quality.
- Free from spoilage: Inspect the corn for any signs of spoilage, such as mold, dark spots, or a strong unpleasant odor. These are indications that the corn has started to decay and should be avoided..
Step 2: Husk and clean the corn
Removing the husks and silks from the corn ears and thoroughly cleaning them is an important step before freezing. Here’s why husking and cleaning the corn is necessary:
- Removing husks and silks: The husks serve as a protective layer for the corn ears, but they are not desirable when freezing corn. By removing the husks, you expose the kernels and ensure that they freeze evenly. Additionally, husks can trap dirt, insects, or mold, which can contaminate the corn during freezing.
- Silk removal: The silks are the fine, thread-like strands found between the husks and the corn kernels. They are not only visually unappealing but can also affect the taste and texture of the corn. If left on the corn during freezing, the silks may become tough and impact the overall quality of the frozen corn.
- Cleaning the corn: Rinsing the corn under cold water helps remove any remaining silks or dirt that might be present. It’s essential to thoroughly clean the corn to ensure that no unwanted particles are frozen along with it. Clean corn contributes to a better end product with optimal taste and texture.
Can I freeze corn on the cob with the husks still on?
Yes, you can freeze corn on the cob with the husks still on, although it is not the most common method. Freezing corn on the cob with the husks intact can help preserve its moisture and flavor. However, it is recommended to remove the silks before freezing, as they can become tough and affect the quality of the corn.
Step 3: Blanch the corn
Blanching is a crucial step in freezing corn as it helps preserve its color, flavor, and texture. Here’s why blanching is necessary and how to do it:
- Preserving color: Blanching corn involves briefly immersing it in boiling water and then quickly cooling it. This process helps to deactivate enzymes present in the corn that can cause discoloration and loss of vibrancy. By blanching the corn, you retain its bright yellow color, making it more visually appealing even after freezing.
- Preserving flavor: Enzymes in corn can also contribute to flavor changes over time. Blanching the corn in boiling water helps to neutralize these enzymes, preserving the natural sweetness and flavor of the corn. It ensures that the frozen corn maintains its delicious taste when cooked or thawed later.
- Preserving texture: Blanching helps to partially cook the corn, which is important for maintaining its texture during freezing. The brief boiling process helps to firm up the kernels slightly, preventing them from becoming mushy or overly soft when thawed and cooked. This ensures that the frozen corn retains its desired texture and bite.
To blanch the corn, follow these steps:
- Bring a large pot of water to a rolling boil. The pot should be large enough to accommodate the corn ears comfortably.
- Carefully add the corn ears to the boiling water. Make sure they are fully submerged.
- Boil the corn for 4-6 minutes, depending on the size of the ears. Larger ears may require a slightly longer blanching time. This ensures that the heat penetrates the kernels thoroughly.
- Keep a close eye on the corn and avoid overcooking it, as this can lead to a loss of flavor and texture.
- After the recommended blanching time, promptly remove the corn from the boiling water and transfer it to a bowl of ice water. This stops the cooking process and cools the corn rapidly.
Can I freeze corn without blanching it?
While blanching is the recommended method to prepare corn for freezing, it is possible to freeze corn without blanching it. However, blanching helps to preserve the quality, color, and flavor of the corn by inactivating enzymes that can cause degradation during freezing. If you choose to skip blanching, be aware that the frozen corn may have a slightly altered texture and flavor, and it is best to use it within a shorter period of time to maintain its quality.
Step 4: Cool the corn
After blanching the corn, it’s crucial to cool it promptly to halt the cooking process. Here’s why cooling the corn in ice water is necessary and how it helps maintain its crispness and texture:
- Halting the cooking process: By transferring the corn from the boiling water to ice water, you rapidly lower its temperature. This quick temperature change stops the cooking process immediately. It helps to preserve the partially cooked state achieved during blanching, preventing the corn from becoming overly soft or mushy.
- Retaining crispness: Cooling the corn in ice water helps maintain its crispness. The rapid cooling solidifies the starches present in the corn, preserving its texture and preventing it from becoming limp or soggy. This is particularly important if you prefer your corn to have a pleasing crunch when cooked or thawed later.
- Equal cooling time: Allowing the corn to cool in the ice water for the same amount of time it was blanched ensures consistent cooling across all the corn ears. This equal cooling time helps to maintain uniformity in the texture and crispness of the corn. It ensures that all the kernels have a consistent level of firmness and retain their desired bite.
To cool the corn after blanching, follow these steps:
- Prepare a large bowl filled with ice water while the corn is being blanched.
- Once the recommended blanching time is complete, carefully remove the corn ears from the boiling water using tongs or a slotted spoon.
- Immediately transfer the hot corn ears to the bowl of ice water. Ensure they are fully submerged.
- Allow the corn to cool in the ice water for the same amount of time it was blanched. This could range from 4-6 minutes, depending on the size of the ears.
- After the cooling time is up, remove the corn from the ice water and gently pat them dry with a clean kitchen towel or paper towels.
Step 5: Cut the kernels off the cob
After blanching and cooling the corn, the next step is to remove the kernels from the cob. Here’s why cutting the kernels off the cob is necessary and how to do it properly:
- Separating the kernels: Cutting the kernels off the cob allows you to separate the edible portion of the corn from the cob itself. The kernels are the desirable part that you’ll freeze and later use in various recipes. Removing them from the cob makes the corn easier to handle and incorporate into different dishes.
- Ease of consumption: Corn kernels are more versatile and easier to consume when they are cut off the cob. This step eliminates the need to chew and navigate around the cob, making the corn kernels more enjoyable to eat. It also provides a more convenient way to portion and use the corn in different recipes.
- Technique for cutting: To cut the kernels off the cob, hold an ear of corn upright on a cutting board. Use a sharp knife to slice downward, starting from the top of the cob. Cut straight down along the length of the cob, rotating it as you go. Applying gentle pressure, the knife will separate the kernels from the cob. Repeat this process for all the corn ears.
- Uniformity in size: Cutting the kernels off the cob allows you to achieve a more uniform size, which can be beneficial for cooking or using the corn in various dishes. Uniformly sized kernels cook more evenly and provide a consistent texture in recipes like soups, salads, or side dishes.
Tips for cutting the kernels off the cob:
- Use a sharp knife to ensure clean cuts and minimize any potential mishaps.
- Hold the cob firmly and exercise caution while cutting to prevent accidents.
- Consider using a corn holder or gripping the cob with a towel to provide a better grip and stability.
Step 6: Package the corn for freezing
Once the corn kernels are cut off the cob, it’s time to package them for freezing. Proper packaging is crucial to maintain the quality and prevent freezer burn. Here’s why packaging the corn kernels and removing air is necessary, along with some packaging tips:
- Portion sizes: Divide the corn kernels into portion sizes that suit your needs. Consider how much corn you typically use in recipes or servings. Portioning the corn allows for easier thawing and reduces the need to defrost more than necessary at a time.
- Freezer bags or airtight containers: There are two common options for packaging frozen corn kernels: freezer bags or airtight containers. Both options work well, but freezer bags are more flexible, allowing you to squeeze out excess air for better preservation.
- Removing air: Air exposure can lead to freezer burn, which can negatively impact the quality of the frozen corn. Freezer burn causes dehydration and texture changes, resulting in a loss of flavor and overall appeal. Squeezing out as much air as possible from the bags before sealing them minimizes the risk of freezer burn and helps maintain the corn’s optimal texture and taste.
Packaging tips for freezing corn:
- Freezer bags: Use sturdy, high-quality freezer bags designed for long-term storage. Place the portioned corn kernels into the bags, leaving some headspace to allow for expansion during freezing. Press out as much air as possible before sealing the bags tightly. Consider double-bagging for added protection.
- Airtight containers: Choose airtight containers made specifically for freezer use. Fill the containers with the portioned corn kernels, leaving some space at the top to accommodate expansion. Seal the containers tightly to prevent air exposure.
Can I freeze corn in a regular plastic bag, or do I need special freezer bags?
While it is possible to freeze corn in regular plastic bags, it is generally recommended to use special freezer bags for better results. Freezer bags are designed to be more durable and resistant to moisture and freezer burn, providing better protection for the corn during freezing and storage. Regular plastic bags may not offer the same level of protection and could result in a loss of quality over time.
Step 7: Label and date the packages
Labeling and dating the packages of frozen corn is a crucial step to ensure proper organization and rotation of your freezer inventory. Here’s why labeling and dating are important, along with their benefits:
- Contents identification: Labeling each package with the contents, in this case, “frozen corn,” allows for easy identification when searching for a specific item in your freezer. It helps avoid confusion, especially if you have multiple types of frozen foods stored. Clear labeling ensures that you can quickly locate the corn when needed.
- Freshness tracking: Dating the packages with the freezing date provides a reference point for the corn’s freshness. Frozen corn is best consumed within a certain timeframe to maintain its optimal quality. By dating the packages, you have a clear indication of how long the corn has been stored, allowing you to use the oldest packages first to prevent any potential food waste.
- Rotation management: Properly labeling and dating the packages enable you to practice proper rotation management in your freezer. When using frozen corn, you can easily identify the oldest packages based on their freezing dates. This ensures that you use the corn in the order of its freezing, preventing packages from being forgotten or left unused for an extended period.
- Inventory control: Labeling and dating also help with overall inventory control. You can keep track of the amount of frozen corn you have and plan your future meals accordingly. It allows you to assess how much corn you need to restock or if any adjustments are necessary to your cooking plans.
Tips for labeling and dating the packages:
- Use waterproof and freezer-safe labels or markers to ensure the labels remain intact during freezing.
- Write the contents and date clearly on each package for easy readability.
- Consider using adhesive labels or reusable freezer-safe labels that can be easily removed or updated when needed.
Step 8: Freeze the corn
Once the corn packages are properly labeled and dated, it’s time to freeze them. Proper freezing is essential to maintain the quality and freshness of the corn. Here’s why freezing the corn flat and allowing sufficient freezing time is important:
- Efficient use of space: Lay the packages of corn flat in the freezer. This allows for easy stacking and efficient use of the available freezer space. Flat packages take up less room and make it easier to organize and access other items in the freezer. It also helps prevent packages from getting lost or buried beneath other items.
- Even freezing: By laying the corn packages flat, you ensure that the corn freezes evenly. The flat position allows for uniform contact with the freezer surface, promoting consistent and efficient freezing throughout the kernels. This helps maintain the corn’s texture, flavor, and overall quality.
- Freezing time: The corn packages should freeze completely within a few hours. Freezing time may vary depending on the thickness of the packages and the temperature of your freezer. Ensure that your freezer is set to a sufficiently low temperature (around 0°F or -18°C) to facilitate quick and thorough freezing. Freezing the corn rapidly helps preserve its freshness and minimizes the formation of ice crystals that can affect the texture and flavor.
Additional steps for freezing corn:
- Avoid overcrowding: Allow sufficient space between the packages to facilitate proper air circulation and promote faster freezing. Overcrowding can hinder the freezing process and lead to uneven freezing.
- Stacking options: If you have multiple layers of corn packages, you can stack them on top of each other once they are completely frozen. Consider using dividers, cardboard, or freezer-safe trays between layers to prevent the packages from sticking together.
- Freezing shelf life: Frozen corn can maintain its quality for about 8 to 12 months when stored at 0°F or below. It’s best to consume the corn within this timeframe for optimal flavor and texture.
Step 9: Store in the freezer
After the corn packages are fully frozen, the final step is to store them properly in the freezer. Proper storage ensures that the frozen corn remains well-organized, easily accessible, and maintains its quality. Here’s why storing the corn in a freezer-safe container or designated freezer section is important:
- Organization: Storing the corn in a designated area or container helps maintain an organized freezer space. By keeping the corn packages separate from other frozen items, you can quickly locate them when needed. This prevents the packages from getting lost or buried beneath other items, saving you time and effort during meal preparation.
- Protection: Placing the corn packages in a freezer-safe container or section provides an additional layer of protection. It helps shield the corn from exposure to temperature fluctuations, odors, and potential contaminants from other items in the freezer. This protection ensures that the corn maintains its quality and taste during its storage period.
- Accessibility: Storing the corn in an easily accessible location allows you to retrieve the desired amount without disturbing the rest of the freezer. You can arrange the packages in a way that facilitates easy grabbing and avoids unnecessary shifting or movement of other items. This makes it convenient to use the corn for various recipes or meals.
Additional steps for storing frozen corn:
- Label the storage container or section: Consider labeling the container or section where you store the corn to easily identify it among other freezer items. This helps maintain organization and prevents confusion when searching for the corn packages.
- FIFO (First In, First Out): Adhere to the FIFO principle by placing the newest packages at the back of the storage area and using the older ones first. This rotation ensures that you consume the corn within its recommended storage time and prevents any packages from being overlooked or forgotten.
- Temperature control: Ensure that your freezer maintains a consistent temperature of 0°F (-18°C) or below. Monitoring and maintaining the freezer temperature helps preserve the quality and freshness of the corn.
How long can I store corn in the freezer?
When properly stored in the freezer, corn can be stored for an extended period of time. For optimal quality, it is recommended to consume frozen corn within 8 to 12 months. Beyond this timeframe, the corn may still be safe to eat, but its taste and texture may deteriorate. To maximize the shelf life, ensure the corn is properly blanched, cooled, and stored in airtight freezer-safe containers or bags to prevent freezer burn and moisture loss. Regularly checking the condition of the frozen corn and adhering to proper storage practices will help maintain its quality for as long as possible.
Other related questions
How do I defrost corn?
To defrost corn, there are a few methods you can choose from. The easiest way is to transfer the frozen corn from the freezer to the refrigerator and let it thaw overnight. Another option is to place the frozen corn in a microwave-safe dish and use the defrost setting on your microwave. If you’re short on time, you can also place the corn in a sealed plastic bag and submerge it in cold water, changing the water every 30 minutes until it’s thawed. Once thawed, use the corn immediately or store it in the refrigerator for up to two days.
Can I refreeze previously thawed corn?
It is generally not recommended to refreeze previously thawed corn. When you thaw corn, ice crystals melt, causing moisture loss and potential bacterial growth. Refreezing corn that has already been thawed increases the risk of foodborne illnesses and can negatively affect its texture and flavor. To maintain quality and food safety, it is best to consume thawed corn promptly or cook it before refreezing.
How do I know if my frozen corn has gone bad?
To determine if your frozen corn has gone bad, you should look for certain signs. First, check for any unusual or off-putting odor coming from the corn. If it has a foul or rancid smell, it is likely spoiled. Additionally, examine the appearance of the corn for signs of freezer burn, such as white or grayish discoloration, ice crystals, or dry and shriveled kernels. If the texture of the corn appears mushy or slimy, it is another indication of spoilage. When in doubt, it’s best to err on the side of caution and discard any frozen corn that you suspect may be spoiled.
Can I use frozen corn with the fresh ones?
Yes, you can use frozen corn alongside fresh corn in recipes. Frozen corn can be a convenient alternative when fresh corn is out of season or unavailable. However, there may be slight differences in texture and flavor between the two. Frozen corn tends to be slightly softer and may release more moisture when cooked, so adjustments in cooking time or recipe ratios may be necessary. Overall, combining frozen and fresh corn can still result in delicious dishes, offering a balance between convenience and taste.
Should I add any seasoning or salt to the corn before freezing it?
It is generally not recommended to add seasoning or salt to corn before freezing it. Seasonings and salt can alter the texture and flavor of the corn during the freezing and thawing process. It is best to freeze the corn in its natural state and add seasonings or salt when you are ready to cook or serve the corn after thawing.
Can I freeze cooked corn, or should it be raw before freezing?
Yes, you can freeze cooked corn. Freezing cooked corn can be a convenient option if you have leftovers or if you prefer the taste and texture of cooked corn. However, it’s important to note that the texture of cooked corn may slightly change after freezing and thawing. To freeze cooked corn, allow it to cool completely before packaging it in airtight containers or freezer bags.

