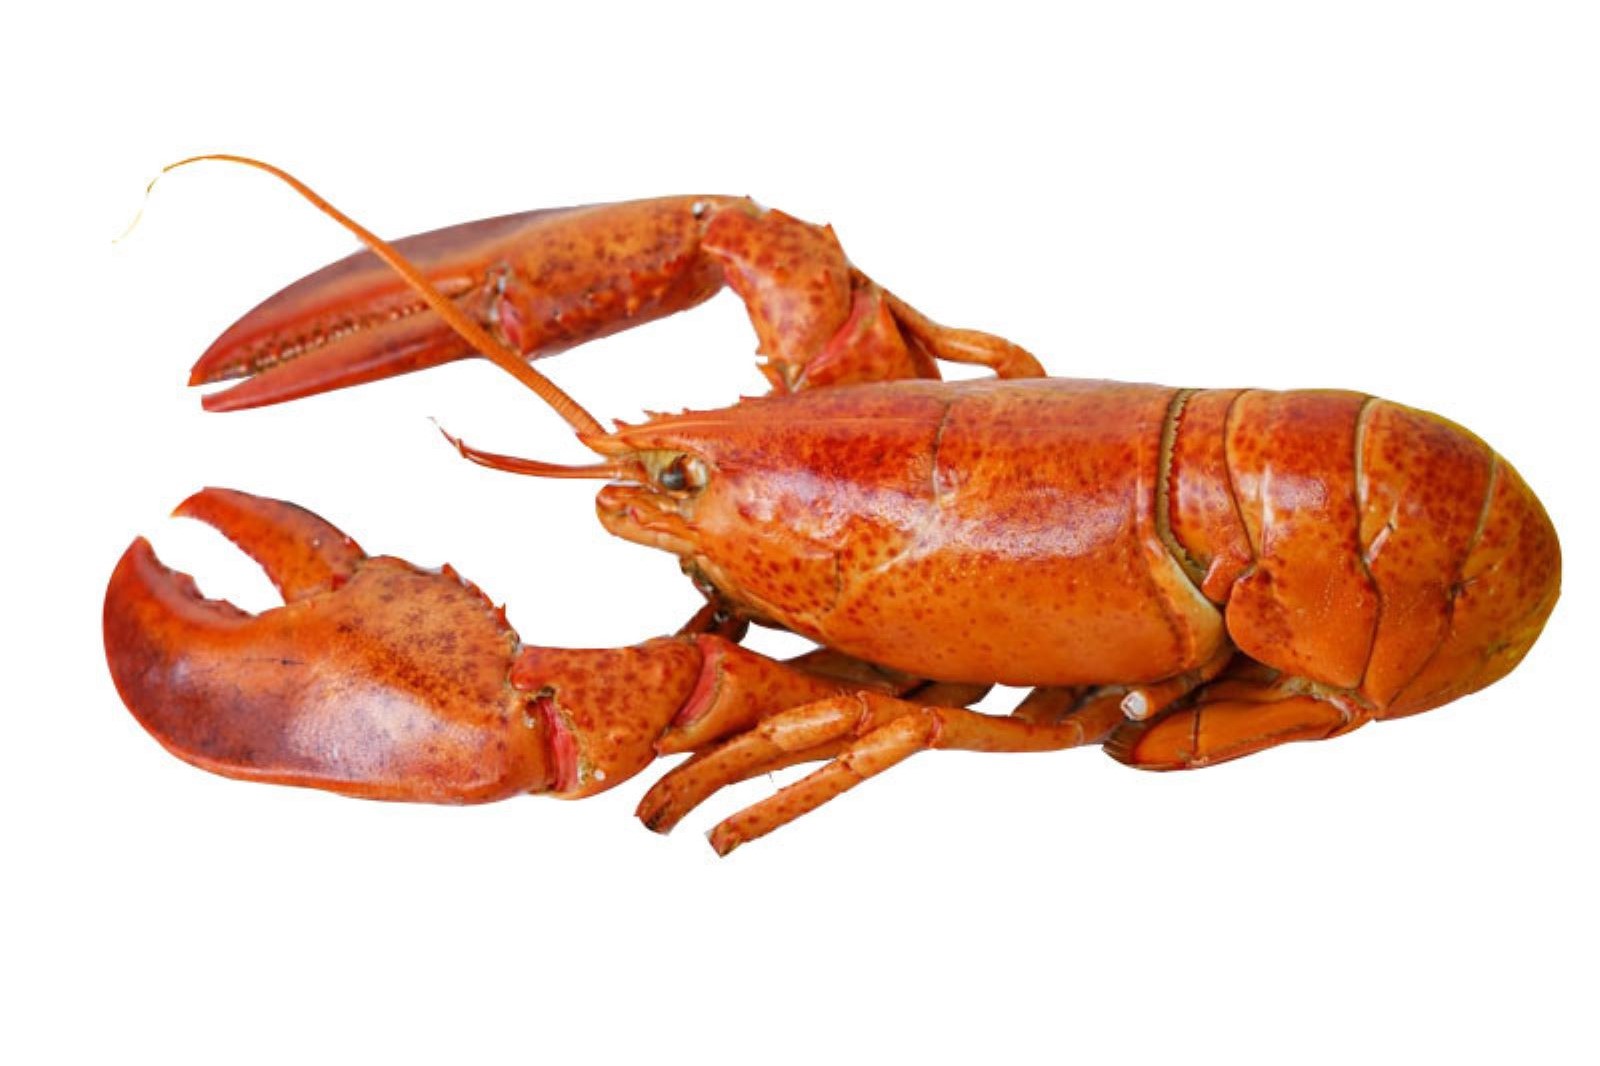
Crayfish, also known as crawfish or freshwater lobsters, are small crustaceans that thrive in freshwater environments. These miniature lobsters are renowned for their succulent meat and delicate flavor, making them a popular choice in many culinary dishes. Whether boiled, grilled, or sautéed, crayfish adds a delightful touch to seafood boils, pastas, and stews. However, if you find yourself with a surplus of crayfish or simply want to extend their shelf life, freezing is an excellent preservation method. Freezing crayfish allows you to enjoy their delectable taste and texture at your convenience, even when they are out of season. In this guide, we will explore the steps and techniques to properly freeze crayfish, ensuring that you can relish the flavors of these delightful crustaceans whenever the craving strikes.
Here are the simple steps to freeze crayfish:
Step 1: Select Fresh Crayfish
Selecting fresh crayfish is essential to ensure that you freeze them at their best quality. Here’s why it’s important and how to choose the right ones:
- Freshness: Crayfish are highly perishable, and their quality deteriorates quickly after they are harvested. Choosing fresh crayfish will ensure that you freeze them at their peak flavor and texture. Fresh crayfish will have a sweet, delicate taste and a firm, succulent texture.
- Lively and active: Look for crayfish that are lively and active. They should be moving around and responsive when handled. Lively crayfish indicate that they are still in good health and have not been stored for too long.
- Intact shells: Check the shells of the crayfish for any cracks, breaks, or signs of damage. Crayfish with intact shells are less likely to have been exposed to contaminants or bacterial growth. Damaged shells can also result in the loss of juices, leading to a decrease in flavor and moisture during freezing.
- No discoloration: Examine the color of the crayfish. Fresh crayfish should have a consistent color, whether it’s red, brown, or another shade depending on the species. Discoloration, such as dark spots or patches, may indicate that the crayfish are past their prime and not suitable for freezing.
- No off-putting odor: Give the crayfish a gentle sniff. Fresh crayfish should have a mild, slightly briny odor. Avoid crayfish with a strong, unpleasant smell, as it can be an indication of spoilage.
By selecting fresh crayfish, you are laying the foundation for a successful freezing process and ensuring that the crayfish will maintain their quality and flavor when it’s time to enjoy them later.
Step 2: Clean and Prepare
Cleaning and preparing the crayfish before freezing is important to remove any dirt, debris, or unwanted parts. Here’s why it’s necessary and how to do it properly:
- Remove dirt and debris: Start by giving the crayfish a thorough rinse under cold running water. This step helps to remove any dirt, sand, or other debris that may be present on the shells or in the crevices. Use your hands to rub the shells gently and ensure all surfaces are cleaned. This helps maintain the overall cleanliness and flavor of the crayfish.
- Brushing the shells (if necessary): If you notice any stubborn dirt or debris on the shells, you can use a soft brush, such as a vegetable brush or a toothbrush, to gently scrub them. Be careful not to apply too much pressure, as crayfish shells can be delicate and easily damaged.
- Trimming the antennae and protrusions: Crayfish have long antennae and other protrusions, which are not commonly eaten and can get in the way during freezing and subsequent preparation. Use a pair of kitchen shears or a sharp knife to carefully trim off these excess parts. Be cautious while handling the crayfish to avoid any accidental injury.
Cleaning and preparing the crayfish not only ensures that they are free from any unwanted substances but also helps enhance their appearance and makes them easier to handle during the freezing process. This step sets the stage for a clean and enjoyable eating experience once the crayfish are cooked and served.
Step 3: Blanch the Crayfish
Blanching the crayfish is an important step in the freezing process as it helps preserve their texture and flavor. Here’s why blanching is beneficial and how to do it effectively:
- Preserving texture and flavor: Blanching involves briefly cooking the crayfish in boiling water, followed by immediate cooling. This process helps to deactivate enzymes that can cause deterioration in the texture and flavor of the crayfish over time. Blanching also helps to kill any surface bacteria, further preserving the quality of the crayfish during freezing.
- Boiling water and salt: Fill a large pot with water and bring it to a rolling boil. If desired, you can add salt to the water, which can enhance the flavor of the crayfish. The salt concentration should be similar to that of seawater, roughly 1-2 tablespoons per liter of water.
- Adding the crayfish: Carefully place the crayfish into the boiling water. It’s best to do this in small batches, ensuring that the pot is not overcrowded. Adding too many crayfish at once can lower the temperature of the water and result in uneven blanching.
- Cooking time: Allow the crayfish to cook in the boiling water for 1 to 2 minutes. The exact cooking time may vary depending on the size and species of the crayfish. Overcooking can lead to a loss of texture and flavor, so it’s important to monitor the time closely.
- Testing for doneness: To ensure the crayfish are properly blanched, you can test a sample crayfish for doneness. The flesh should turn opaque and have a firm texture. If it still appears translucent or mushy, give it a little more time in the boiling water.
- Cooling the crayfish: After blanching, immediately transfer the crayfish to a bowl or sink filled with ice water. This rapid cooling process stops the cooking and preserves the bright color and firmness of the crayfish flesh. Let the crayfish sit in the ice water for about 5 minutes to ensure thorough cooling.
Blanching the crayfish helps to maintain their quality during freezing by preserving their texture, flavor, and color. It is a crucial step in the freezing process and ensures that the crayfish will be enjoyable to eat once they are thawed and prepared for a meal.
Step 4: Cool the Crayfish
After blanching the crayfish, it’s important to cool them down quickly to halt the cooking process and preserve their texture and flavor. Here’s why cooling is necessary and how to do it effectively:
- Halting the cooking process: Transferring the crayfish from the boiling water to an ice water bath rapidly reduces their temperature, effectively stopping the cooking process. This step is crucial to prevent the crayfish from becoming overcooked and to maintain their desired texture and taste.
- Using an ice water bath: Prepare a bowl or basin filled with ice water. The ice water should be cold enough to cool the crayfish rapidly. The ice helps maintain a low temperature throughout the cooling process. Make sure the bowl is large enough to accommodate all the crayfish.
- Transferring the crayfish: Using a slotted spoon or tongs, carefully transfer the blanched crayfish from the boiling water into the ice water bath. Be gentle to avoid damaging the delicate flesh or shells. The slotted spoon or tongs allow any excess water to drain off as you transfer the crayfish.
- Allowing sufficient cooling time: Once the crayfish are in the ice water bath, let them sit for about 5 minutes. This duration ensures that the crayfish are thoroughly cooled and helps preserve their freshness and firmness.
- Importance of rapid cooling: Rapidly cooling the crayfish after blanching not only stops the cooking process but also helps maintain their vibrant color. It also prevents the crayfish from becoming mushy or overcooked, ensuring they retain their desired texture and taste.
Once the crayfish have been cooled in the ice water bath, they are ready for further preparation or packaging for freezing. Cooling the crayfish promptly after blanching is a critical step in maintaining their quality during the freezing process, and it ensures that they will be in optimal condition when thawed and prepared for consumption.
Step 5: Remove the Shells (optional)
Removing the shells from the crayfish before freezing is an optional step that can make them more convenient to use in certain recipes or preparations. Here’s why you might choose to remove the shells and how to do it properly:
- Convenience in cooking: Some recipes may call for crayfish meat without the shells, as it can be more convenient and save preparation time. Removing the shells in advance allows for easier incorporation into dishes such as soups, stews, pasta, or stir-fries.
- Twist and pull the tail: To begin, hold the crayfish firmly and twist the tail gently but firmly until it separates from the body. This twisting motion helps detach the tail from the rest of the crayfish.
- Cutting the shell: Use a small knife or kitchen scissors to carefully cut along the underside of the tail shell. Begin at the wider end of the tail and make a shallow incision along the length of the shell. Be cautious not to cut too deeply, as you want to avoid damaging the meat.
- Gently remove the meat: After making the incision, use your fingers or the knife to gently separate the shell from the meat. Slowly peel back the shell, taking care not to tear or break the meat. With a bit of patience and delicacy, the meat should come away cleanly from the shell.
- Discard or save the shells: Once the meat has been removed, you can discard the shells or save them for making seafood stock or broth, if desired. The shells can add depth of flavor to stocks and sauces.
It’s important to note that removing the shells is optional, and some prefer to freeze crayfish with their shells intact for various reasons, such as maintaining moisture and flavor during freezing. The decision to remove the shells depends on personal preference and the intended use of the crayfish.
Whether you choose to keep the shells on or remove them, properly storing and packaging the crayfish for freezing is the next step to ensure their quality and freshness.
Step 6: Arrange the Crayfish to freeze
Properly arranging the crayfish for freezing is essential to ensure that they freeze individually and do not stick together. Here’s why it’s important and how to arrange them effectively:
- Preventing sticking: Placing the crayfish in a single layer on a baking sheet lined with parchment paper or a silicone mat helps prevent them from sticking together during the freezing process. If the crayfish come into contact with each other while freezing, they can freeze together and become difficult to separate when it’s time to use them.
- Using a baking sheet and lining: Choose a baking sheet that is large enough to accommodate the crayfish in a single layer without overcrowding. Line the baking sheet with parchment paper or a silicone mat to prevent the crayfish from sticking to the surface of the sheet.
- Single layer arrangement: Lay the crayfish on the baking sheet in a single layer, ensuring they are not touching each other. This allows for proper air circulation around each crayfish, promoting even and efficient freezing.
- Spacing the crayfish: Leave a small gap between each crayfish to prevent them from touching. This spacing ensures that they freeze individually and maintain their shape and texture. If necessary, you can use multiple baking sheets to accommodate all the crayfish without overcrowding.
By arranging the crayfish in a single layer without touching each other, you set the stage for successful freezing and easy retrieval when it’s time to use them. This step helps maintain the individuality and quality of each crayfish throughout the freezing process.
Step 7: Flash-Freeze the Crayfish
Flash-freezing the crayfish is an important step to individually freeze them quickly and prevent them from clumping together. Here’s why flash-freezing is beneficial and how to do it effectively:
- Quick freezing process: Transfer the baking sheet with the arranged crayfish to the freezer. The freezer’s low temperature allows the crayfish to freeze rapidly. Flash-freezing helps to preserve the quality and texture of the crayfish by minimizing the formation of large ice crystals, which can lead to a loss of moisture and affect their overall texture.
- Individually freezing: Flash-freezing the crayfish ensures that each piece freezes individually. This prevents them from clumping together, making it easier to portion out the desired amount later on without having to thaw and separate them. Individually frozen crayfish also allow for better preservation of their quality and taste.
- Freezing time: Let the crayfish freeze in the freezer for about 1 to 2 hours, or until they are firm and solid to the touch. The exact freezing time may vary depending on the size of the crayfish and the temperature of your freezer. Check on them periodically to determine when they are completely frozen.
- Monitoring freezing progress: Keep an eye on the crayfish while they are freezing to ensure they don’t over freeze or get freezer burn. If you notice any signs of freezer burn, such as discoloration or dryness, it’s important to wrap them tightly to protect their quality.
By flash-freezing the crayfish, you’re preserving their individuality and ensuring they won’t clump together during the freezing process. This step enables easier portioning and maintains the quality of the crayfish until they are ready to be thawed and prepared for a delicious meal.
Step 8: Pack and Seal
Proper packaging and sealing of the frozen crayfish are crucial to maintain their quality, prevent freezer burn, and prolong their shelf life. Here’s why packaging and sealing are important and how to do it effectively:
- Choosing appropriate containers: Transfer the fully frozen crayfish from the baking sheet to airtight freezer bags or containers. Freezer bags are commonly used for their flexibility and ability to remove excess air, but you can also use rigid containers specifically designed for freezer storage. Ensure that the containers you choose are suitable for freezer use and can provide an airtight seal.
- Minimizing air exposure: Air exposure is a primary cause of freezer burn, which can negatively affect the texture and flavor of the crayfish. Before sealing the bags or containers, make an effort to remove as much air as possible. This can be done by gently pressing the bags or containers to release any trapped air. Alternatively, you can use a vacuum sealer to remove air entirely.
- Airtight sealing: Once you have removed as much air as possible, securely seal the bags or containers. For freezer bags, use the zipper lock mechanism to create a tight seal. If using containers, ensure the lids are properly closed and tightly sealed. This step is crucial to prevent air from entering and moisture from escaping, which helps maintain the quality of the crayfish during freezer storage.
Proper packaging and sealing protect the crayfish from air exposure and help maintain their texture, flavor, and overall quality during freezer storage. By minimizing air and providing an airtight environment, you reduce the risk of freezer burn and ensure that the crayfish remain in optimal condition until they are ready to be thawed and prepared for a delicious meal.
Step 9: Label and Date the Packages
Labeling and dating the frozen crayfish packages is a crucial step to keep track of their freshness and ensure they are used within the recommended time frame. Here’s why labeling and dating are important and how to do it effectively:
- Tracking freshness: By labeling the bags or containers with the date of freezing, you establish a record of when the crayfish were frozen. This information allows you to keep track of their freshness and determine how long they have been stored in the freezer. It is recommended to use crayfish within a certain period to maintain their quality and taste.
- Identifying packages: Labeling the packages with the contents, such as “frozen crayfish,” helps you easily identify them among other items in the freezer. Clear and visible labeling prevents confusion and saves time when searching for specific ingredients.
- Using a permanent marker: To ensure the labels remain intact and legible throughout the freezing period, use a permanent marker. Permanent markers are designed to resist smudging and fading, even in low temperatures. Make sure to write the information clearly and prominently on the package.
- Placing labels: Choose a visible spot on the package to place the label, such as the front or top. This makes it easier to identify and read the information without having to move or rearrange the packages in the freezer.
By labeling and dating the packages, you can effectively monitor the freshness of the crayfish and ensure they are used within the recommended time frame. This simple step helps you stay organized and maintain the quality of the crayfish for the best culinary experience when you decide to thaw and prepare them.
Step 10: Store in the Freezer
Proper storage of the sealed crayfish packages in the freezer is essential to maintain their quality and freshness over an extended period. Here’s why storing them correctly is important and how to do it effectively:
- Choosing the coldest part of the freezer: Locate the coldest part of your freezer, typically towards the back or bottom. This area experiences the most consistent low temperatures, which are crucial for keeping the crayfish frozen solid and preserving their quality. Aim for a temperature below 0°F (-18°C) to maintain optimal storage conditions.
- Avoiding temperature fluctuations: Ensure that the freezer maintains a stable and consistent temperature. Fluctuating temperatures can cause the crayfish to thaw and refreeze, leading to loss of texture, moisture, and overall quality. Avoid opening the freezer frequently or leaving it open for extended periods to minimize temperature fluctuations.
- Storage duration: Frozen crayfish can be stored in the freezer for up to 3 months without significant loss of quality. While they may remain safe to consume beyond this time, their texture and flavor may deteriorate. It is recommended to use them within the specified time frame for the best culinary experience.
- Organized storage: Arrange the sealed packages in a way that maximizes space and allows easy access. Stack them neatly, with the labeled side facing outward, to help identify them quickly without disturbing the other packages. Consider using a storage container or bin to keep the crayfish organized and prevent them from getting lost or damaged in the freezer.
- Monitoring storage conditions: Periodically check the temperature of the freezer to ensure it remains below 0°F (-18°C). Additionally, keep an eye on the condition of the crayfish packages, looking for signs of freezer burn or any other damage. If you notice any issues, it may be necessary to reseal or repackage the crayfish to maintain their quality.
By storing the sealed crayfish packages in the coldest part of the freezer and maintaining stable temperatures, you can ensure that they remain frozen and of high quality for up to 3 months. Proper storage conditions and organization help preserve the flavor, texture, and overall freshness of the crayfish until you’re ready to thaw and prepare them for a delicious meal.
Other related questions
How do you defrost crayfish?
To defrost crayfish, it is best to do so gradually in the refrigerator. Place the sealed package of frozen crayfish in the refrigerator and allow it to thaw for 24 to 48 hours. Once fully thawed, the crayfish can be used in various culinary preparations.
Can you refreeze crayfish?
Refreezing crayfish is generally not recommended due to potential quality and safety concerns. Once crayfish have been thawed, bacteria may have started to grow, and refreezing can further degrade their texture and flavor. It is advisable to consume crayfish after thawing, but if refreezing is necessary, it should be done immediately after cooking the thawed crayfish to minimize any potential risks.
How do I know if the crayfish has gone bad after being frozen?
After being frozen, if crayfish has gone bad, there are a few signs to look out for. Check for any unusual odor, such as a strong fishy or ammonia-like smell, as this can indicate spoilage. Additionally, inspect the crayfish for changes in color, texture, or the presence of sliminess or mold. If any of these signs are present, it is best to discard the crayfish to avoid the risk of foodborne illness.
Can frozen crayfish be used in dishes such as salads or soups?
Yes, frozen crayfish can be used in dishes such as salads or soups. After thawing them properly, they can be added to salads for a flavorful seafood component or incorporated into soups for added texture and taste. However, it’s essential to ensure the crayfish is fully thawed and heated before consuming to ensure food safety.
Can you boil frozen crayfish?
Yes, you can boil frozen crayfish. To do so, bring a pot of water to a rolling boil and add the frozen crayfish. Cook them for the recommended time, typically around 8-10 minutes, or until they are fully cooked and their shells turn bright red. Ensure they are fully thawed and heated to ensure food safety before consuming.

