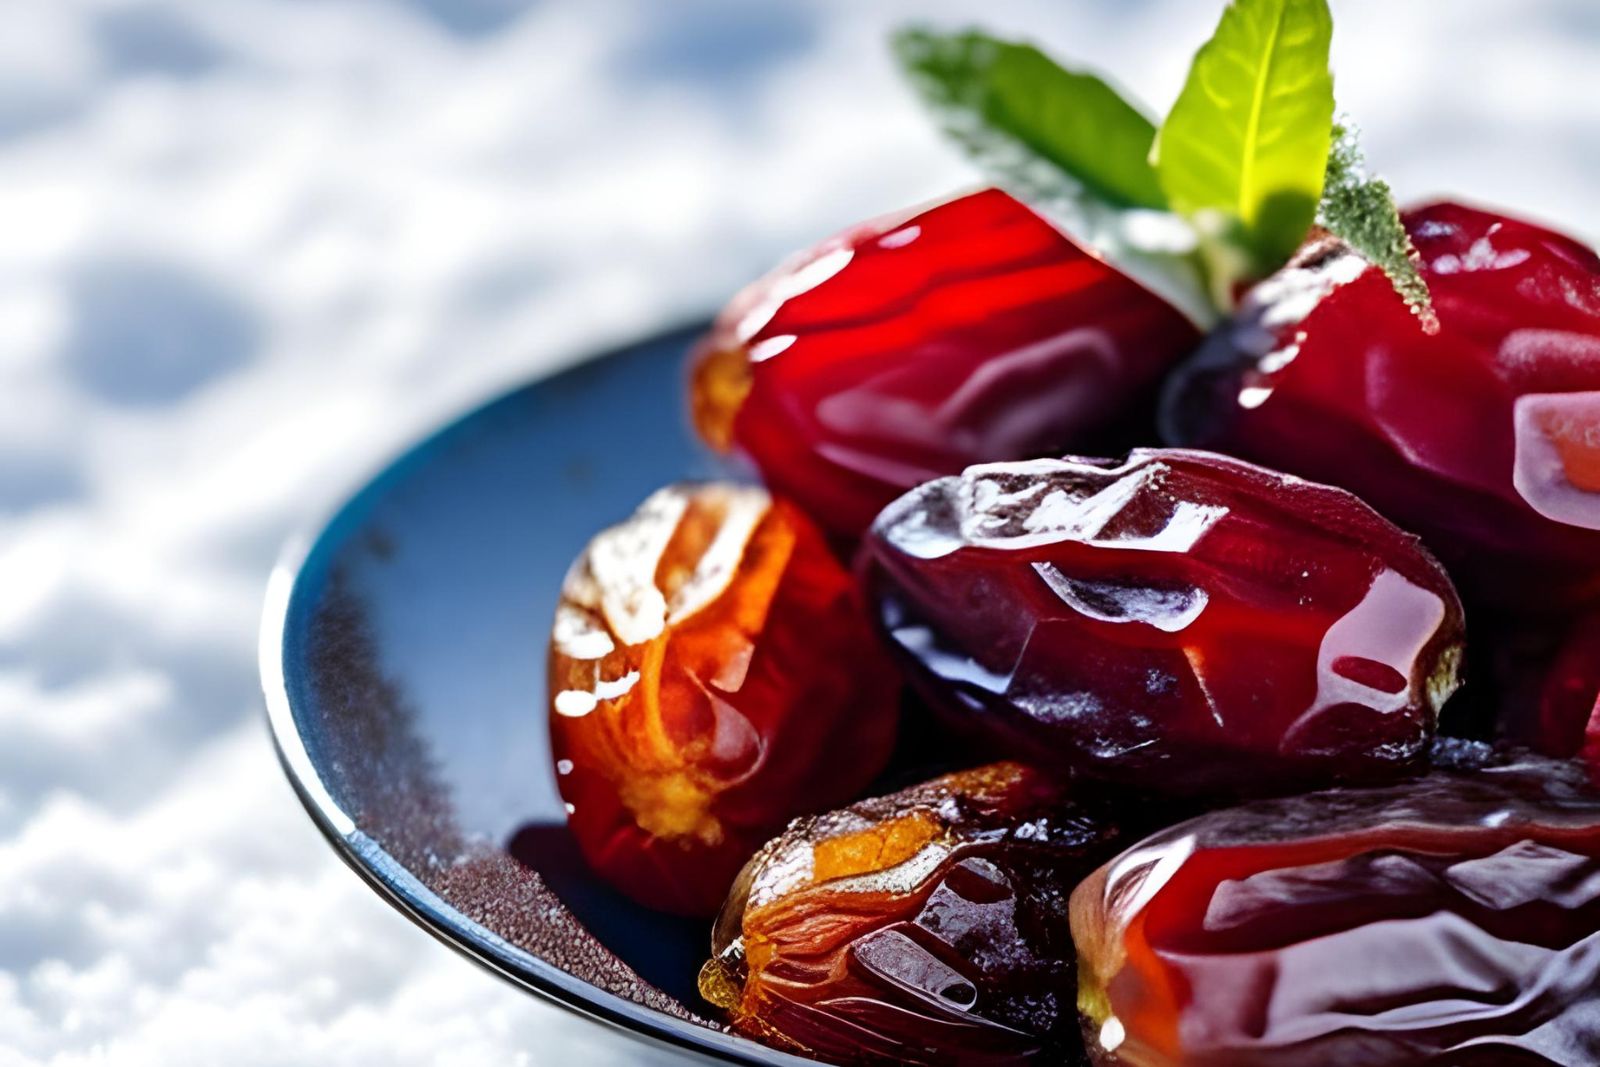
Dates are a delectable fruit known for their natural sweetness and numerous health benefits. These small, wrinkled wonders can be enjoyed on their own, added to various recipes, or used as natural sweeteners in smoothies and desserts. While dates have a long shelf life, freezing them is an excellent way to extend their freshness and ensure they’re readily available for your culinary creations year-round. In this article, we’ll walk you through the simple steps to freeze dates properly, preserving their flavor and texture for later enjoyment.
Here’s a guide on how to freeze dates:
Step 1: Select high-quality dates
When it comes to freezing dates, the first and most crucial step is to select high-quality dates. The quality of the dates you choose will directly impact the taste and texture of the frozen product. Here’s why this step is so important:
- Freshness Matters: Freshness is key when it comes to dates. High-quality dates should be plump and moist. They should not appear overly dry or shriveled. When you pick up a date, it should feel slightly soft to the touch. Fresh dates have a natural sweetness that intensifies when frozen, making them a delightful treat.
- Unblemished Appearance: Examine the dates carefully for any signs of blemishes or damage. A quality date should have a smooth, unblemished skin. Any visible mold, discoloration, or soft spots are indicators of spoilage. Discard any dates that show these signs to prevent them from affecting the overall quality of the batch.
- Rich Color and Glossy Appearance: High-quality dates typically have a rich, vibrant color and a glossy surface. This is a sign of freshness and indicates that the date has retained its natural sugars and moisture. Dates that appear dull or have a matte finish may have lost some of their moisture content and might not freeze as well.
- Avoid Spoilage: It’s essential to be vigilant when inspecting your dates. Consuming dates that have signs of mold or spoilage can lead to health issues. Freezing dates in good condition ensures that they remain safe to eat even after an extended period of storage.
Step 2: Wash and dry the dates
Once you’ve carefully selected high-quality dates in Step 1, the next important step in preparing dates for freezing is washing and drying them. This seemingly simple step serves several essential purposes:
- Removing Surface Dirt and Residue: Dates, like many other fruits, can accumulate dust, dirt, or residues from handling and packaging. Rinsing them under cool running water helps remove any external contaminants that may have come into contact with the fruit during processing, transportation, or storage.
- Ensuring Cleanliness: Ensuring that your dates are clean is not only about aesthetics but also about maintaining food safety. By washing the dates, you reduce the risk of introducing unwanted foreign substances into your frozen date supply.
- Preventing Freezer Burn: Moisture is the enemy when it comes to freezing food. Any excess moisture on the surface of the dates can lead to freezer burn, which can negatively affect the quality and taste of the fruit. Freezer burn occurs when moisture on the surface of the food freezes and forms ice crystals. These ice crystals can cause the fruit to become dehydrated and develop off-flavors. By patting the dates dry after washing them, you remove excess moisture and minimize the risk of freezer burn.
Here’s how to wash and dry dates effectively:
- Place the dates in a colander or sieve.
- Hold the colander under cool, running water, allowing the water to flow over the dates.
- Gently agitate the dates with your fingers to ensure that all surfaces are rinsed.
- Transfer the rinsed dates to a clean kitchen towel or a stack of paper towels.
- Gently pat the dates dry, removing any remaining water droplets.
- It’s important to note that you should not soak dates for an extended period, as dates can absorb excess water and become overly soft or mushy. A brief rinse followed by thorough drying is all that’s needed to prepare your dates for freezing.
Step 3: Remove the pits
Now that you’ve washed and dried your selected dates, the next critical step is to remove the pits. This might seem like a straightforward task, but it holds significant importance in the process of freezing dates. Here’s why removing the pits is essential:
- Avoid Unpleasant Surprises: Dates are typically sold with pits intact, and while the pits are entirely edible, they can be quite hard. Biting into a frozen date with its pit still inside can lead to an unexpected and sometimes uncomfortable experience. Removing the pits ensures that your frozen dates are ready to eat without any surprises.
- Enhance Versatility: Pit-free dates are more versatile in recipes. Whether you’re using them in smoothies, baking, or cooking, pitted dates are easier to incorporate into your dishes. You won’t need to worry about dealing with the pits during food preparation.
- Even Freezing: When you remove the pits from dates, you create a consistent texture throughout the fruit. This is especially important when freezing dates, as it allows them to freeze more evenly. Dates with pits can develop ice crystals around the pit area, potentially affecting the overall quality and texture of the fruit.
Here’s a step-by-step guide on how to remove the pits from dates:
- Using a small, sharp knife, make a lengthwise slit along one side of each date, starting from the stem end and ending at the opposite tip.
- Gently open the date by pulling it apart along the slit. You should be able to see the pit inside.
- Carefully remove the pit using the tip of your knife or your fingers. Be cautious not to damage the date’s flesh while doing so.
- Once the pit is removed, gently press the date back together, if needed, to ensure it retains its original shape.
- Taking the time to remove the pits from your dates before freezing them ensures a more enjoyable and hassle-free eating experience. It also helps maintain the uniformity of the fruit during freezing, preserving both its taste and texture. With pit-free dates, you’ll have a versatile ingredient ready for various culinary creations.
Can I freeze dates with the pits still in them?
Freezing dates with pits is possible but not recommended. While the pits themselves are edible, freezing dates with pits can make them challenging to use in recipes or enjoy as a snack. Removing the pits before freezing ensures a more convenient and versatile experience when incorporating dates into your culinary endeavors.
Can I freeze dates in halves or slices?
Yes, you can freeze dates in halves or slices. Flash-freeze them on a baking sheet in a single layer to prevent clumping, then transfer them to airtight containers or bags. This method allows for convenient portioning and use in recipes without the need to thaw a whole date block.
Step 4: Arrange the dates for freezing
Now that your dates are washed, dried, and pit-free, it’s time to prepare them for the freezing process. Properly arranging the dates on a baking sheet or tray is a crucial step in ensuring that they freeze individually and remain in excellent condition. Here’s why this step is essential:
- Prevent Clumping: Dates have a natural stickiness due to their high sugar content. When you place them in a container or bag without first freezing them individually, they are likely to clump together. This can make it challenging to separate them when you want to use them, and it can also cause them to lose their shape and become mushy during the thawing process.
- Even Freezing: By arranging the dates on a baking sheet or tray, you ensure that each date is exposed to the cold air in the freezer. This allows them to freeze evenly and maintain their individual shapes and textures. When you eventually use frozen dates in your recipes, you’ll appreciate their consistent quality.
- Easy Portioning: Properly arranging the dates for freezing also makes it easier to portion them out later. Whether you need just a few dates for a smoothie or a larger quantity for baking, you can remove the exact number you need without thawing the entire batch.
Here’s how to arrange the dates for freezing:
- Prepare a Baking Sheet or Tray: Line a baking sheet or tray with parchment paper or a silicone baking mat. This prevents the dates from sticking to the surface and makes them easier to remove after freezing.
- Single Layer: Place the pitted dates on the prepared baking sheet or tray in a single layer. Ensure that there is some space between each date, so they are not touching or overlapping. This spacing prevents them from freezing together.
- Even Spacing: If necessary, you can use your fingers or a utensil to arrange the dates with equal spacing between them. This step ensures that they freeze individually.
- Open Freezer Space: Before placing the baking sheet or tray in the freezer, make sure there is enough open space in your freezer to accommodate it. The dates need ample room for proper freezing.
Step 5: Flash-freeze the dates
Flash-freezing is a critical step in the process of freezing dates that ensures they retain their individual integrity and remain easy to work with. By following this step, you’ll prevent the dates from clumping together, making it convenient to use just a few at a time without thawing the entire batch. Here’s why flash-freezing is essential:
- Preserve Individuality: Dates, as mentioned earlier, can become sticky when frozen due to their natural sugar content. Flash-freezing ensures that each date freezes individually. This prevents them from sticking together, which would make them difficult to separate and use in recipes later.
- Prevent Freezer Burn: Flash-freezing also helps prevent freezer burn. When you place dates directly in a container or bag without initial freezing, any moisture on the surface of the fruit can form ice crystals. These ice crystals can lead to freezer burn, affecting the taste and texture of the dates.
- Ease of Portioning: Flash-freezing allows you to easily portion out the exact quantity of dates you need for a particular recipe. Since the dates are individually frozen, you can remove them one by one without having to thaw the entire batch.
Here’s how to flash-freeze the dates:
- Place the Baking Sheet or Tray in the Freezer: Carefully transfer the baking sheet or tray of arranged dates into the freezer. Ensure it is on a flat surface so that the dates remain in a single layer.
- Leave to Freeze for 1 to 2 Hours: Allow the dates to remain in the freezer for about 1 to 2 hours. This duration may vary depending on your freezer’s temperature and the quantity of dates being frozen. The goal is to freeze them until they are solid.
- Check for Firmness: After the specified time, check the dates for firmness. They should feel solid and cold to the touch.
- Remove and Proceed: Once the dates are sufficiently frozen, you can take them out of the freezer. They are now ready to be packaged for long-term storage.
Step 6: Package and seal the dates
After successfully flash-freezing your dates, it’s essential to transfer them into proper storage containers to maintain their quality during long-term freezing. This step involves using airtight containers or freezer-safe resealable bags and ensuring minimal air exposure. Here’s why this step is crucial:
- Preserve Quality: Proper packaging helps protect the frozen dates from moisture and air, which are the main culprits behind freezer burn. Freezer burn can affect the texture, taste, and overall quality of the dates, making them less enjoyable to eat or use in recipes.
- Prevent Odor Absorption: Airtight packaging also prevents the dates from absorbing any unwanted odors from other items in the freezer. Dates can easily take on the flavors of nearby foods, affecting their natural taste.
- Extend Shelf Life: By sealing the dates tightly, you extend their shelf life in the freezer. Well-packaged dates can remain in good condition for up to a year or longer, allowing you to enjoy them whenever you need them.
Here’s how to package and seal the frozen dates properly:
- Select Airtight Containers or Resealable Bags: Choose containers or bags specifically designed for freezing. These should be airtight and made of materials that won’t allow moisture or air to penetrate.
- Portion the Dates: If you have a large quantity of dates, consider portioning them into smaller batches based on your typical usage. This way, you can take out just the amount you need without exposing the entire batch to the air.
- Transfer the Dates: Carefully transfer the flash-frozen dates into the chosen containers or bags. Ensure they are in a single layer or separated by parchment paper or plastic wrap to prevent clumping.
- Minimize Air Exposure: Press out as much air as possible before sealing the containers or bags. This can be done by gently squeezing the bags or using a vacuum sealer if available. The goal is to create a vacuum-like seal that limits air contact with the dates.
- Seal Tightly: Seal the containers or bags tightly to prevent any air from entering. If using bags, make sure the zipper or seal is securely closed. For containers, double-check that the lids are sealed properly.
Step 7: Label and date the packages
Labeling and dating your frozen date packages is a simple yet crucial step in the freezing process. This step ensures that you can keep track of the dates’ freshness and use them in a systematic manner, following the “first-in, first-out” (FIFO) principle. Here’s why it’s so important:
- Freshness Monitoring: Dates, like most frozen foods, have a limited shelf life in the freezer. Labeling and dating your packages help you monitor how long they’ve been stored. This information is vital because frozen foods can degrade in quality over time, affecting taste and texture. By knowing when you froze them, you can make informed decisions about their use.
- Prevent Food Waste: FIFO is a widely recommended practice in food storage, ensuring that older items are used before newer ones. This helps prevent food waste by ensuring that you consume your frozen dates before they deteriorate in quality.
- Efficient Meal Planning: Having labeled and dated packages allows you to plan your meals more efficiently. You can incorporate frozen dates into your recipes or snacks, knowing exactly when they were frozen and how long they’ve been in the freezer.
Here’s how to label and date your frozen date packages effectively:
- Use Permanent Marker: Choose a permanent marker with a fine tip for clear labeling. Avoid using regular pens or markers that may smudge or fade over time.
- Write the Date: On each container or bag, write the date you froze the dates. Include the day, month, and year for accuracy.
- Be Specific: Be as specific as possible with your labeling. For example, if you’re freezing different batches of dates on the same day, label them with additional information, such as “Batch 1,” “Batch 2,” etc.
- Place the Label Clearly: Ensure that the label is clearly visible and won’t be easily rubbed off or obscured during storage.
- Organize in FIFO Order: When placing your labeled and dated packages in the freezer, arrange them in a way that allows you to access the oldest dates first. This ensures that you use them before newer batches.
Step 8: Store in the freezer
After carefully preparing and packaging your dates for freezing, the final step is to store them in your freezer. Proper storage in the freezer is essential to maintain the quality of the dates over an extended period. Here’s why this step is crucial:
- Maintain Temperature: Freezers are designed to maintain consistently low temperatures, which is essential for preserving the quality of frozen foods. Storing your dates in the freezer ensures that they remain frozen and safe to eat for an extended period.
- Prevent Thawing and Refreezing: Fluctuations in temperature can lead to thawing and refreezing, which can negatively impact the texture and flavor of frozen foods, including dates. By storing your dates in a consistently cold part of the freezer, you minimize the risk of these temperature fluctuations.
- Minimize Moisture and Air Exposure: Proper freezer storage also helps minimize exposure to moisture and air, which can lead to freezer burn and a degradation in the quality of the dates. When stored in airtight containers or bags, your dates are protected from these potential issues.
Here’s how to store your frozen date packages in the freezer effectively:
- Choose a Suitable Location: Select a spot in your freezer that maintains a consistently low temperature. Avoid placing the packages near the freezer door or in an area that experiences frequent temperature changes when the door is opened and closed.
- Keep Dates Upright: When placing your containers or bags in the freezer, keep them upright to prevent any leakage or spills. Ensure they are securely placed and won’t tip over.
- Maintain FIFO Order: Continue following the “first-in, first-out” (FIFO) principle by arranging your packages so that the oldest dates are easily accessible. This ensures that you use them before newer batches.
- Avoid Overcrowding: Avoid overfilling your freezer with items, as this can lead to poor air circulation and uneven cooling. Leave enough space around your date packages for proper airflow.
- Check the Temperature: Periodically check and monitor the temperature of your freezer to ensure it remains at the recommended freezing temperature, which is typically around 0°F (-18°C). This will help maintain the quality of all frozen foods, including your dates.
How long can dates last in the freezer?
Dates can last in the freezer for up to 12 months or longer when stored properly in airtight containers or freezer-safe bags. Maintaining a consistently low freezer temperature and minimizing exposure to air and moisture are key factors in preserving their quality over an extended period. Regularly labeling and dating the packages can help ensure that you use the oldest dates first.
Other related questions
How do I defrost dates?
To defrost dates, simply transfer them from the freezer to the refrigerator and leave them there for several hours or overnight. Alternatively, you can place them at room temperature for a shorter period. Avoid using a microwave or hot water as these methods can alter the texture and flavor of the dates.
Can I refreeze dates?
Refreezing dates is generally not recommended due to potential quality loss. When dates thaw, they may become mushy or develop undesirable textures. To maintain their quality, it’s best to use them within a short period after thawing rather than refreezing.
How do I know if the dates have gone bad after being frozen?
Dates that have gone bad after freezing may exhibit signs of freezer burn, such as dry, discolored, or toughened areas. Additionally, if they develop an off-putting odor or unusual taste, it’s an indication of spoilage. Properly stored frozen dates can maintain their quality for an extended period, so regular inspection for these signs is essential to ensure their edibility.
What are some creative ways to use frozen dates?
Frozen dates can be creatively used in various culinary applications. They can be blended into smoothies to add natural sweetness and thickness, incorporated into energy bars or balls for a nutritious snack, or used as a natural sweetener in baked goods like muffins and cookies. Additionally, frozen dates can be chopped and sprinkled over yogurt or oatmeal for added flavor and texture. Their versatility makes them a valuable ingredient in both sweet and savory dishes.
Can I freeze dates that are already stuffed or filled with ingredients like nuts or cheese?
Freezing stuffed dates, such as those filled with nuts or cheese, is possible, but there are some considerations. The texture of the filling may change slightly upon freezing and thawing, potentially becoming firmer. Ensure the stuffed dates are well-sealed in an airtight container or freezer-safe bag to prevent moisture and air exposure, which can lead to freezer burn. It’s advisable to test a small batch first to assess the quality of the filling after freezing before freezing a larger quantity.
Are there any special considerations for freezing Medjool dates compared to other date varieties?
Freezing Medjool dates follow the same general principles as other date varieties. However, due to their large size and higher moisture content, Medjool dates may retain their natural softness and texture better after freezing. It’s important to maintain proper packaging and storage practices to preserve their quality, just as you would with other date varieties. Whether you’re freezing Medjool dates or other date types, ensure they are stored in airtight containers or freezer-safe bags and labeled with the freezing date for optimal results.
Should I add any preservatives before freezing dates?
Adding preservatives before freezing dates is typically unnecessary. Dates naturally have a long shelf life, and freezing them in proper airtight containers or bags is sufficient to maintain their quality. Preservatives are seldom used and may alter the taste or texture of the dates, making them less suitable for various culinary applications.
Can I freeze dates in a sugar syrup or honey solution?
Freezing dates in a sugar syrup or honey solution is possible, but it may alter their texture and sweetness. The added liquid can cause the dates to become softer and stickier during the freezing process. It’s generally recommended to freeze dates without additional liquids to maintain their versatility for various culinary uses.

