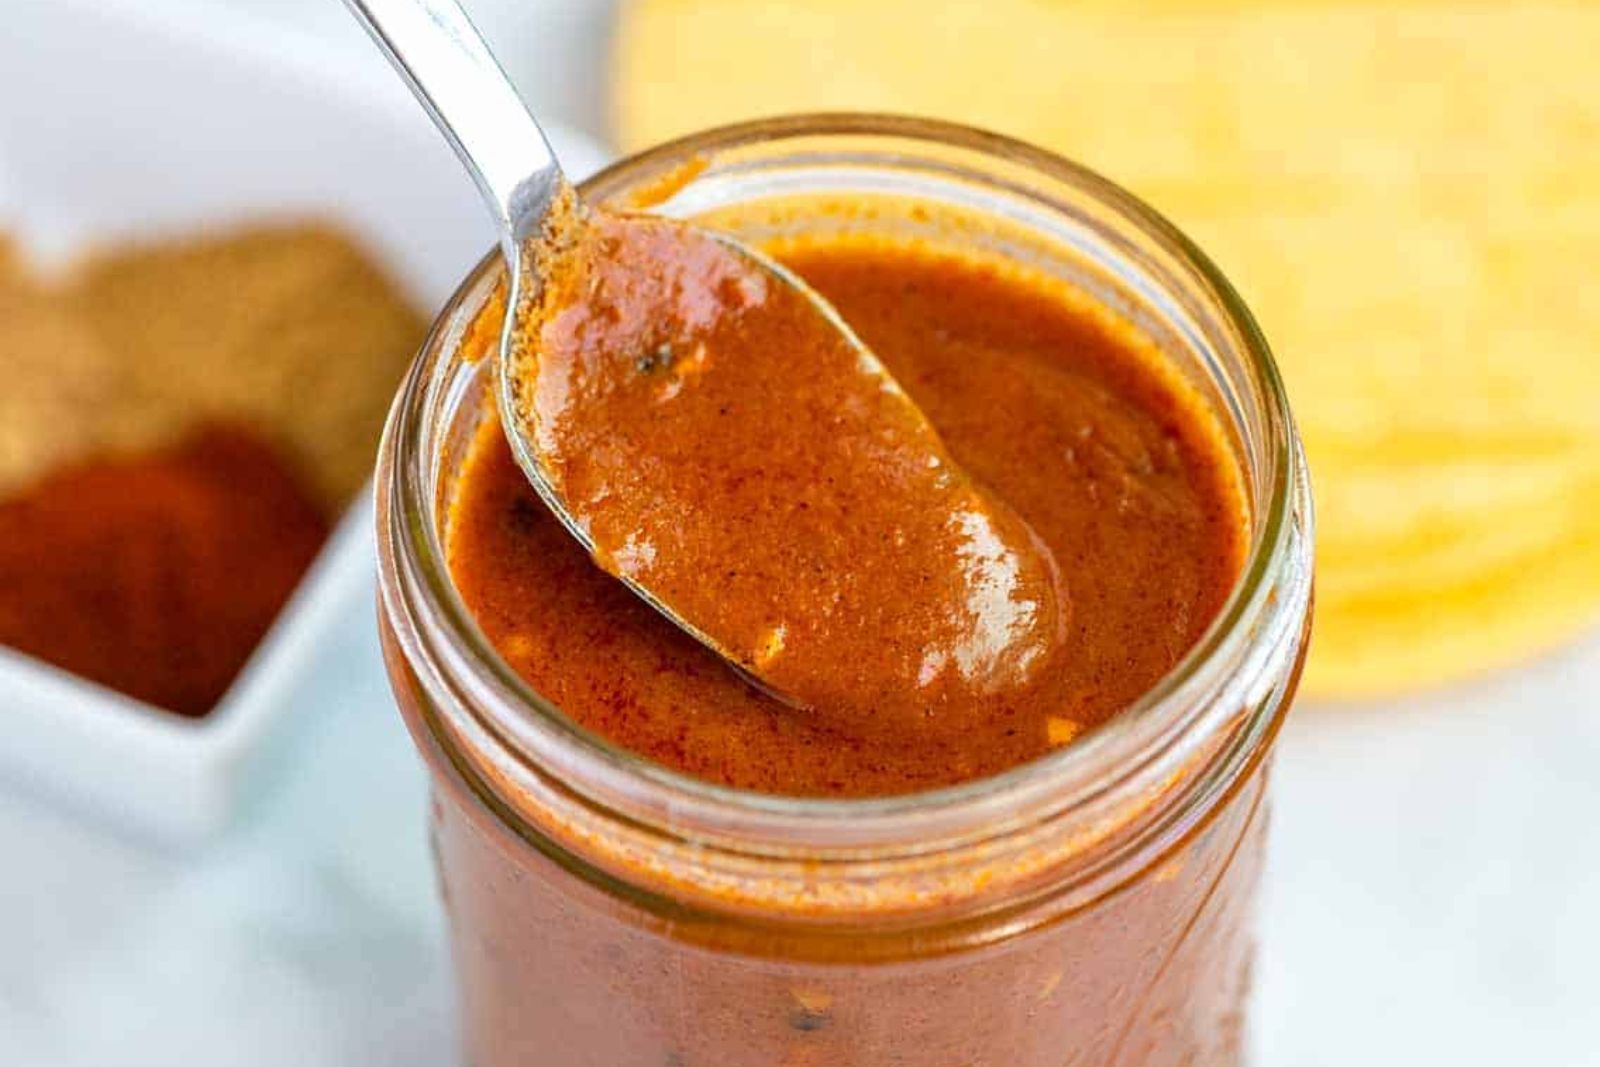
Enchilada sauce is a flavorful and versatile condiment often used in Mexican cuisine to add a rich and spicy kick to various dishes. Whether you’ve made a large batch of homemade enchilada sauce or have store-bought sauce that you’d like to preserve, freezing is an excellent option to extend its shelf life and have it ready whenever you’re craving that delicious South-of-the-border taste. This article outlines a step-by-step process for freezing enchilada sauce while maintaining its taste and quality for future use.
Here’s a comprehensive guide on how to freeze enchilada sauce:
Step 1: Prepare the enchilada sauce
Before you embark on the process of freezing enchilada sauce, it’s crucial to have the sauce itself ready to go. Whether you’re whipping up a homemade batch brimming with your preferred combination of spices and flavors or opting for a store-bought version, the key lies in ensuring that the sauce is cooked to perfection and seasoned just the way you love it. This step is the foundation for a successful freezing endeavor, as the quality of your sauce prior to freezing greatly impacts its taste and texture after thawing.
- Homemade Enchilada Sauce: If you’re taking the DIY route, start by gathering your choice of ingredients such as tomatoes, chili peppers, onions, garlic, and a medley of spices. Saute the aromatics, blend the ingredients into a smooth mixture, and let the sauce simmer to develop its flavors. Ensure that it has reached the desired consistency – not too thin or too thick – before you deem it ready for freezing.
- Store-Bought Enchilada Sauce: If you’re working with a pre-made sauce, be it for reasons of convenience or time constraints, inspect the packaging to ensure that it hasn’t been compromised and is well within its expiration date. Heat the sauce according to the instructions provided, giving it a good stir to distribute any settled flavors. If needed, you can add a personal touch by incorporating extra spices, herbs, or even a dash of lime juice to elevate its taste.
Once your enchilada sauce is prepared, allow it a moment to cool slightly. This step is important as freezing hot or warm liquids can result in uneven freezing and potentially cause condensation, which might affect the sauce’s texture when thawed. A brief cooling period also prevents temperature shocks in the freezer that could alter the quality of your sauce over time.
Step 2: Choose your freezing containers
When it comes to freezing enchilada sauce, the right choice of containers plays a significant role in maintaining its taste and quality during its time in the freezer. The selection of containers depends on your preferences, available resources, and how you envision using the sauce after it’s thawed. Here’s a breakdown of the options and considerations for each:
- Airtight Plastic Containers: Airtight plastic containers are a popular choice for freezing sauces due to their convenience and durability. They come in various sizes, allowing you to portion the enchilada sauce according to your needs. These containers effectively prevent freezer burn and keep the sauce well-sealed, preserving its flavor and texture. Make sure to choose containers that are specifically labeled as freezer-safe to withstand the low temperatures without becoming brittle or cracking.
- Glass Jars: Glass jars, such as mason jars, are another viable option for freezing enchilada sauce. They provide a visually appealing way to store your sauce and allow you to see its vibrant colors. However, it’s important to exercise caution when using glass jars, as liquids expand as they freeze, and the glass might crack if the sauce is filled to the brim. Leave some space at the top to accommodate expansion, and avoid using jars with narrow necks, which might be prone to breaking due to pressure changes.
- Freezer-Safe Plastic Bags: Freezer-safe plastic bags are a space-saving choice that’s particularly convenient for portioning. They can be laid flat to freeze, which facilitates quicker thawing. These bags are especially handy when you want to freeze smaller quantities of enchilada sauce or if you have limited freezer space. Opt for high-quality bags that are designed to resist punctures and tears.
Before transferring the enchilada sauce to any container, ensure that the chosen containers are clean and dry. Any residual moisture could lead to ice crystals forming within the sauce, affecting its texture. Additionally, labeling the containers with the date of freezing helps you keep track of the sauce’s storage duration, making it easier to manage your freezer inventory.
Can I freeze enchilada sauce in aluminum foil?
Freezing enchilada sauce in aluminum foil is not recommended. Aluminum foil may not provide sufficient protection against freezer burn and moisture. Opt for airtight containers or freezer-safe bags to maintain sauce quality during freezing.
Step 3: Portion the sauce
Careful portioning of your enchilada sauce before freezing is a strategic step that maximizes convenience and minimizes wastage. By estimating the amount of sauce you typically use in one go and dividing it into serving-sized portions, you set yourself up for a hassle-free experience when it’s time to thaw and use the sauce. This thoughtful approach ensures that you have the perfect amount available without having to thaw the entire batch.
- Determine Serving Sizes: Before you begin portioning, consider the dishes or recipes in which you commonly use enchilada sauce. Do you usually require a small amount for tacos, or a larger quantity for a casserole? By understanding your usage patterns, you can decide on appropriate serving sizes.
- Minimize Thawing: Freezing the sauce in individual or small portions allows you to defrost only the amount you need for a particular meal. This prevents the need to thaw an entire container and risks ending up with excess sauce that might go to waste. Plus, it expedites the thawing process, as smaller portions thaw more quickly than a large, frozen block of sauce.
- Easy Meal Preparation: Pre-portioned enchilada sauce is a time-saving asset during meal preparation. You can seamlessly incorporate it into your recipes without the hassle of thawing and measuring. Whether you’re sautéing vegetables or assembling a plate of enchiladas, having the right amount of sauce at your fingertips streamlines the cooking process.
- Variety and Flexibility: Portioning enables you to experiment with different recipes without committing to using a substantial amount of sauce. You can keep various serving sizes to match the diversity of your culinary creations. This approach encourages culinary exploration while minimizing the potential for food waste.
To execute this step effectively, start by determining the serving sizes that suit your cooking habits. Use small containers, freezer-safe bags, or even ice cube trays to portion the sauce.
Step 4: Fill the containers
As you transition to the stage of filling your selected containers with the flavorful enchilada sauce, it’s essential to proceed with a focus on precision and foresight. This step involves a delicate balance between achieving the desired portion size and allowing sufficient space within the container for the sauce to expand as it freezes. This thoughtful approach safeguards against potential spillage and texture alteration caused by improper freezing conditions.
- Maintaining Portion Accuracy: Whether you’re working with small airtight plastic containers, glass jars, or flexible plastic bags, the first consideration is to fill each one with the intended serving size of enchilada sauce. This accuracy ensures that you’ll have the ideal amount of sauce available when you decide to use it, without any need for additional measurements.
- Allowing Space for Expansion: The process of freezing involves the transformation of liquids into solid ice, which causes the volume of the sauce to expand. Neglecting to leave enough room for expansion can lead to the container cracking or bursting open, making a mess within the freezer and potentially compromising the texture of the sauce. To prevent this, leave some space at the top of the container. For airtight containers, about an inch or two of empty space is usually sufficient. In the case of plastic bags, ensure that there’s enough room left at the top before sealing.
- Safeguarding Quality: Properly filling the containers with the right amount of enchilada sauce while leaving adequate expansion room contributes to maintaining the sauce’s taste, texture, and overall quality. By preventing overfilling and understanding the expansion dynamics of freezing liquids, you’re creating the optimal environment for preserving the sauce in its most appealing state.
- Choosing the Right Technique: Depending on the container type, you can choose between ladling or pouring the sauce. For larger containers like jars or plastic containers, using a ladle can help you control the process and avoid spills. For smaller portions or bags, a steady pour works well, ensuring that the sauce fills evenly without splattering.
When filling the containers, take your time and work deliberately. It’s worth the extra effort to ensure that each container is filled accurately and has the necessary space for expansion. This diligence sets the stage for successful freezing and, ultimately, the enjoyment of your enchilada sauce in its full, flavorful glory.
Step 5: Seal and protect
As you transition from filling your chosen containers with the delectable enchilada sauce, the next crucial step is to ensure that the containers are securely sealed. Proper sealing is not only about keeping the sauce contained; it’s a key factor in safeguarding the sauce’s taste, texture, and overall quality during its time in the freezer. The sealing process varies depending on the type of container you’re using, so let’s delve into the specifics.
- For Containers with Lids: If you’ve opted for airtight plastic containers or glass jars equipped with lids, this is the moment to secure them tightly. Ensure that the lids are properly aligned with the containers and fit snugly. The goal is to create an airtight seal that prevents any air or moisture from entering the container. This sealing action acts as a protective barrier, shielding the enchilada sauce from potential freezer burn and maintaining its original flavor.
- For Plastic Bags: When using freezer-safe plastic bags, sealing involves an additional step to ensure the best preservation outcome. As you gently pour the sauce into the bag and reach the desired portion, it’s important to squeeze out as much excess air as possible before sealing. Air contains moisture, and in the cold environment of the freezer, this moisture can crystallize and lead to freezer burn – a condition that can affect the sauce’s taste, texture, and overall appeal.
- Preventing Freezer Burn: Freezer burn occurs when food is exposed to air in the freezer, causing moisture to evaporate from the surface. This results in the formation of ice crystals that can alter the texture and flavor of the sauce. By creating a tight seal, whether with lids or by removing air from bags, you’re minimizing the risk of freezer burn and ensuring that your enchilada sauce remains as vibrant and delicious as the day you froze it.
- Maintaining Quality: Proper sealing isn’t just about avoiding freezer burn. It’s a key contributor to maintaining the enchilada sauce’s optimal quality throughout its freezing journey. When the sauce is well-sealed, it’s less susceptible to temperature fluctuations and moisture changes, both of which can impact its taste and texture.
Step 6: Label and date
As you move forward in your journey to freeze enchilada sauce, an often-overlooked yet crucial step is to label each container or bag with the date of freezing. While it might seem like a small detail, this practice holds significant benefits in terms of organization, quality control, and ensuring that you make the most of your frozen sauce.
- Organization and Easy Identification: The freezer can quickly become a maze of containers and bags, and without proper labeling, identifying the contents and their age can become a guessing game. By using a permanent marker to clearly label each container or bag with the date you froze the enchilada sauce, you’re granting yourself the gift of instant recognition. This makes it easy to locate the sauce you need and make informed choices about its usage.
- Quality Control and Rotation: Frozen foods, including enchilada sauce, have a limited shelf life even when properly stored. By dating your frozen sauce, you’re establishing a reliable system for tracking its age. This empowers you to adhere to the principle of “first in, first out.” In other words, you can prioritize using the older sauce before moving on to the newer batches. This rotation system prevents the unfortunate scenario of discovering forgotten sauce that has been languishing in the freezer for too long.
- Maintaining Optimal Flavor: The act of labeling and dating might seem mundane, but it directly contributes to preserving the quality of the enchilada sauce. Over time, even frozen foods can experience flavor degradation due to factors like temperature fluctuations. By keeping track of the date of freezing, you’re equipped to use the sauce within its prime window of taste, ensuring that your culinary creations maintain the same deliciousness you expect.
- Inventory Management: Labeling and dating extend beyond the realm of individual containers. They offer insight into your overall inventory of frozen enchilada sauce. If you’re a dedicated meal planner or enjoy keeping a well-stocked freezer, this practice helps you stay informed about how much sauce you have at your disposal and when it might be time to prepare a new batch.
- Reducing Waste: Ultimately, labeling and dating contribute to the goal of minimizing food waste. You’re empowered to make informed decisions about using the sauce, ensuring that you enjoy it at its best and don’t let any go to waste due to neglect or oversight.
Step 7: Freeze flat (for bags)
When it comes to freezing enchilada sauce in plastic bags, a strategic approach can make a significant difference in the organization and utilization of your freezer space. The technique of freezing the bags flat is a simple yet effective way to optimize storage, ensure even freezing, and streamline access to your frozen sauce. Here’s why this step matters:
- Uniform Freezing: Enchilada sauce, like any liquid, has a tendency to take on the shape of its container when it’s frozen. If you were to freeze a plastic bag filled with sauce in a random orientation, you might end up with unevenly distributed contents and an irregular shape. This can make the bags difficult to stack or store efficiently in your freezer.
- Space Efficiency: Freezing the bags flat addresses the issue of space in your freezer. By laying the bags on a baking sheet in a single layer, you allow them to freeze into a uniform, stackable shape. This means they can be easily arranged on shelves or stacked on top of each other without taking up excessive space.
- Ease of Access: When bags are frozen flat, they’re more manageable to handle and retrieve. You can slide them in and out of your freezer without wrestling with irregularly shaped containers. This level of accessibility simplifies meal prep and eliminates the frustration of having to shuffle through a jumble of frozen bags.
- Prevent Stickiness: If the enchilada sauce comes into contact with the exterior of the plastic bag while freezing, it might stick to the bag’s surface. This can cause inconvenience when you’re attempting to thaw the sauce. Freezing the bags flat mitigates this risk, ensuring that the sauce remains contained within the bag’s interior.
- Visual Clarity: Frozen bags that are laid flat offer clear visibility of their contents. You can easily identify the sauce and its quantity without having to handle each bag individually. This visual clarity is particularly helpful when planning your meals.
To execute this step, place the filled plastic bags on a baking sheet or tray in a single layer. Make sure the bags are spread out and not touching one another. Placing them in the freezer in this manner allows them to freeze evenly and in a consistent shape. Once they’re frozen solid, you can stack them vertically or horizontally in your freezer without worrying about them losing their shape or taking up excessive space.
Step 8: Store in the freezer
After diligently completing the previous steps of preparing, portioning, sealing, labeling, and freezing your enchilada sauce, the final act is to find a fitting home for your frozen treasures within the confines of your freezer. The way you store the sauce at this stage plays a pivotal role in maintaining its quality, accessibility, and overall integrity. Here’s why thoughtful freezer storage matters:
- Prevent Crushing: Frozen sauces, especially when stored in containers or bags, can be vulnerable to pressure and impact. Placing heavy items on top of them or overcrowding your freezer can lead to containers being crushed, which may damage both the packaging and the contents. Prioritize a designated area that ensures your frozen enchilada sauce is protected from such accidents.
- Ensure Accessibility: Opt for a spot within your freezer that grants easy access to your frozen sauce. This facilitates swift retrieval when you’re ready to incorporate the sauce into your culinary creations. An accessible location also encourages you to use the sauce more often, preventing the scenario where it gets forgotten or buried under other items.
- Temperature Stability: Certain areas of your freezer might experience temperature fluctuations due to their proximity to the freezer’s cooling elements or frequent opening and closing. These fluctuations can compromise the texture and taste of frozen foods, including your enchilada sauce. Aim to store your sauce away from such areas to ensure consistent freezing conditions.
- Strategic Organization: When storing your frozen enchilada sauce, consider the larger freezer context. Strategically organize your freezer space to accommodate different frozen items, allowing you to easily access a variety of foods without excessive reorganizing.
- Label Visibility: While this step is closely related to labeling, it’s important to reiterate that clear labeling and proper storage go hand in hand. Store your enchilada sauce containers or bags in a way that enables you to see their labels at a glance. This ensures that you can quickly identify the sauce and its date of freezing without having to handle each container.
- Rotation and Usage: Consider placing newer batches of enchilada sauce behind older ones to encourage rotation and prevent the sauce from remaining in the freezer for too long. This ensures that you consistently enjoy the freshest flavors and that none of your sauce goes to waste.
How long can frozen enchilada sauce be stored?
Frozen enchilada sauce can be stored for about 4 to 6 months while maintaining its quality. Beyond this time frame, flavor and texture might deteriorate, though it’s usually safe to consume. Proper packaging and labeling help manage storage duration.
Step 9: Thaw and use
As the moment arrives to savor the fruits of your frozen enchilada sauce preservation, the process of thawing and using the sauce is the final bridge between storage and culinary delight. Ensuring that you thaw the sauce correctly is crucial in preserving its flavors and textures. Here’s a step-by-step breakdown of how to achieve the best results:
- Transferring and Thawing: Begin by removing the desired quantity of frozen enchilada sauce from the freezer. If you’ve stored the sauce in containers, carefully transfer it to a bowl or saucepan. If using plastic bags, cut them open and empty the contents into a suitable container. The goal is to facilitate even thawing.
- Refrigerator Thawing: For the most controlled and gentle thawing process, place the container with the frozen sauce in the refrigerator. This method requires some patience as it might take several hours or overnight for the sauce to thaw completely. However, it ensures that the sauce thaws uniformly and retains its original flavors.
- Stovetop Thawing: If you’re looking to thaw the sauce more quickly, you can opt for stovetop thawing. Pour the frozen sauce into a saucepan and set it over low to medium heat. Gently warm the sauce, stirring occasionally to ensure even heating. Take care not to rush this process by using high heat, as it can cause the sauce to heat unevenly and potentially lead to overcooking or loss of flavor.
- Maintaining Consistency: Throughout the thawing process, whether in the refrigerator or on the stovetop, keep an eye on the sauce’s consistency. Stirring occasionally helps ensure even thawing and prevents any parts of the sauce from remaining frozen while others overheat. Aim to achieve the desired consistency – whether it’s a pourable texture for drizzling or a slightly thicker texture for spreading.
- Utilizing Thawed Sauce: Once the enchilada sauce is fully thawed, it’s ready to use in your recipes. Incorporate it into dishes such as enchiladas, tacos, or as a marinade for meats and vegetables. Remember that the thawed sauce should be used promptly. If you have leftover thawed sauce, it’s advisable to refrain from refreezing it, as this can affect both the flavor and texture.
Can I use frozen enchilada sauce directly in recipes without thawing?
Yes, using frozen enchilada sauce directly in recipes is possible. However, thawing before use yields better texture and flavor integration. Adjust cooking times as needed when using frozen sauce.
Other related questions
Can I refreeze enchilada sauce?
It is generally not recommended to refreeze enchilada sauce once it has been thawed. Repeated freezing and thawing can compromise its quality, resulting in changes in taste and texture. To maintain optimal flavor and texture, it’s advisable to thaw only the amount needed for use.
How do I know if the enchiladas sauce has gone bad after being frozen?
Signs of frozen enchilada sauce going bad include changes in color, texture, or odor. Freezer burn, ice crystals, or separation can indicate degradation. If unsure, use sensory cues – unusual smell, off color, or unusual texture – to determine if it’s still safe to use.
Can I use thawed sauce for cold dishes like dips?
Yes, thawed enchilada sauce can be used for cold dishes like dips. Ensure thorough refrigeration after thawing to prevent bacterial growth. Its flavor and consistency can enhance various cold preparations.
Can I freeze enchilada sauce with added cheese or dairy?
Freezing enchilada sauce with added cheese or dairy is possible but can alter texture upon thawing. Dairy may separate, affecting consistency. Consider adding cheese or dairy after thawing for better results.
Is it safe to freeze enchilada sauce with meat or vegetables?
Yes, it’s safe to freeze enchilada sauce with cooked meat or vegetables. Cook ingredients thoroughly before adding to the sauce, and cool everything before freezing. Proper storage prevents spoilage and maintains quality.

