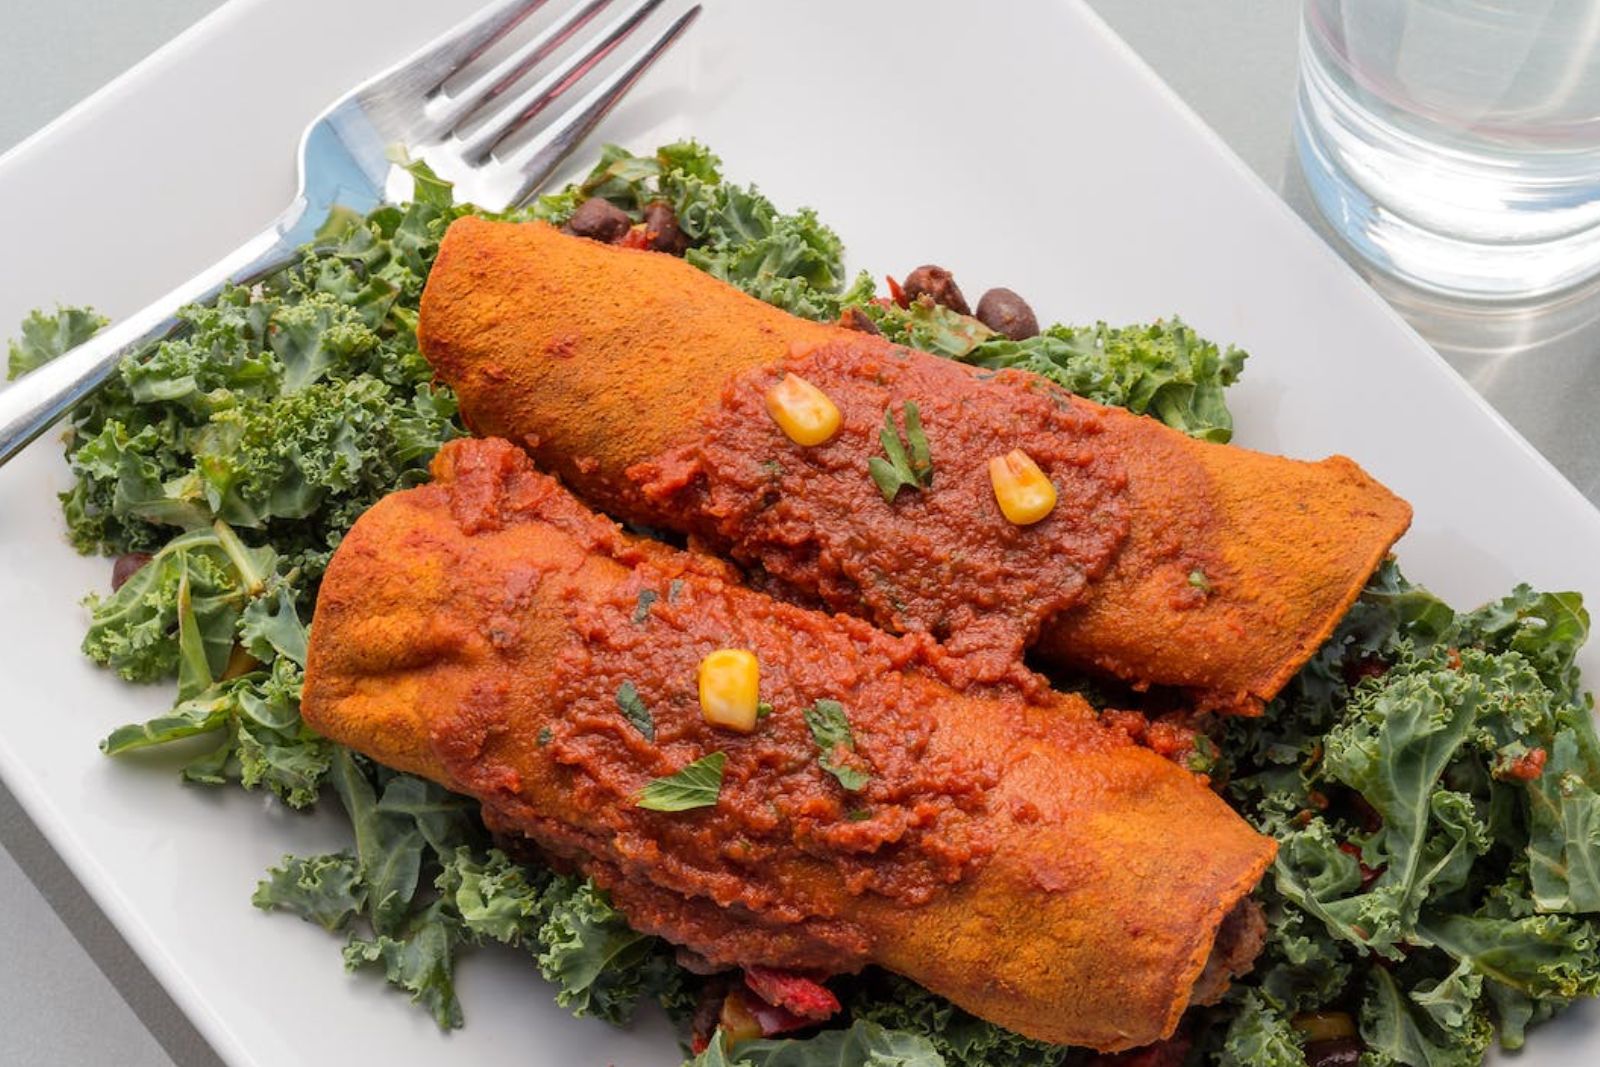
Enchiladas are a beloved Mexican dish that consists of tortillas filled with a variety of ingredients, such as meat, cheese, and vegetables, and then smothered in a flavorful sauce. Whether you have a surplus of enchiladas or want to prepare a batch in advance for future meals, freezing them can be a convenient option to preserve their deliciousness and extend their shelf life. In this article, we will guide you through the proper techniques for freezing enchiladas, ensuring they remain flavorful and ready to enjoy whenever you crave them.
Here are the steps to follow:
Step 1: Prepare the enchiladas
When it comes to freezing enchiladas, it’s crucial to start with properly prepared enchiladas. This involves assembling the enchiladas with your desired filling, which can vary based on personal preference and dietary restrictions. Popular fillings include seasoned meat, such as shredded chicken or beef, cheese, beans, or a combination of vegetables.
To assemble the enchiladas, you’ll need tortillas and your chosen filling. If you’re using store-bought tortillas, it’s a good idea to warm them slightly to make them more pliable. You can do this by placing them in a dry skillet over medium heat for a few seconds on each side or by microwaving them for a few seconds. If you’re using homemade tortillas, they may already be soft and ready to use.
Once you have warmed tortillas, spread a generous amount of the filling along the center of each tortilla. Be careful not to overfill, as this can make it challenging to roll the enchiladas tightly. The amount of filling will depend on the size of your tortillas and personal preference. Aim for a balance between having enough filling to create flavorful enchiladas without overstuffing them.
Next, carefully roll the tortilla tightly around the filling, ensuring the seam side is facing down. Placing the seam side down helps prevent the enchiladas from unraveling during the freezing and reheating process.
It’s essential to make sure the enchiladas are fully cooked before proceeding to the next step. This ensures that the ingredients are properly heated and any raw meat or vegetables are cooked through. You can bake the enchiladas in the oven according to your recipe’s instructions, usually at a moderate temperature for a specific duration. Cooking times may vary, so it’s crucial to follow the recipe or package instructions.
Step 2: Allow the enchiladas to cool
After cooking the enchiladas, it’s essential to allow them to cool down completely before proceeding with the freezing process. This step is crucial for several reasons.
Firstly, cooling the enchiladas helps prevent condensation from forming inside the packaging. When hot food is placed in a sealed container, moisture can accumulate as steam and then turn into ice crystals when frozen. This can lead to freezer burn, which can affect the taste and texture of the enchiladas. Freezer burn occurs when moisture evaporates from the food’s surface, leaving it dehydrated and resulting in a dry, unappetizing texture.
By allowing the enchiladas to cool down, you give the steam and excess moisture a chance to dissipate, reducing the chances of freezer burn. It also helps maintain the desired texture of the enchiladas during freezing.
Additionally, cooling the enchiladas before freezing them helps ensure food safety. When hot food is immediately placed in the freezer, it can raise the temperature inside the freezer and potentially affect the safety of other perishable items stored in it. By allowing the enchiladas to cool at room temperature, you prevent any potential risks to food stored in the freezer.
To cool the enchiladas, remove them from the oven and place them on a wire rack or a heat-resistant surface. This allows air to circulate around the enchiladas, helping them cool down more quickly and evenly. It’s best to avoid stacking the enchiladas while they’re still hot, as this can trap heat and moisture, prolonging the cooling process.
The cooling time will vary depending on the size and thickness of the enchiladas. As a general guideline, allow them to cool for at least 30 minutes to an hour before proceeding with the next steps of the freezing process. Ensuring that the enchiladas are completely cooled before freezing helps maintain their quality and prevents potential issues during storage.
Step 3: Wrap each enchilada individually
Once the enchiladas have cooled down completely, the next step in the freezing process is to wrap each enchilada individually in plastic wrap. This step is essential for several reasons.
Wrapping each enchilada individually provides several benefits when it comes to freezing, thawing, and reheating. Here’s why:
- Convenience and Portion Control: Wrapping each enchilada individually allows for convenient portion control. You can freeze as many enchiladas as you desire and easily thaw and reheat them one by one, depending on your needs. This way, you don’t have to thaw and reheat an entire batch if you only want to enjoy a single enchilada.
- Easy Thawing: Individual wrapping makes the thawing process more efficient. When enchiladas are wrapped individually, you can easily remove the desired number of portions from the freezer without having to thaw the entire batch. This flexibility is especially useful if you have varying appetites or want to enjoy enchiladas at different times.
- Prevents Sticking: Wrapping each enchilada individually helps prevent them from sticking together during freezing. When enchiladas are frozen in a single mass, they can fuse together, making it challenging to separate them without damaging their shape or appearance. By wrapping them individually, you ensure that each enchilada remains separate and intact.
When wrapping the enchiladas, use plastic wrap that is specifically designed for freezing. Start by placing an enchilada near one end of a sheet of plastic wrap. Gently roll the enchilada in the plastic wrap, tucking the sides as you go to create a tight seal. Continue rolling until the enchilada is completely wrapped, ensuring that the plastic wrap covers the enchilada from all sides, leaving no exposed areas.
Make sure the plastic wrap is tightly secured around the enchilada to prevent air from entering, which can lead to freezer burn. This will help maintain the enchiladas’ flavor, texture, and quality during freezing.
Step 4: Double-wrap with aluminum foil
Once you have individually wrapped the enchiladas in plastic wrap, the next step in the freezing process is to double-wrap them with aluminum foil. This additional layer of protection offers several benefits when it comes to preserving the quality of the enchiladas during freezing. Here’s why it is important to double-wrap with aluminum foil:
- Enhanced Protection: Aluminum foil acts as a barrier against air and moisture, providing enhanced protection for the enchiladas. It helps prevent freezer burn by minimizing the exposure of the enchiladas to cold, dry air. Freezer burn can cause dehydration and affect the texture and taste of the enchiladas. By double-wrapping with aluminum foil, you create an extra layer of insulation, reducing the risk of freezer burn and maintaining the enchiladas’ moisture.
- Prevents Odor Transfer: Aluminum foil also helps prevent odor transfer between different foods in the freezer. Enchiladas, especially when filled with aromatic ingredients such as spices and seasonings, can emit strong smells. Double-wrapping with aluminum foil creates a barrier that reduces the likelihood of these odors permeating other foods in the freezer. This ensures that your enchiladas retain their authentic flavor and aroma.
- Improved Freezing Efficiency: The double-wrap with aluminum foil helps improve the freezing efficiency of the enchiladas. It helps maintain a more consistent and controlled temperature around each individual enchilada, ensuring they freeze evenly. This is particularly important in preventing ice crystal formation and maintaining the quality of the enchiladas.
When double-wrapping with aluminum foil, ensure that the foil is tightly sealed around the enchiladas. This helps prevent air from entering and maintains a secure environment for freezing. You can fold the edges of the foil tightly around the enchiladas to create a sealed package. This will help preserve the enchiladas’ texture, flavor, and overall quality during their time in the freezer.
It’s important to note that while double-wrapping with aluminum foil provides additional protection, it is not mandatory. If you prefer to only use plastic wrap for freezing, it can still be effective. The double-wrapping step with aluminum foil is an extra precaution that can further enhance the preservation of the enchiladas.
Should I place enchiladas in a container after wrapping?
It is not necessary to place the individually wrapped enchiladas in a container after wrapping them. However, using a container can provide additional protection and organization in the freezer. If you choose to use a container, ensure it is freezer-safe and has a tight-fitting lid to prevent air and moisture from entering. Label the container with the contents and freezing date for easy identification.
Step 5: Label and date the package
After wrapping the enchiladas in double layers of plastic wrap and aluminum foil, it’s important to label and date the package. This step may seem simple, but it is crucial for maintaining organization and ensuring the quality and safety of the frozen enchiladas. Here’s why labeling and dating the package is essential:
- Contents Identification: By labeling the package with the name “Enchiladas,” you can easily identify its contents at a glance. This is particularly helpful if you have multiple types of frozen foods stored in your freezer. Clear labeling allows you to quickly locate the enchiladas when you’re ready to enjoy them.
- Date Tracking: Writing the current date on the package helps you keep track of how long the enchiladas have been in the freezer. This is especially important if you plan to store them for an extended period. Freezing can alter the taste and texture of foods over time, so knowing the freezing date allows you to prioritize consuming the oldest enchiladas first. This ensures that you enjoy them at their best quality and prevents them from being forgotten and potentially wasted.
- Inventory Management: Labeling and dating the package also helps with inventory management. By keeping track of what you have stored in the freezer and when you freeze them, you can better plan your meals and ensure you use the frozen enchiladas before their quality starts to decline. This practice helps minimize food waste and promotes efficient use of your freezer space.
To label the package, you can use a permanent marker or a label sticker. Write the word “Enchiladas” clearly on the package, and next to it, write the current date or the date of freezing. Place the label in a visible area on the package, such as the front or the top.
Step 6: Place the wrapped enchiladas in the freezer
After completing the previous steps of wrapping, double-wrapping, and labeling the enchiladas, it’s time to store them in the freezer. Proper placement and spacing within the freezer are important to ensure the enchiladas freeze efficiently and maintain their individual shape and quality. Here’s why this step is crucial:
- Avoiding Damage: Finding a flat surface or tray in the freezer to place the wrapped enchiladas helps prevent them from being squished or damaged by other items in the freezer. Placing them on a flat surface ensures that they maintain their shape and integrity during freezing. Avoid stacking or piling enchiladas on top of each other, as this can cause them to become misshapen or stick together.
- Individual Freezing: Allowing enough space between each enchilada ensures that they freeze individually. When foods freeze, ice crystals form, and if the enchiladas are too close together, these ice crystals can connect and cause the enchiladas to stick. By providing sufficient space, you promote individual freezing, which helps preserve the texture and integrity of each enchilada.
- Accessibility and Organization: Placing the wrapped enchiladas in an organized manner makes it easier to locate and access them when needed. A flat surface or tray allows you to arrange the enchiladas in a way that maximizes freezer space and makes it easier to see and retrieve specific portions without disturbing the others.
To store the wrapped enchiladas, find a flat surface or tray in your freezer. If you have a baking sheet or a shallow container, it can be useful for this purpose. Place the wrapped enchiladas on the surface or tray, ensuring they are spread out in a single layer and not touching each other. If you have a large number of enchiladas, you can use multiple trays or flat surfaces to accommodate them.
It’s important to note that once the enchiladas are frozen solid, you can rearrange them if needed. If you prefer to store them in a different container or freezer-safe bag for long-term storage, you can do so while ensuring they are still properly labeled and dated.
Step 7: Thaw and reheat
When you’re ready to enjoy the deliciousness of your frozen enchiladas, it’s time to thaw and reheat them. Proper thawing and reheating methods are essential to ensure the enchiladas are safe to eat and retain their flavor and texture. Here’s how to thaw and reheat frozen enchiladas:
Thawing:
- Start by removing the desired number of enchiladas from the freezer. To thaw them safely, transfer the wrapped enchiladas from the freezer to the refrigerator. Place them on a plate or a shallow dish to catch any condensation that may occur during thawing. Thawing enchiladas in the refrigerator is the recommended method as it allows for slow, even thawing while minimizing the risk of bacterial growth.
- It’s important to note that the thawing process takes time, so plan ahead. For best results, allow the enchiladas to thaw overnight in the refrigerator. This gradual thawing ensures that the enchiladas thaw evenly, maintaining their texture and minimizing any potential loss of flavor.
Reheating:
- Once the enchiladas are completely thawed, you can proceed to reheat them. The preferred method for reheating enchiladas is using the oven. Preheat the oven to a low temperature, typically around 325°F (163°C). Remove the plastic wrap and aluminum foil from the thawed enchiladas before reheating.
- Place the enchiladas on a baking sheet or in a baking dish, and cover them with aluminum foil to prevent them from drying out. Heating them at a lower temperature allows for gentle reheating, ensuring that the enchiladas heat through evenly without becoming overly dry or losing their texture.
Reheat the enchiladas in the preheated oven for about 20 to 30 minutes or until they are heated through. If desired, you can remove the foil during the last few minutes of baking to allow the top of the enchiladas to crisp up slightly.
- Checking for Doneness: To ensure the enchiladas are properly reheated, check their internal temperature using a food thermometer. The internal temperature should reach 165°F (74°C) to ensure that they are heated through and safe to eat.
- Once the enchiladas have reached the desired temperature, remove them from the oven and let them cool for a few minutes before serving. Garnish with your favorite toppings, such as salsa, sour cream, or fresh cilantro, and enjoy!
Other related questions
How long can I keep frozen enchiladas in the freezer?
When properly stored, frozen enchiladas can be kept in the freezer for up to three months. Beyond this period, their quality may start to deteriorate. It’s always a good practice to label and date the packages, allowing you to keep track of their storage time and consume the oldest enchiladas first.
Can I refreeze enchiladas?
No, it is generally not recommended to refreeze enchiladas. Refreezing can compromise the texture, flavor, and overall quality of the enchiladas as it leads to moisture loss and potential bacterial growth. It is best to consume thawed enchiladas promptly or store them in the refrigerator for a short period before reheating and consuming.
How do I know if the enchiladas have gone bad after being frozen?
To determine if frozen enchiladas have gone bad, examine their appearance, smell, and texture. Look for any signs of freezer burn, such as dry or discolored areas on the enchiladas. If there are significant changes in texture, such as sogginess or excessive dryness, or if they emit an off-putting odor, it is best to discard them to avoid potential foodborne illnesses. When in doubt, trust your senses and prioritize food safety.
Can I freeze enchiladas with sauce?
Yes, you can freeze enchiladas with sauce. However, it’s important to note that the texture of the sauce may change slightly upon thawing and reheating. To maintain the best quality, consider freezing the enchiladas without the sauce and adding it after reheating.
Can I freeze enchiladas made with corn tortillas?
Absolutely! You can freeze enchiladas made with corn tortillas. However, it’s worth mentioning that corn tortillas may become slightly softer upon thawing. To minimize texture changes, you can partially cook the tortillas before assembling the enchiladas or choose to use flour tortillas, which tend to freeze and thaw better.
Can I freeze leftover enchiladas?
Absolutely! Freezing leftover enchiladas is a great way to minimize food waste. Follow the same freezing steps mentioned in the article, ensuring that they are properly wrapped and labeled. Enjoy the deliciousness of your enchiladas at a later time by thawing and reheating them following the recommended methods.
Can I freeze enchiladas with dairy-based fillings, such as cheese or sour cream?
Yes, you can freeze enchiladas with dairy-based fillings like cheese or sour cream. However, it’s important to note that the texture of the dairy products may change upon freezing and thawing. The cheese may become slightly crumbly, and the sour cream may separate. To minimize texture changes, consider adding fresh cheese or sour cream as toppings after reheating the frozen enchiladas.
Can I freeze enchiladas that contain fresh ingredients, like avocado or lettuce?
It is generally not recommended to freeze enchiladas that contain fresh ingredients like avocado or lettuce. Freezing can cause these ingredients to become watery, wilted, or mushy upon thawing. For the best quality, consider omitting or adding these fresh ingredients after reheating the frozen enchiladas.
Can I freeze enchiladas that have been topped with salsa or other condiments?
It is possible to freeze enchiladas that have been topped with salsa or other condiments, but it’s important to consider the condiment’s texture and quality after thawing. Salsa and similar condiments may become watery or lose their fresh flavor when frozen and thawed. To preserve their quality, it is recommended to add the condiments after reheating the frozen enchiladas for the best taste and texture.
Are there any special considerations when freezing enchiladas made with gluten-free tortillas?
When freezing enchiladas made with gluten-free tortillas, there are a few special considerations to keep in mind. Gluten-free tortillas can be more delicate and prone to becoming soggy or breaking apart upon thawing and reheating. To minimize texture changes, it is recommended to partially cook the tortillas before assembling the enchiladas. Additionally, consider using corn tortillas, which generally freeze and thaw better than gluten-free flour tortillas.

