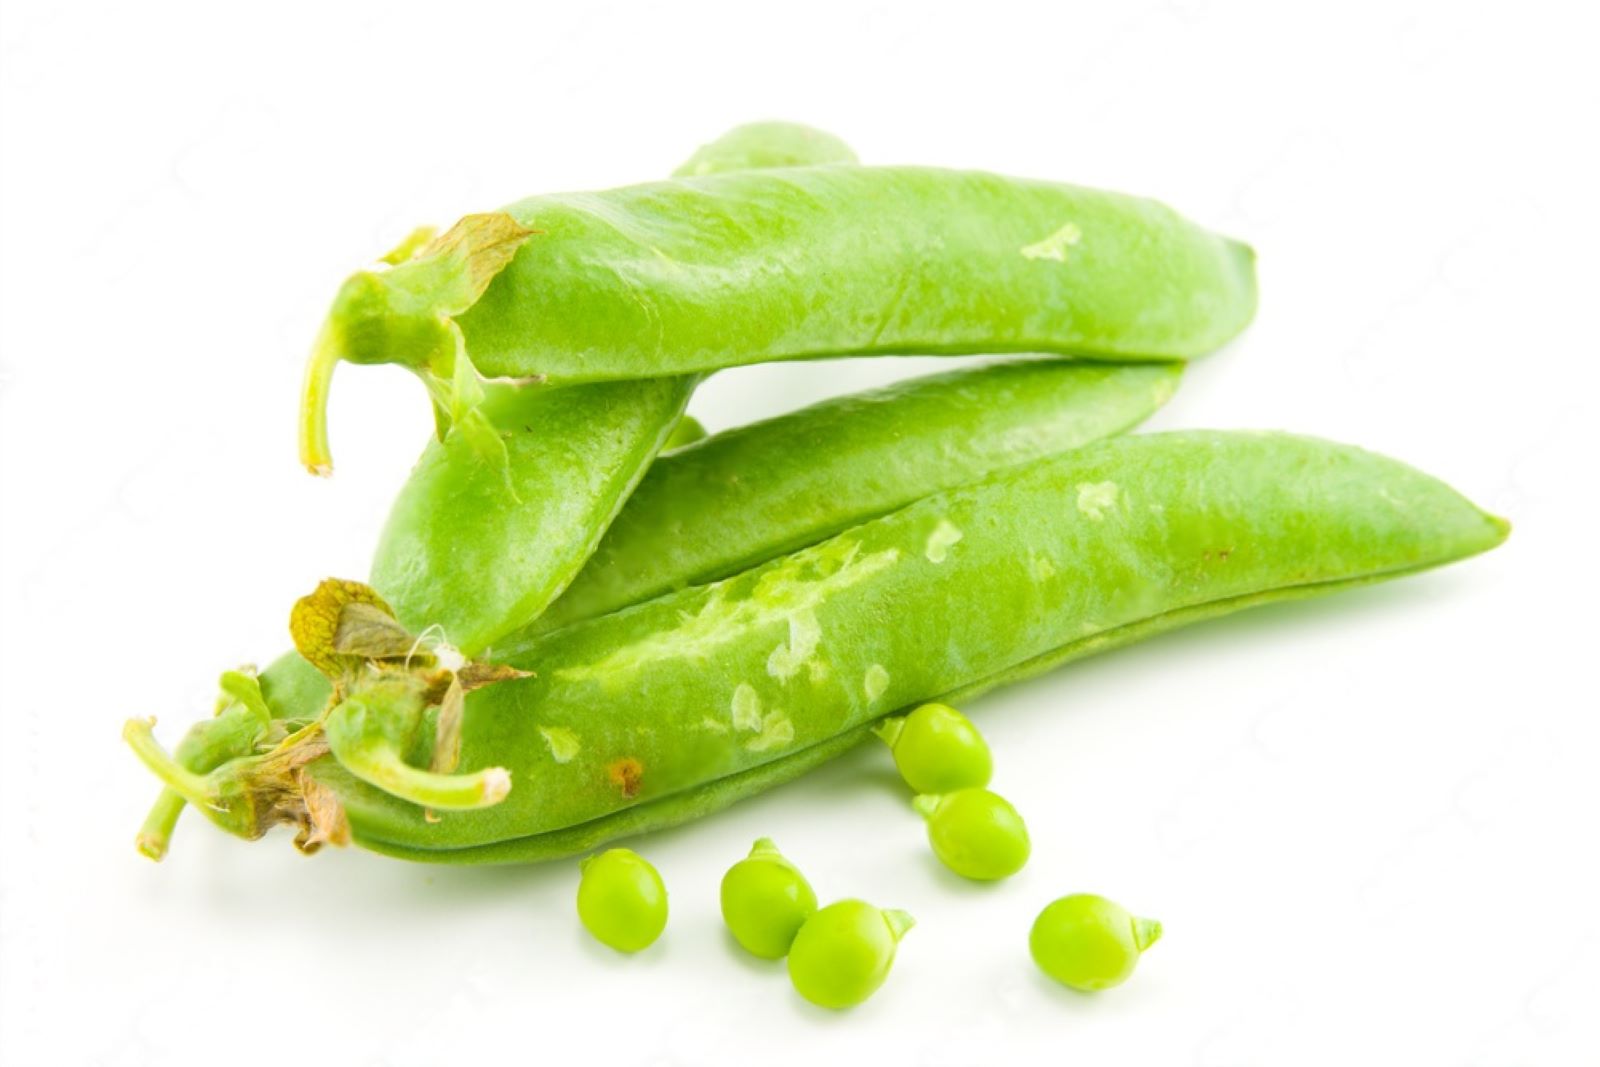
English peas, also known as garden peas, are a delightful and versatile vegetable that can be enjoyed in various dishes. These vibrant green peas are packed with nutrients and have a sweet, delicate flavor. Freezing English peas is an excellent way to preserve their freshness and extend their availability beyond their limited season. By following a simple process, you can freeze English peas while maintaining their desired texture and taste. This article offers a comprehensive guide on freezing English peas to ensure they retain their optimal quality for future enjoyment.
Here’s a step-by-step guide on how to freeze English peas:
Step 1: Select fresh English peas
When freezing English peas, it is crucial to begin with fresh and high-quality peas. The quality of the peas you select will directly impact the taste and texture of the frozen peas. Follow these guidelines to choose the best English peas for freezing:
- Firmness: Look for pea pods that feel firm when gently squeezed. Avoid pods that are overly soft or mushy, as they may indicate that the peas inside are past their prime.
- Plumpness: Opt for plump pea pods that appear well-filled with peas. Avoid pods that look shriveled or deflated, as they may contain underdeveloped or starchy peas.
- Vibrant green color: Choose pea pods that have a vibrant green color. This indicates freshness and ensures that the peas inside will have a bright and appetizing appearance.
- Avoid blemishes: Inspect the pea pods carefully for any signs of blemishes, spots, or discoloration. These can be indicators of spoilage or poor quality. Select only pods that are free from such imperfections.
Can you freeze English peas that have been seasoned or cooked with other ingredients?
Yes, you can freeze English peas that have been seasoned or cooked with other ingredients. However, it’s important to note that the texture and flavor of the peas may slightly change upon thawing and reheating. To freeze seasoned or cooked English peas, allow them to cool completely, then transfer them to airtight freezer-safe containers or bags. When reheating, consider gentle methods such as steaming or microwaving to help preserve their texture.
Step 2: Shell the peas
Once you have selected fresh English pea pods, the next step is to remove the peas from their pods. Shelling the peas is essential for freezing them, as it allows for better preservation and more convenient usage later on. Here’s why shelling is necessary and how to do it:
- Remove inedible parts: The outer pods of English peas are fibrous and tough, making them unsuitable for consumption. By shelling the peas, you separate the edible peas from the inedible pods.
- Quality control: Shelling the peas gives you the opportunity to inspect each pea individually. Discard any pods that are damaged, discolored, or have signs of mold or decay. Removing these compromised peas ensures that only the best quality ones are frozen, resulting in a superior end product.
- Enhanced freezing and cooking: Shelled peas freeze more effectively than peas still in their pods. The removal of the pods minimizes the risk of freezer burn and helps maintain the quality and flavor of the peas during storage. Shelling also facilitates even cooking when you eventually use the peas in recipes.
To shell the peas, follow these simple steps:
- Hold a pea pod firmly in one hand.
- Use your other hand to apply gentle pressure along the seam of the pod with your thumb.
- Continue running your thumb along the seam, exerting light pressure to open the pod.
- The pod should easily split open, revealing the peas nestled inside. If necessary, use your fingers to gently loosen the peas from the pod.
- Transfer the shelled peas to a clean bowl or container.
- Discard the empty pea pod.
Can you freeze English peas in their pods?
It is not recommended to freeze English peas in their pods. The pods are not suitable for freezing as they have a higher water content, which can lead to a poor texture and quality after thawing. It is best to shell the peas from their pods before freezing for optimal results.
Step 3: Blanch the peas
Blanching is an essential step in the process of freezing English peas. It involves briefly immersing the peas in boiling water, followed by a quick cooling in ice water. Blanching serves several important purposes in preserving the quality of the peas. Here’s why blanching is necessary and how to do it:
- Enzyme inactivation: Peas contain enzymes that can lead to color and flavor deterioration, as well as the loss of nutrients over time. Blanching deactivates these enzymes, helping to maintain the vibrant green color, texture, and flavor of the peas during freezing and storage.
- Surface sanitation: Blanching also helps remove any dirt, bacteria, or microorganisms present on the surface of the peas. The exposure to boiling water helps sanitize the peas, reducing the risk of spoilage and extending their shelf life.
- Retention of nutrients: While blanching causes minimal nutrient loss, it helps to preserve the overall nutritional value of the peas. The short cooking time ensures that the peas retain most of their vitamins, minerals, and other beneficial compounds.
To blanch English peas, follow these steps:
- Fill a large pot with water and bring it to a rolling boil. You’ll need enough water to fully submerge the peas.
- Carefully add the shelled peas to the boiling water. Make sure not to overcrowd the pot to ensure even cooking.
- Allow the peas to cook in the boiling water for about 1-2 minutes. The exact time may vary slightly depending on the size and freshness of the peas. Keep a close eye on them to prevent overcooking.
- Test the peas for doneness by removing one and biting into it. It should be bright green and slightly tender, with a crisp texture.
- Once the peas are blanched, quickly remove them from the boiling water using a slotted spoon or a sieve.
- Immediately transfer the blanched peas to a bowl or basin filled with ice water. This stops the cooking process and rapidly cools down the peas.
- Allow the peas to cool in the ice water for the same amount of time they were blanched, typically 1-2 minutes. This helps to preserve their crispness and vibrant color.
- Drain the peas thoroughly after they have cooled, ensuring there is no excess moisture. This helps prevent the formation of ice crystals during freezing, which can lead to freezer burn.
Is it okay to freeze English Peas without blanching them first?
It is generally recommended to blanch English peas before freezing them for optimal results. Blanching helps preserve their flavor, texture, and color by deactivating enzymes that can cause deterioration. It also helps to maintain the peas’ nutritional value. While it is possible to freeze English peas without blanching, they may experience a loss in quality, including a potential decrease in taste, texture, and overall appearance. Blanching is a simple and effective step to ensure the best results when freezing English peas.
Step 4: Cool the peas
After blanching the English peas, it is important to cool them promptly. The cooling process involves transferring the peas from the boiling water to a bowl filled with ice water. Cooling the peas rapidly serves several purposes and helps maintain their texture and crispness. Here’s why cooling is necessary and how to do it effectively:
- Halting the cooking process: By quickly transferring the peas to ice water, you stop the cooking process that began during blanching. This prevents the peas from becoming overcooked and helps them retain their desired texture and firmness.
- Preserving crispness and color: Cooling the peas in ice water helps them cool down rapidly. This preserves their natural crispness and vibrant green color, enhancing their visual appeal when frozen and later thawed for consumption.
- Retaining nutrients: The rapid cooling process minimizes the loss of nutrients that may occur during blanching. By preserving the peas’ nutritional content, you can enjoy their health benefits even after freezing.
To cool the peas effectively, follow these steps:
- Prepare a large bowl or basin filled with ice water. The water should be icy cold to ensure a rapid cooling process.
- Using a slotted spoon or a sieve, carefully transfer the blanched peas from the boiling water to the ice water bath. Do this as quickly as possible to minimize the time the peas spend in the residual heat.
- Submerge the peas fully in the ice water, ensuring that they are evenly surrounded by the cold water.
- Allow the peas to cool in the ice water for the same amount of time they were blanched, typically 1-2 minutes. This ensures that the peas cool down completely and retain their crispness and color.
- After the peas have cooled, drain them thoroughly. You can use a colander or sieve to remove excess water. Ensure that there is no excess moisture on the peas before proceeding with the next steps of the freezing process.
Step 5: Drain and dry the peas
After cooling the English peas in ice water, the next step is to drain and dry them thoroughly. Removing excess moisture is crucial to prevent the formation of ice crystals and freezer burn during the freezing process. Here’s why draining and drying the peas is important and how to do it effectively:
- Preventing freezer burn: Freezer burn occurs when moisture on the surface of the peas evaporates and recondenses as ice crystals. These ice crystals can cause the peas to become dry, discolored, and develop an off-flavor. By removing excess moisture, you minimize the risk of freezer burn and maintain the quality of the frozen peas.
- Preserving texture and flavor: Excess moisture can lead to the formation of ice crystals within the peas, affecting their texture and taste. By draining and drying the peas, you help retain their natural texture and prevent any undesirable changes caused by excessive moisture.
- Avoiding clumping: When peas are frozen with excess moisture, they can stick together and form clumps. By ensuring the peas are thoroughly dried before freezing, you can prevent clumping and make it easier to remove only the desired amount of peas from the freezer later on.
To drain and dry the peas effectively, follow these steps:
- Place a colander or sieve in the sink.
- Carefully pour the peas from the ice water bath into the colander, allowing the water to drain away. Gently shake the colander to remove any excess water.
- Transfer the drained peas to a clean kitchen towel or paper towels.
- Spread out the peas in a single layer on the towel or paper towels.
- Gently pat the peas dry with another clean towel or paper towels. Be careful not to crush or smash the peas while drying them.
- Roll or fold the towel or paper towels containing the peas to absorb any remaining moisture.
- Check for any lingering moisture and ensure that the peas are completely dry before proceeding to the next steps of the freezing process.
Step 6: Portion the peas for freezing
Once the English peas have been drained and dried, it’s time to portion them for freezing. By dividing the peas into appropriate portion sizes, you can conveniently use only the desired amount when needed without thawing the entire batch. Here’s why portioning is important and how to do it effectively:
- Convenience and flexibility: Portioning the peas allows you to have individual serving sizes readily available. This way, you can easily take out the amount you need for a specific recipe or meal without having to thaw and refreeze the entire batch. It provides flexibility in using the peas according to your requirements.
- Minimizing waste: By portioning the peas, you reduce the chances of waste. You can defrost and use only what you need, ensuring that the remaining peas remain in optimal condition for future use. This way, you can enjoy the fresh flavor and texture of the peas while minimizing food waste.
- Allowing for expansion: During freezing, water in the peas turns into ice, causing it to expand. Leaving some headspace in the containers or bags allows room for this expansion, preventing the containers from bursting or the bags from being overstretched. It helps maintain the integrity of the packaging and prevents leaks or potential damage.
To portion the peas for freezing effectively, follow these steps:
- Decide on the portion sizes that work best for your needs. Consider how you will use the peas and the quantities required for your recipes.
- Prepare small freezer bags or airtight containers suitable for freezing. Ensure that they are clean and in good condition.
- Scoop the desired portion of peas into each bag or container. Leave some headspace, typically around 1/2 inch (1.27 cm), to allow for expansion during freezing. This headspace prevents the bags or containers from bursting as the peas freeze and expand.
- Seal the bags or containers tightly, ensuring they are airtight to prevent moisture loss and freezer burn.
- If using freezer bags, press out any excess air before sealing them to minimize the potential for freezer burn.
- Label each bag or container with the contents and the date of freezing. This helps you keep track of the storage time and ensures you can easily identify the peas in the freezer.
- Place the portioned peas in a single layer on a flat surface, such as a baking sheet, if using bags. This allows for easier and more uniform freezing. Once they are partially frozen, you can stack the bags or containers to save space in the freezer.
Step 7: Seal and label the packages
After portioning the English peas for freezing, the next step is to seal the bags or containers tightly and label them appropriately. Proper sealing and labeling are crucial for maintaining the quality of the peas and ensuring their optimal usage. Here’s why sealing and labeling are important and how to do it effectively:
- Preventing air exposure: Air exposure can lead to freezer burn, which can affect the texture, flavor, and overall quality of the peas. By sealing the packages tightly, you minimize air contact and help preserve the freshness of the peas during storage.
- Maintaining moisture levels: Proper sealing also helps to retain the moisture within the packages, preventing excessive drying out of the peas. This helps to preserve their tenderness and flavor.
- Organizational purposes: Labeling each package with the date of freezing allows you to keep track of the storage time and ensure that you use the peas within a reasonable timeframe. This helps to maintain their optimal quality and flavor.
To seal and label the packages effectively, follow these steps:
- For freezer bags: Press out as much air as possible from the bags before sealing them. This can be done by gently squeezing the bags from the bottom upward to force out the air. Once the air is removed, seal the bags tightly.
- For airtight containers: Ensure that the lids or covers of the containers fit securely and create an airtight seal. Double-check that there are no gaps or openings that may allow air to enter.
- Label each package with the date of freezing. Use a permanent marker or freezer-safe labels to clearly indicate the date. This allows you to keep track of the storage time and prioritize the use of older packages first.
- Optionally, you can also label the packages with the contents to easily identify them in the freezer.
- Place the sealed and labeled packages in a single layer on a flat surface, such as a baking sheet, for easier initial freezing. Once they are fully frozen, you can stack them in the freezer to save space.
Step 8: Freeze the peas
After sealing and labeling the packages of English peas, the next step is to place them in the freezer for freezing. Proper freezing ensures that the peas maintain their quality and remain individually frozen for easy portioning. Here’s why freezing is important and how to do it effectively:
- Maintaining quality: Freezing the peas promptly helps preserve their texture, color, and flavor. The low temperature in the freezer halts the enzymatic activity that can lead to quality deterioration, ensuring that the peas retain their freshness and taste.
- Preventing clumping: Placing the sealed packages of peas in a single layer initially allows them to freeze individually. This prevents the peas from sticking together and forming clumps. Individual freezing ensures that you can easily remove only the desired amount of peas from the freezer without thawing the entire package.
- Ensuring proper storage: By arranging the packages in a single layer until they are frozen solid, you create an optimal storage environment. This allows for better air circulation and helps maintain a consistent freezing temperature throughout the peas, ensuring their overall quality.
To freeze the peas effectively, follow these steps:
- Place the sealed packages of peas in the freezer. Ensure that they are arranged in a single layer, with enough space between each package.
- It is recommended to initially place the packages on a flat surface, such as a baking sheet, to allow for individual freezing. Once the peas are frozen solid, usually after several hours, you can stack the packages in the freezer to save space.
- Avoid overcrowding the freezer with too many packages at once, as it can affect the efficiency of freezing and the overall temperature stability.
- Maintain a constant freezing temperature in the freezer, ideally at or below 0°F (-18°C), to ensure the peas freeze quickly and maintain their quality.
- Allow the peas to freeze completely before moving or reorganizing them in the freezer. This usually takes several hours, but the exact freezing time can vary depending on the quantity and thickness of the peas.
Step 9: Store in the freezer
After the sealed packages of English peas have been completely frozen, it’s time to store them in the freezer. Proper storage ensures that the peas remain in good condition and can be easily accessed whenever needed. Here’s why storing the frozen peas correctly is important and how to do it effectively:
- Organized freezer space: Once the peas are frozen solid, you can stack or arrange the packages more conveniently in your freezer. This helps maximize space utilization and allows you to efficiently store other frozen items as well.
- Easy access: Storing the packages in an organized manner makes it easier to locate and retrieve the desired amount of peas when needed. You can stack them vertically or arrange them side by side, depending on the available space and your preference.
- Prevention of cross-contamination: Proper storage in the freezer ensures that the peas are kept separate from other food items, reducing the risk of cross-contamination and maintaining their quality and taste.
To store the frozen peas effectively, follow these steps:
- Once the peas are completely frozen, you can stack the packages on top of each other or arrange them side by side in the freezer. Ensure that they are stable and won’t topple over.
- Consider using a designated shelf or section in your freezer for storing the peas. This helps keep them organized and easily accessible.
- If you’re stacking the packages, place the ones with the earliest freezing date at the bottom to ensure proper rotation and usage.
- Avoid overcrowding the freezer and allow some space between packages to promote better air circulation. This helps maintain a consistent freezing temperature and prevents freezer burn.
- Keep the freezer temperature at or below 0°F (-18°C) to ensure the long-term quality and safety of the peas.
- Regularly check the freezer for any signs of temperature fluctuations, and adjust the settings if necessary. This helps ensure optimal storage conditions for the peas and other frozen items.
How long can you keep frozen English peas?
Frozen English peas can be safely stored for an extended period. When properly stored in airtight containers or freezer bags, they can retain their quality for up to 8 to 12 months in a standard home freezer. It’s important to ensure the peas are stored at a constant temperature of 0°F (-18°C) or below to maintain their texture, flavor, and nutritional value. Beyond the recommended storage time, the peas may still be safe to consume but may experience a decline in quality.
Other related questions
How do you thaw frozen English peas?
To thaw frozen English peas, you have a few options. The easiest method is to transfer the desired amount of peas from the freezer to the refrigerator and let them thaw overnight. Alternatively, you can place the peas in a colander and run cold water over them until they thaw. If you’re in a hurry, you can also microwave the frozen peas on the defrost setting, using short intervals and stirring occasionally until they are fully thawed. Once thawed, use the peas immediately or store them in the refrigerator for up to two days.
Can I refreeze previously thawed English Peas?
It is generally not recommended to refreeze previously thawed English peas. When you thaw peas, ice crystals form and cause some cell damage, resulting in a loss of quality. Refreezing the peas can further degrade their texture, flavor, and nutritional value. Additionally, each thawing and refreezing cycle increases the risk of bacterial growth and foodborne illnesses. To preserve the quality and safety of English peas, it’s best to use them immediately after thawing or consume them within a few days if kept in the refrigerator.
How do I know if my frozen English Peas has gone bad?
There are a few indicators to determine if frozen English peas have gone bad. First, check for any signs of freezer burn, such as discoloration, dry or shriveled texture, or ice crystals on the surface. If the peas have developed an off-putting odor, unusual sliminess, or a sour smell, it’s likely an indication of spoilage. Additionally, if there are any visible signs of mold or an abnormal texture, it’s best to discard them. When in doubt, trust your senses and err on the side of caution by disposing of any peas that appear or smell questionable.
Can I use frozen English Peas with the fresh ones?
Yes, you can use frozen English peas alongside fresh ones in many recipes. However, there are a few considerations to keep in mind. Frozen peas tend to be more tender and cook faster than fresh peas, so adjust cooking times accordingly if using both types in the same dish. Additionally, be mindful of the texture difference between fresh and frozen peas, as frozen peas may be slightly softer. Taste-wise, there may be a subtle difference, but in most recipes, the combination of fresh and frozen peas should work well together.
Are frozen English peas as nutritious as fresh ones?
Frozen English peas are generally as nutritious as fresh ones. The freezing process helps to preserve their nutritional content, including vitamins, minerals, and antioxidants. However, there may be a slight loss in certain heat-sensitive nutrients during blanching, which is a common step in the freezing process. Overall, frozen English peas are a convenient and healthy option that retains much of their nutritional value compared to fresh peas.
Can you cook frozen English peas directly, or do you need to thaw them first?
Frozen English peas can be cooked directly from their frozen state without the need to thaw them first. Cooking them from frozen helps to retain their texture and flavor. Simply add the frozen peas to your recipe or cook them in boiling water, sauté them, or use them in stir-fries without thawing. Adjust the cooking time accordingly to ensure they are heated through.

