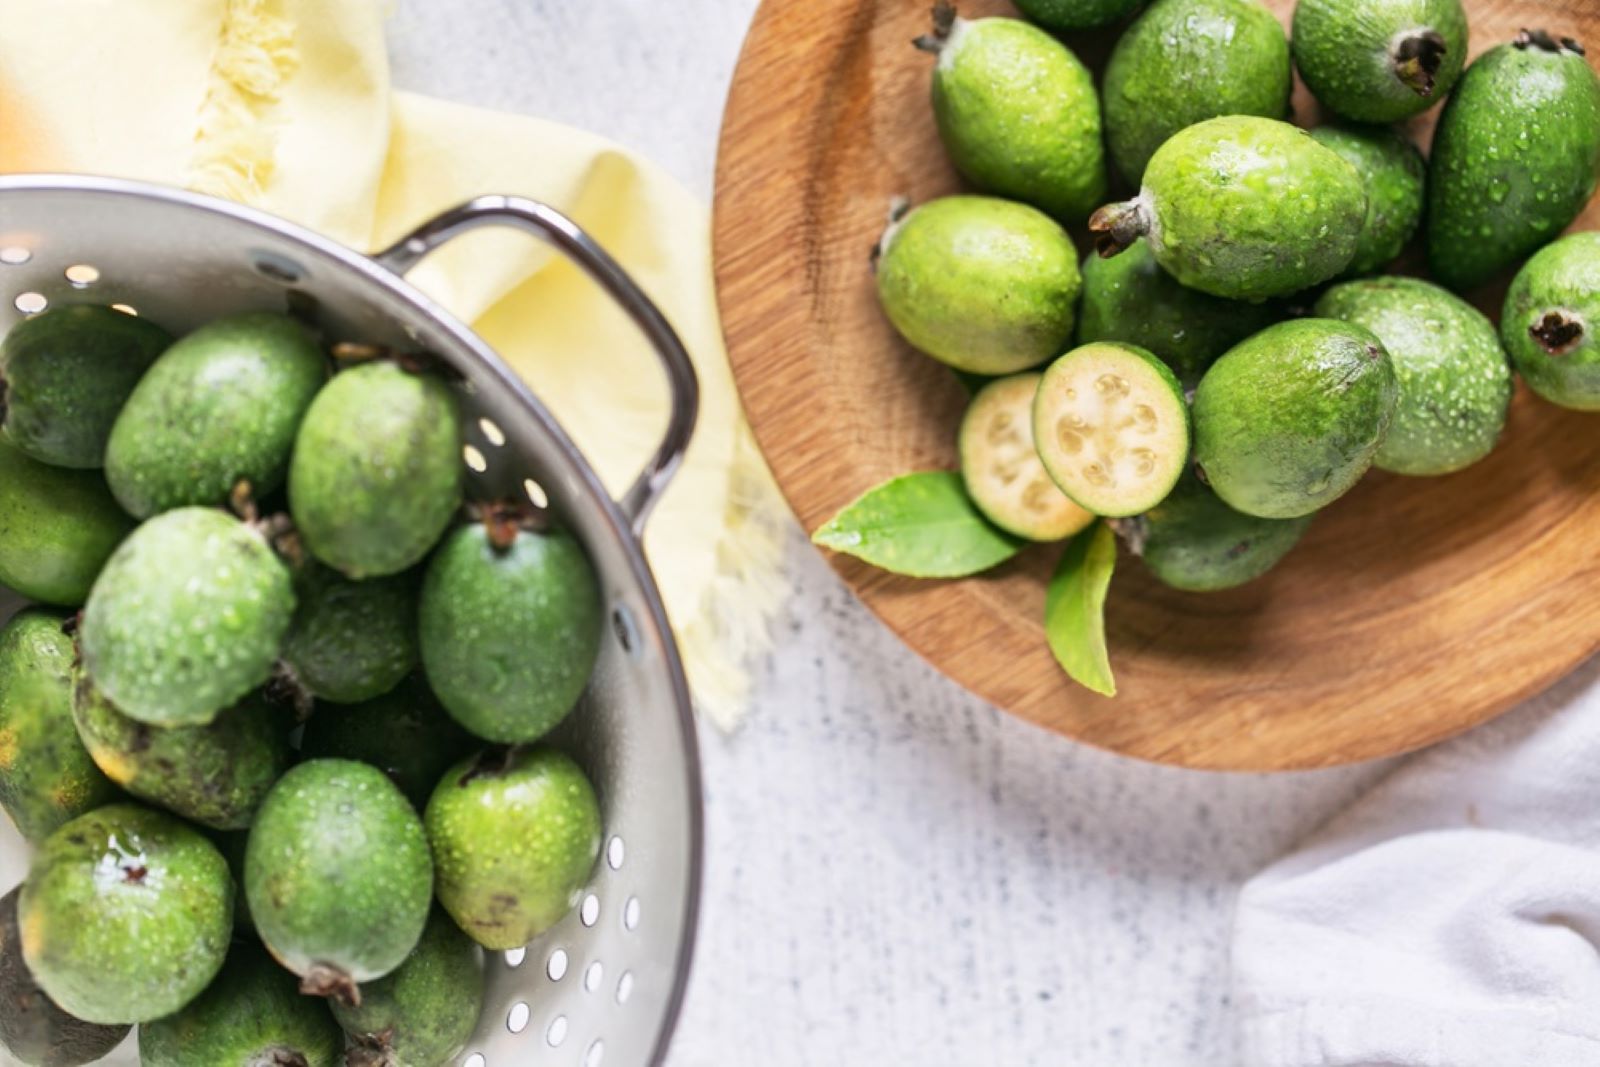
Feijoas, also known as pineapple guavas, are delicious fruits with a unique flavor profile. They have a sweet-tart taste and a fragrant aroma that make them a favorite among many fruit enthusiasts. If you have an abundance of feijoas and want to enjoy them even when they’re out of season, freezing is a great option. Freezing feijoas preserves their freshness and allows you to enjoy them in smoothies, desserts, or as a standalone treat. This article provides a step-by-step guide on how to freeze feijoas, ensuring that their texture and flavor are maintained for future use.
Here’s a comprehensive guide on freezing feijoas:
- Step 1: Select ripe feijoas
- Step 2: Wash and peel the feijoas
- Step 3: Slice or dice the feijoas
- Step 4: Prepare an ascorbic acid solution
- Step 5: Dip the feijoas in the ascorbic acid solution
- Step 6: Drain and pat dry the feijoas
- Step 7: Arrange the feijoas for freezing
- Step 8: Freeze the feijoas
- Step 9: Package and seal the feijoas
- Step 10: Label and date the packages
- Step 11: Store in the freezer
Step 1: Select ripe feijoas
When freezing feijoas, it’s crucial to choose fruits that are fully ripe yet still firm. The ripeness of the feijoas plays a significant role in ensuring optimal results during the freezing process. Here’s why selecting ripe feijoas is important:
- Texture: Fully ripe feijoas have a desirable texture that is firm but not overly soft or mushy. When you freeze feijoas, the water content within the fruit forms ice crystals, which can affect the texture. Overripe feijoas with a mushy texture may become even softer after freezing, resulting in a less appealing consistency.
- Flavor: Ripe feijoas offer the best flavor experience. They have reached their peak sweetness and developed a balanced taste profile. Freezing helps preserve the flavor to a great extent, but starting with ripe feijoas ensures that the frozen fruit retains its delicious taste.
- Freezing capacity: Underripe feijoas may not freeze well because they lack sufficient sugar content and flavor development. As feijoas ripen, their sugar content increases, contributing to better freezing outcomes. Overripe feijoas, on the other hand, may already be compromised in terms of texture and flavor, which can further deteriorate during freezing.
To determine if a feijoa is ripe, gently squeeze it with your fingers. Ripe feijoas will have a slight give, indicating that they are soft enough to be enjoyed while still maintaining their firmness. Additionally, a pleasant fragrance from the feijoa’s skin is a good indicator of ripeness.
Step 2: Wash and peel the feijoas
Before freezing feijoas, it’s important to properly wash and peel them. This step ensures that any dirt, debris, or potential contaminants on the fruit’s surface are removed. Here’s why washing and peeling feijoas is recommended:
- Cleanliness: Washing feijoas under cold running water helps eliminate any dirt, residue, or surface impurities that may be present. This is especially important if the feijoas were picked directly from a tree or if you purchased them from a market where they may have come into contact with various elements during transportation.
- Hygiene: Washing feijoas reduces the risk of consuming any harmful bacteria or microorganisms that could be present on the skin. While the skin of feijoas is edible and contains beneficial nutrients, it’s important to prioritize hygiene when freezing the fruit for long-term storage.
- Skin texture: Although feijoa skin is edible and adds a slight tartness to the fruit, it can become tough and unpleasant when frozen. Freezing causes the water inside the feijoa to expand, potentially affecting the texture of the skin. By peeling the feijoas before freezing, you ensure a better texture and mouthfeel when you later thaw and use the fruit.
To peel feijoas, you can use a paring knife or a vegetable peeler. Gently glide the blade along the feijoa’s skin, removing it in a thin layer. Take care not to remove too much flesh while peeling. If the feijoa skin is particularly thick, you may want to make a slightly deeper cut to ensure the removal of the tough outer layer.
Can you freeze feijoas without any preparation?
Yes, you can freeze feijoas without any preparation. Feijoas can be frozen as is, without the need for peeling, slicing, or any additional preparation. Simply place the whole feijoas in an airtight container or freezer bag, ensuring they are well-sealed to prevent freezer burn. Freezing them without preparation allows for easier and more versatile use when you decide to thaw and use them later.
Step 3: Slice or dice the feijoas
When preparing feijoas for freezing, deciding how to slice or dice them is an important consideration. The size and shape of the feijoas can affect their versatility and ease of use after thawing. Here’s why choosing the appropriate slicing or dicing method is beneficial:
- Recipe suitability: By considering your intended use for the feijoas after thawing, you can determine the optimal size and shape for your needs. Slicing the feijoas into smaller pieces is ideal for recipes like smoothies or sauces, where you want the fruit to blend easily and evenly. Diced feijoas work well for desserts or as standalone snacks, providing bite-sized chunks that can be enjoyed on their own or incorporated into various dishes.
- Texture and consistency: The size of the feijoa pieces can impact the texture and consistency of your final dish. Slicing the feijoas into thin slices or dicing them into small cubes allows for a more uniform distribution of the fruit within your recipes. This ensures a balanced texture and flavor experience in every bite.
- Thawing time: The size of the feijoa pieces also affects the thawing time. Smaller slices or diced feijoas will thaw more quickly compared to larger chunks. This is particularly relevant if you’re using the feijoas in time-sensitive recipes or when you want to enjoy the fruit without waiting for extensive thawing.
When deciding how to slice or dice the feijoas, consider your personal preference and the specific recipes you have in mind. If you’re unsure, you can opt for a combination of both slicing and dicing, allowing you to have versatile options for different culinary creations.
Remember to use a sharp knife when slicing or dicing feijoas to ensure clean cuts and minimize any damage to the fruit. It’s also essential to maintain consistency in the size of the pieces to ensure even freezing and thawing.
Step 4: Prepare an ascorbic acid solution
To prevent feijoas from browning when exposed to air during the freezing process, it’s beneficial to treat them with an ascorbic acid solution. Ascorbic acid, also known as vitamin C, is a natural antioxidant that inhibits enzymatic browning. Here’s why preparing an ascorbic acid solution is helpful and how you can do it:
- Browning prevention: Feijoas, like many fruits, contain enzymes called polyphenol oxidases. When these enzymes come into contact with oxygen in the air, they catalyze a chemical reaction that causes browning on the fruit’s surface. By treating feijoas with an ascorbic acid solution, the ascorbic acid acts as an antioxidant, slowing down the enzymatic browning process and helping preserve the fruit’s natural color.
- Ascorbic acid benefits: Ascorbic acid is a safe and commonly used food additive that not only inhibits browning but also offers nutritional benefits. It is a potent antioxidant that helps protect cells from damage and supports the immune system. By using ascorbic acid to treat the feijoas, you not only maintain their visual appeal but also enhance their nutritional value.
To prepare an ascorbic acid solution:
- Dissolve 1 teaspoon of ascorbic acid powder in 1 cup of water. Ensure that the powder is completely dissolved to create a uniform solution.
- If you don’t have ascorbic acid powder on hand, you can use lemon juice as a natural alternative. Lemon juice contains ascorbic acid and offers similar browning prevention properties. Squeeze fresh lemon juice and dilute it with water in a ratio of 1 part lemon juice to 3 parts water.
When using the ascorbic acid solution, you can dip the sliced or diced feijoas into it for a few minutes, ensuring they are fully coated. This treatment helps reduce browning and preserves the feijoas’ vibrant color during freezing.
Note: It’s important not to soak the feijoas in the ascorbic acid solution for an extended period, as this may affect their texture and flavor. A brief dip is sufficient to provide the desired browning prevention benefits.
Step 5: Dip the feijoas in the ascorbic acid solution
After preparing the ascorbic acid solution or using lemon juice as a natural alternative, the next step is to dip the sliced or diced feijoas into the solution. This process helps prevent browning and maintains the vibrant color of the fruit throughout the freezing process. Here’s why dipping the feijoas in the ascorbic acid solution is important:
- Browning prevention: Feijoas contain enzymes called polyphenol oxidases, which are activated when the fruit is exposed to air. These enzymes can cause browning on the fruit’s surface through an enzymatic reaction. By dipping the feijoas in the ascorbic acid solution, the ascorbic acid acts as an antioxidant, inhibiting the activity of polyphenol oxidases and preventing enzymatic browning. This ensures that the feijoas retain their appealing color even after freezing and thawing.
- Uniform treatment: Dipping the feijoas in the ascorbic acid solution allows for an even distribution of the solution on the fruit’s surface. This ensures that all exposed areas of the feijoas receive the protective benefits of the ascorbic acid, effectively preventing browning throughout the fruit.
To dip the feijoas in the ascorbic acid solution:
- Gently place the sliced or diced feijoas into the solution. Ensure that they are fully submerged or at least come into contact with the solution on all exposed surfaces.
- Let the feijoas soak in the ascorbic acid solution for a few minutes. This allows sufficient time for the ascorbic acid to coat the fruit and provide the desired browning prevention benefits.
- Avoid excessive soaking, as it may affect the texture and flavor of the feijoas. A brief dip is sufficient to achieve the desired results.
Step 6: Drain and pat dry the feijoas
After dipping the sliced or diced feijoas in the ascorbic acid solution to prevent browning, the next step is to drain and pat them dry. This process removes excess moisture from the feijoas before freezing, which is essential for maintaining their quality. Here’s why draining and patting dry the feijoas is important:
- Excess moisture removal: Removing excess moisture from the feijoas before freezing helps prevent the formation of ice crystals and freezer burn. When moisture is present on the fruit’s surface, it can contribute to the development of icy patches, which can negatively affect the texture and taste of the feijoas. By draining and patting dry the feijoas, you minimize the amount of moisture that can lead to these undesirable effects.
- Texture preservation: Excessive moisture during freezing can cause feijoas to become mushy or develop an unpleasant texture. By removing moisture through draining and drying, you help maintain the feijoas’ desired texture. This is particularly important if you plan to use the feijoas in recipes or enjoy them as a standalone snack after thawing.
To drain and pat dry the feijoas:
- Remove the feijoas from the ascorbic acid solution and place them in a colander or sieve. This allows any excess liquid to drain off.
- Gently shake the colander or sieve to remove as much liquid as possible.
- After draining, transfer the feijoas to a clean kitchen towel or paper towels.
- Pat the feijoas dry with the towel or paper towels, absorbing any remaining moisture. Be gentle to avoid damaging the fruit.
It’s important to ensure that the feijoas are thoroughly drained and patted dry before proceeding to the next step of freezing. Removing excess moisture helps maintain the quality of the feijoas and prevents potential issues such as freezer burn.
Step 7: Arrange the feijoas for freezing
Once the feijoas have been drained and dried, it’s time to arrange them for freezing. Proper arrangement ensures that the feijoas freeze individually and maintain their individual shape, making it easier to store and use them later. Here’s why arranging the feijoas in a single layer is important:
- Individual freezing: Placing the feijoas in a single layer on a baking sheet or tray allows each piece to freeze individually. This prevents them from sticking together during freezing, making it easier to retrieve individual feijoas when needed. Individual freezing also helps maintain the texture and integrity of the fruit, ensuring they don’t clump together into a solid mass.
- Better airflow: When the feijoas are arranged in a single layer without touching each other, there is better airflow around each piece. This promotes more efficient and uniform freezing, allowing the feijoas to freeze faster and retain their quality. Adequate airflow also helps prevent the formation of ice crystals, which can lead to freezer burn and affect the texture of the feijoas.
To arrange the feijoas for freezing:
- Line a baking sheet or tray with parchment paper. This prevents the feijoas from sticking to the surface and facilitates their removal once frozen.
- Place the feijoas in a single layer on the prepared baking sheet or tray. Ensure that they are not touching or overlapping each other. Leave a small gap between each piece.
- If you have a large quantity of feijoas to freeze, you may need to use multiple baking sheets or trays to accommodate them all. Make sure to maintain a single layer for each batch.
Step 8: Freeze the feijoas
After arranging the feijoas in a single layer, it’s time to freeze them. Freezing the feijoas individually before packaging ensures that they remain separate and easy to work with when needed. Here’s why freezing the feijoas individually is important:
- Prevents clumping: By freezing the feijoas individually on the tray, you prevent them from sticking together or forming clumps during the freezing process. This is particularly beneficial if you plan to use the feijoas in smaller quantities or want the flexibility to remove only a few pieces at a time. Freezing them individually allows for easy separation and prevents the need to thaw the entire batch when you only need a portion.
- Ease of portioning: When the feijoas are frozen individually, it becomes simpler to portion out the desired amount. Whether you’re using them for smoothies, desserts, or other recipes, having the feijoas freeze separately enables you to take out exactly the quantity you need without thawing more than necessary. This preserves the quality and texture of the remaining frozen feijoas for future use.
To freeze the feijoas:
- Transfer the tray with the feijoas to the freezer. Ensure that the feijoas are placed on a flat surface for stability.
- Let the feijoas freeze for about 2 hours or until they are firm. The exact freezing time may vary depending on the temperature of your freezer and the size of the feijoas.
- Once the feijoas are fully frozen and firm, you can proceed to the packaging step for long-term storage.
Freezing the feijoas individually not only prevents clumping but also ensures that each piece retains its individual shape and texture. This allows for easier handling and portioning when you’re ready to use the feijoas in your recipes or enjoy them as a snack.
Step 9: Package and seal the feijoas
After the feijoas have been individually frozen, it’s important to properly package and seal them to maintain their freshness and protect them from freezer burn. Here’s why packaging and sealing the feijoas is crucial and the different methods you can use:
- Maintaining freshness: Packaging the feijoas in airtight containers or freezer bags helps to maintain their freshness by preventing exposure to air and moisture. Air and moisture can contribute to the development of freezer burn, which can negatively impact the flavor, texture, and overall quality of the feijoas. By packaging them tightly, you create a barrier that helps preserve the feijoas’ taste and appearance.
- Minimizing freezer burn: Freezer burn occurs when food is exposed to air inside the freezer, causing moisture to evaporate from the surface and leaving behind dehydrated patches. This can result in a dry, off-flavored texture. To minimize the risk of freezer burn, it’s important to remove as much air as possible from the packaging. Air trapped in the packaging can lead to the formation of ice crystals and accelerate the deterioration of the feijoas. Removing air helps maintain the feijoas’ quality during long-term storage in the freezer.
Here are two methods you can use to package and seal the feijoas:
- Freezer bags: Transfer the individually frozen feijoas to freezer-safe bags. Squeeze out as much air as possible from the bags before sealing them. You can use the straw method by inserting a straw into the bag, closing the seal around the straw, and sucking out the air before quickly sealing it. Alternatively, you can use a vacuum sealer to remove the air and create a tight seal.
- Airtight containers: Place the frozen feijoas in airtight, freezer-safe containers. Ensure that the containers have a secure lid or cover to create a tight seal. Press down gently on the lid to remove any excess air before sealing. This method is particularly useful if you prefer a more rigid packaging option.
Regardless of the method you choose, remember to label the packages with the date of freezing. This allows you to keep track of the feijoas’ storage time and ensures you use them within their optimal quality period.
Are there any special containers or packaging materials needed for freezing feijoas?
Special containers or packaging materials are not necessarily needed for freezing feijoas, but using airtight containers or freezer bags is recommended. These containers help prevent freezer burn and maintain the quality of the feijoas during freezing. It is important to ensure that the containers are sealed tightly to minimize the exposure of the feijoas to air and moisture.
Step 10: Label and date the packages
Labeling and dating the packages is an essential step when freezing feijoas or any other food items. Here’s why it is important and how it benefits you:
- Easy identification: Labeling each package with the contents, in this case, feijoas, allows for easy identification when you have multiple packages in the freezer. This simple step saves you time and effort by eliminating the need to open each package to identify its contents. You can quickly locate the feijoas and retrieve them when needed.
- Preventing waste: By including the date of freezing on the label, you have a reference point to track the freshness and storage duration of the feijoas. It helps you keep track of how long the feijoas have been in the freezer and ensures that you use them within a reasonable time frame. This is particularly important for maintaining the best quality and flavor of the feijoas. By knowing the date of freezing, you can prioritize using older packages before newer ones to avoid waste.
- Organizational convenience: Labeling and dating the packages contribute to better organization in your freezer. You can arrange the packages in a systematic manner, such as by stacking them in order of the freezing date. This way, you can maintain a well-organized freezer and easily access the feijoas whenever you need them.
To label the packages:
- Use adhesive labels, masking tape, or freezer-safe marker pens to write the contents and freezing date on each package. Include any additional information you find useful, such as the quantity or specific variety of feijoas.
- Place the label in a visible location on the package, ensuring that it won’t easily rub off or be covered by other packages.
Step 11: Store in the freezer
After properly packaging and labeling the feijoas, it’s time to store them in the freezer. Here’s why the storage conditions are important and how to ensure optimal freezing:
- Temperature control: The ideal temperature for freezing feijoas is below 0°F (-18°C). Freezing at this temperature ensures that the feijoas freeze quickly and effectively, preserving their texture, flavor, and nutritional value. It helps maintain the quality of the feijoas throughout their storage period.
- Avoiding damage: When placing the feijoas in the freezer, it’s essential to store them in a location where they won’t be crushed or damaged. Avoid overcrowding the freezer, as this can lead to pressure and potential damage to the feijoas. Ensure there is sufficient space between the feijoas and other items in the freezer to prevent them from being squished or bumped around during freezing or when retrieving other items.
Here are a few steps for storing the feijoas in the freezer:
- Find a flat and stable surface in the freezer to place the packaged feijoas. A freezer shelf or a designated area specifically for frozen fruits is ideal.
- Arrange the packages in a way that they are easily accessible and not stacked on top of each other to prevent damage.
- Make sure there is enough space around the packages to allow proper airflow and maintain consistent freezing temperatures.
- If you have multiple batches of feijoas, consider organizing them by freezing date, placing the older packages at the front for easy access and usage.
Remember to periodically check and maintain the temperature of your freezer to ensure it remains at the appropriate freezing temperature.
How long can frozen feijoas stay good in the freezer?
Frozen feijoas can stay good in the freezer for about 8 to 12 months. However, it’s important to note that the quality and flavor of the feijoas may gradually decline over time. To ensure the best taste and texture, it’s recommended to consume them within the first 6 to 9 months. Proper packaging, such as using airtight containers or freezer bags, can help extend their shelf life and maintain their quality for a longer period.
Other related questions
How do I defrost feijoas properly?
To defrost feijoas properly, transfer them from the freezer to the refrigerator and let them thaw overnight. This slow thawing process helps preserve the texture and flavor of the feijoas. Avoid using hot water or microwaving them, as it can lead to a mushy consistency. Once thawed, the feijoas can be enjoyed as is or used in your desired recipes.
Can I refreeze previously thawed feijoas?
It is generally not recommended to refreeze feijoas that have already been thawed. When feijoas are thawed, moisture is released, which can affect their texture and quality. Refreezing them can lead to further deterioration, resulting in a mushy consistency and loss of flavor. To maintain the best taste and texture, it is advisable to consume the feijoas once they have been thawed and not refreeze them.
How do I know if my frozen feijoas have gone bad?
There are a few signs to look out for to determine if your frozen feijoas have gone bad. Firstly, check for any visible signs of freezer burn, such as discoloration, ice crystals, or dried-out patches. Secondly, if the feijoas have developed an off smell or unpleasant odor, it is an indication of spoilage. Lastly, if the texture of the feijoas has become mushy or excessively soft, it is likely that they have deteriorated. Trust your senses and discard any frozen feijoas that exhibit these signs of spoilage.
Can I use frozen feijoas with the fresh ones?
Yes, you can use frozen feijoas alongside fresh ones in recipes. Combining frozen and fresh feijoas can provide a balance of flavors and textures. However, keep in mind that the texture of the frozen feijoas may be slightly softer compared to fresh ones. Adjust cooking times accordingly to ensure the desired consistency in your dishes. Additionally, if using frozen feijoas in recipes that require them to be intact, make sure to thaw and drain them before incorporating them into the dish.
Can frozen feijoas be used in baking recipes?
Yes, frozen feijoas can be used in baking recipes. When using frozen feijoas in baking, it is best to thaw them first and drain any excess liquid to prevent the recipe from becoming too watery. The thawed feijoas can then be used as a flavorful addition to cakes, muffins, pies, or any other baked goods that call for feijoas, adding a unique taste to your treats.
Can frozen feijoas be eaten as a snack or dessert?
Frozen feijoas can be enjoyed as a snack or dessert, although the texture will be different from fresh feijoas. Once thawed, frozen feijoas become softer and have a slightly different consistency. They can be eaten as is, or you can use them as a topping for yogurt, ice cream, or incorporate them into fruit salads for a refreshing and unique twist.
Can frozen feijoas be used to make smoothies or juices?
Yes, frozen feijoas can be used to make smoothies or juices. Thawed frozen feijoas can be blended along with other ingredients to create flavorful and refreshing smoothies. They can also be used as a base for homemade juices, either by blending them or allowing them to thaw and then extracting the juice. The natural sweetness and tanginess of feijoas can add a unique flavor to your smoothies or juices.
Can I freeze feijoas that are already cut into slices or chunks?
Yes, you can freeze feijoas that are already cut into slices or chunks. However, it is important to note that sliced or chunked feijoas may have a slightly different texture after freezing compared to whole feijoas. To freeze them, place the sliced or chunked feijoas in an airtight container or freezer bag, ensuring they are well-sealed to prevent freezer burn.

