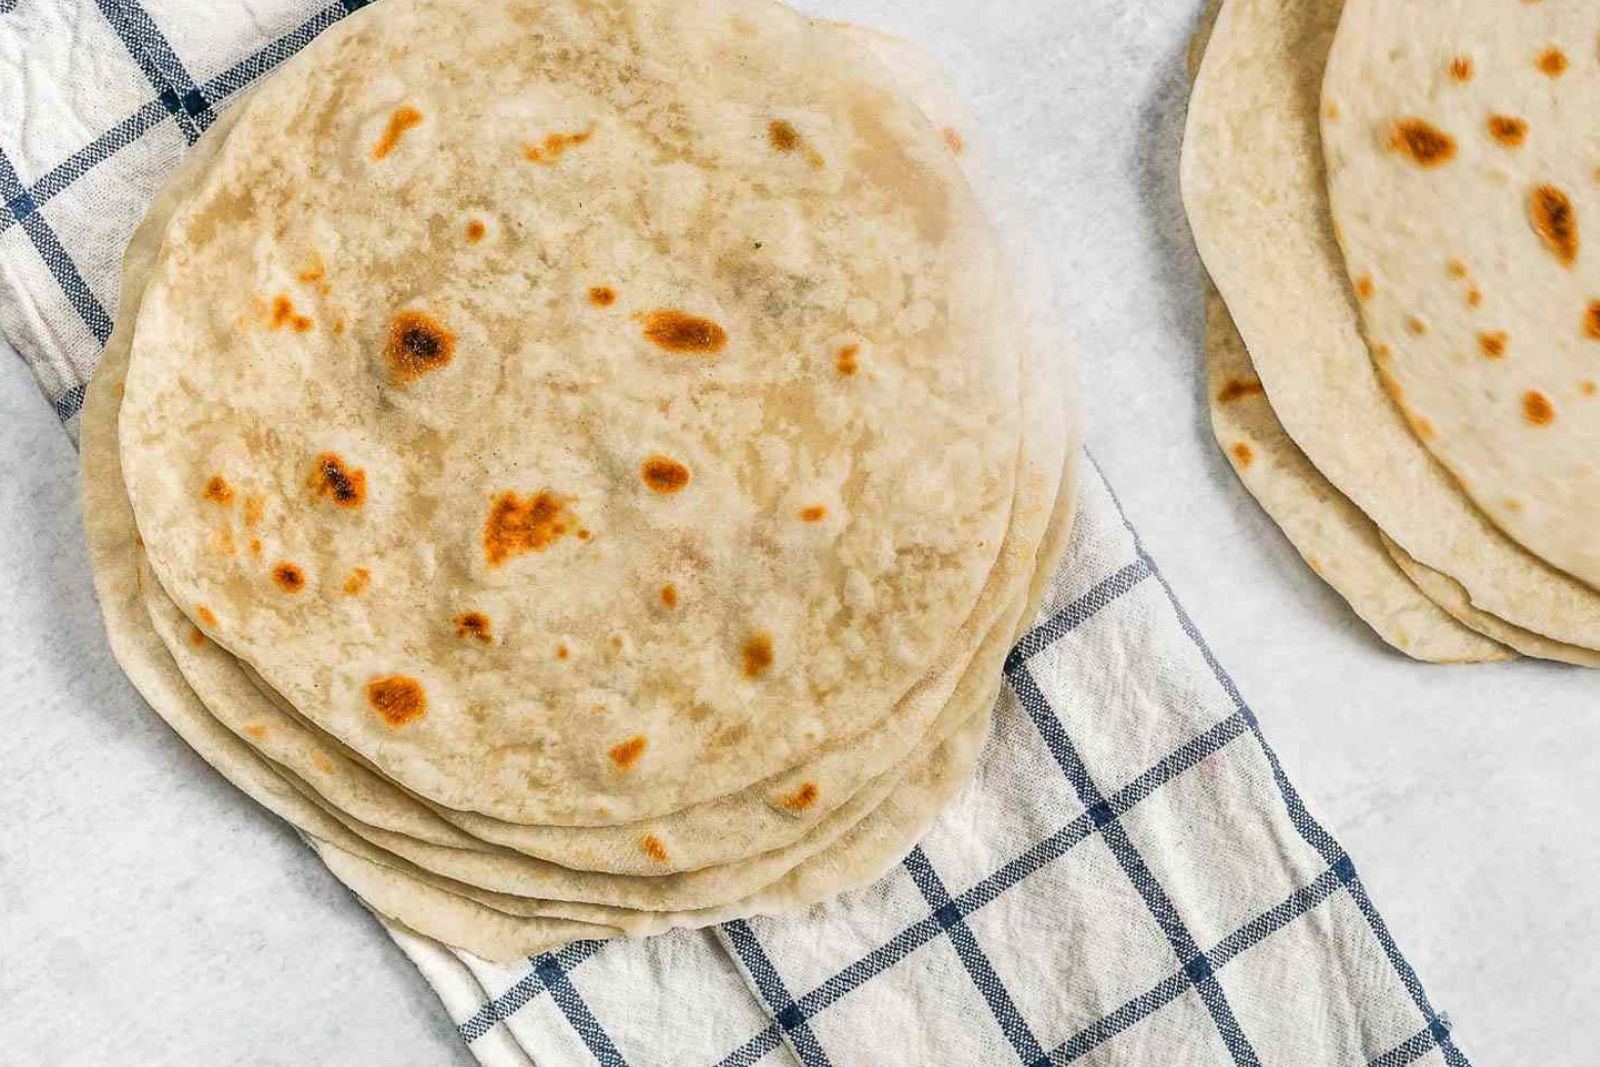
Flour tortillas are a versatile and beloved staple in many cuisines, from Mexican to Tex-Mex and beyond. These soft, flatbreads are perfect for wrapping up all sorts of delicious fillings, from savory meats to crunchy veggies. If you find yourself with an abundance of flour tortillas and want to make sure they last, freezing is a great option. Properly frozen flour tortillas can maintain their taste and texture, allowing you to enjoy them at your convenience. In this article, we’ll walk you through the steps to freeze flour tortillas effectively, ensuring they’re ready for your next culinary adventure.
Here’s a guide on how to freeze flour tortillas:
Step 1: Gather your fresh flour tortillas
The first step in freezing flour tortillas is to gather fresh ones. Whether you’ve purchased them from a store or lovingly crafted them in your own kitchen, starting with fresh tortillas is essential for preserving their taste and texture during the freezing process.
Freshness is crucial because it directly impacts the quality of the tortillas after they’ve been frozen and thawed. Here’s why it matters:
- Texture: Fresh tortillas have the ideal soft and pliable texture that makes them perfect for wrapping around fillings or using as a base for various dishes. As tortillas age, they may become dry or brittle, making them less enjoyable to eat.
- Taste: Freshly made or recently purchased tortillas have a delicious, authentic flavor that enhances your culinary creations. Stale or old tortillas can develop off-flavors or lose their original taste, which can negatively affect the overall taste of your dishes.
- Freezing Effectiveness: Fresh tortillas freeze better than older ones. The freezing process itself can lock in the tortillas’ freshness, so starting with high-quality, fresh tortillas ensures that you’ll have better results when you eventually thaw and use them.
- Food Safety: Fresh tortillas are less likely to have been exposed to bacteria or contaminants that can multiply during freezing and thawing. Starting with fresh tortillas reduces the risk of foodborne illness.
Whether you’re planning to use your flour tortillas for tacos, burritos, enchiladas, or any other culinary creation, beginning with fresh tortillas sets the stage for a successful freezing experience. So, check the expiration date if you bought them from the store, or if you’ve made them at home, ensure they are at their peak of freshness before you proceed with the freezing process.
Step 2: Separate and stack the tortillas
Step 2 in the process of freezing flour tortillas involves separating and stacking them properly to prepare them for freezing. This step may seem simple, but it plays a significant role in maintaining the quality of the tortillas during storage. Here’s why it’s essential:
- Preventing Sticking: Flour tortillas have a soft and pliable texture, which can make them prone to sticking together when stacked without any separation. Separating them with parchment paper or wax paper creates a barrier that prevents the tortillas from sticking. This is crucial because stuck tortillas can tear or lose their shape when you try to separate them after thawing, leading to a less appealing presentation.
- Ease of Use: Separating and stacking the tortillas evenly helps you maintain organization and makes them easier to handle. When you’re ready to use them, you can simply grab as many tortillas as needed without struggling to separate them individually.
- Space Efficiency: Stacking tortillas neatly allows you to maximize the use of space in your freezer. This organization ensures that you can store more tortillas without overcrowding or damaging them.
Here’s how to go about it:
- Remove Packaging: Take the tortillas out of their original packaging. This could be a plastic bag, foil wrapper, or any other container they came in.
- Separate Gently: Carefully separate each tortilla from the stack. Be gentle to avoid tearing or damaging them.
- Use Parchment or Wax Paper: If you have a large stack of tortillas, consider placing a piece of parchment paper or wax paper between each tortilla. This extra layer of separation ensures that they won’t stick together.
- Stack Neatly: Once separated, stack the tortillas neatly. Ensure they are evenly aligned to make the most of your freezer space.
Can I freeze store-bought flour tortillas directly in their original packaging?
Freezing store-bought flour tortillas directly in their original packaging is possible but not recommended for long-term storage. The original packaging may not provide adequate protection against moisture and freezer burn, potentially affecting the tortillas’ quality. It’s advisable to wrap the tortillas individually in plastic wrap or foil before freezing to safeguard their texture and taste during storage.
Is it better to freeze flour tortillas individually or in stacks?
It is generally better to freeze flour tortillas individually rather than in stacks. Freezing them individually, with parchment paper or wax paper between each tortilla, prevents sticking and makes it easier to separate them when needed. This approach also allows for more flexible portioning, so you can take out just the number of tortillas you require without thawing the entire stack.
Step 3: Wrap the tortillas in plastic wrap
Step 3 is a crucial part of the process when freezing flour tortillas. It involves individually wrapping each tortilla in plastic wrap to protect them from moisture and freezer burn. Here’s why this step is essential:
- Moisture Protection: Flour tortillas are prone to absorbing moisture, which can lead to a soggy and undesirable texture when they’re thawed. By wrapping each tortilla in plastic wrap, you create a barrier that prevents moisture from seeping in. This is especially important if you plan to store the tortillas for an extended period.
- Freezer Burn Prevention: Freezer burn occurs when food is exposed to air in the freezer, causing it to dehydrate and develop ice crystals. These ice crystals can negatively affect the texture and taste of the tortillas. Tight plastic wrap seals around each tortilla help prevent freezer burn by minimizing air exposure.
- Maintaining Freshness: The tight seal created by the plastic wrap helps maintain the freshness of the tortillas. It locks in their flavor and texture, ensuring that they taste as good as they did when you first prepared them.
Here’s how to wrap flour tortillas in plastic wrap:
- Prepare a sheet of plastic wrap: Tear off a piece of plastic wrap long enough to fully encase one tortilla.
- Place the tortilla: Lay one tortilla in the center of the plastic wrap.
- Wrap tightly: Fold the sides of the plastic wrap over the tortilla and then roll it up tightly, like you would with a burrito. Ensure there are no gaps or openings where air could get in.
- Seal the ends: Twist the ends of the plastic wrap to seal them securely.
- Repeat for each tortilla: Continue this process for each tortilla you want to freeze, wrapping them individually.
Step 4: Place tortillas in a resealable plastic bag
Step 4 in the process of freezing flour tortillas involves adding an extra layer of protection by placing the individually wrapped tortillas inside a resealable plastic bag or an airtight container. This step is crucial for several reasons:
- Double Protection: The plastic wrap you used in the previous step provides a primary barrier against moisture and freezer burn. Placing the wrapped tortillas inside a resealable plastic bag or airtight container offers a secondary layer of protection. This redundancy helps ensure that your tortillas stay fresh and free from freezer-related issues.
- Added Insulation: The bag or container provides additional insulation, helping to maintain the temperature and prevent temperature fluctuations within the tortilla storage. This helps to preserve the texture and quality of the tortillas.
- Organization: Using a bag or container keeps your freezer tidy and organized. It prevents individual tortillas from scattering or getting lost in the freezer, making it easier to locate and use them when needed.
Here’s how to do it:
- Select a Resealable Bag or Container: Choose a resealable plastic bag or an airtight container that can comfortably accommodate the wrapped tortillas without crushing them.
- Place the Wrapped Tortillas Inside: Carefully transfer the individually wrapped tortillas into the bag or container. If you stack the tortillas with parchment or wax paper between them, ensure they stay neatly stacked within the bag or container.
- Seal the Bag or Container: Seal the resealable bag or container tightly to prevent air from entering. If using a bag, remove as much air as possible before sealing. If using a container, make sure the lid is securely closed.
Step 5: Remove excess air
Step 5 in the process of freezing flour tortillas is a critical one – removing excess air from the resealable bag or airtight container before sealing it. This step is essential for several reasons:
- Preventing Freezer Burn: Air contains moisture, and when that moisture comes into contact with the tortillas, it can lead to freezer burn. Freezer burn occurs when ice crystals form on the surface of the food. These ice crystals can cause the tortillas to become dehydrated and develop off-flavors, negatively impacting their texture and taste.
- Preserving Texture: Flour tortillas are best enjoyed when they have a soft, pliable texture. Excess air in the packaging can cause the tortillas to become stiff or brittle during freezing, making them less enjoyable to eat.
Here’s how to remove excess air:
- For Resealable Bags: If you’re using a resealable plastic bag, after placing the wrapped tortillas inside, gently press on the bag to remove as much air as possible. Start at the bottom and work your way up towards the top of the bag while sealing it. The goal is to create a vacuum-like effect inside the bag.
- For Airtight Containers: If you’re using an airtight container, press the tortillas down to eliminate any pockets of air trapped around them. You can also insert a piece of parchment paper or plastic wrap directly on top of the tortillas before sealing the container, which helps create an air-tight seal.
Step 6: Seal and label
Step 6 involves sealing the plastic bag or container securely and labeling it with the date of freezing. This step is crucial for several reasons:
- Maintaining Freshness: Proper sealing ensures that the tortillas remain protected from external factors, such as moisture, odors, and temperature fluctuations. This protection helps maintain their freshness and quality during storage.
- Preventing Cross-Contamination: A securely sealed bag or container also prevents cross-contamination with other foods in the freezer. It ensures that the tortillas won’t absorb any unwanted flavors or odors from other items in the freezer.
- Organizing Your Freezer: Labeling the package with the date of freezing helps you keep track of how long the tortillas have been in the freezer. This is important because flour tortillas, like many foods, have a limited shelf life, even when frozen. By knowing when they were frozen, you can prioritize using the oldest tortillas first, reducing the risk of wasting them.
Here’s how to seal and label your frozen tortillas:
- Seal Securely: If you’re using a resealable plastic bag, ensure that it’s sealed tightly. If using an airtight container, make sure the lid is securely closed, creating an airtight seal.
- Label with Date: Using a permanent marker, write the date of freezing on the bag or container. Be sure to include the month and year. This way, you’ll always know how long the tortillas have been in the freezer.
- Optional: Add Any Additional Information: You can also note the quantity of tortillas in the package or any other relevant information, such as the type of flour tortillas if you have different varieties.
Step 7: Freeze
Step 7 is all about the actual freezing process. Once you have properly prepared your flour tortillas by wrapping them individually, placing them in a resealable bag or airtight container, and removing excess air, it’s time to put them in the freezer. Here’s why this step is important:
- Temperature Control: Freezing your tortillas promptly after packaging helps maintain their quality. It locks in their freshness, flavor, and texture at their best.
- Preventing Contamination: Placing the tortillas in the freezer ensures they are kept separate from other food items. This prevents any potential cross-contamination and helps maintain the integrity of the tortillas.
- Efficient Use of Space: Storing the tortillas flat inside the freezer maximizes space efficiency and ensures that they remain in good shape. If they are stacked neatly, they are less likely to bend or break during the freezing process.
Here’s how to freeze your prepared flour tortillas:
- Lay Flat: Place the sealed bag or container of tortillas flat in your freezer. Ensure it’s positioned in a way that prevents the tortillas from being bent or folded during freezing.
- Avoid Overcrowding: Try not to overcrowd the freezer with too many items at once, as this can cause temperature fluctuations and slower freezing times. Leave enough space for proper air circulation around the tortillas.
- Quick Freeze: For the best results, aim to freeze your tortillas as quickly as possible. This helps preserve their quality by minimizing the formation of ice crystals.
Once you’ve placed the tortillas in the freezer, they will begin to freeze gradually. Depending on your freezer’s temperature, this can take several hours overnight. After they’re fully frozen, you can safely store them in the freezer for an extended period.
How long can flour tortillas last in the freezer?
Flour tortillas can typically be stored in the freezer for up to 6-8 months when properly packaged to prevent freezer burn and maintain their quality. Beyond this period, they may still be safe to eat but could experience a decline in texture and taste. Regularly labeling and dating the packaging can help ensure they are used within their recommended storage time frame.
Step 8: Thaw and use
Step 8 is the final stage in the process of freezing and using flour tortillas. This step involves thawing the frozen tortillas and preparing them for use in your recipes. Here’s why this step is crucial:
- Texture Preservation: Proper thawing helps maintain the texture of the tortillas. Slow, controlled thawing prevents them from becoming overly moist or soggy, which can occur if they thaw too quickly.
- Food Safety: Thawing in a controlled manner reduces the risk of bacterial growth. It ensures that the tortillas remain safe for consumption.
Here’s how to thaw and use your frozen flour tortillas:
- Room Temperature Thawing: To thaw at room temperature, simply remove the desired number of tortillas from the freezer and place them on a clean kitchen counter or a plate. Allow them to thaw for a few hours. The exact time will depend on the thickness of the tortillas and the temperature of your kitchen. Check periodically, and when they are pliable and no longer frozen in the center, they are ready to use.
- Refrigerator Thawing: For a slower and more controlled thawing process, you can place the frozen tortillas in the refrigerator overnight. This method is particularly useful if you’re planning to use them the next day. Be sure to keep the tortillas in their original packaging or a sealed bag or container during refrigerator thawing to prevent moisture absorption.
- Reheating: Once the tortillas are thawed, you can reheat them for use in your recipes. A common method is to heat them in a dry skillet over medium heat for a few seconds on each side until they become pliable and slightly warm. Alternatively, you can wrap them in a damp paper towel and microwave them in 10-20 second intervals until they are heated to your desired temperature.
Can I use frozen flour tortillas directly in recipes without thawing?
Yes, you can use frozen flour tortillas directly in recipes without thawing them first. However, keep in mind that frozen tortillas may be less pliable and could require additional cooking time. Thawing them before use usually results in more flexible and easier-to-work-with tortillas, especially in dishes like tacos or wraps.
Other related questions
Can I refreeze flour tortillas?
It is generally not recommended to refreeze flour tortillas once they have been thawed. Repeated freezing and thawing can adversely affect their quality, leading to changes in texture and taste. To preserve their integrity, it’s best to only thaw the amount of tortillas you plan to use and consume within a single thawing cycle.
How do I know if the tortillas have gone bad after being frozen?
To determine if frozen tortillas have gone bad, examine their appearance, texture, and odor. If you notice significant ice crystals, freezer burn, or a change in color, they may have deteriorated. Additionally, if they exhibit an off-putting odor or an unusual taste, it’s a sign they may be no longer suitable for consumption. Always rely on your senses and best judgment to assess their quality before using.
What recipes can I make with frozen flour tortillas after thawing?
After thawing, you can use frozen flour tortillas in a wide range of recipes. Common options include making tacos, burritos, quesadillas, enchiladas, fajitas, wraps, and even homemade tortilla chips. These thawed tortillas are versatile and can be filled with various ingredients to create a variety of flavorful dishes. With proper thawing, they will be ready to use in your favorite recipes, enhancing your culinary creations.
Can I freeze flour tortillas with fillings or ingredients already inside, like burritos?
Freezing flour tortillas with fillings or ingredients already inside, such as burritos, is possible, but it requires special consideration. To do so successfully, it’s essential to wrap them tightly and securely in an airtight manner to prevent freezer burn and maintain quality. Vacuum sealing is an effective method for this purpose. However, keep in mind that the texture of some ingredients, like vegetables, can change during freezing, so results may vary depending on the filling.

