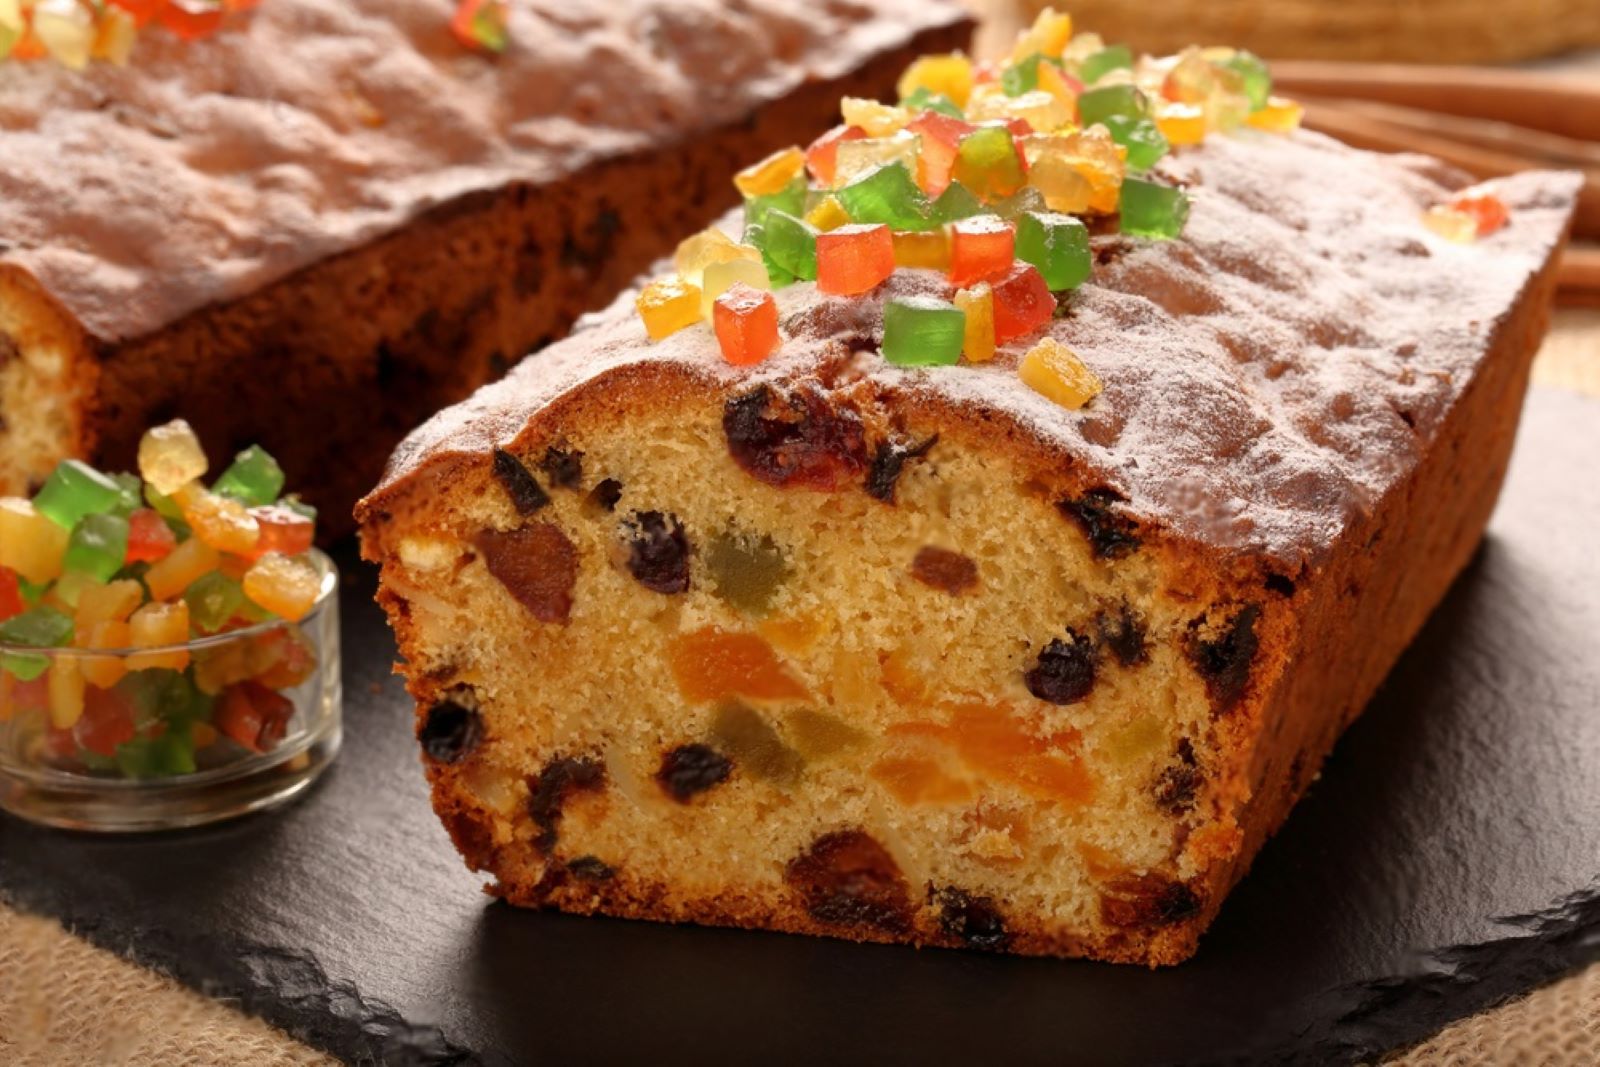
Fruit cake, a timeless and indulgent treat, holds a special place in the realm of desserts with its rich flavors and festive allure. Bursting with candied fruits, nuts, and a touch of warming spices, fruit cake encapsulates the essence of celebrations and shared moments. Whether enjoyed during holidays or as a special delight, this dense and flavorful cake carries the traditions of generations and a sense of culinary nostalgia. However, when baking or receiving a larger fruit cake, it might be challenging to consume it all before it loses its freshness or succulence.
Freezing fruit cake becomes a practical and effective method to preserve its delightful taste and luscious texture, ensuring that each slice captures the essence of a homemade delicacy, ready to elevate your moments with the essence of perfectly frozen fruit cake, even when a freshly baked confection isn’t readily available or when you wish to relish this beloved dessert at your convenience. In this guide, we will explore the best practices for freezing fruit cake, enabling you to savor the richness of this timeless dessert and elevate your celebrations with the essence of perfectly frozen fruit cake, without the need for a fresh preparation or frequent baking endeavors.
Here are the simple steps to freeze fruit cake:
Step 1: Choose the Right Fruit Cake
The process of freezing a fruit cake begins with the critical step of selecting the appropriate cake for preservation. When considering which fruit cakes to freeze, it’s important to prioritize freshness, taste, and texture. Here’s a breakdown of this step:
- Freshly Baked and Desirable Taste:
Opting for fruit cakes that have been recently baked is essential. Freshly baked cakes retain their moisture and flavors more effectively than cakes that have been stored for an extended period. The natural moisture content present in a newly baked fruit cake contributes to its succulence and taste. The aromas and flavors that emerge from a recently baked cake are also more vibrant and appealing.
- Texture Consideration:
The texture of a fruit cake plays a crucial role in the overall enjoyment of the dessert. Ideally, the cake should have a moist and tender crumb with well-distributed fruits and nuts. A cake that is too dry or overly dense might not freeze as successfully, as it could lead to a less-than-pleasant texture upon thawing.
- Signs of Spoilage:
Before freezing any fruit cake, thoroughly inspect it for any visible signs of spoilage. These signs could include mold growth, unusual odors, or discolored patches. If you notice any of these indicators, it’s best to avoid freezing the cake, as these issues could intensify during the freezing and thawing process.
Step 2: Prepare the Fruit Cake
After you’ve selected the right fruit cake for freezing, the next crucial step involves preparing the cake for optimal preservation in the freezer. This involves removing certain elements and portioning the cake to suit your future consumption needs. Here’s a closer look at what this step entails:
- Remove Decorative Elements:
Many fruit cakes come adorned with decorative elements such as icing, glazes, or other embellishments. However, these decorative components might not fare well in the freezing and thawing process. Icing can become watery or lose its texture, and glazes might become less visually appealing. To ensure the best results, gently remove any decorative elements from the surface of the cake before proceeding with freezing.
- Cut into Portions:
Before freezing the entire cake, consider portioning it into individual slices or smaller servings. By doing so, you can conveniently thaw only the amount you intend to consume, rather than having to defrost the entire cake. Cutting the cake into portions also promotes more even freezing and thawing, ensuring that each piece retains its texture and flavor.
- Suitable Consumption Sizes:
When cutting the fruit cake into portions, consider your typical consumption needs. Aim for sizes that align with how much you’d typically enjoy in one sitting. This not only makes the thawing process more convenient but also helps prevent wastage by allowing you to defrost only what you’ll actually eat.
- Uniform Sizing:
While cutting the cake into portions, try to maintain uniform sizes to promote even freezing and thawing. This helps ensure that each piece undergoes consistent temperature changes, preserving the cake’s overall quality.
By removing any potentially problematic decorative elements and cutting the fruit cake into appropriately sized portions, you’re taking proactive measures to safeguard the cake’s taste and texture during freezing and thawing. These steps contribute to a smoother and more enjoyable experience when you’re ready to enjoy your frozen fruit cake.
Step 3: Wrap the Fruit Cake
Once you’ve prepared the fruit cake by removing any decorative elements and portioning it for individual servings, the next vital step in the freezing process involves securely wrapping each slice or portion of the cake. This meticulous wrapping serves to protect the cake from freezer burn and preserve its moisture, ensuring that the cake remains as delicious and satisfying as when it was freshly baked. Here’s a detailed explanation of this crucial step:
- Preventing Freezer Burn:
Freezer burn occurs when moisture is drawn out from the surface of food due to exposure to dry, cold air in the freezer. This process can lead to changes in texture, flavor, and overall quality. By wrapping each slice or portion of the fruit cake tightly, you create a barrier that shields the cake from direct contact with the freezing air. This significantly reduces the risk of freezer burn, helping to maintain the cake’s integrity.
- Maintaining Moisture:
Moisture retention is paramount to preserving the desirable texture and taste of the fruit cake. The moisture present in the cake helps prevent it from becoming overly dry or tough after freezing and thawing. Wrapping the cake tightly in plastic wrap creates a sealed environment that traps moisture within the cake, minimizing the potential for moisture loss during freezing.
- Effective Wrapping Technique:
When wrapping the fruit cake slices, ensure that the plastic wrap adheres closely to the surface of the cake. Start by placing the cake slice in the center of the plastic wrap, then fold the sides of the wrap over the cake and press gently to remove any air pockets. Fold the top and bottom of the plastic wrap over the cake and secure it with gentle pressure.
Step 4: Double Wrapping (Optional)
As you embark on the journey of freezing fruit cake, you might choose to implement an additional layer of protection to enhance the preservation of your delectable treats. This step involves double wrapping the plastic-wrapped fruit cake slices with aluminum foil, offering an extra shield against freezer burn and moisture loss. Here’s a detailed explanation of this optional but beneficial technique:
- Enhanced Barrier Against Freezer Burn:
While plastic wrap is effective in creating a barrier against freezer burn, adding a layer of aluminum foil further strengthens this defense. Aluminum foil is impermeable to air and moisture, providing an additional shield that safeguards the cake slices from the harsh conditions of the freezer. This is particularly useful for longer storage periods, as it minimizes the chances of any air seepage that might compromise the cake’s quality.
- Preservation of Moisture:
By double wrapping with aluminum foil, you’re creating a multi-layered shield that helps maintain the cake’s natural moisture content. Moisture loss during freezing can lead to textural changes and potential dryness, affecting the overall enjoyment of the cake upon thawing. The aluminum foil acts as a safeguard, helping to lock in the cake’s moisture and prevent it from becoming overly dry.
- Method of Double Wrapping:
To execute this technique, first, ensure that the plastic-wrapped fruit cake slice is tightly sealed. Then, place the wrapped slice in the center of a sheet of aluminum foil. Fold the sides of the foil over the cake, making sure it is completely encased. Next, fold the top and bottom edges of the foil over the cake, creating a snug envelope-like package.
- Extra Protection for Longer Storage:
While double wrapping might not be necessary for short-term storage, it becomes particularly valuable when you plan to freeze fruit cake for an extended period. This method ensures that the cake remains in prime condition, with its flavors, textures, and moisture preserved over time.
By opting for the optional step of double wrapping your plastic-wrapped fruit cake slices with aluminum foil, you’re bolstering the protection against freezer burn and moisture loss. This extra layer of defense contributes to the maintenance of the cake’s quality, ultimately resulting in a delicious and satisfying experience when you finally relish your frozen fruit cake.
Step 5: Arrange in Freezer-safe Containers
After meticulously wrapping your fruit cake slices to shield them from freezer burn and moisture loss, the next strategic step involves arranging these wrapped slices within suitable freezer-safe containers. This arrangement ensures both efficient use of space and protection for your frozen treats. Here’s a detailed explanation of how to effectively execute this step:
- Choosing Freezer-safe Containers:
Select containers that are explicitly designed for freezer storage. These containers are crafted to withstand the low temperatures of the freezer without becoming brittle or cracking. The use of proper containers helps maintain the integrity of the fruit cake slices and prevents any potential contamination from other foods in the freezer.
- Organized Placement:
Place the individually wrapped fruit cake slices neatly inside the freezer-safe containers. This organization prevents the slices from coming into direct contact with the freezer’s surfaces or each other. Proper placement also makes it easier to retrieve specific slices when you’re ready to thaw and enjoy them.
- Using Parchment Paper Dividers:
If you’re freezing multiple slices in one container, consider inserting sheets of parchment paper between each slice. These paper dividers prevent the slices from sticking together during freezing. When slices adhere to one another, their textures can become compromised, and separating them can lead to undesirable damage.
- Efficient Space Utilization:
While arranging the wrapped slices, make sure to utilize the container’s space efficiently. Avoid overcrowding the container, as this can impede proper air circulation and result in uneven freezing. Leave a small gap between the slices and the container’s lid to allow for slight expansion as the cake freezes.
- Container Labeling (Optional):
For added organization, you can choose to label the containers with information such as the date of freezing or the flavor of the fruit cake slices. This labeling simplifies the process of selecting slices based on your preferences and helps you keep track of storage times.
Step 6: Seal and Label Containers
Once you have carefully arranged your wrapped fruit cake slices in freezer-safe containers, it’s time to secure these containers to create an airtight seal. Additionally, labeling the containers with the date of freezing serves as a useful reminder for tracking storage time. Here’s a detailed explanation of the importance and procedure of sealing and labeling your frozen fruit cake containers:
- Airtight Seal for Optimal Preservation:
Airtight sealing is a crucial step in preserving the quality of your frozen fruit cake slices. A proper seal prevents air and moisture from entering the container, which can lead to freezer burn and diminish the cake’s taste and texture. Ensuring an airtight environment inside the container maintains the integrity of the cake slices during storage.
- Secure Closure Technique:
Close the lids of the freezer-safe containers securely. Pay attention to any locking mechanisms or tabs that the containers might have. Ensure that the lids are tightly pressed into place, leaving no gaps that could allow air to infiltrate.
- Adhesive Labels for Effective Organization:
Using adhesive labels to mark each container is a simple yet highly effective way to keep track of your frozen fruit cake slices. Write down the date on which you froze the slices on each label. This practice helps you monitor the storage time and ensure that you consume the cake within the recommended duration for optimal quality.
- Tracking Storage Time:
Different types of fruit cakes may have varying recommended storage durations. By labeling the containers with the freezing date, you can easily calculate how long the cake has been stored in the freezer. This information empowers you to plan your consumption accordingly and enjoy the cake while it’s still at its best.
- Label Placement:
Place the adhesive label on a visible and easily accessible spot on the container. This ensures that you can quickly identify the storage duration without having to open the container each time.
Step 7: Freeze the Fruit Cake
As you near the completion of the fruit cake freezing process, it’s time to transfer the sealed containers into the freezer. This step involves strategic placement within the freezer to ensure even freezing and maintain the cake’s quality over time. Here’s an in-depth explanation of why this step is crucial and how to execute it effectively:
- Even Freezing for Consistent Quality:
Proper placement of the sealed containers in the freezer is essential to achieve even freezing. Even freezing helps preserve the cake’s texture, flavors, and overall quality. Uneven freezing could result in variations in taste and texture among different slices, which might affect your enjoyment when you thaw and consume the cake.
- Choosing a Flat Surface:
Select a flat surface within your freezer to place the sealed containers. This ensures that the containers remain stable and level during freezing, preventing any shifting or tilting that might compromise the integrity of the cake slices or cause spills.
- Space for Air Circulation:
Arrange the sealed containers with some space between them. Proper air circulation is vital for maintaining consistent freezing temperatures within the freezer. Ample space between containers allows cold air to flow freely around each container, ensuring that all slices freeze uniformly.
- Avoid Overcrowding:
Resist the temptation to overcrowd the freezer space with too many containers. Overcrowding can impede air circulation and hinder the freezer’s efficiency in maintaining the desired temperature. Adequate spacing between containers is key to successful and even freezing.
- Cautions with Other Foods:
Keep in mind the contents of your freezer and ensure that the sealed containers of fruit cake are not placed next to items with strong odors or liquids that might accidentally spill onto them. This precaution helps preserve the cake’s flavors and appearance during the freezing process.
By placing the sealed containers on a flat surface in the freezer with ample space between them, you’re setting the stage for a successful freezing process. This step guarantees that your fruit cake slices freeze evenly and retain their high quality, ensuring that each slice remains a delectable treat to savor when the time comes to enjoy your frozen delight.
Step 8: Storage Duration
As you embark on the journey of freezing fruit cake, it’s important to be mindful of the optimal storage duration to ensure that your frozen treats remain at their peak quality when you decide to indulge. While fruit cake can be safely stored for extended periods, there are certain considerations to keep in mind regarding texture and flavor preservation. Here’s a comprehensive explanation of the recommended storage duration and its significance:
- Ideal Storage Duration for Quality:
For the best experience, it’s advisable to consume your frozen fruit cake within a window of 3 to 6 months from the date of freezing. Within this timeframe, the cake’s texture, flavors, and overall quality are likely to be well-preserved, closely resembling the deliciousness of the freshly baked cake.
- Texture and Flavor Considerations:
As time goes on, even in the controlled environment of the freezer, some changes can occur in the texture and flavor of frozen fruit cake. The moisture content might gradually diminish, leading to a slightly drier texture upon thawing. Additionally, while flavors will still be present, they might become less vibrant compared to the initial freezing period.
- Longer Storage:
It’s important to note that while frozen fruit cake can be safely stored for longer periods, beyond 6 months, the gradual changes in texture and flavor become more pronounced. The cake might become noticeably drier, and the flavors might mellow. However, it’s worth mentioning that even after longer storage, the frozen fruit cake remains safe for consumption.
- Maintaining Quality:
If you plan to store the fruit cake beyond the 6-month mark, consider double wrapping the cake with an extra layer of aluminum foil to provide an added layer of protection against freezer burn and moisture loss. This practice can help mitigate some of the textural and flavor changes associated with prolonged storage.
- Regular Monitoring:
As the storage duration extends, it’s a good practice to occasionally assess the quality of the frozen fruit cake. Thaw and sample a slice to gauge any changes in texture and flavor. This assessment can guide your decision on whether to consume the cake or make alternative plans.
Other related questions
How do you defrost fruit cake?
To defrost fruit cake, transfer it from the freezer to the refrigerator. Allow it to thaw slowly for several hours or overnight. Alternatively, you can unwrap and microwave individual slices using the defrost setting, ensuring careful monitoring to prevent overheating.
Can you refreeze fruit cake?
Yes, you can refreeze fruit cake, but it might affect its quality. Multiple thawing and freezing cycles can lead to texture and flavor changes due to moisture loss. It’s best to minimize refreezing to maintain optimal taste and texture.
How do I know if the fruit cake has gone bad after being frozen?
Signs of a frozen fruit cake going bad include mold growth, unusual odors, or changes in texture, like excessive dryness. Discoloration or freezer burn can also indicate deterioration. If any of these signs are observed, it’s advisable not to consume the cake.
Should I remove any decorative elements before freezing a fruit cake?
Yes, it’s advisable to remove delicate decorative elements like fondant decorations or fresh flowers before freezing a fruit cake. Freezing can cause these decorations to become brittle or lose their visual appeal. Safely remove and store decorations separately to ensure the best presentation when thawing and serving the fruit cake.
Are there any differences in freezing light fruit cakes vs. dense fruit cakes?
Freezing light fruit cakes poses fewer concerns due to their less dense structure, as they tend to retain moisture and flavor better during freezing and thawing. In contrast, dense fruit cakes may require longer thawing periods and careful wrapping to prevent moisture loss and potential textural changes. Adapting freezing methods to cake density ensures optimal taste and texture preservation upon thawing.
Can you freeze a fruit cake that contains alcohol or liquor?
Yes, you can freeze a fruit cake with alcohol or liquor, but there are considerations. Alcohol can lower freezing temperature, affecting texture. To preserve taste and prevent sogginess, wrap cake tightly, use alcohol-resistant packaging, and allow cake to thaw gradually.


