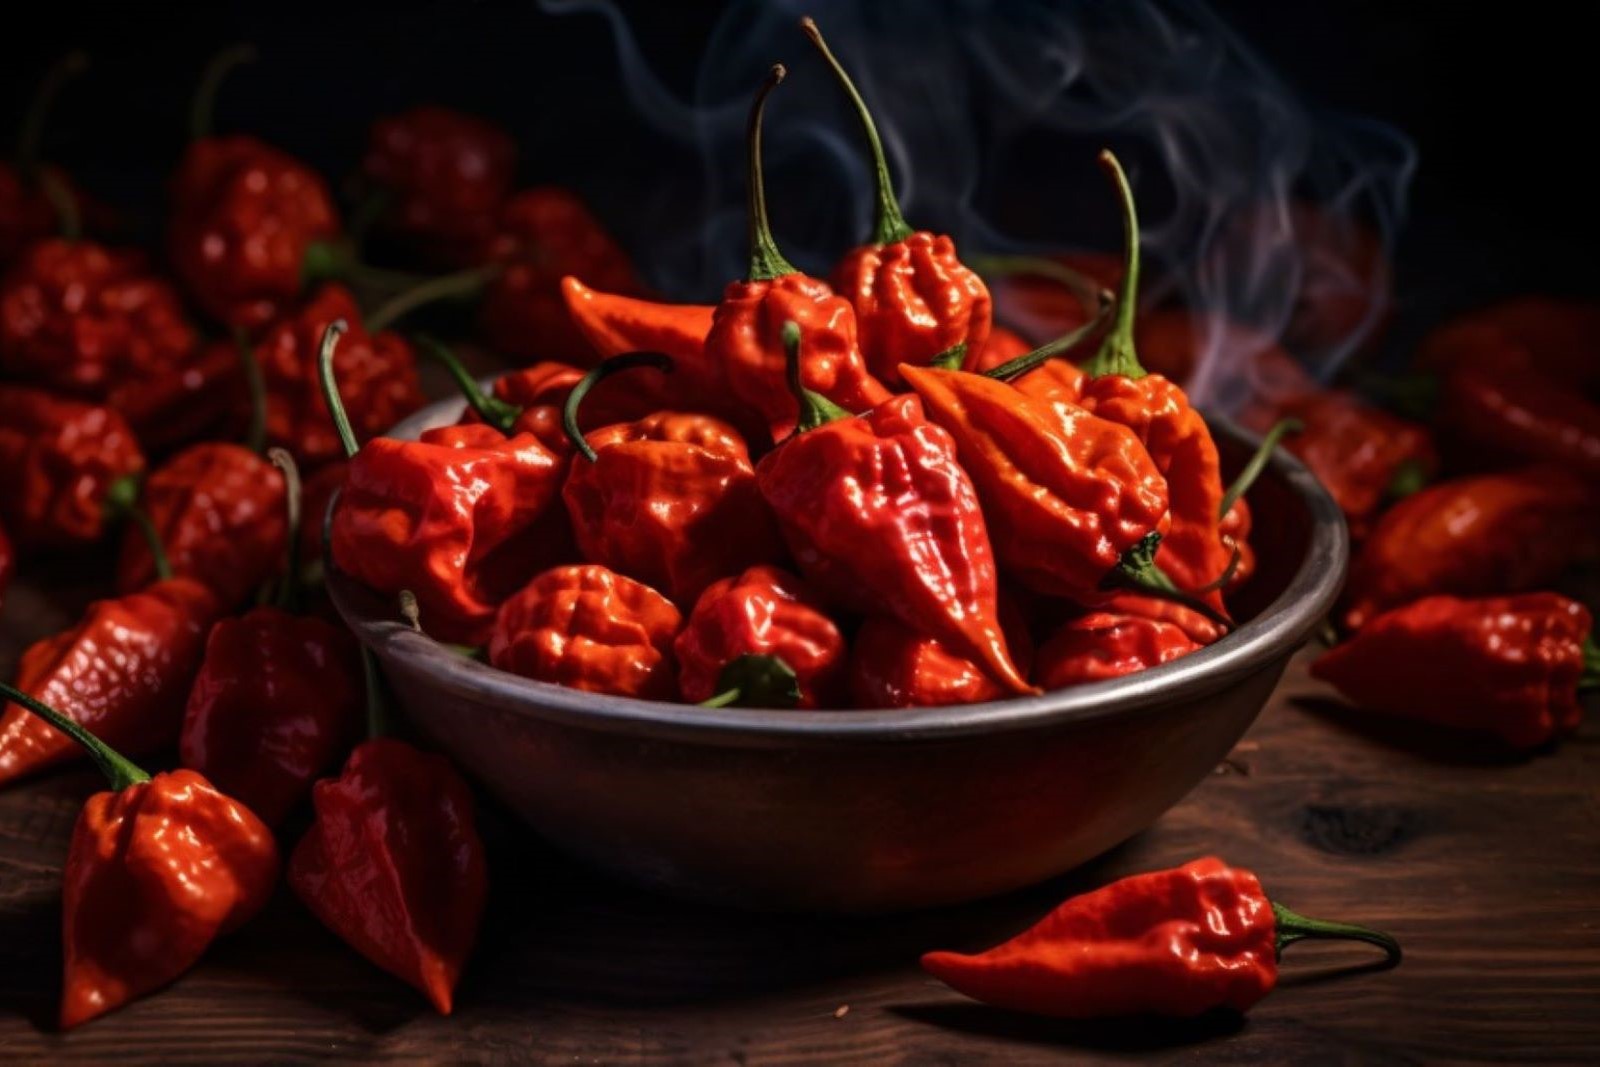
Ghost peppers, known for their intense heat and fiery flavor, are among the hottest chili peppers in the world. These small, wrinkled peppers pack a punch and are a favorite among spice enthusiasts looking for an exhilarating culinary experience. If you have an abundance of ghost peppers or want to preserve their potent heat for later use, freezing is an excellent option. Freezing ghost peppers allows you to retain their spiciness and extend their shelf life, ensuring that you can add a fiery kick to your dishes whenever you desire. In this guide, we will explore the best practices for freezing ghost peppers, including proper preparation, packaging, and storage techniques, so you can harness the heat of these legendary peppers while keeping them fresh and ready to use. Join us as we unlock the secrets of freezing ghost peppers and embrace the boldness and intensity they bring to your culinary creations.
Here are the simple steps to freeze ghost pepper:
- Step 1: Select Fresh Ghost Peppers
- Step 2: Wash and Prepare the Peppers
- Step 3: Wear Gloves and Handle with Caution
- Step 4: Arrange the Peppers on a Baking Sheet
- Step 5: Flash-Freeze the Peppers
- Step 6: Transfer to Freezer-Safe Containers or Bags
- Step 7: Label and Date the Packages
- Step 8: Store in the Freezer
Step 1: Select Fresh Ghost Peppers
Choosing fresh ghost peppers is essential for achieving optimal results when freezing them. Here’s why it’s important and what to look for:
- Firmness: Select ghost peppers that are firm to the touch. Avoid peppers that feel soft or have any mushy spots, as they may indicate decay or spoilage.
- Plumpness: Look for peppers that are plump and well-rounded. Avoid shriveled or wrinkled peppers, as they may have lost moisture and quality.
- Absence of rot or mold: Inspect the peppers carefully and ensure there are no signs of rot or mold. Discolored spots, dark patches, or fuzzy growth are indicators of decay and should be avoided.
By choosing fresh ghost peppers, you ensure that the peppers are at their peak flavor and quality. Fresh peppers freeze better and retain their spiciness and texture more effectively. If you’re growing your own ghost peppers, harvest them when they have fully ripened and are vibrant in color. For store-bought peppers, check the packaging or bins for any visible signs of deterioration before making your selection.
Step 2: Wash and Prepare the Peppers
Washing and preparing the ghost peppers before freezing is an important step to ensure cleanliness and remove any unwanted dirt or debris. Here’s a breakdown of why this step is necessary and how to do it:
- Removing dirt and debris: Ghost peppers, like any produce, may have dirt, dust, or other residues on their surface. Washing them helps eliminate these impurities, ensuring that your frozen peppers are clean and safe to consume.
- Gentle wash under cool running water: Place the ghost peppers under cool running water and gently rub them with your hands. This helps dislodge any dirt particles or contaminants clinging to the peppers. Avoid using soap or any cleaning agents, as they can leave a residue or alter the flavor of the peppers.
- Removing stems: After washing the ghost peppers, carefully remove the stems. You can do this by using a sharp knife or kitchen shears. Cut the stems as close to the pepper as possible without cutting into the flesh. Removing the stems helps prevent any unwanted bitterness and makes it easier to handle the peppers during cooking or when using them in recipes.
- Determining the desired size: At this stage, you have the option to either leave the ghost peppers whole or cut them into your desired size. Cutting them can make it easier to portion them later on or incorporate them into specific dishes. Consider your preferences and the recipes you plan to use the peppers in when deciding on the size.
By washing the ghost peppers and removing the stems, you ensure that any surface contaminants are eliminated, promoting food safety. Additionally, cutting the peppers to your desired size provides convenience and flexibility when using them in future culinary endeavors. Remember to handle the peppers with caution, using gloves if necessary, as they can cause skin irritation due to their spiciness.
Step 3: Wear Gloves and Handle with Caution
Handling ghost peppers requires caution due to their extreme spiciness and the potential for skin irritation or burns. Here’s why wearing gloves and being mindful of avoiding contact with your face or eyes is crucial:
- Spiciness and capsaicin: Ghost peppers are renowned for their intense heat, thanks to the compound called capsaicin. Capsaicin is responsible for the fiery sensation and can cause irritation when it comes into contact with the skin or mucous membranes.
- Skin irritation and burns: The high concentration of capsaicin in ghost peppers can lead to skin irritation or burns, especially if you have sensitive skin or any open wounds. Touching the peppers with bare hands can transfer the capsaicin to your skin, causing discomfort or even painful burns.
- Eye and face protection: Capsaicin can be particularly irritating if it gets into your eyes or on your face. Rubbing your eyes after handling ghost peppers can result in a stinging sensation, redness, and temporary discomfort. To prevent this, it’s essential to avoid touching your face or eyes while working with the peppers.
To protect yourself when handling ghost peppers, it’s highly recommended to wear gloves. Latex or nitrile gloves provide a barrier between your skin and the peppers, reducing the risk of irritation or burns. By wearing gloves, you ensure that capsaicin doesn’t come into direct contact with your skin.
In addition, be cautious not to touch your face or eyes with gloved hands, as the capsaicin can transfer from the gloves to your skin. After handling ghost peppers, thoroughly wash your hands with soap and water to remove any lingering capsaicin.
By following these precautions and wearing gloves, you can safely handle ghost peppers and minimize the risk of skin irritation or burns.
Step 4: Arrange the Peppers on a Baking Sheet
Arranging the prepared ghost peppers in a single layer on a baking sheet is an important step in the freezing process. Here’s why it’s necessary and how to do it correctly:
- Preventing sticking together: Placing the ghost peppers in a single layer on a baking sheet ensures that they freeze individually and don’t stick together. If the peppers touch or overlap during freezing, they can freeze together into clumps, making it difficult to separate and use the desired quantity later on.
- Uniform freezing: Spreading out the ghost peppers on a baking sheet allows for better air circulation during freezing. This promotes uniform freezing, ensuring that each pepper freezes at the same rate and temperature. Uniform freezing helps maintain the quality, texture, and flavor of the peppers.
Here’s how to arrange the peppers on a baking sheet:
- Line a baking sheet with parchment paper or a silicone baking mat. This helps prevent the peppers from sticking to the surface of the baking sheet.
- Place the prepared ghost peppers on the baking sheet in a single layer, ensuring they are not touching each other. If you have a large quantity of peppers, you may need to use multiple baking sheets or work in batches.
- Make sure the peppers are evenly spaced on the baking sheet, allowing enough room for air to circulate around each pepper.
By arranging the ghost peppers in a single layer on a baking sheet, you ensure that they freeze individually and don’t stick together. This makes it easier to retrieve the desired quantity of peppers when you need them. Once the peppers are frozen, you can proceed to the next steps of packaging and storing them for long-term freezer storage.
Step 5: Flash-Freeze the Peppers
Flash freezing the ghost peppers is a crucial step to ensure that each pepper freezes individually, preventing them from clumping together. Here’s why flash freezing is beneficial and how to do it properly:
- Individual freezing: Flash freezing involves rapidly freezing the ghost peppers individually. This process ensures that each pepper freezes separately and doesn’t stick to others. Individual freezing allows you to retrieve the desired quantity of peppers easily without having to thaw and separate them later on.
- Preventing clumping: When peppers freeze together in clumps, it can be challenging to separate them, resulting in uneven portions or wasting more than needed. Flash freezing minimizes the chances of clumping, allowing you to maintain better control over the portioning and usage of the peppers.
Here’s how to flash-freeze the ghost peppers:
- Once the ghost peppers are arranged in a single layer on the baking sheet, place the baking sheet in the freezer.
- Allow the peppers to freeze for about 2 to 3 hours. The exact time may vary depending on the temperature and efficiency of your freezer. It’s recommended to check the peppers periodically to ensure they are frozen solid.
- Flash freezing the peppers quickly at a low temperature helps preserve their quality, texture, and flavor. The rapid freezing process prevents the formation of large ice crystals, which can degrade the peppers’ overall quality.
- After flash freezing the ghost peppers for the recommended time, they should be firm and completely frozen. At this stage, they are ready to be transferred to freezer-safe containers or bags for long-term storage.
By flash freezing the ghost peppers individually, you ensure that they do not clump together, making it easier to retrieve the desired quantity whenever you need them. This freezing method helps preserve the peppers’ individual integrity and quality, allowing you to enjoy their fiery flavor and heat to the fullest.
Step 6: Transfer to Freezer-Safe Containers or Bags
After flash freezing the ghost peppers, it’s time to transfer them to freezer-safe containers or resealable bags. This step ensures proper storage and helps maintain the quality of the peppers. Here’s why transferring the peppers and removing air is important, along with the correct procedure:
- Protecting against freezer burn: Freezer burn occurs when food is exposed to air in the freezer, leading to moisture loss and the development of dry, discolored patches. Transferring the ghost peppers to airtight containers or bags helps protect them from freezer burn, preserving their flavor, texture, and overall quality.
- Maintaining freshness: Removing as much air as possible from the containers or bags before sealing them tightly is crucial. The presence of excess air inside the packaging can lead to freezer burn and affect the peppers’ freshness over time. By minimizing air exposure, you help maintain the peppers’ quality during their freezer storage.
Here’s how to transfer and package the flash-frozen ghost peppers:
- Prepare freezer-safe containers or resealable bags: Ensure that the containers or bags you use are designed for freezer storage and can withstand low temperatures. Clean and sanitize them beforehand to ensure proper hygiene.
- Portion the peppers (optional): If you prefer to store the ghost peppers in specific portions, divide them accordingly before placing them in the containers or bags. This step allows you to easily retrieve the desired quantity without having to thaw the entire batch.
- Fill the containers or bags: Carefully transfer the flash-frozen ghost peppers into the containers or bags. Leave a small headspace at the top to accommodate any potential expansion during freezing.
- Remove air and seal: To minimize air exposure, press down gently on the containers or bags to remove as much air as possible. For bags, you can use the water displacement method by partially closing the bag, submerging it in water, and pressing out the air before sealing it tightly. Ensure a secure seal to prevent any air from entering.
Properly transferring the flash-frozen ghost peppers to airtight containers or bags, removing air, and sealing them tightly is key to preserving their quality and protecting against freezer burn. By following these steps, you ensure that the peppers retain their spicy flavor and remain fresh for an extended period in the freezer.
Step 7: Label and Date the Packages
Labeling and dating the packages of frozen ghost peppers is an essential step in organizing your freezer and keeping track of the peppers’ freshness. Here’s why labeling and dating are important and how to do it effectively:
- Tracking freshness: Ghost peppers, like any frozen food, have a limited shelf life. By labeling and dating the packages, you establish a system to track the peppers’ freshness. This allows you to prioritize the use of the oldest peppers first, ensuring that none go to waste.
- Easy identification: When your freezer contains various frozen items, labeling the ghost pepper packages helps you quickly identify them without having to open each package. It saves time and ensures you can easily locate the peppers when needed.
Here’s how to label and date the packages of frozen ghost peppers:
- Use a marker or labels: Choose a marker that is suitable for freezer use, as regular markers may fade or smudge over time. Alternatively, you can use adhesive labels that adhere well to freezer containers or bags.
- Write the date: On each package, clearly write the date of freezing. Use the format that works best for you, such as “MM/DD/YYYY” or “DD/MM/YYYY.” This date represents the day the ghost peppers were frozen.
- Additional information (optional): If desired, you can include additional information on the label, such as the quantity or any specific variety or type of ghost pepper.
- Attach the labels: Place the labels on the containers or bags in a visible location, making sure they won’t easily come off or become illegible during freezer storage.
By labeling and dating the packages of frozen ghost peppers, you establish an organized system that allows you to easily track their freshness and prioritize their usage. This ensures that you can enjoy the spiciness of the peppers while they are still at their best quality.
Step 8: Store in the Freezer
Once you have labeled and dated the packages of frozen ghost peppers, it’s time to store them in the freezer. Proper freezer storage helps maintain the peppers’ quality and extends their shelf life. Here’s why and how to store the ghost peppers effectively:
- Temperature consistency: Freezers should be set to a consistent temperature to ensure food safety and quality. The ideal freezer temperature is 0°F (-18°C) or below. Storing the ghost pepper packages in the coldest part of the freezer, such as the back or bottom shelf, helps maintain a more stable and consistent temperature.
- Protection from temperature fluctuations: Fluctuating temperatures can negatively impact the quality of frozen food. By storing the ghost pepper packages in the coldest part of the freezer, you minimize the chances of temperature fluctuations, keeping the peppers in optimal condition.
- Organized placement: Storing the ghost pepper packages in a designated area, such as a specific shelf or compartment, helps keep your freezer organized. This makes it easier to locate the peppers when you need them and prevents them from getting buried or lost among other frozen items.
Here’s how to store the labeled ghost pepper packages in the freezer effectively:
- Clear space: Ensure there is enough space in the freezer to accommodate the ghost pepper packages without overcrowding. This allows for proper air circulation and helps maintain the desired temperature.
- Coldest part of the freezer: Identify the coldest part of your freezer, which is usually the back or bottom shelf. This area is ideal for storing the ghost pepper packages as it experiences less temperature variation when the freezer door is opened.
- Arrange in an organized manner: Place the labeled ghost pepper packages in the designated area, ensuring they are neatly arranged and not stacked on top of each other. This minimizes the risk of damage and makes it easier to access individual packages when needed.
By storing the labeled ghost pepper packages in the coldest part of the freezer, you maintain a consistent temperature and protect the peppers from temperature fluctuations. This helps preserve their quality and ensures that they remain fresh and flavorful for an extended period.
How long can ghost peppers last in the freezer?
Ghost peppers can last in the freezer for up to 12 months when properly stored. When frozen at a temperature of 0°F (-18°C) or below, the peppers can maintain their quality and spiciness for an extended period. However, it is recommended to use them within the first 6 to 8 months for the best flavor and texture.
Other related questions
How do you defrost ghost peppers?
To defrost ghost peppers, remove the desired quantity from the freezer and place them in a sealed container or bag. Thaw the peppers in the refrigerator for several hours or overnight until they are completely thawed. Alternatively, you can thaw them more quickly by using a microwave on the defrost setting, but exercise caution to avoid overheating or cooking the peppers.
Can you refreeze ghost peppers?
It is generally safe to refreeze ghost peppers if they have been thawed properly and handled in a food-safe manner. However, the quality of the peppers may be compromised with each freeze-thaw cycle, resulting in changes in texture and flavor. It is recommended to use the thawed ghost peppers within a reasonable time frame and avoid repeated refreezing to maintain their optimal quality.
How do I know if the ghost peppers have gone bad after being frozen?
To determine if frozen ghost peppers have gone bad, look for signs of freezer burn, such as discoloration, dryness, or a frosty texture. If the peppers develop an off smell or an unpleasant taste, it may indicate spoilage. Additionally, if there are any signs of mold or if the peppers have been stored for an extended period beyond their recommended shelf life, it is best to discard them for safety reasons.
Can I freeze ghost peppers in oil?
It is not recommended to freeze ghost peppers in oil. Freezing peppers in oil can pose a risk of botulism due to the anaerobic environment created by the oil. Instead, it is safer to freeze ghost peppers by blanching them, removing the seeds and stems, and placing them in airtight freezer bags or containers.
Can I freeze roasted ghost peppers?
Yes, you can freeze roasted ghost peppers. After roasting the peppers, allow them to cool before freezing. Remove the stems, seeds, and charred skin, if desired, and place the roasted peppers in airtight freezer bags or containers. Label them with the date and store in the freezer for future use in recipes, such as salsas, sauces, or spicy dishes.
Can I freeze ghost peppers for use in hot sauces or salsas?
Yes, you can freeze ghost peppers for use in hot sauces or salsas. Start by washing and drying the peppers, then remove the stems and seeds if desired. Chop or puree the peppers, and transfer them to ice cube trays or freezer bags. Label them with the date and store in the freezer until needed, allowing you to conveniently add the frozen peppers to your homemade hot sauces or salsas for an extra kick of heat.
Can I freeze ghost pepper plants or cuttings?
Freezing ghost pepper plants or cuttings is not a recommended method of preservation. Ghost pepper plants are not well-suited for freezing as the freezing temperatures can damage the plant tissues, leading to loss of viability. If you want to propagate or store ghost pepper plants, it is better to explore other methods such as air-layering, rooting in water, or transplanting into pots for indoor cultivation.

