Ginger is a versatile and aromatic root that adds a unique flavor and zing to many dishes. Whether you use it for its culinary qualities or its potential health benefits, you might find yourself with more ginger than you can use before it goes bad. Freezing ginger is an excellent way to preserve its freshness and ensure you always have this flavorful ingredient on hand. In this article, we’ll guide you through the steps to freeze ginger effectively, so you can enjoy its flavor in your cooking year-round.
Here’s a comprehensive guide on how to freeze ginger:
Step 1: Select fresh ginger
Choosing the right ginger is crucial when it comes to freezing this flavorful root. The quality of the ginger you select will significantly impact the taste and texture of the frozen product. Here’s why it’s essential to start with fresh ginger:
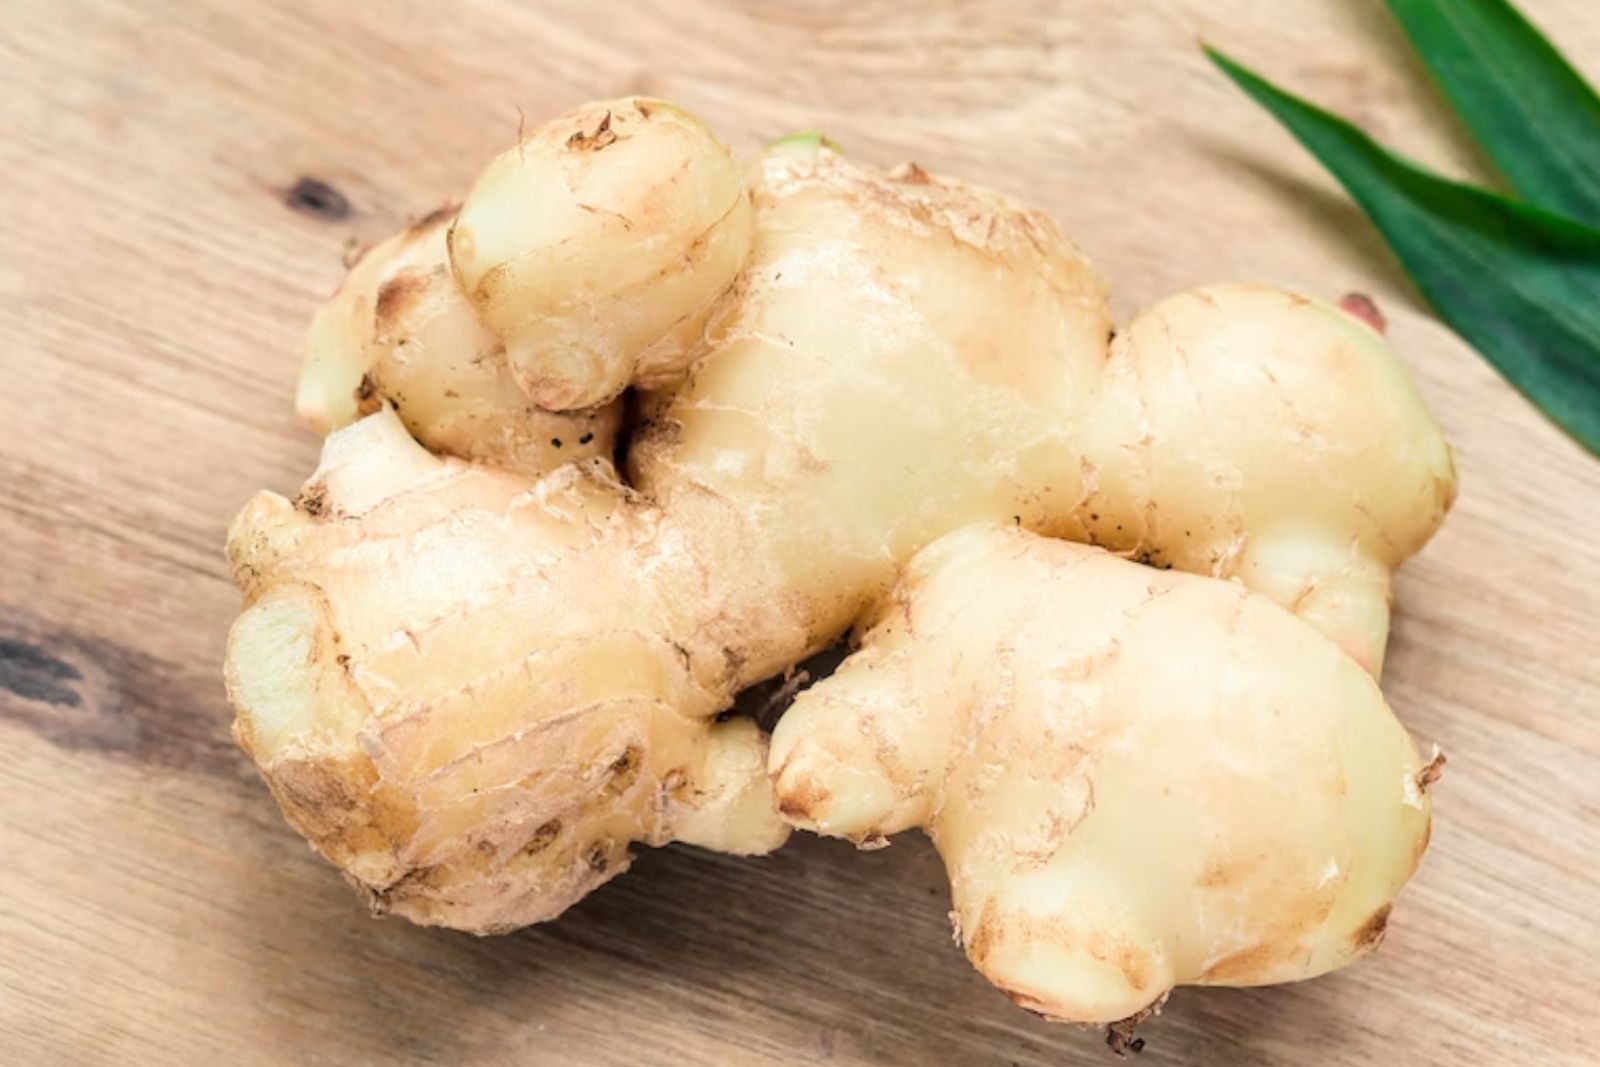
- Firmness: Fresh ginger should feel firm to the touch. When you gently squeeze it, it should give just a little, indicating that it’s still moist and not dried out. Firm ginger ensures that it’s at the peak of its flavor and moisture content, making it perfect for freezing.
- No Mold or Wrinkles: Inspect the ginger root carefully for any signs of mold, mildew, or wrinkles. Mold or wrinkling can be an indicator that the ginger is past its prime and may not freeze well. Opt for ginger that looks clean and blemish-free.
- Smooth Skin: The skin of the ginger should be smooth, without any visible blemishes or shriveled areas. Smooth skin usually indicates that the ginger is fresh and hasn’t been sitting around for too long.
- Young Ginger: While mature ginger has a stronger, spicier flavor, young ginger tends to be milder and less fibrous. For freezing purposes, young ginger is often preferred because of its smoother texture and milder taste. However, you can freeze both young and mature ginger depending on your preferences.
Step 2: Wash and peel the ginger
Once you’ve selected your fresh ginger root, the next step in the process of freezing ginger is to wash and peel it properly. Here’s why this step is essential and how to do it effectively:
- Removing Dirt and Debris: Ginger often comes with a bit of dirt or residual soil on its surface. To ensure that your frozen ginger is clean and free from any impurities, washing it under running water is crucial. This step removes any external contaminants that may affect the taste and quality of the ginger.
- Peeling for Texture and Flavor: Ginger skin can be tough and fibrous, which can impact the texture of your dishes. Peeling the ginger not only eliminates this toughness but also enhances the overall flavor. The skin of ginger can sometimes have a slightly bitter taste, so peeling it helps to make the ginger more palatable.
- Methods of Peeling: There are a few ways to peel ginger:
- Vegetable Peeler: Using a vegetable peeler is one of the easiest and safest methods. Simply hold the ginger firmly and gently slide the vegetable peeler across its surface to remove the skin.
- Spoon: Some prefer using a spoon to scrape off the skin. This method is less precise than using a peeler but can work well for irregularly shaped ginger pieces.
- Knife: If you’re comfortable with your knife skills, you can also use a knife to carefully remove the skin. However, be cautious not to remove too much of the ginger flesh in the process.
When peeling ginger, it’s important not to be too aggressive. You want to remove the skin while preserving as much of the ginger flesh as possible. Over-peeling can result in unnecessary waste and less ginger for your recipes.
Can I freeze ginger without peeling it first?
Yes, ginger can be frozen without peeling it first. However, peeling ginger before freezing is recommended as it can enhance texture and flavor. Unpeeled ginger may develop a tougher skin and may not be as pleasant to use in recipes.
Can I freeze the whole ginger root?
Yes, you can freeze whole ginger root, but it’s generally recommended to peel and slice or grate it before freezing for more convenient usage. Freezing the whole ginger root may affect its texture and make it harder to portion for recipes. Slicing or grating before freezing allows for easy access and minimizes waste when you only need a small amount of ginger.
Step 3: Slice or grate the ginger
After washing and peeling your ginger, the next decision you’ll need to make is how you want to prepare it for freezing. Ginger can be frozen in various forms, depending on your cooking preferences and convenience. Here’s why this step is important and how to go about it:
- Portioning for Convenience: Deciding whether to freeze whole ginger, sliced ginger, or grated ginger depends on how you plan to use it in your cooking. Slicing or grating ginger before freezing can be convenient because it allows you to portion it out easily when you’re ready to use it in recipes. This can save you time and effort during meal preparation.
- Enhancing Flavor Dispersion: Slicing or grating ginger also helps disperse its flavor more evenly throughout your dishes. When ginger is finely sliced or grated, its essence is released more readily, infusing your recipes with its distinctive zing and aroma.
- Grating Methods: If you choose to grate the ginger, you can use a fine grater or a microplane. Both tools produce finely grated ginger, but the microplane is often preferred for its ability to create an even finer texture, almost like ginger paste. This can be especially useful when you want ginger to dissolve completely into a sauce or marinade.
- Slicing Techniques: When slicing ginger, use a sharp knife to create thin, uniform slices. This ensures that the ginger will cook evenly and blend seamlessly into your dishes.
Ultimately, the choice of whether to freeze whole, sliced, or grated ginger comes down to your personal cooking habits and preferences. Consider how you typically use ginger in your recipes and choose the form that will best suit your needs. Regardless of your choice, freezing ginger in any of these forms will allow you to enjoy its flavor and convenience even when it’s not in season or readily available.
Step 4: Portion the ginger
Once you’ve decided to slice or grate your ginger for freezing, the next crucial step is to portion it into convenient sizes that suit your cooking requirements. Properly portioning ginger ensures that you have readily accessible servings whenever you need them. Here’s why this step is essential and how to go about it:
- Convenient Usage: Portioning ginger before freezing makes it incredibly convenient to use in your recipes. Instead of having to thaw and use an entire frozen block of ginger, you can access smaller, pre-measured amounts. This is particularly helpful when you only need a small quantity of ginger for a dish.
- Prevents Waste: Portioning ginger helps reduce food waste. It allows you to use just what you need, minimizing the chances of thawing more ginger than required and potentially wasting the rest.
- Individual Freezing Options: There are a couple of effective methods for portioning ginger:
- Ice Cube Trays: One popular option is to use ice cube trays. Simply fill each cube compartment with the sliced or grated ginger. Once frozen, you can pop out individual ginger cubes as needed. This method is especially convenient for recipes that call for small amounts of ginger.
- Baking Sheet with Parchment Paper: Alternatively, you can arrange the ginger portions on a baking sheet lined with parchment paper. Make sure they are spaced apart so they don’t stick together during freezing. Once frozen, transfer them into a freezer bag or container for easy access.
- Uniform Portions: Try to portion the ginger into uniform sizes to ensure consistent flavor in your dishes. This makes it easier to gauge how much ginger you’re adding to each recipe, enhancing your cooking precision.
Step 5: Flash-freeze the ginger
After portioning your ginger into convenient sizes, the next step in preserving its freshness and preventing clumping during freezing is to flash-freeze it. This involves a quick initial freeze on a baking sheet before transferring the portions to storage containers. Here’s why flash-freezing is essential and how to do it effectively:
- Prevents Clumping: Flash-freezing is crucial to ensure that your ginger portions don’t stick together in a solid block. When ginger pieces are placed close to each other before freezing, they can freeze together, making it challenging to separate them later. Flash-freezing prevents this by individually freezing the portions before they come into contact with one another.
- Preserves Quality: Flash-freezing locks in the ginger’s freshness and flavor. Rapid freezing prevents the formation of large ice crystals, which can damage the cell structure of the ginger and lead to a loss of texture and flavor. By quickly freezing the portions, you preserve the ginger’s quality and taste.
- Quick and Convenient: Flash-freezing is a quick process that takes about 1-2 hours in the freezer. This initial step ensures that you can efficiently store your ginger portions in containers without worrying about them sticking together.
Here’s how to flash-freeze ginger portions:
- Arrange the ginger portions on a baking sheet lined with parchment paper or a silicone baking mat. Make sure they are spaced apart, with some distance between each piece to allow for individual freezing.
- Place the baking sheet in the freezer. It’s essential to use a level surface to prevent ginger portions from sliding into each other.
- Leave the ginger in the freezer for about 1-2 hours, or until they are completely frozen. You can check by touching them lightly; they should feel firm and cold to the touch.
- Once the ginger portions are frozen solid, you can transfer them to airtight containers or resealable freezer bags without worrying about them sticking together.
Step 6: Package and seal the ginger
Now that you’ve successfully flash-frozen your ginger portions, the next step is to transfer them into suitable storage containers and seal them tightly. Proper packaging is essential to protect your ginger from freezer burn, which can deteriorate its quality over time. Here’s why this step is crucial and how to do it effectively:
- Preventing Freezer Burn: Freezer burn occurs when food is exposed to air inside the freezer. It can lead to the loss of flavor, texture, and overall quality of the ginger. By packaging and sealing the ginger properly, you create a barrier that helps prevent air from coming into contact with the frozen ginger, reducing the risk of freezer burn.
- Maintaining Freshness: Airtight containers or resealable freezer bags are designed to keep the contents fresh by preventing moisture loss and the absorption of unwanted odors from the freezer. This ensures that your ginger retains its flavor and aroma for an extended period.
Here’s how to package and seal your frozen ginger portions:
- Select airtight containers or high-quality resealable freezer bags. Airtight containers are an excellent choice for long-term storage, while freezer bags work well for shorter storage periods.
- Carefully transfer the flash-frozen ginger portions into the selected containers or bags. If you’re using bags, try to remove as much air as possible before sealing. You can use a straw to help suck out excess air from the bag, creating a vacuum seal.
- Seal the containers or bags securely to create an airtight seal. Ensure that there are no gaps or openings that could allow air to enter.
- If you’re using bags, consider double-bagging for added protection against air and moisture.
Step 7: Label and date the packages
Labeling and dating the containers or bags containing your frozen ginger may seem like a simple step, but it plays a crucial role in ensuring that you can effectively manage your frozen ginger supply. Here’s why labeling and dating are important and how they benefit your cooking and meal planning:
- Tracking Freshness: Ginger can be stored in the freezer for several months, but its quality can deteriorate over time. By labeling and dating the packages, you’ll have a clear record of when you froze the ginger. This allows you to prioritize using older ginger first, ensuring that you enjoy it at its freshest.
- Portion Control: Knowing the quantity of ginger inside each container or bag is invaluable when you’re planning your recipes. You can easily determine how much ginger to thaw and use for a particular dish without guessing or potentially defrosting more than needed.
- Organization: A well-organized freezer makes meal planning and cooking more efficient. With labeled and dated packages, you can quickly locate the ginger you need, reducing the time and effort spent searching through your freezer.
Here’s how to label and date your frozen ginger packages:
- Use a permanent marker or freezer-safe labels to write the date of freezing on the container or bag. Be sure to include the month and year. This information will give you a clear idea of how long the ginger has been stored.
- If you have multiple containers or bags with different quantities of ginger, also label them with the quantity. This makes it easier to grab the right amount without having to open multiple packages.
- Consider creating a freezer inventory list, either on paper or digitally, to keep track of all the frozen items in your freezer, including the ginger. This can help you plan meals and reduce food waste.
Step 8: Store in the freezer
After diligently following the steps to prepare and package your ginger for freezing, the final step is to store it in your freezer. Proper freezer storage is crucial to maintain the quality and flavor of your frozen ginger. Here’s why this step is essential and how to do it effectively:
- Preservation of Freshness: Storing your ginger in the freezer helps preserve its freshness and flavor. The cold temperatures inhibit bacterial growth and enzymatic activity that can cause the ginger to deteriorate over time.
- Protection from Freezer Burn: Placing your ginger in the back of the freezer, where temperatures are consistently low, minimizes the chances of temperature fluctuations. This reduces the risk of freezer burn, which can negatively impact the texture and taste of frozen ginger.
- Efficient Use of Space: Storing your ginger containers or bags in an organized manner helps you maximize your freezer space. When items are neatly arranged, you can easily access the ginger you need without rummaging through a cluttered freezer.
Here’s how to store your frozen ginger effectively in the freezer:
- Place the sealed containers or bags containing your ginger in the coldest part of your freezer. The back of the freezer is typically colder and less susceptible to temperature fluctuations when you open the freezer door.
- Ensure that the containers or bags are stored in a stable position, so they won’t topple over or be crushed by other frozen items. If possible, lay them flat or stack them neatly to optimize space.
- Avoid overcrowding the freezer shelf where you’re storing the ginger. Adequate air circulation is essential for maintaining consistent low temperatures. If you have a lot of ginger to store, consider distributing it across multiple freezer shelves.
- Periodically check your freezer to ensure it maintains a consistent temperature of 0°F (-18°C) or lower. This ensures that your ginger remains frozen at the appropriate temperature for long-term storage.
How long can ginger last in the freezer?
Frozen ginger can maintain its quality for up to 6-8 months when stored properly at 0°F (-18°C) or lower. However, it may remain safe to eat beyond this period, but there may be a gradual decline in flavor and texture. Labeling and dating packages can help you track freshness and use older ginger first for optimal quality.
Other related questions
How do I defrost ginger?
Here’s how to defrost ginger:
- Defrosting in the Refrigerator: To defrost ginger, place it in a sealed plastic bag or container and set it in the refrigerator for several hours or overnight. This gradual thawing method preserves its flavor and texture.
- Defrosting with Water: Alternatively, submerge the ginger in a bowl of cold water, changing the water every 30 minutes until it’s thawed. This method is quicker but may result in slightly softened ginger.
- Using Immediately: For immediate use, grate or slice the frozen ginger directly into your recipe, as it’s easier to handle in its frozen state and can infuse your dishes with a burst of fresh flavor.
Can I refreeze ginger?
Refreezing ginger is generally not recommended due to potential quality loss. Repeated freezing and thawing can lead to texture changes and loss of flavor. It’s best to portion ginger before freezing to minimize waste and only thaw what you need for recipes to maintain its optimal quality.
How do I know if the ginger has gone bad after being frozen?
Check for signs of spoilage in frozen ginger, including freezer burn (dry, discolored patches), off-putting odors, or a change in texture (mushiness). If any of these are present, the ginger may have gone bad. Taste a small portion; if it has an unpleasant or rancid flavor, it’s best to discard it.
What are some creative ways to use frozen ginger?
Frozen ginger can be creatively used in a variety of culinary applications. You can grate it directly into dishes like soups, stir-fries, and marinades for a burst of fresh flavor. It’s also handy for making ginger-infused tea or cocktails. Additionally, try blending frozen ginger into smoothies or incorporating it into homemade sauces and dressings for a zesty kick.
Is there a difference in taste between frozen and fresh ginger?
Frozen ginger can retain a similar flavor profile to fresh ginger, but some individuals may detect a subtle difference in taste and aroma. The freezing process may slightly alter the ginger’s characteristics. However, for most culinary purposes, the taste difference is minimal, and frozen ginger remains a flavorful and convenient alternative to fresh ginger, especially when it’s out of season or not readily available.
Is it necessary to blanch ginger before freezing it?
Blanching ginger before freezing is not necessary but can be beneficial. Blanching involves briefly immersing ginger in boiling water and then cooling it rapidly in ice water. This process can help preserve the ginger’s quality by slowing down enzymatic reactions and maintaining its color and flavor. However, it’s optional, and you can freeze ginger without blanching for convenience.
Can I freeze ginger with other ingredients, like garlic or herbs?
Yes, ginger can be frozen with other ingredients, such as garlic or herbs, but it’s essential to package them separately to maintain their individual flavors and qualities. Portion and seal each ingredient separately in airtight containers or bags before freezing. This ensures that they can be used independently in recipes without compromising their distinct characteristics.

