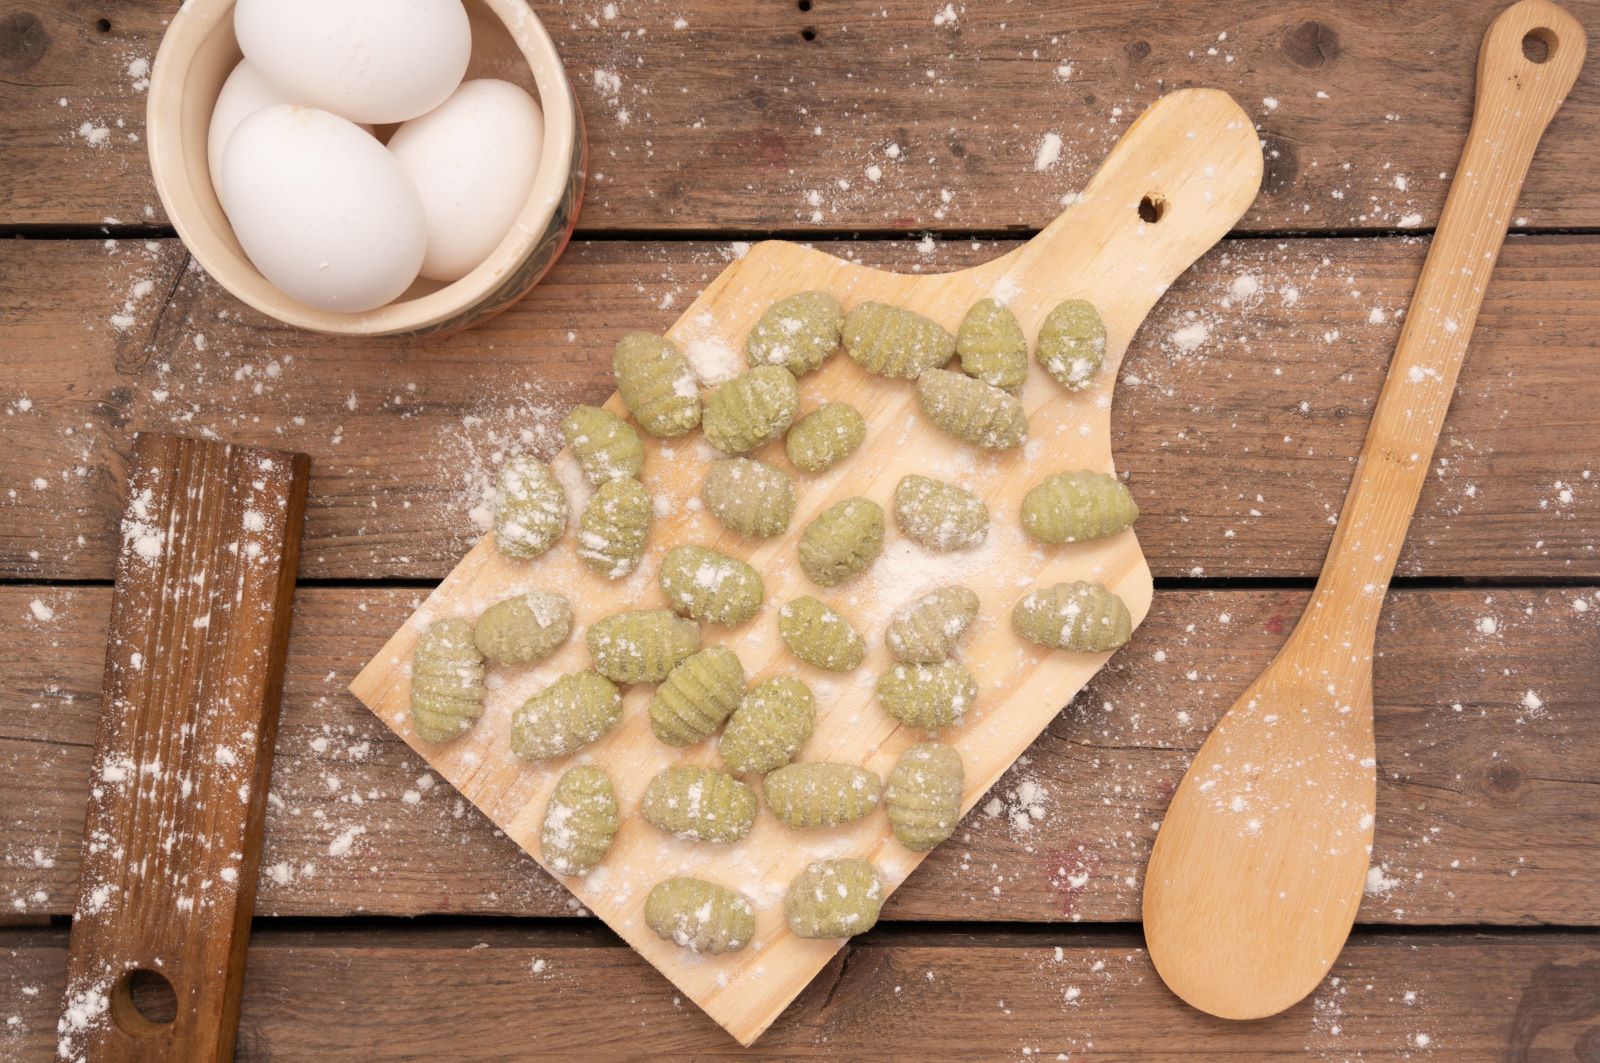
Gnocchi, those delightful Italian potato dumplings, are a beloved addition to many pasta dishes. Whether you’ve made a big batch and want to save some for later or just found a fantastic deal at the store, freezing gnocchi is a great way to ensure you always have these tasty morsels on hand. With a few simple steps, you can freeze gnocchi while preserving their texture and flavor. This article will guide you through the process of freezing gnocchi to maintain their quality for future meals.
Here’s a step-by-step guide on how to freeze gnocchi:
Step 1: Select fresh gnocchi
Selecting fresh gnocchi is the crucial first step in the process of freezing them effectively. Freshness plays a significant role in the final texture and flavor of the gnocchi after they’ve been frozen and thawed. Here’s why it’s important to start with fresh gnocchi:
- Texture Preservation: Freshly-made or store-bought gnocchi are at their peak in terms of texture. They are soft, pliable, and haven’t undergone any freezing or thawing cycles, which can affect their consistency. Starting with fresh gnocchi ensures they will maintain a more appealing texture when you eventually cook them after freezing.
- Flavor Quality: Gnocchi are known for their delicate potato flavor. Fresh gnocchi tend to have a more pronounced and authentic taste compared to those that have been stored for a long time. Freezing can sometimes diminish the intensity of flavors, so beginning with fresh gnocchi ensures that they’ll taste as delicious as possible when you serve them.
- Less Risk of Freezer Burn: Fresh gnocchi typically have less moisture content compared to older ones, reducing the risk of freezer burn. Freezer burn can occur when moisture on the surface of the food turns into ice crystals, causing unpleasant texture and taste changes. Starting with fresh gnocchi helps mitigate this risk.
- Consistent Cooking Results: Whether you’re planning to sauté, boil, or bake the gnocchi after freezing, using fresh gnocchi provides a more predictable and consistent cooking experience. They are less likely to become mushy or fall apart during cooking.
If you have the time and inclination, making your own gnocchi from scratch can be a rewarding culinary experience. Homemade gnocchi allows you to control the ingredients and tailor them to your preferences. However, high-quality store-bought gnocchi are readily available and can save you a considerable amount of time while still offering excellent results.
Step 2: Cook the gnocchi
Cooking the gnocchi before freezing is a critical step in ensuring they maintain their quality and taste when you decide to use them later. This process involves boiling the gnocchi briefly, typically for 2-3 minutes until they float to the surface. Here’s why cooking the gnocchi is essential:
- Prevents Clumping: Gnocchi, especially when fresh, have a tendency to stick together. Cooking them briefly in boiling water helps prevent this by creating a thin layer around each piece. This layer keeps the gnocchi separate, making it easier to portion and freeze them individually without the risk of sticking together.
- Sets the Shape: Boiling the gnocchi briefly helps set their shape. Gnocchi are delicate, and by partially cooking them, you firm up the outer layer, allowing them to maintain their distinct dumpling shape even after freezing. This ensures they look and feel as good as freshly made gnocchi when you decide to use them.
- Preserves Texture: The blanching process helps preserve the desired texture of the gnocchi. It partially cooks them without making them overly soft or mushy. This means that after thawing and cooking them for your meal, they will still have that desirable combination of a slightly tender interior and a slightly firmer exterior.
- Reduces Enzyme Activity: Blanching gnocchi briefly can deactivate enzymes in the potato or other ingredients, which could otherwise cause discoloration or off-flavors during freezing and storage. This ensures that the gnocchi maintain their original color and taste.
- Ensures Food Safety: Briefly boiling the gnocchi also serves as a safety measure by eliminating any potential harmful bacteria or microorganisms on the surface. While freezing will also help preserve the gnocchi, this step adds an extra layer of food safety.
Step 3: Drain and cool
After cooking the gnocchi in boiling water, the next important step is to drain and cool them rapidly. This step is crucial for preserving the quality and texture of the gnocchi before freezing. Here’s why draining and cooling are essential:
- Halting the Cooking Process: When you remove the gnocchi from the boiling water and transfer them to ice water, it immediately stops the cooking process. This is important because overcooking can result in mushy, overly soft gnocchi. Rapid cooling ensures that the gnocchi retain the desired level of tenderness and don’t become overcooked.
- Preserving Texture: Rapid cooling helps the gnocchi maintain their texture. It prevents them from continuing to cook due to residual heat, which can cause them to become gummy or lose their shape. The quick transition from hot water to cold water helps lock in the ideal texture.
- Preventing Stickiness: Cooling the gnocchi in ice water also helps prevent them from becoming sticky or clumping together. The shock of cold water shocks the exterior starches, reducing their stickiness and making it easier to handle the gnocchi during freezing.
- Maintaining Color: Rapid cooling can help preserve the vibrant color of the gnocchi, especially if they are made with ingredients like spinach or sweet potatoes. It helps set the color and prevents any potential discoloration that can occur if they are allowed to cool slowly.
- Enhancing Food Safety: Cooling the gnocchi quickly reduces the time they spend in the temperature danger zone where harmful bacteria can multiply rapidly. This contributes to food safety by preventing the growth of pathogens.
To execute this step, you can use a slotted spoon or a strainer to remove the gnocchi from the boiling water. Placing them in a bowl of ice water ensures a rapid and efficient cooling process. It’s essential to maintain a swift transition from hot to cold to reap the benefits of this step fully.
Step 4: Drain and pat dry
Once you have cooled the gnocchi in ice water to stop the cooking process, the next important step is to drain and pat them dry before freezing. This step is crucial to ensure that excess moisture is removed, which can otherwise lead to freezer burn and deteriorate the quality of the gnocchi during storage. Here’s why draining and patting them dry is essential:
- Preventing Freezer Burn: Freezer burn occurs when moisture on the surface of food turns into ice crystals and dehydrates the item. This can lead to changes in texture, taste, and overall quality. By removing excess water from the gnocchi, you reduce the risk of freezer burn, helping them maintain their ideal texture and flavor.
- Minimizing Ice Crystal Formation: Excess moisture on the gnocchi can lead to the formation of larger ice crystals, which can damage the texture of the dumplings. By patting them dry, you reduce the amount of moisture present, which, in turn, decreases the size of ice crystals that may form during freezing.
- Preventing Clumping: Gnocchi can stick together if they are frozen with residual moisture. This can make it challenging to separate them when you want to use them, potentially damaging their shape and texture. Patting them dry helps prevent clumping.
- Enhancing Storage Quality: Removing excess moisture not only preserves the quality of the gnocchi but also ensures that your freezer stays frost-free and odor-free. Moisture in the freezer can lead to frost buildup and unwanted odors, which can affect the taste of the gnocchi and other frozen items.
To execute this step, drain the gnocchi thoroughly in a colander or strainer to allow any excess water to escape. After draining, gently pat them dry using a clean kitchen towel or paper towels. Be careful not to press too hard, as gnocchi can be delicate, and you don’t want to deform them.
Step 5: Portion for freezing
After you’ve cooked, cooled, and dried the gnocchi, the next step is to portion them appropriately before freezing. This step allows you to have better control over the quantity you need for future meals and makes it more convenient when it’s time to use them. Here’s why portioning is essential:
- Convenience: Portioning the gnocchi before freezing makes meal preparation more convenient. You can divide them into serving-sized portions, which saves you from defrosting more gnocchi than you need for a particular meal. This is especially helpful for quick weeknight dinners.
- Reduced Waste: By portioning, you minimize food waste. You can freeze exactly the amount you’ll use in a single meal, reducing the chances of thawing excess gnocchi that might go to waste.
- Flexibility: Portioning allows you to choose between different serving sizes. You can create smaller portions for individual meals or larger batches for family gatherings or dinner parties, depending on your needs.
- Even Freezing: Dividing the gnocchi into portions ensures that they freeze evenly. When you spread them out in a single layer in your freezer containers or bags, it prevents them from sticking together during freezing, making it easier to separate them when it’s time to cook.
- Efficient Use of Space: Portioning also helps you make the most of your freezer space. You can arrange portions neatly, maximizing the available room and ensuring that other frozen items aren’t disrupted when you need to access the gnocchi.
When portioning the gnocchi, consider the number of servings you typically need for your meals and how you plan to use them in the future. You can use small freezer bags, airtight containers, or silicone ice cube trays for this purpose, depending on your preference. Be sure to label the portions with the date of freezing for easy identification.
Step 6: Arrange on a baking sheet
Once you’ve portioned your gnocchi, the next step is to arrange them on a baking sheet before they go into the freezer. This step may seem simple, but it’s crucial for the freezing process. Here’s why it’s important and how to do it effectively:
- Preventing Stickiness: Placing the gnocchi in a single layer on a baking sheet helps ensure they don’t stick together during freezing. Gnocchi can be quite delicate, and if they freeze while touching each other, they may become inseparable once frozen. This can lead to clumps of gnocchi, making it challenging to use only the amount you need in the future.
- Even Freezing: Arranging the gnocchi in a single layer ensures that they freeze evenly. When items are close together, they may not freeze uniformly, potentially leading to variations in texture and quality. By spacing them out, you encourage a consistent freezing process.
- Ease of Separation: Once the gnocchi are frozen solid, removing them from the baking sheet is easier than trying to pry them apart if they’ve stuck together. This makes it simpler to transfer them into freezer bags or containers for long-term storage.
- Use of Parchment Paper or Silicone Mat: To further prevent sticking, it’s advisable to place parchment paper or a silicone baking mat on the baking sheet before arranging the gnocchi. These non-stick surfaces create a barrier between the gnocchi and the metal sheet, reducing the chances of sticking and making cleanup easier.
- Space Efficiency: By using a baking sheet, you make efficient use of freezer space. The flat surface allows you to maximize the use of available room in your freezer, ensuring that other frozen items aren’t disturbed when you add the gnocchi.
To arrange the gnocchi on a baking sheet, simply lay them out in a single layer, ensuring they do not touch or overlap. If you have a large batch, you may need to use multiple baking sheets or work in batches. Once the gnocchi are on the sheet, place it in the freezer for a brief period, typically about 1-2 hours, or until the gnocchi are frozen solid.
Step 7: Flash-freeze the gnocchi
Once you’ve arranged the portioned gnocchi on a baking sheet with parchment paper or a silicone baking mat to prevent sticking, the next step is to flash-freeze them. Flash-freezing is a crucial process that helps maintain the quality and individuality of the gnocchi during long-term storage. Here’s why flash-freezing is important and how to do it effectively:
- Preserving Shape and Texture: Flash-freezing involves rapidly lowering the temperature of the gnocchi, which helps preserve their shape and texture. It prevents them from fusing together and forming clumps during the freezing process. Gnocchi are delicate, and flash-freezing ensures they remain as distinct dumplings.
- Preventing Ice Crystal Formation: Flash-freezing minimizes the size of ice crystals that can form on the gnocchi’s surface. Smaller ice crystals are less likely to damage the gnocchi’s texture, ensuring they remain tender and appealing after freezing and thawing.
- Ensuring Even Freezing: Flash-freezing guarantees that the gnocchi freeze uniformly. When items are flash-frozen, the entire piece reaches the desired temperature quickly, minimizing the potential for variations in texture and taste.
- Time and Energy Efficient: Flash-freezing is a time-efficient method. You only need to keep the gnocchi in the freezer for 1-2 hours or until they are firm to the touch. This quick process saves energy and reduces the risk of thawing and refreezing, which can impact quality.
To flash-freeze the gnocchi, simply place the baking sheet in the freezer. Ensure that the gnocchi are in a single layer, with enough space between them to prevent contact. The precise freezing time may vary slightly depending on your freezer’s temperature, but 1-2 hours is generally sufficient.
You’ll know the gnocchi are ready for the next step when they are firm to the touch and no longer pliable. At this point, they are individually frozen and can be transferred into airtight freezer bags or containers for long-term storage.
Step 8: Package and seal
After flash-freezing the gnocchi on the baking sheet, the next important step is to transfer them into suitable packaging and ensure that they are well-sealed. Proper packaging is essential to maintain the quality of the gnocchi during long-term freezer storage. Here’s why this step is crucial and how to do it effectively:
- Preventing Freezer Burn: Freezer burn occurs when moisture on the surface of food turns into ice crystals, leading to dehydration and a deterioration in quality. Properly sealing the gnocchi in airtight packaging helps prevent freezer burn by keeping external air and moisture out.
- Maintaining Flavor and Texture: Airtight packaging ensures that the gnocchi remain as flavorful and tender as possible. It prevents exposure to the freezer’s cold, dry air, which can impact the texture and taste of the gnocchi.
- Avoiding Odor Transfer: Properly sealed packaging also prevents the absorption of unwanted odors from the freezer or other foods. This ensures that your gnocchi retain their original aroma and flavor.
- Efficient Use of Space: Using freezer bags or containers allows you to maximize the use of your freezer space. You can stack them neatly, making efficient use of the available room.
To package and seal the gnocchi:
- Freezer Bags: If you’re using freezer bags, place the flash-frozen gnocchi into the bags in portion sizes that suit your needs. Remove as much air as possible from the bags before sealing them. A vacuum sealer can be particularly effective in removing excess air, but manually pressing out air works as well.
- Airtight Containers: If you prefer containers, choose ones that are suitable for freezer storage. Fill the containers with the gnocchi, leaving a small gap at the top to accommodate any expansion during freezing. Ensure that the containers have secure, airtight seals.
Proper packaging and sealing of the gnocchi provide a protective barrier against freezer burn, maintain their flavor and texture, and allow for efficient storage. With these precautions, your gnocchi will remain in excellent condition until you’re ready to use them in your favorite recipes.
Step 9: Label and date
Labeling and dating the bags or containers holding your frozen gnocchi is a small but crucial step in the freezing process. This simple action provides several benefits that can make your freezer organization and food management much more efficient. Here’s why labeling and dating are essential:
- Identification: By labeling your packages, you can easily identify the contents. This is especially helpful if you have multiple items stored in your freezer. A quick glance at the label allows you to see what’s inside without having to open each bag or container.
- First-In, First-Out (FIFO): Labeling with the date of freezing allows you to follow the FIFO principle, which means using the oldest items first. This ensures that you rotate your frozen food inventory, preventing items from staying in the freezer for too long and potentially losing quality.
- Preventing Food Waste: Knowing the date of freezing helps you keep track of how long the gnocchi have been in the freezer. This way, you can use them before they exceed their recommended storage duration, reducing the risk of food waste.
- Meal Planning: The description on the label can remind you of the type of gnocchi you froze. Whether it’s plain potato gnocchi or a specific flavor variation, the description can be handy when you’re planning meals.
To label and date your frozen gnocchi packages, you can use adhesive labels, masking tape, or even a permanent marker directly on the bag or container. Include the date when you froze the gnocchi and a brief description if you think it’s necessary (e.g., “Potato Gnocchi” or “Spinach Gnocchi”).
Make sure the label is clear and easy to read. As you add more items to your freezer, you’ll appreciate the simplicity of quickly identifying what’s inside each package.
Step 10: Store in the freezer
After you’ve properly packaged, labeled, and dated your gnocchi, the final step is to place them in your freezer for long-term storage. Proper storage in the freezer is essential to maintain the quality and safety of the gnocchi. Here’s why storing them in the freezer is important:
- Preservation of Quality: The freezer provides a stable, low-temperature environment that prevents the growth of bacteria, yeast, and molds. This allows the gnocchi to remain safe to eat and maintain their quality over an extended period.
- Long-Term Convenience: Storing gnocchi in the freezer allows you to have a convenient and readily available ingredient for future meals. Whether you’re preparing a quick weeknight dinner or planning a special occasion, having frozen gnocchi on hand can save you time and effort.
- Minimizing Food Waste: Properly stored frozen gnocchi can be used within the recommended storage duration (typically 2-3 months). Using a first-in, first-out (FIFO) approach ensures that you consume the oldest gnocchi first, reducing the risk of them exceeding their best quality and going to waste.
- Efficient Use of Space: Organizing your freezer effectively ensures that you make the most of the available space. Consider using storage bins or shelves to keep items accessible and prevent overcrowding.
To store your sealed gnocchi in the freezer:
- Choose a Suitable Location: Select a location in your freezer where the temperature remains consistently low. Avoid placing the gnocchi near the freezer door, as temperature fluctuations can occur there.
- Stack Neatly: If you have multiple packages of gnocchi, stack them neatly to maximize freezer space. Be careful not to overpack the freezer, as adequate airflow is essential for proper freezing.
- Follow FIFO: Always follow the first-in, first-out approach. Use the oldest gnocchi before the newer ones to ensure that none of them exceed their recommended storage duration.
- Monitor Temperature: Keep an eye on your freezer’s temperature to ensure it remains at or below 0°F (-18°C). This is the optimal temperature for preserving the quality and safety of frozen foods.
Other related questions
How do I defrost gnocchi?
To defrost gnocchi, transfer them from the freezer to the refrigerator and allow them to thaw for several hours or overnight. Alternatively, you can directly add frozen gnocchi to simmering sauce or boiling water and cook until they float to the surface, usually within 2-3 minutes. Avoid using a microwave for defrosting, as it may result in uneven heating and affect the texture of the gnocchi.
What’s the recommended way to reheat frozen gnocchi?
The recommended way to reheat frozen gnocchi is to cook them directly from frozen. You can add frozen gnocchi directly to simmering sauces, soups, or boiling water. They will typically take a bit longer to cook than fresh gnocchi, usually around 2-3 minutes or until they float to the surface and become tender. Alternatively, you can thaw them in the refrigerator and then use your preferred cooking method, such as sautéing or pan-frying, to reheat and brown them for added flavor and texture.
Can I refreeze gnocchi?
Refreezing gnocchi is generally not recommended, as it can impact their quality. When gnocchi are thawed and then refrozen, ice crystals can form, leading to changes in texture and potentially compromising taste. It is advisable to cook thawed gnocchi and consume them immediately, rather than attempting to refreeze them.
How do I know if the gnocchi have gone bad after being frozen?
To determine if frozen gnocchi have gone bad, examine their appearance, texture, and smell. If they display signs of freezer burn, such as ice crystals or significant drying, they may have deteriorated in quality. Additionally, if the gnocchi exhibit an unusual odor or off-putting scent, it is a strong indicator of spoilage, and they should be discarded. Always follow proper storage guidelines and consume frozen gnocchi within the recommended time frame to maintain their freshness and taste.
Can I freeze gnocchi with sauce, or should I freeze them separately?
It’s generally better to freeze gnocchi separately from sauce to maintain their individual quality. Freeze gnocchi in a single layer on a baking sheet, and once frozen, transfer them to airtight containers or bags. You can add sauce when reheating.
Are there any specific recipes that work well with frozen gnocchi?
Frozen gnocchi can be used in a variety of recipes that involve cooking them from a frozen state. Popular options include adding them directly to simmering sauces for dishes like Gnocchi with Tomato Sauce or Gnocchi with Pesto. They are also suitable for hearty soups and stews, where they absorb flavors and contribute to a comforting texture. Additionally, skillet dishes like Sautéed Gnocchi with Vegetables and Gnocchi with Sausage are excellent choices for frozen gnocchi, as they allow for quick and convenient preparation.
Can I season or flavor the gnocchi before freezing them?
It’s generally best to freeze gnocchi plain without additional seasonings or flavors. Freezing can sometimes intensify or alter the taste of seasonings, which may result in unexpected flavor changes upon thawing and reheating. To maintain versatility, it’s advisable to season or flavor the gnocchi when you prepare them for a specific recipe after thawing. This approach allows you to adapt the flavors to suit different dishes and ensures that the gnocchi remains a neutral canvas for a wide range of culinary creations.

