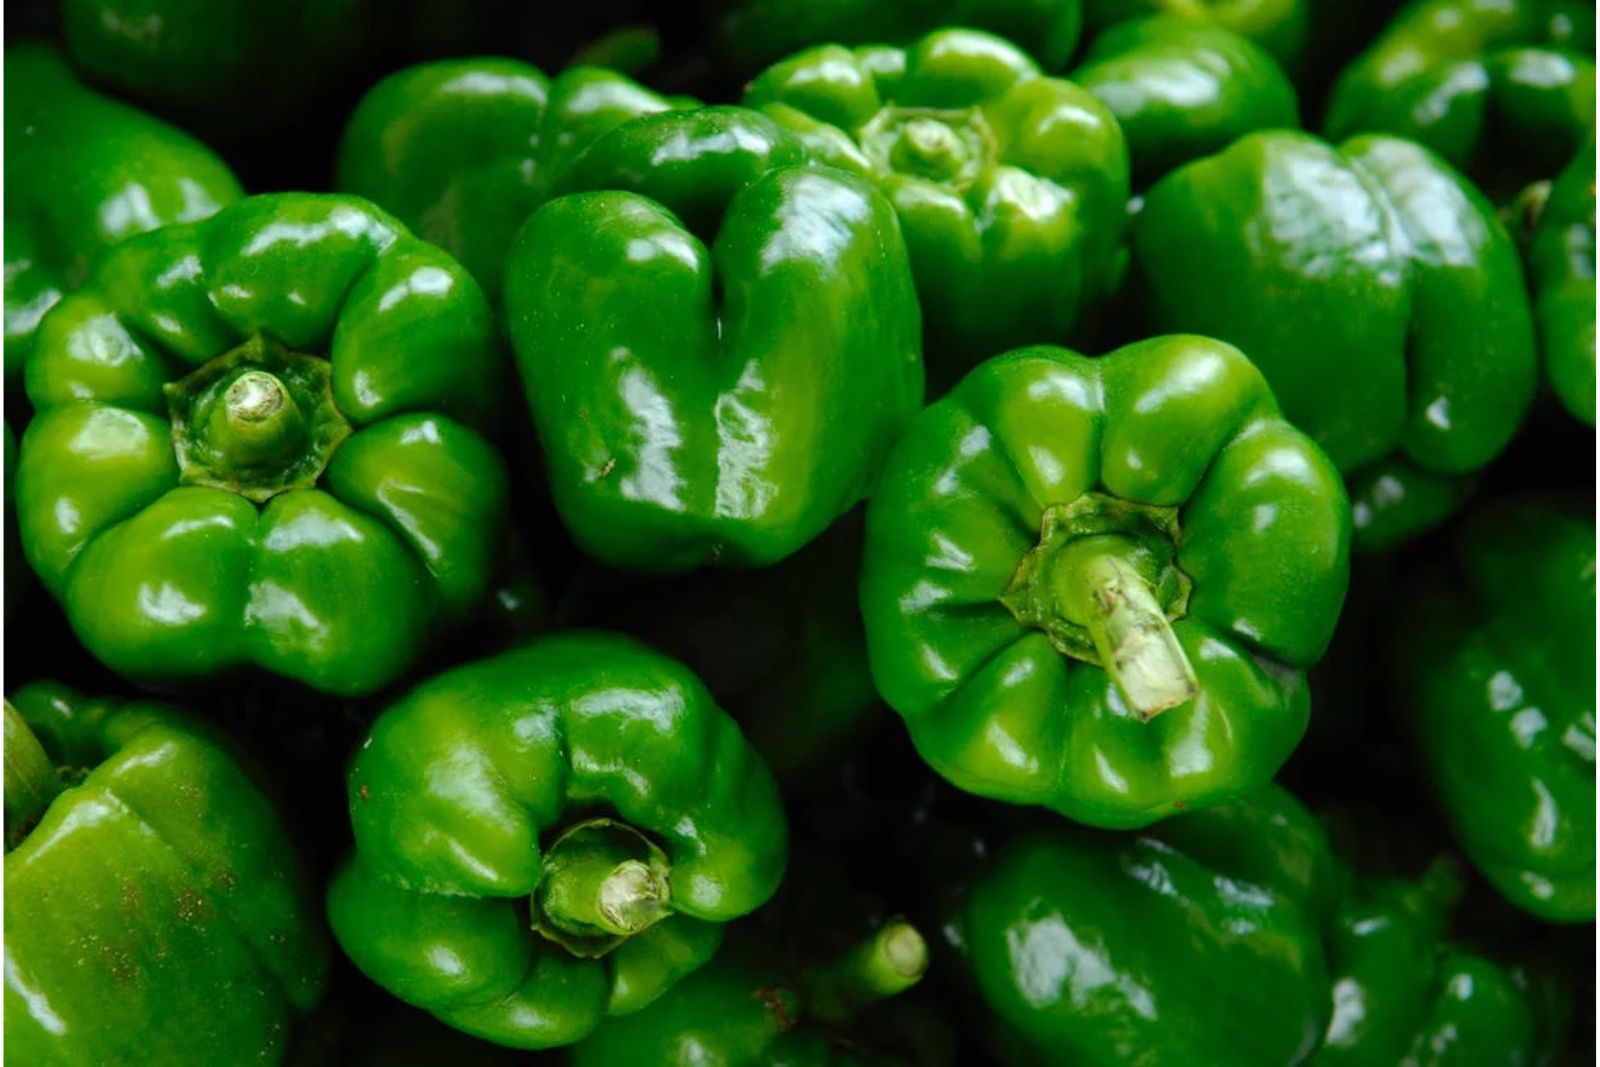
Green bell peppers are a versatile vegetable used in a wide range of culinary creations. Whether you’re adding them to salads, stir-fries, or stuffing them with delicious fillings, green bell peppers are a kitchen staple. However, they can often be subject to seasonal availability and price fluctuations. Fortunately, freezing green bell peppers is a straightforward way to extend their shelf life and ensure you always have this crisp and colorful ingredient on hand. In this article, we’ll walk you through the steps to freeze green bell peppers effectively, preserving their flavor and texture for future use.
Here’s a comprehensive guide on how to freeze green bell peppers:
- Step 1: Choose Fresh Green Bell Peppers
- Step 2: Wash and Prepare the Peppers
- Step 3: Cut and Remove the Seeds
- Step 4: Slice or Dice
- Step 5: Blanch the Green Bell Peppers
- Step 6: Drain and Dry
- Step 7: Arrange for Freezing
- Step 8: Flash-Freeze the Peppers
- Step 9: Package and Seal
- Step 10: Label and Date the Packages
- Step 11: Store in the Freezer
Step 1: Choose Fresh Green Bell Peppers
Selecting fresh green bell peppers is a crucial first step in the process of freezing them. The quality of the peppers you choose will directly impact the taste and texture of the frozen product. Here’s a breakdown of why this step is essential:
- Flavor and Texture: Fresh green bell peppers have a crisp and vibrant texture along with a sweet, slightly tangy flavor. When you freeze high-quality peppers, they are more likely to retain these desirable characteristics. On the other hand, peppers that are overripe, wilted, or damaged may have a softer texture and may lose some of their natural sweetness during freezing.
- Nutrient Retention: Fresh peppers are rich in essential nutrients like vitamins A and C, which are known for their antioxidant properties. Choosing fresh peppers ensures that you’ll get the maximum nutritional benefit when you consume them after freezing. Older or damaged peppers may have lower nutrient content.
- Appearance: The visual appeal of green bell peppers also matters, especially if you plan to use them in dishes where their vibrant green color is a key element. Fresh peppers with glossy, unblemished skins will maintain their appealing appearance even after freezing, making your meals more visually appealing.
- Freezer Burn Prevention: High-quality peppers are less likely to develop freezer burn, a common issue in frozen foods. Freezer burn occurs when moisture within the food evaporates and forms ice crystals on the surface. It can lead to the degradation of flavor and texture. Choosing fresh peppers reduces the risk of freezer burn.
- Flavor Consistency: Fresh green bell peppers contribute a consistent and pleasant flavor to your recipes. Using inferior-quality peppers can result in an uneven or off-flavor in your dishes after freezing.
Step 2: Wash and Prepare the Peppers
After selecting fresh green bell peppers in step 1, the next crucial step in the process of freezing them is thorough washing and preparation. This step is essential for several reasons:
- Food Safety: Washing green bell peppers helps remove any surface dirt, contaminants, or pesticides that may be present on the skin. Even if the peppers look clean, it’s always a good practice to wash them to ensure they are safe for consumption.
- Flavor Enhancement: Washing the peppers can also contribute to a more enjoyable eating experience. It removes any lingering residues or substances that might impart unwanted flavors to your dishes. This ensures that the natural, fresh taste of the peppers shines through after freezing.
- Textural Consistency: Washing the peppers helps maintain a consistent texture. Any debris or dirt left on the surface could affect the texture of the peppers during freezing and thawing, potentially leading to an undesirable mouthfeel in your dishes.
- Hygiene: Keeping your hands and cooking equipment clean is an important aspect of food preparation. By washing the green bell peppers, you reduce the risk of cross-contamination, ensuring that no harmful bacteria or pathogens are transferred to the peppers or other foods you may be working with.
Here’s a step-by-step breakdown of how to wash and prepare green bell peppers:
- Rinse Under Cool, Running Water: Hold each green bell pepper under cool, running water. Use your hands to rub the surface gently while rinsing. This helps remove any loose dirt or contaminants.
- Scrub Gently: Use a soft vegetable brush or your fingers to gently scrub the skin of the peppers, paying attention to any stubborn spots or residues.
- Inspect for Blemishes: While washing, take the opportunity to inspect the peppers for any hidden blemishes or imperfections. If you come across any soft spots or discolorations, consider removing those portions before proceeding.
- Pat Dry: After washing, pat the peppers dry with a clean kitchen towel or paper towels. Removing excess moisture is important, as it helps prevent the growth of mold or bacteria during freezing.
Step 3: Cut and Remove the Seeds
After washing and preparing your green bell peppers, the next critical step in the freezing process involves cutting and removing the seeds and membranes. This step is essential for several reasons:
- Bitterness Prevention: The seeds and membranes inside green bell peppers can sometimes impart a bitter taste to your dishes. By removing these parts, you ensure that your frozen peppers retain their fresh, sweet, and slightly tangy flavor. Bitterness can be particularly noticeable in recipes where the peppers are a prominent ingredient.
- Texture Improvement: The seeds and membranes of green bell peppers have a different texture compared to the flesh. They can be slightly tougher and less appealing when frozen. Removing these parts ensures a more consistent and pleasant texture in your dishes.
- Enhanced Freezing: The seeds and membranes contain a higher moisture content than the flesh of the pepper. Excess moisture can lead to ice crystal formation and freezer burn during freezing. By eliminating these moisture-rich components, you reduce the risk of freezer burn and help maintain the quality of your frozen peppers.
Here’s a step-by-step guide on how to cut and remove the seeds from green bell peppers:
- Slice Off the Tops: Start by using a sharp knife to slice off the tops (also known as the crown) of the green bell peppers. Discard these tops as they are usually tough and less flavorful than the rest of the pepper.
- Cut the Peppers in Half Lengthwise: Slice each pepper in half lengthwise, creating two equal halves. This step exposes the interior of the pepper for easy seed removal.
- Remove the Seeds and Membranes: With the halves open, gently use a knife or your fingers to remove the seeds and membranes. Scrape them out, ensuring that you eliminate all traces of seeds and the white membrane. You can rinse the pepper halves under running water to help remove any remaining seeds.
- Trim Any Remaining Membrane: Inspect the pepper halves for any lingering membrane or tough white parts. Trim them away if necessary to leave only the crisp, colorful flesh.
Step 4: Slice or Dice
Once you’ve washed, prepared, and removed the seeds and membranes from your green bell peppers, the next step is to decide how you want to freeze them: in slices or diced. This step allows you to tailor your frozen green bell peppers to your specific culinary needs. Here’s an explanation of the importance of this choice:
- Versatility in Cooking: Slicing or dicing green bell peppers before freezing allows you to use them in a wide range of recipes. Your choice depends on the types of dishes you typically prepare. Slices are great for fajitas, stir-fries, or as pizza toppings, while diced peppers work well in soups, stews, omelets, or casseroles.
- Time and Convenience: Consider your cooking habits and how much time you’re willing to spend when you decide whether to slice or dice your peppers. If you often cook recipes that require finely diced peppers, doing this before freezing can save you time during meal preparation.
- Portion Control: Slicing or dicing your green bell peppers before freezing also allows you to portion them according to your needs. This can be especially helpful if you have specific recipes in mind or if you want to ensure portion control in your dishes.
- Freezer Space: The method you choose can also affect how you arrange your peppers in the freezer. Slices may stack neatly, while diced peppers may be easier to store in portion-sized bags.
To make your decision, think about your cooking style and the types of recipes you frequently prepare. It’s also worth considering how you plan to use your frozen green bell peppers in the future. Both slicing and dicing methods are effective for freezing, so choose the option that aligns best with your cooking preferences and needs.
Whichever method you select, remember to spread the slices or diced peppers in a single layer on a baking sheet during the flash-freezing process (Step 8) to prevent them from sticking together. This way, you’ll have convenient, individual portions of green bell peppers ready for use in your favorite recipes, maintaining their quality and flavor even after freezing.
Step 5: Blanch the Green Bell Peppers
Blanching is a crucial step in the process of freezing green bell peppers, as it helps preserve their color, flavor, and texture. This method involves briefly immersing the pepper slices or dice in boiling water and then rapidly cooling them down. Here’s an explanation of why blanching is essential and how it works:
- Enzyme Deactivation: Green bell peppers, like many vegetables, contain enzymes that can cause them to deteriorate over time, even when frozen. Blanching deactivates these enzymes, slowing down the natural aging process. This helps maintain the peppers’ color, flavor, and texture during storage in the freezer.
- Bacterial Reduction: The brief exposure to boiling water also helps reduce the number of surface bacteria, pathogens, and microorganisms on the peppers, enhancing their safety for long-term storage.
- Color Retention: Blanching helps lock in the vibrant green color of the peppers. Without blanching, the peppers may lose their color and become dull or discolored during freezing.
Here’s how to blanch green bell peppers effectively:
- Boil Water: Start by bringing a large pot of water to a rolling boil. Ensure that there’s enough water in the pot to submerge all the pepper slices or dice you plan to blanch.
- Prepare an Ice Bath: While the water is heating, prepare a bowl of ice water. Adding ice cubes to cold water works best. This ice bath is crucial for rapidly cooling the peppers after blanching.
- Blanch the Peppers: Once the water is boiling vigorously, carefully add the pepper slices or dice to the pot. Allow them to boil for approximately 2-3 minutes. The exact time may vary slightly depending on the size of the pieces and your altitude, but the goal is to heat them through without cooking them.
- Rapidly Cool: Immediately after blanching, use a slotted spoon or tongs to transfer the blanched peppers to the ice bath. The cold water will stop the cooking process almost instantly and cool the peppers down. This step is essential to prevent overcooking and ensure that the peppers retain their crispness.
Can I freeze green bell peppers without blanching them first?
Blanching is recommended to preserve the quality of the peppers, but you can freeze them without blanching if you plan to use them in cooked dishes like stir-fries, where texture isn’t critical.
Step 6: Drain and Dry
After blanching and rapidly cooling your green bell peppers, the next important step in the freezing process is to drain and dry them thoroughly. This step is crucial for several reasons:
- Excess Moisture Removal: During the blanching and cooling process, the peppers absorb some water. Excess moisture on the surface of the peppers can lead to ice crystal formation and freezer burn during freezing. Properly draining and drying the peppers help prevent these issues.
- Texture Preservation: If green bell peppers are frozen with excess moisture, they can become mushy or develop an undesirable texture when thawed and cooked. Removing excess moisture before freezing helps maintain their crispness and texture.
- Prevents Clumping: Drainage and drying ensure that the peppers don’t stick together in the final packaging. Individual pieces should remain separate, making it easier to portion them out for your recipes.
Here’s how to drain and dry your blanched green bell peppers effectively:
- Drain in a Colander: If you have a colander, simply place the blanched peppers in it. Allow any excess water to drain away naturally. You can gently shake the colander to encourage further drainage.
- Use a Clean Kitchen Towel or Paper Towels: Alternatively, you can lay the blanched peppers out on a clean kitchen towel or paper towels. Pat them gently to absorb any residual moisture. Ensure that the peppers are spread out in a single layer to facilitate drying.
- Air Drying: Another option is to let the peppers air dry on a clean, dry kitchen counter or a baking sheet for a short period. This method may take a bit more time but can be effective if you have the space.
- Check for Dryness: Before moving on to the next step, ensure that the green bell peppers are as dry as possible. You shouldn’t observe any visible moisture on the surface of the peppers.
Step 7: Arrange for Freezing
Once you’ve blanched, drained, and dried your green bell pepper slices or dice, the next important step is to arrange them for freezing. This step involves spreading them out in a single layer on a baking sheet before placing them in the freezer. Here’s why this step is crucial and how it benefits the freezing process:
- Prevents Clumping: One of the key reasons for spreading the blanched and dried peppers in a single layer is to prevent them from sticking together when they freeze. If you were to pack them tightly in a container or bag before freezing, they would likely freeze in a clumped or stuck-together state. This would make it challenging to separate and use individual pieces when you’re ready to cook, potentially leading to food waste.
- Facilitates Quick Freezing: Spreading the pepper slices or dice in a single layer on a baking sheet allows for faster and more even freezing. When the pieces are spread out, they can freeze more rapidly, which helps preserve their quality. Quick freezing minimizes the formation of large ice crystals, which can negatively impact the texture and flavor of the peppers.
- Easier Portioning: Arranging the peppers in a single layer also makes it easier to portion them according to your needs. After they’re frozen individually on the baking sheet, you can transfer them to containers or bags in the desired portion sizes. This makes it convenient to grab the right amount for your recipes without thawing the entire batch.
Here’s how to arrange your blanched and dried green bell pepper slices or dice for freezing:
- Line a Baking Sheet: Cover a baking sheet with parchment paper or a silicone baking mat to prevent the peppers from sticking to the surface.
- Spread the Peppers: Lay out the blanched and dried green bell pepper slices or dice in a single layer on the prepared baking sheet. Ensure that they are not touching or overlapping.
- Use Multiple Sheets, if Necessary: If you have a large quantity of peppers, you may need to use multiple baking sheets to ensure they can all freeze in a single layer.
Step 8: Flash-Freeze the Peppers
After arranging your blanched and dried green bell pepper slices or dice on a baking sheet, the next crucial step is to flash-freeze them. Flash-freezing is a rapid freezing process that ensures individual pieces of food freeze quickly and maintain their quality. Here’s why flash-freezing is essential and how it benefits the freezing process:
- Prevents Clumping: Flash-freezing ensures that the green bell pepper slices or dice freeze individually and don’t stick together. If you were to skip this step and place the peppers directly into containers or bags, they would likely freeze into a solid block or clump, making it challenging to separate and use them later.
- Preserves Quality: Rapid freezing minimizes the formation of large ice crystals within the food. Large ice crystals can damage the cell structure of the peppers, leading to a loss of texture and flavor. Flash-freezing helps preserve the peppers’ crispness and taste.
- Saves Time: Flash-freezing allows you to prepare and freeze a large quantity of peppers at once without the need for additional containers or bags. Once they are individually frozen on the baking sheet, you can easily transfer them to a container or bag for long-term storage.
Here’s how to flash-freeze your green bell pepper slices or dice effectively:
- Arrange on a Baking Sheet: As explained in Step 7, spread out the blanched and dried green bell pepper slices or dice in a single layer on a baking sheet lined with parchment paper or a silicone baking mat.
- Place in the Freezer: Carefully transfer the baking sheet with the peppers to the freezer. Ensure that it is positioned flat and level.
- Freeze Until Solid: Leave the peppers in the freezer for a few hours or until they are frozen solid. The exact freezing time may vary depending on your freezer’s temperature and the quantity of peppers being frozen.
- Check for Firmness: To ensure they are adequately frozen, check the peppers by pressing on them with a finger. They should feel firm and not yield to pressure.
- Transfer to Storage Containers or Bags: Once the peppers are frozen solid, you can easily transfer them to airtight containers or freezer bags for long-term storage.
Step 9: Package and Seal
After flash-freezing your green bell peppers, the next critical step is to transfer them into appropriate storage containers or freezer bags and seal them tightly. This step is vital for maintaining the quality of your frozen peppers during long-term storage. Here’s why packaging and sealing are important:
- Prevents Freezer Burn: One of the primary reasons for packaging and sealing your green bell peppers is to protect them from freezer burn. Freezer burn occurs when moisture within the food evaporates and forms ice crystals on the surface. This can lead to the degradation of flavor, texture, and overall quality. Properly sealed containers or bags help prevent freezer burn by creating an airtight barrier.
- Maintains Freshness: Airtight packaging ensures that your peppers remain as fresh as possible. It prevents the absorption of odors and flavors from other foods in the freezer, preserving the authentic taste of your peppers.
- Reduces the Risk of Contamination: Sealed containers or bags also help keep your frozen peppers safe from potential contaminants in the freezer, such as ice particles, debris, or spills from other items.
Here’s how to package and seal your flash-frozen green bell peppers effectively:
- Choose Appropriate Containers or Bags: Select airtight containers or heavy-duty freezer bags for storing your peppers. Containers should be made of materials suitable for freezer use, such as plastic or glass with airtight lids.
- Portion the Peppers: If you plan to use specific quantities of peppers in your recipes, portion them accordingly before packaging. This can help reduce waste and make meal preparation more convenient.
- Fill and Seal: Carefully transfer the flash-frozen green bell peppers into the chosen containers or bags. If using bags, remove as much air as possible before sealing them. With containers, make sure the lids are securely closed and airtight.
Step 10: Label and Date the Packages
Labeling and dating the containers or bags containing your frozen green bell peppers is a small yet essential step in the freezing process. This simple act offers several benefits and helps you maintain an organized and efficient freezer. Here’s why it’s important to label and date your packages:
- Freshness Tracking: Adding a date to your packages allows you to track the freshness of your frozen green bell peppers. It helps you determine how long they have been in the freezer, ensuring that you use the oldest peppers first. This is particularly crucial when you have multiple batches of frozen foods in your freezer.
- Prevents Food Waste: By using the oldest items first, you reduce the risk of food waste. Freezing helps extend the shelf life of foods, but it’s still important to consume them in a timely manner to enjoy their best quality. Labeling and dating enable you to prioritize items for consumption.
- Recipe Planning: Knowing the freezing date makes it easier to plan your meals. You can incorporate the frozen green bell peppers into your recipes based on their age, ensuring that you have the freshest ingredients possible.
- Inventory Management: If you frequently freeze various foods, labeling and dating packages help you keep an organized inventory in your freezer. This prevents confusion and makes it easier to find what you need when you need it.
- Allergen and Dietary Considerations: If you have specific dietary requirements or allergens to consider, labeling ensures that you can quickly identify the contents of each package without having to open it.
To label and date your packages effectively:
- Use a Permanent Marker: Use a permanent marker to write the date of freezing on the container or bag. Be sure to use clear and legible handwriting for easy identification.
- Be Specific: If you have multiple packages of frozen green bell peppers, consider labeling each package with additional details like portion size or any special preparation notes. This can be particularly helpful if you have various recipes in mind.
- Update as Needed: As you use the frozen peppers, update the date on the remaining packages. This ensures that you always have accurate information about their freshness.
Step 11: Store in the Freezer
After properly packaging, sealing, labeling, and dating your green bell peppers, the final step is to store them in the freezer. This step is straightforward but essential to ensure that your frozen peppers remain in optimal condition until you’re ready to use them. Here’s why storing your frozen green bell peppers in the freezer is crucial:
- Preservation of Quality: The freezer is the ideal environment for preserving the quality of your green bell peppers. The low temperatures in the freezer inhibit the growth of microorganisms, enzymes, and bacteria, which helps maintain the peppers’ color, flavor, texture, and overall freshness.
- Long-Term Storage: Storing your peppers in the freezer allows you to extend their shelf life for an extended period, often up to several months or more. This makes it possible to enjoy green bell peppers in your recipes even when they are out of season or when you have an abundance of fresh peppers to freeze.
- Convenience: Having frozen green bell peppers readily available in your freezer makes meal preparation more convenient. They can be easily incorporated into various recipes without the need for thawing, as they cook quickly from a frozen state.
- Minimized Food Waste: Storing green bell peppers in the freezer helps reduce food waste by allowing you to use them as needed. This means you can enjoy their benefits while avoiding spoilage or discarding excess fresh peppers.
To store your frozen green bell peppers in the freezer effectively:
- Arrange Them Neatly: Place the sealed packages in the freezer in an organized and efficient manner. If you have multiple packages, consider stacking them neatly to maximize space.
- Keep Them Accessible: Store the packages in a location in your freezer that is easy to access. This way, you can quickly grab the amount you need for your recipes without having to dig through the freezer.
- Maintain Freezer Temperature: Ensure that your freezer maintains a consistent temperature at or below 0°F (-18°C) to ensure the long-term preservation of your frozen peppers.
- Check and Rotate: Periodically check the packages for any signs of freezer burn or deterioration. Rotate packages if necessary, using the oldest ones first.
How long can green bell peppers last in the freezer?
Green bell peppers can last in the freezer for up to 10-12 months without significant loss of quality if properly packaged, sealed, and stored at 0°F (-18°C) or lower. After this period, they may remain safe to eat but could experience a decline in taste and texture. Labeling and dating packages are essential to keep track of their freshness.
Other related questions
How do I defrost green bell peppers?
To defrost green bell peppers, place the frozen peppers in the refrigerator for several hours or overnight. Alternatively, you can defrost them quickly by placing the peppers in a sealed plastic bag and submerging the bag in cold water. Use a microwave on the defrost setting for small portions, being careful not to cook them.
Can I refreeze green bell peppers?
Refreezing green bell peppers is not recommended as it can negatively affect their texture and quality. When thawed, the peppers may become mushy due to the breakdown of cell structures caused by the freezing and thawing process. It’s best to use thawed green bell peppers promptly in your recipes rather than attempting to refreeze them.
How do I know if the green bell peppers have gone bad after being frozen?
Frozen green bell peppers that have gone bad may exhibit signs such as freezer burn, which appears as white or grayish patches on the surface, indicating moisture loss. They may also develop an off-putting odor, suggesting spoilage. Texture changes, such as extreme softness or ice crystal formation, are additional indicators of deterioration. Always inspect the peppers for these signs before using them in recipes to ensure safety and quality.
Can I freeze green bell peppers that have been stuffed or cooked in a recipe?
Yes, you can freeze green bell peppers that have been stuffed or cooked in a recipe, but it’s important to consider that their texture may change during freezing and reheating. Cooked or stuffed peppers can become slightly softer after freezing, which may affect their overall presentation. It’s advisable to package them carefully, removing excess air, and label them with the freezing date for best results.
What are some recipes and meal ideas for using frozen green bell peppers?
Frozen green bell peppers are versatile and can be used in a variety of recipes. They work well in stir-fries, soups, and stews, adding flavor and crunch. You can also incorporate them into casseroles, omelets, pasta dishes, and homemade salsas, making them a valuable ingredient for a wide range of culinary creations.
Can I use frozen green bell peppers in uncooked recipes like salads?
Using frozen green bell peppers in uncooked recipes like salads is possible, but it’s essential to consider potential texture differences. Thawed frozen peppers may be softer than fresh ones, which can affect the salad’s overall texture. It’s advisable to use them in salads where a slightly softer texture is acceptable, but they may not provide the same crispness as fresh peppers.
Can I freeze green bell peppers in different forms, like halves or rings?
Yes, you can freeze green bell peppers in various forms, including halves or rings. The key is to follow the same blanching and freezing procedures as outlined in the article. This process ensures that green bell peppers in different forms are preserved safely and maintain their quality in the freezer, allowing for versatility in your future recipes.

