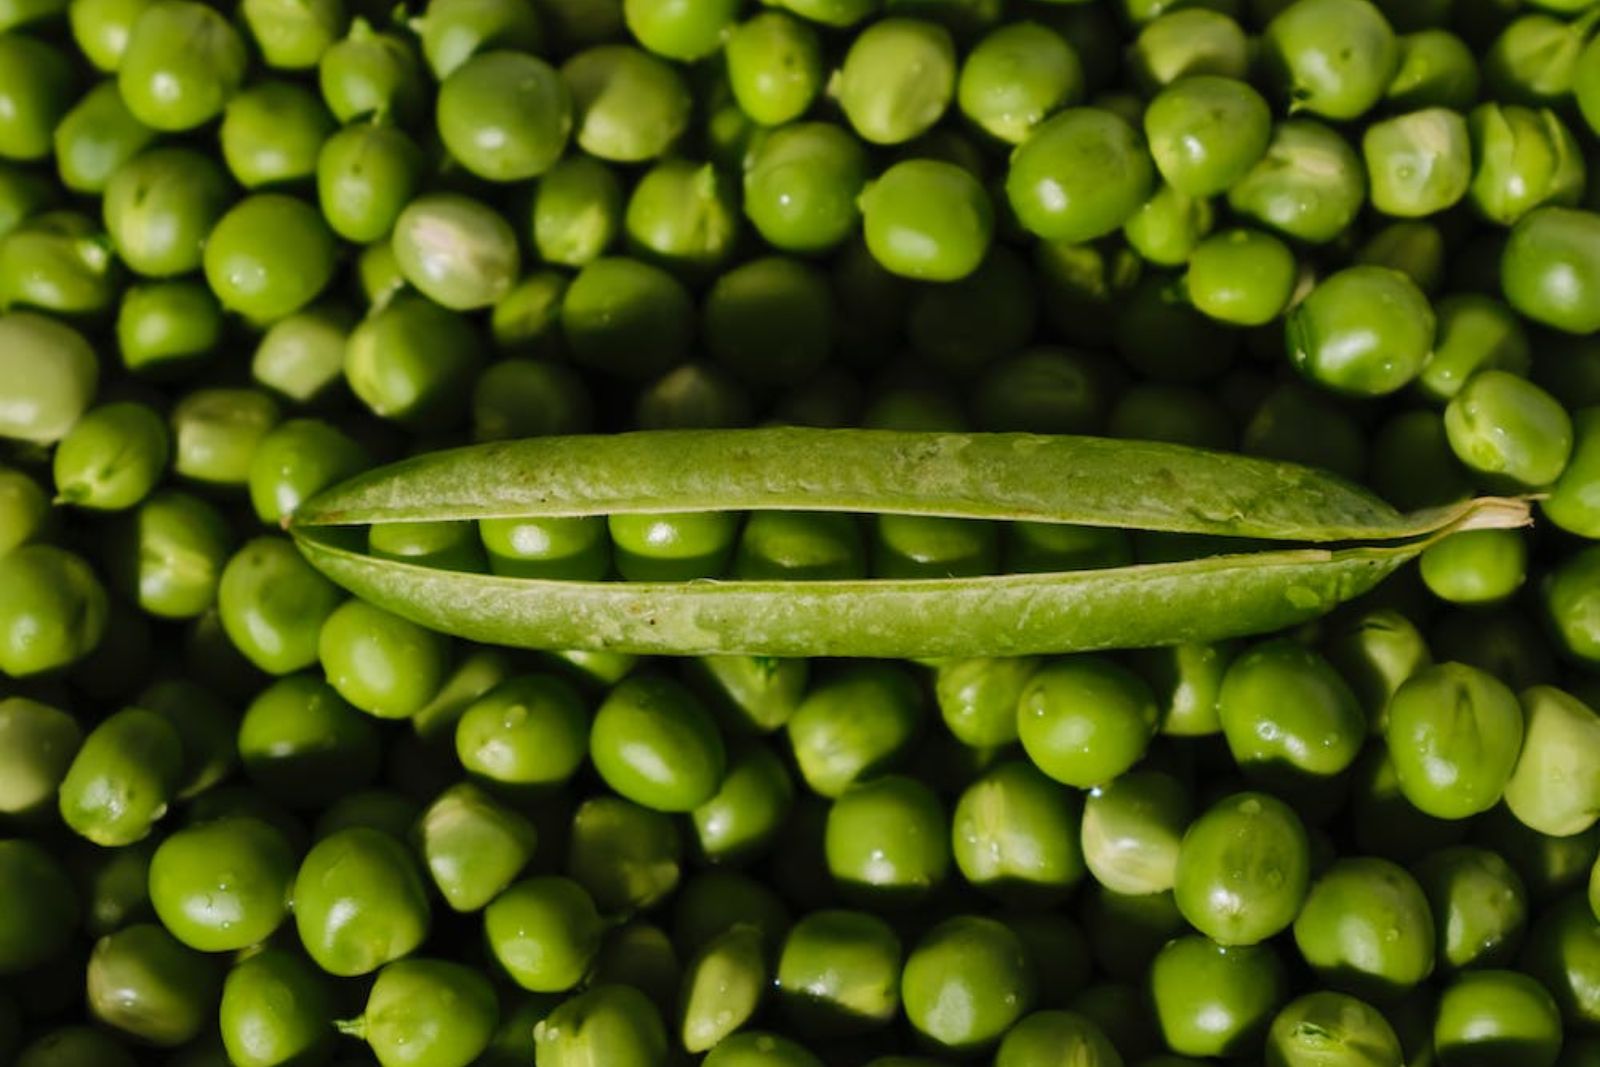
Green peas, those tiny, vibrant orbs of deliciousness, are a versatile and nutritious addition to many dishes. Whether you’ve grown your own peas in the garden or picked up a fresh batch from the market, freezing green peas is an excellent way to preserve their taste and nutritional value. By following a few simple steps, you can ensure that your frozen green peas maintain their vibrant color and delightful taste. In this article, we’ll walk you through the process of freezing green peas, so you can enjoy their garden-fresh goodness all year round.
Here’s a step-by-step guide on how to freeze green peas:
Step 1: Select fresh green peas
Selecting the freshest green peas is the foundational step in ensuring the success of your frozen peas. Here’s why it’s so crucial:
- Flavor and Texture Preservation: Freshness is key to the flavor and texture of green peas. When you choose peas that are at the peak of their ripeness, they are bursting with natural sweetness and a tender, crisp texture. These qualities are what make green peas such a beloved addition to various dishes. As peas age, their sugars start converting into starches, which can lead to a loss of sweetness and a less appealing texture.
- Nutrient Retention: Freshly harvested or recently purchased green peas are packed with essential nutrients, including vitamins like vitamin C, vitamin K, and various B vitamins, as well as minerals like potassium and iron. The longer peas sit after harvest, the more their nutrient content may degrade. Freezing them at their freshest helps preserve these valuable nutrients for future consumption.
- Minimal Risk of Spoilage: Peas that show signs of wilting, discoloration, or damage are more likely to spoil during freezing or storage. By selecting bright green, plump peas, you reduce the risk of having to discard spoiled or undesirable peas later in the process.
- Enhanced Freezing Quality: Fresh peas freeze better than older ones. The cell walls of fresh peas are less likely to break down during the blanching and freezing processes, resulting in better quality when they are eventually thawed and cooked.
- Optimal Taste: When you select the freshest green peas, you ensure that your frozen peas will taste just as good as if they were freshly picked. Their vibrant, sweet flavor will shine through in your dishes, whether you use them in soups, casseroles, or as a simple side.
Step 2: Shell the peas
Shelling green peas is the next essential step in the process of freezing them. While it might seem like an extra effort, shelling the peas offers several advantages:
- Access to Pure Peas: Shelling allows you to access the pure, tender peas inside the pods. The pods themselves are not typically consumed and can have a fibrous, tough texture. By removing the peas from their pods, you ensure that you are freezing only the delicious and edible parts of the vegetable.
- Improved Quality: Shelling the peas ensures that you are freezing the freshest, most vibrant peas possible. Sometimes, even if the pods look intact, peas inside may be overripe or beginning to deteriorate. By shelling them, you have better control over the quality of the peas you freeze, helping you maintain their optimal taste and texture.
- Consistent Cooking: When peas are shelled, they cook more evenly. This is especially important when you eventually prepare dishes with your frozen peas. Uniformly sized peas ensure that they cook at the same rate, preventing some peas from becoming mushy while others remain undercooked.
- Reduced Waste: Shelling peas may seem like an extra step, but it minimizes waste. You’re discarding the inedible pods, which can be composted or discarded without adding bulk to your freezer storage.
- Easier Measurement: Shelled peas are easier to measure accurately. This is important when you need a specific quantity of peas for a recipe. It’s simpler to measure out shelled peas than trying to estimate the amount when they are still in their pods.
Can I freeze green peas in their pods?
Freezing green peas in their pods is possible but not recommended for optimal results. The pods have a fibrous and tough texture, making them less desirable for consumption. Shelling the peas before freezing ensures better quality, as the individual peas freeze more evenly and retain their flavor and texture.
Step 3: Blanch the green peas
Blanching green peas is a pivotal step in the process of freezing them, and it serves multiple important purposes:
- Preserving Color and Flavor: One of the primary reasons for blanching green peas is to preserve their vibrant green color and delicious, fresh taste. Blanching briefly in boiling water helps to deactivate enzymes that can cause color changes and flavor loss over time. This ensures that your frozen peas retain their appealing appearance and taste when you eventually cook and enjoy them.
- Nutrient Retention: Blanching is also vital for preserving the nutritional value of green peas. The brief exposure to high heat helps maintain the peas’ nutrient content by stopping enzyme activity that can lead to nutrient degradation during storage. This ensures that your frozen peas remain a nutritious addition to your meals.
- Bacterial Deactivation: Blanching helps kill any potential harmful bacteria or microorganisms present on the surface of the peas. While green peas are generally safe, this step provides an extra layer of protection, ensuring that your frozen peas remain safe to eat during storage.
Here’s a more detailed breakdown of the blanching process:
- Boiling Water: Start by bringing a large pot of water to a rolling boil. The water should be enough to fully submerge the green peas. This boiling water serves to both blanch the peas and eliminate any potential bacteria.
- Ice Water Bath: Prepare a separate bowl filled with ice water. This ice water bath is crucial for rapidly cooling the blanched peas and stopping the cooking process. It also helps maintain the peas’ bright green color.
- Brief Cooking: Once the water is boiling vigorously, carefully add the shelled green peas to the pot. Allow them to cook for only 1-2 minutes. This short cooking time is sufficient to inactivate enzymes without overcooking the peas.
- Transfer to Ice Water: Immediately after blanching, use a slotted spoon or a sieve to quickly transfer the peas to the bowl of ice water. This rapid cooling step is essential to halt the cooking process and maintain the peas’ crisp texture and color.
Can I freeze green peas without blanching them first?
Blanching is recommended for preserving the color, flavor, and nutrients of green peas during freezing. While you can freeze peas without blanching, the quality and shelf life may be compromised.
Step 4: Drain and dry the peas
After blanching your green peas and cooling them in the ice water bath, the next crucial step is to drain and dry them. This might seem like a simple task, but it plays a significant role in preserving the quality of your frozen peas. Here’s why it’s essential:
- Moisture Control: Properly draining and drying the peas is essential to remove excess moisture. Excess moisture can lead to ice crystals forming during freezing, which can compromise the texture and flavor of your peas. By eliminating as much water as possible, you ensure that your frozen peas remain intact and free from freezer burn.
- Prevent Clumping: Drying the peas helps prevent them from sticking together when you freeze them. If peas are frozen while still wet, they can freeze in clumps or chunks, making it challenging to separate and portion them when you’re ready to use them in your recipes.
- Maintains Quality: The goal when freezing peas is to maintain their texture and flavor as closely as possible to when they were fresh. By removing excess moisture, you ensure that the peas retain their firmness and don’t become mushy or soggy during freezing and thawing.
Here’s how to properly drain and dry your blanched green peas:
- Use a Colander: Place a colander in your sink or over a large bowl. Carefully pour the blanched peas into the colander, allowing the excess water to drain away.
- Shake Off Excess Water: Give the colander a gentle shake to help remove any lingering water droplets clinging to the peas.
- Pat Dry: To further ensure that the peas are as dry as possible, you can pat them gently with a clean kitchen towel. Lay the peas on a clean, lint-free kitchen towel and blot them lightly. This step is particularly helpful if you notice any residual moisture on the peas.
- Air Drying: If you have time, you can also let the peas air dry for a few minutes on a clean kitchen towel or a paper towel-lined tray. This allows any remaining moisture to evaporate before freezing.
Step 5: Arrange the peas for freezing
Once you’ve drained and dried your blanched green peas, the next step is to arrange them properly for freezing. This seemingly simple task is crucial for maintaining the quality of your peas during the freezing process. Here’s why it’s important:
- Prevents Clumping: Green peas tend to be sticky when they are wet, and if they come into contact with each other while freezing, they can freeze together in clumps or clusters. This makes it difficult to portion them out when you’re ready to use them in your dishes.
- Ensures Even Freezing: When peas are arranged in a single layer, they freeze more quickly and evenly. This is essential for preserving their individual texture and preventing them from freezing into a solid mass. Even freezing also helps maintain the color and flavor of the peas.
- Easier Portioning: Once your green peas are frozen individually on the baking sheet, they can be easily transferred to storage containers or bags without sticking together. This makes it convenient to scoop out the precise amount you need for your recipes without defrosting more than necessary.
Here’s how to properly arrange your blanched and dried green peas for freezing:
- Use a Baking Sheet: Lay out a clean baking sheet or tray. Ensure that it’s large enough to accommodate all the peas in a single layer without crowding.
- Single Layer: Spread the blanched and dried green peas evenly across the baking sheet. Make sure they are not touching or overlapping. This spacing ensures that each pea has room to freeze individually.
- Quick Freeze: Place the baking sheet with the peas in the freezer. The goal is to perform a “quick freeze.” This means that you’ll leave the peas in the freezer for a few hours until they are fully frozen. Quick freezing helps maintain the quality of the peas by preventing the formation of large ice crystals.
- Check for Firmness: After the peas are frozen solid, check them by touching a few. They should feel firm and hard. This indicates that they are ready for the next step of packaging and sealing.
Step 6: Flash-freeze the green peas
After arranging your blanched and dried green peas in a single layer on a baking sheet, the next critical step is to flash-freeze them. Flash-freezing is a rapid freezing process that plays a significant role in preserving the individual integrity of each pea. Here’s why it’s essential:
- Minimizes Ice Crystal Formation: Flash-freezing involves freezing the peas quickly at very low temperatures. This rapid freezing minimizes the size of ice crystals that can form within the peas. Large ice crystals can rupture the cell walls of the peas, leading to a loss of texture and quality during freezing and thawing.
- Prevents Clumping: Flash-freezing ensures that the peas freeze individually rather than sticking together in clumps. Individual freezing allows for easy portioning when you’re ready to use the peas in your recipes. It also maintains the peas’ distinct shape and texture.
- Preserves Freshness: The speed of flash-freezing helps lock in the fresh flavor and vibrant color of the peas. It essentially “locks” the peas in their prime state at the moment of freezing, so they taste as good as when they were first blanched.
Here’s how to properly flash-freeze your green peas:
- Place in the Freezer: Carefully transfer the baking sheet with the arranged green peas to the coldest part of your freezer. Ensure that the peas are not touching each other.
- Quick Freeze: Leave the peas in the freezer for a few hours or until they are completely frozen. The exact time may vary depending on your freezer’s temperature and the quantity of peas, but it typically takes a few hours. The peas should feel hard and icy when touched.
- Check for Frozen Peas: To ensure that the peas are adequately frozen, you can pick one up and check its texture. It should be firm, with no signs of softness or flexibility.
Step 7: Package and seal the green peas
After flash-freezing your green peas, the next crucial step is to package and seal them for long-term freezer storage. Proper packaging is essential for maintaining the quality and flavor of your peas. Here’s why it matters:
- Protects Against Freezer Burn: Freezer burn occurs when food is exposed to air inside the freezer. It results in the formation of ice crystals on the food’s surface, leading to a loss of moisture and flavor. By transferring your peas to airtight containers or freezer bags and removing as much air as possible, you create a protective barrier that helps prevent freezer burn.
- Preserves Freshness: Airtight packaging helps maintain the freshness of the green peas. It locks in their vibrant color, sweet flavor, and nutritional value, ensuring that they taste as good as when they were first frozen.
- Keeps Peas Separate: Proper packaging prevents the peas from sticking together during storage. Individual freezing during the flash-freezing step is preserved, making it easier to portion out the peas as needed for your recipes.
Here’s how to package and seal your frozen green peas effectively:
- Choose Suitable Containers or Bags: Select airtight containers or high-quality freezer bags for storing your peas. Ensure that the containers or bags are specifically designed for freezer use to prevent moisture and air from seeping in.
- Portion as Desired: If you plan to use specific quantities of peas in your recipes, portion them out accordingly before sealing. This way, you can easily grab the amount you need without thawing the entire batch.
- Remove Air: Before sealing, press down on the containers or bags to eliminate as much air as possible. For bags, consider using a straw to suck out any remaining air before sealing the bag tightly. For containers, press plastic wrap or parchment paper directly onto the surface of the peas to minimize air contact.
Is vacuum-sealing necessary for freezing green peas, or can I use regular freezer bags?
While vacuum-sealing can provide an extra layer of protection against freezer burn, using high-quality freezer bags and removing excess air can also be effective for storing frozen green peas.
Step 8: Label and date the packages
Labeling and dating the containers or bags in which you store your frozen green peas is a small yet essential step in ensuring their long-term quality and safety. Here’s why it’s crucial:
- Freshness Tracking: Labeling allows you to keep track of when the green peas were frozen. By including the date of freezing on each package, you create a simple system that helps you identify the age of your frozen peas. This is particularly important because the quality of frozen vegetables can deteriorate over time, affecting their taste and texture.
- Rotation: Labeling with the date ensures that you use the oldest peas first. This practice follows the “first in, first out” (FIFO) principle, where you consume the older items before the newer ones. It helps prevent your green peas from sitting in the freezer for too long, which can lead to a loss of quality and nutritional value.
- Quality Assurance: By knowing the freezing date, you can gauge how long your frozen peas have been in storage. While frozen vegetables can remain safe to eat for an extended period, their quality, especially in terms of texture and flavor, may decline over time. Labeling allows you to assess whether the peas are still in their prime or if it’s time to prioritize their use.
Here’s how to properly label and date your packages of frozen green peas:
- Use a Permanent Marker: Write the date of freezing directly on the container or on a label affixed to the bag. Use a permanent marker to ensure that the date remains legible throughout the storage period.
- Include Additional Information: If you like, you can also include additional information on the label, such as the quantity of peas in the package or any specific use-by date that you’ve determined based on your preferences or guidelines.
- Organize for Easy Retrieval: When storing multiple packages of frozen peas, consider organizing them by date in your freezer. This makes it easy to identify and access the oldest peas when you’re planning meals.
Step 9: Store in the freezer
After properly packaging, labeling, and dating your green peas, the final step is to store them in the freezer. Proper freezer storage is crucial to maintain the quality and safety of your frozen peas. Here’s why this step is essential:
- Temperature Control: Storing your green peas at a constant temperature of 0°F (-18°C) or lower is vital for preserving their quality. At these temperatures, most enzymatic and bacterial activities are greatly slowed or halted, ensuring that your peas remain safe to eat and maintain their flavor and texture.
- Prevention of Freezer Burn: The low temperatures of your freezer help prevent freezer burn. Freezer burn occurs when food is exposed to air, leading to the formation of ice crystals on the food’s surface. Proper storage at the recommended temperature, combined with airtight packaging, helps safeguard your peas against this undesirable occurrence.
- Extended Shelf Life: When stored correctly, green peas can maintain their quality for an extended period. While they remain safe to eat beyond this time frame, their flavor and texture may gradually deteriorate. By following best practices for freezer storage, you can maximize the shelf life of your frozen peas.
Here’s how to properly store your green peas in the freezer:
- Choose the Coldest Part: Place the sealed containers or bags of green peas in the coldest part of your freezer. This area is typically towards the back or bottom of the freezer, where the temperature remains the most stable.
- Avoid Overcrowding: Ensure that there is enough space around the containers or bags to allow cold air to circulate freely. Overcrowding can lead to uneven freezing and potentially compromise the quality of your peas.
- Regularly Check and Rotate: Periodically check the frozen peas to ensure that they remain properly sealed and haven’t developed any signs of freezer burn. Rotate the containers or bags, using the “first in, first out” (FIFO) method to use the oldest peas before the newer ones.
- Keep the Temperature Consistent: Try to avoid frequent fluctuations in freezer temperature by not leaving the freezer door open for extended periods. This helps maintain a stable environment for your frozen peas.
- Follow Recommended Storage Times: While properly frozen green peas can be stored for up to 8-12 months, it’s a good practice to use them within this time frame to enjoy the best quality. Over time, the flavor and texture of frozen peas may gradually change, although they will still be safe to eat.
Other related questions
How do I defrost green peas?
To defrost green peas, transfer them to the refrigerator and let them thaw for several hours or overnight. Alternatively, you can place them in a resealable plastic bag and immerse the bag in cold water for quicker thawing. Avoid using hot water, as it can cause the peas to become mushy.
Can I refreeze green peas?
Refreezing green peas is generally not recommended, as it can affect their quality and safety. When food is frozen, ice crystals can form, damaging cell structures. If peas are thawed and then refrozen, these crystals can cause texture changes and moisture loss, diminishing their taste and nutritional value. It’s advisable to consume thawed peas promptly or cook them before refreezing to minimize potential quality issues.
How do I know if the green peas have gone bad after being frozen?
To determine if frozen green peas have gone bad, inspect them for any signs of freezer burn, which appears as white or grayish patches on the surface. Additionally, check for unusual odors or off-putting flavors, as these can indicate spoilage. If the peas exhibit any of these signs, it’s best to discard them, as their quality may have deteriorated.
What are some creative ways to use frozen green peas in recipes?
Frozen green peas are versatile and can be used in various dishes, such as soups, stir-fries, salads, and even as a side dish. Experiment with different recipes to enjoy their garden-fresh taste year-round.
Should I season green peas before freezing them?
It’s generally advisable not to season green peas before freezing them. Seasonings like salt and spices can alter the peas’ texture and taste over time in the freezer. It’s best to freeze green peas in their natural state and add seasonings when you cook or prepare them after thawing to preserve their fresh flavor.

