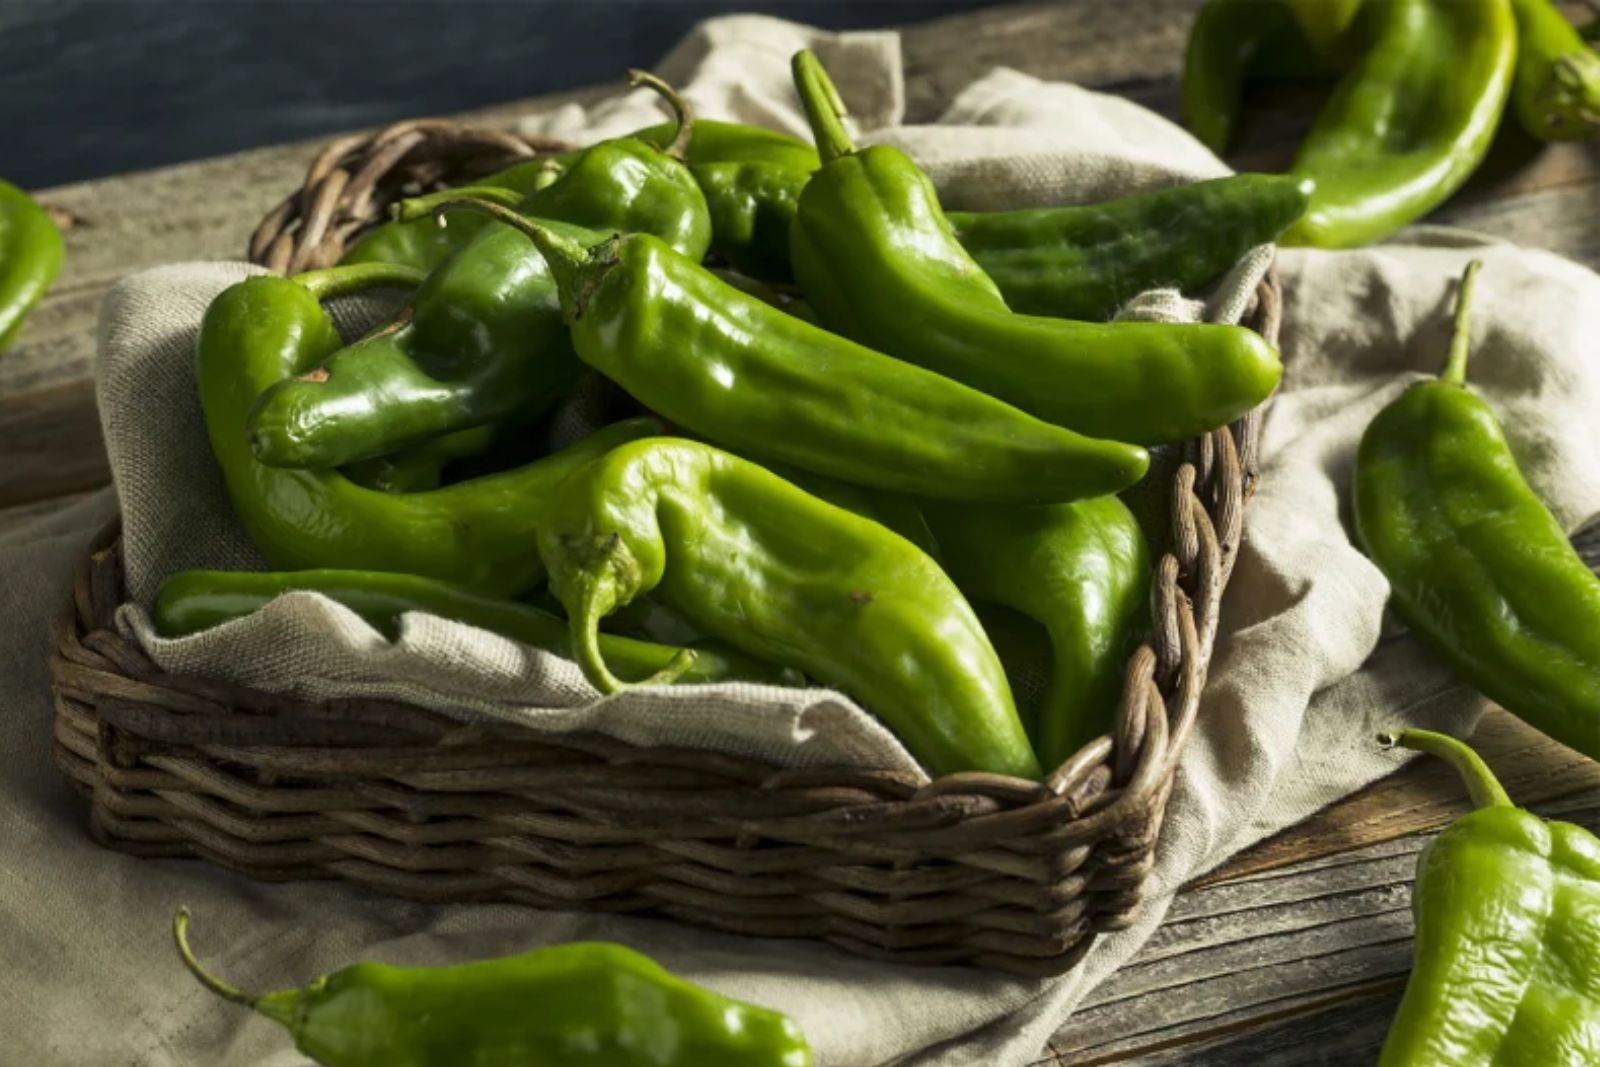
Hatch chilies are a beloved and flavorful variety of chili peppers originating from the Hatch Valley in New Mexico. These chilies are known for their unique smoky-sweet taste and come in various heat levels, making them a versatile ingredient in countless dishes. While they are typically available during the late summer and early fall, freezing Hatch chilies allows you to enjoy their deliciousness year-round. This article provides a step-by-step guide on how to properly freeze Hatch chilies to preserve their flavor and versatility for your future culinary adventures.
Here’s a guide on how to freeze Hatch chilies:
Step 1: Choose fresh Hatch chilies
The first and most crucial step in freezing Hatch chilies is selecting the right ones. Choosing fresh Hatch chilies ensures that your frozen chilies will retain their flavor, texture, and overall quality when you decide to use them in your culinary creations. Here’s why this step is so important:
- Flavor preservation: Fresh Hatch chilies have the fullest, most vibrant flavor. When you freeze them at their peak freshness, you capture that delicious taste and maintain it until you’re ready to use them. Older or overripe chilies may lose some of their flavor during the freezing process.
- Texture matters: The texture of your chilies can greatly impact the final dish. Firm, fresh Hatch chilies freeze better and maintain their crispness and integrity when thawed. Mushy or overripe chilies can become limp and less appealing after freezing.
- Mold and rot prevention: Inspect the chilies carefully before freezing. Look for vibrant colors, which can vary depending on the Hatch chili variety, but should generally be consistent and not dull. Firmness is a good indicator of freshness, as overly soft chilies may be past their prime. Additionally, check for any signs of mold, rot, or blemishes on the chilies. Freezing damaged chilies can lead to poor quality and potential contamination of your frozen batch.
- Seasonal advantage: Hatch chilies are typically harvested during late summer and early fall when they are in peak season. This is the ideal time to freeze them because they are abundant and at their best. Freezing them during this period allows you to enjoy their unique flavor all year long, even when they are not in season.
Step 2: Wash and prepare the chilies
Now that you’ve selected fresh Hatch chilies in Step 1, the next crucial step is to wash and prepare them properly. Here’s a detailed explanation of why this step is essential:
- Dirt and Debris Removal: Hatch chilies, like most vegetables, can carry traces of dirt, dust, or other contaminants from the field. Washing them thoroughly under running water helps remove these impurities. It ensures that your frozen chilies are clean and safe for consumption.
- Stem and Seed Removal: The stems and seeds of Hatch chilies can contribute significantly to their spiciness. By removing these parts, you have more control over the heat level in your dishes. Cutting off the tops and then slicing the chilies open to remove the seeds is an effective method. Remember, the more seeds you remove, the milder the chili’s heat will be.
- Spice Sensitivity: Handling chilies, especially Hatch chilies, can transfer their spicy oils onto your hands. If you’re sensitive to chili residue or want to avoid accidentally touching your face or eyes and experiencing discomfort, wearing gloves is a prudent choice during this step.
- Consistency in Cooking: Preparing the chilies by washing, removing stems, and seeds at this stage ensures that they are ready to use when you need them. It streamlines your cooking process, as you won’t have to do these tasks when you’re in the middle of preparing a meal.
- Aesthetics: Removing stems and seeds also enhances the visual appeal of your dishes. Chilies without stems and seeds are often more visually appealing and easier to incorporate into various recipes, such as salsas, stews, or sauces.
Step 3: Blanch the Hatch chilies
Blanching is a vital step in the process of freezing Hatch chilies, and it serves multiple essential purposes. Here’s a detailed explanation of why blanching is crucial and how to do it effectively:
- Color Preservation: Hatch chilies are renowned for their vibrant colors, which can range from green to red, and even shades of yellow and orange. Blanching helps lock in these vivid colors by deactivating enzymes that can cause color deterioration over time. When you blanch the chilies briefly, you’re essentially hitting the “pause” button on the natural aging process, allowing them to maintain their visual appeal.
- Flavor Retention: Blanching also plays a key role in preserving the distinct flavor of Hatch chilies. While it may seem counterintuitive to expose them to boiling water, this step helps lock in the chili’s flavor compounds, preventing loss during freezing. The brief exposure to heat enhances the overall taste profile when you use the chilies in your future dishes.
- Texture Maintenance: Hatch chilies have a desirable firm texture. Blanching helps retain this texture by inactivating enzymes responsible for softening over time. The quick blanching process allows the chilies to maintain their crispness and structure even after freezing and thawing.
Here’s how to effectively blanch Hatch chilies:
- Boil Water: Start by bringing a large pot of water to a rolling boil. Make sure the pot is large enough to accommodate all the chilies comfortably without overcrowding.
- Prepare an Ice Bath: While the water is coming to a boil, prepare a separate bowl filled with ice water. This ice bath is crucial for rapidly cooling the chilies after blanching to halt the cooking process.
- Submerge the Chilies: Carefully place the cleaned Hatch chilies into the boiling water. The blanching time can vary depending on the size and thickness of the chilies. Typically, smaller chilies require about 2-3 minutes, while larger ones might need up to 5 minutes. Keep a close eye on them to avoid overcooking.
- Transfer to Ice Bath: Using a slotted spoon or tongs, quickly transfer the blanched chilies into the prepared ice bath. This step is essential for stopping the cooking process immediately and preserving the color, flavor, and texture.
- Pat Dry: After the chilies have cooled in the ice bath for a few minutes, remove them and pat them dry gently with paper towels. Removing excess moisture helps prevent freezer burn during the freezing process.
Can I freeze Hatch chilies without blanching them first?
Freezing Hatch chilies without blanching is possible, but blanching is recommended for optimal results. Blanching briefly in boiling water helps preserve color, flavor, and texture while inactivating enzymes that can cause deterioration. If you choose not to blanch, be aware that the chilies may have a slightly altered texture and flavor after thawing, but they remain safe to eat.
Step 4: Arrange the chilies for freezing
After blanching and patting dry the Hatch chilies, the next step involves arranging them on a baking sheet before freezing. This seemingly simple step plays a crucial role in ensuring the quality and usability of the chilies once they are frozen. Here’s an explanation of its significance:
- Prevent Sticking Together: When Hatch chilies are placed in the freezer without any separation, there is a risk of them sticking together as they freeze. This can make it challenging to separate them when you only need a few for a particular recipe. By laying them out in a single layer on a baking sheet with space between each chili, you reduce the chances of them becoming a clump during freezing.
- Easy Portioning: Arranging the chilies individually on the baking sheet facilitates portioning when you’re ready to use them in your cooking. Whether you need one chili or several, having them individually frozen means you can easily take the desired amount without having to thaw and refreeze a larger batch.
- Preserve Shape and Texture: Placing the chilies in a single layer prevents them from pressing against each other, which could potentially deform their shape or cause damage to the skin. Maintaining the chilies’ individual integrity ensures they retain their desirable texture when you eventually use them.
- Space for Quick Freezing: Freezing the chilies in a single layer also allows for faster and more efficient freezing. It ensures that the cold air in the freezer can circulate around each chili, which leads to quicker freezing. Rapid freezing helps preserve the chilies’ overall quality, including their flavor and texture.
To arrange the chilies for freezing, you can follow these steps:
- Use a Baking Sheet: Place a clean and dry baking sheet or tray in a location in your freezer where it can lie flat.
- Single Layer: Lay the blanched Hatch chilies on the baking sheet in a single layer. Ensure that they are not touching each other to maintain separation.
- Spacing: Leave a small gap between each chili, about half an inch to an inch, depending on the size of the chilies.
- Freezer Space: Carefully transfer the baking sheet with the arranged chilies to your freezer. Make sure it is placed on a level surface.
Step 5: Flash-freeze the Hatch chilies
Flash-freezing is a crucial technique in the process of preserving Hatch chilies for long-term storage. It involves rapidly freezing the individual chilies on a baking sheet before transferring them to their final storage containers. Here’s an explanation of why this step is important:
- Prevent Clumping: Flash-freezing ensures that the chilies freeze individually and do not stick together. When chilies are placed in storage containers before freezing, they can often freeze in a clump or block, making it difficult to separate them when needed. Flash-freezing prevents this issue, allowing you to easily access the quantity you require without defrosting the entire batch.
- Maintain Quality: Rapid freezing helps maintain the quality of the chilies. When you freeze food quickly, it forms smaller ice crystals, which cause less damage to the cellular structure of the chilies. This results in better texture and flavor retention when you eventually use them in your dishes.
- Efficient Use: Flash-freezing also enables efficient use of your freezer space. By first freezing the chilies individually on a baking sheet, they take up minimal space, allowing you to optimize your freezer’s capacity and store other items around them.
To flash-freeze Hatch chilies, follow these steps:
- Arrange on a Baking Sheet: As explained in Step 4, arrange the blanched and prepared chilies in a single layer on a baking sheet. Ensure they are not touching to prevent sticking together during freezing.
- Place in Freezer: Carefully transfer the baking sheet with the arranged chilies to your freezer. Make sure it is placed on a level surface within the freezer.
- Monitor Freezing Time: Allow the chilies to freeze for a few hours or until they are completely solid. The exact time may vary depending on your freezer’s temperature and the size of the chilies. Smaller chilies might freeze faster than larger ones.
- Check for Solidification: To determine if the chilies are adequately frozen, gently touch one or two. They should feel solid and firm to the touch. Once they have reached this state, they are ready for the final packaging step.
Step 6: Package and seal the Hatch chilies
Once you have successfully flash-frozen the Hatch chilies, the next crucial step is to transfer them into suitable storage containers and ensure they are properly sealed. Proper packaging is essential to maintain the chilies’ quality and prevent freezer burn. Here’s an explanation of why this step matters:
- Preventing Freezer Burn: Freezer burn occurs when food is exposed to air in the freezer. It can lead to a loss of flavor, texture, and overall quality. Proper packaging, such as airtight containers or freezer bags, creates a barrier that seals out air and moisture, preventing freezer burn.
- Maintaining Flavor and Texture: By sealing the chilies in airtight containers or bags, you preserve their flavor and texture. Air and moisture can cause ice crystals to form on the chilies’ surface, which can degrade their quality over time. A tight seal helps prevent this.
- Long-Term Storage: Properly sealed containers or bags are essential for long-term storage. Whether you plan to use the chilies in a few weeks or several months, airtight packaging helps ensure that they remain in excellent condition until you’re ready to use them.
Here’s how to package and seal the Hatch chilies effectively:
- Choose Suitable Containers: Select airtight containers or high-quality freezer bags specifically designed for freezing. These containers should be made of materials that can withstand low temperatures without becoming brittle.
- Transfer the Chilies: Carefully transfer the flash-frozen Hatch chilies into the selected containers or bags. Be gentle to avoid damaging the chilies or breaking them apart.
- Remove Air: If using bags, squeeze out as much air as possible before sealing them. For containers, press the chilies down to eliminate air pockets. Reducing air exposure is crucial in preventing freezer burn.
- Seal Tightly: Ensure that the containers or bags are sealed tightly to create an airtight seal. Double-check the seals to make sure they are secure.
Step 7: Label and date the packages
Labeling and dating your frozen Hatch chilies is a crucial step in maintaining an organized and efficient freezer, and it serves several important purposes. Here’s an explanation of why this step is essential:
- Tracking Freezing Date: By labeling each container or bag with the date of freezing, you create a clear record of when the chilies were preserved. This information is vital because it helps you track the age of your frozen chilies. Over time, frozen food can experience changes in flavor, texture, and quality, so knowing how long they’ve been stored is essential for maintaining the best possible taste.
- Identification: Labeling with the type of chilies (in this case, “Hatch chilies”) helps you quickly identify the contents without having to open the containers or bags. This makes it easier to find what you need, especially when your freezer contains various frozen items.
- Use-By Time frame: Labeling allows you to establish a reasonable time frame for using the frozen chilies. While frozen foods remain safe to eat indefinitely, their quality can deteriorate over time. Knowing when you froze the chilies helps you prioritize their use and enjoy them at their best.
- Inventory Management: Labeling and dating enable better inventory management. You can keep track of how many Hatch chilies you have in your freezer, making it easier to plan meals and reduce food waste. This is particularly useful if you’re an avid cook or like to keep a well-stocked freezer.
- Prevent Waste: Clear labeling reduces the likelihood of food waste. When you can easily identify and track the age of your frozen items, you’re more likely to use them before their quality declines significantly.
Here’s how to label and date your packages effectively:
- Use a Permanent Marker: Write the date of freezing and the type of chilies (“Hatch chilies”) directly on the containers or bags using a permanent marker. This ensures that the information remains visible and doesn’t smudge or fade over time.
- Be Specific: Include as much detail as necessary to make future identification and use easier. For instance, you can also note the quantity of chilies in each container if they are packaged in varying amounts.
- Legible Writing: Ensure that your labeling is clear and legible. This makes it easier to read even if the containers or bags become frosty or icy.
- Update as Needed: If you remove a portion of the chilies from a container, be sure to update the date on the remaining portion. This helps you keep track of the freshness of the remaining chilies.
Step 8: Store in the freezer
Once you’ve properly packaged and labeled your Hatch chili packages, it’s time to store them in the freezer. This final step is crucial for ensuring the long-term preservation of your chilies. Here’s an explanation of why this step is important:
- Maintaining Temperature: The freezer provides a consistently low temperature, typically around 0°F (-18°C) or lower, which is essential for preserving the quality of frozen foods. Storing the Hatch chili packages in the freezer ensures that they remain at a temperature where bacterial growth and spoilage are inhibited.
- Preventing Temperature Fluctuations: Fluctuations in temperature can lead to freezer burn and deterioration in the quality of frozen food. Placing your Hatch chili packages in a location in the freezer where they won’t be subject to frequent temperature changes helps maintain their texture, flavor, and overall quality.
- Long-Term Storage: Frozen Hatch chilies can remain good for up to 12 months when stored properly. While they may still be safe to eat beyond this time, the quality may begin to deteriorate. Storing them in the freezer allows you to enjoy the flavor of Hatch chilies even when they are out of season.
Here’s how to store your Hatch chili packages in the freezer effectively:
- Choose a Suitable Location: Find a stable and well-organized spot in your freezer to store the packages. Ensure there is enough space to accommodate them without overcrowding.
- Avoid Frequent Opening: Minimize the number of times you open the freezer door, as this can lead to temperature fluctuations. Frequent opening and closing can also introduce warm air, which may affect the quality of your frozen items.
- Stack Carefully: If you need to stack multiple packages, do so carefully to avoid crushing or damaging the chilies. You can use dividers or shelves within the freezer to create dedicated storage spaces for your packages.
- Check for Proper Seals: Periodically check the sealed packages to ensure they remain tightly sealed. If you notice any signs of damage or a loss of vacuum seal (for vacuum-sealed bags), consider repackaging to maintain freshness.
- Follow the Use-By Date: While Hatch chilies can remain safe for consumption beyond 12 months, it’s best to use them within this time frame to enjoy them at their peak quality.
Other related questions
How do I defrost Hatch chilies?
To defrost Hatch chilies, transfer them from the freezer to the refrigerator and allow them to thaw slowly for several hours or overnight. Alternatively, for a quicker thaw, place the sealed package in a bowl of cold water, changing the water every 30 minutes until thawed. Avoid using the microwave for defrosting, as it can compromise the chilies’ texture and flavor.
Can I use frozen Hatch chilies directly in recipes, or do I need to thaw them first?
You can use frozen Hatch chilies directly in recipes that involve cooking, such as soups and stews. Thawing is typically necessary for recipes where the chilies need to maintain their texture, such as salads or salsas.
Can I refreeze Hatch chilies?
Refreezing Hatch chilies is generally not recommended, as it can negatively impact their quality. Once chilies are thawed, their texture and flavor may deteriorate due to the formation of ice crystals during the initial freezing and thawing process. It’s advisable to use thawed chilies promptly in your recipes to fully enjoy their taste and texture.
How do I know if the Hatch chilies have gone bad after being frozen?
Signs that frozen Hatch chilies have gone bad include changes in color, texture, and the presence of ice crystals or freezer burn. If the chilies appear discolored, mushy, or have a strong freezer-burnt odor, they may no longer be suitable for consumption. Always use your best judgment and discard Hatch chilies that show any signs of spoilage to ensure food safety.
What recipes can I use frozen Hatch chilies in?
Frozen Hatch chilies are versatile ingredients that can enhance a variety of recipes. They can be used in salsas, soups, stews, and sauces to add a smoky-sweet flavor and mild to moderate heat. Additionally, you can incorporate them into dishes like enchiladas, chili, burgers, omelets, and even cornbread for a distinctive southwestern twist. Their adaptability makes them suitable for many culinary creations, providing a delightful kick to your meals.


