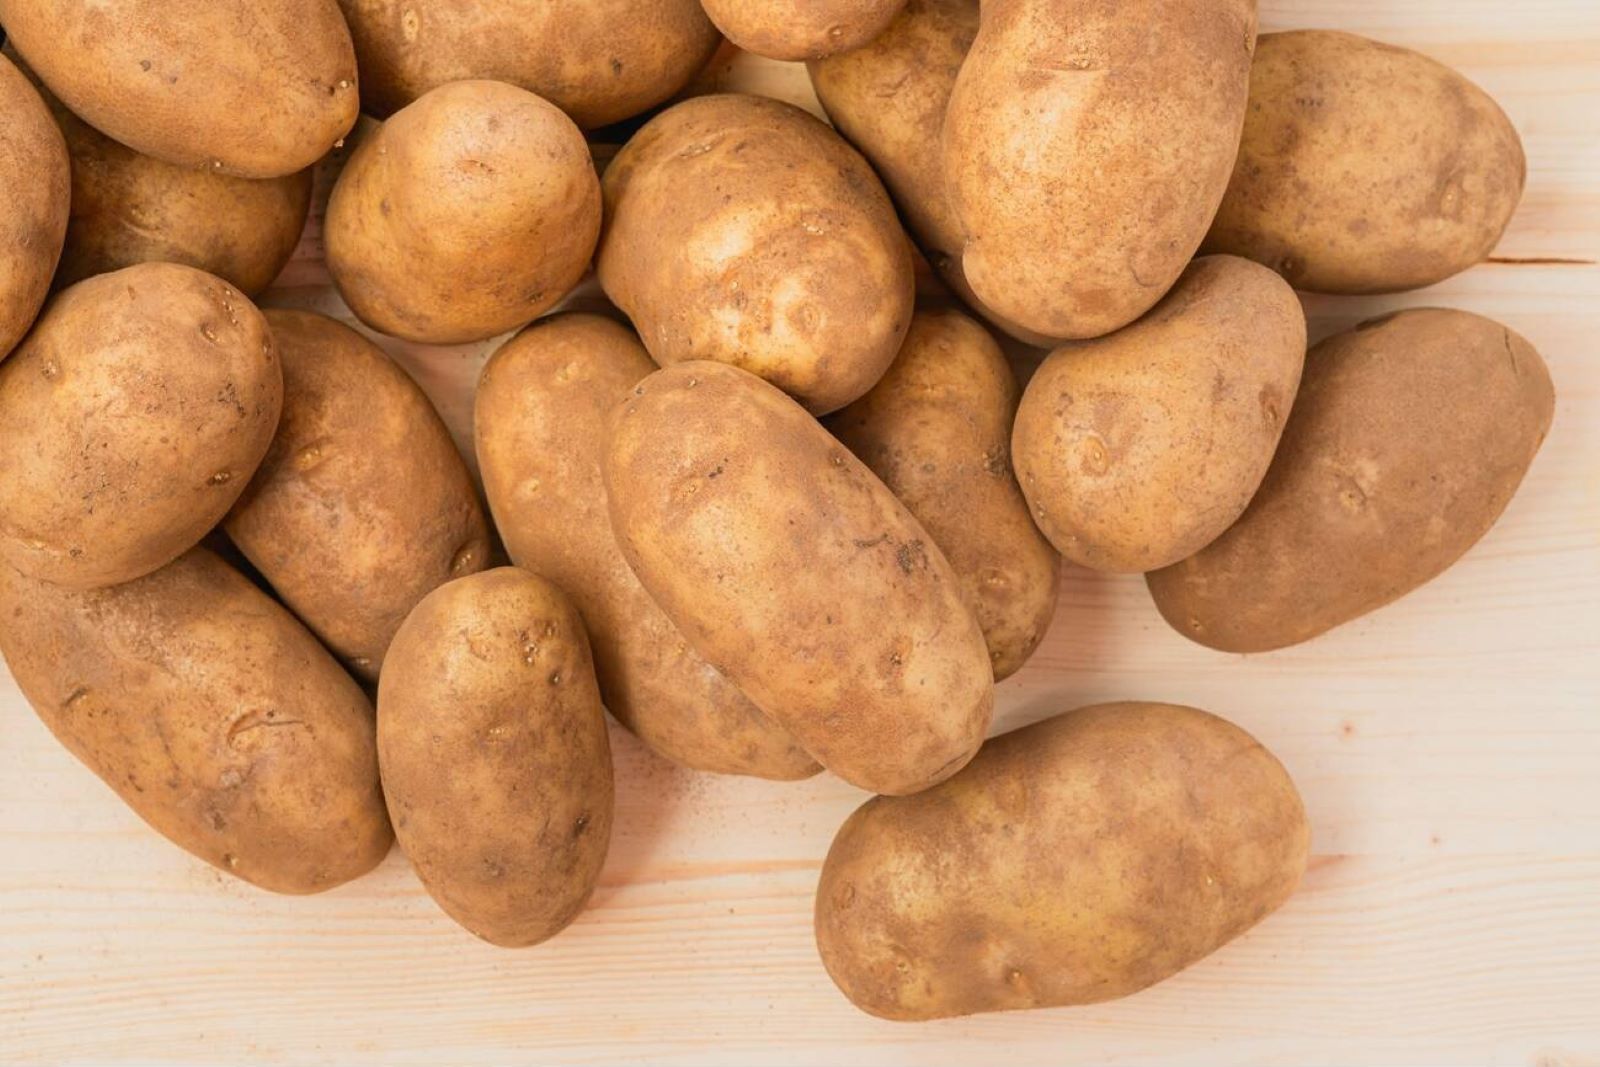
Idaho potatoes, renowned for their starchy texture and versatility in the kitchen, are a beloved staple in many households. These russet potatoes have a fluffy interior and a thick skin that holds up well in various cooking methods, making them perfect for mashing, baking, frying, or roasting. If you find yourself with a surplus of Idaho potatoes or want to stock up for future use, freezing is an excellent option. Freezing Idaho potatoes allows you to extend their shelf life and preserve their quality and flavor. In this guide, we will explore the best practices for freezing Idaho potatoes, including proper preparation, storage techniques, and tips for maintaining their texture and taste upon thawing. Join us as we dive into the world of freezing Idaho potatoes and discover how to keep this versatile tuber readily available for all your culinary endeavors.
Here are the simple steps to freeze idaho potatoes:
- Step 1: Select Fresh Idaho Potatoes
- Step 2: Wash and Peel the Potatoes (optional)
- Step 3: Cut the Potatoes into your Preferred Shape
- Step 4: Blanch the Potato Pieces
- Step 5: Drain and Pat Dry the Blanched Potatoes
- Step 6: Arrange the Potato Pieces for Freezing
- Step 7: Flash-Freeze the Potato Pieces
- Step 8: Package and Seal the Potato Pieces
- Step 9: Label and Date the Packages
- Step 10: Store in the Freezer
Step 1: Select Fresh Idaho Potatoes
When freezing Idaho potatoes, it’s crucial to begin with fresh potatoes to ensure the best results. Here’s why selecting the right potatoes is important:
- Firmness: Choose Idaho potatoes that feel firm when gently squeezed. Avoid potatoes that feel mushy or have a spongy texture, as they may indicate spoilage or age. Firm potatoes are more likely to retain their texture and flavor after freezing.
- Blemishes: Examine the potatoes for any visible blemishes, such as cuts, bruises, or dark spots. While minor blemishes can be trimmed off, it’s best to select potatoes with minimal damage. Blemishes can affect the quality and taste of the potatoes during freezing and storage.
- Smooth skin: Look for Idaho potatoes with smooth, unbroken skin. Rough or wrinkled skin can be a sign of dehydration or aging. Potatoes with smooth skin tend to have a higher moisture content, which helps maintain their texture and flavor when frozen.
- Avoid soft spots and signs of decay: Inspect the potatoes carefully and avoid any that have soft spots, mold, or signs of decay. Soft spots indicate rotting, and decayed areas can affect neighboring potato sections even after freezing. Choosing potatoes without these issues ensures better overall quality.
By selecting fresh Idaho potatoes that are firm, free from blemishes, and have smooth skin, you increase the chances of successfully freezing them while preserving their taste, texture, and nutritional value. This attention to quality at the start will yield satisfying results when you eventually use the frozen Idaho potatoes in your favorite dishes.
Step 2: Wash and Peel the Potatoes (optional)
When preparing Idaho potatoes for freezing, you have the option to wash and peel them. Here’s why this step is included and the considerations involved:
- Washing: Thoroughly washing the potatoes under running water helps remove any dirt, soil, or other debris that may be present on the skin. This step is especially important if the potatoes were freshly dug from the ground or have visible dirt on them. Washing the potatoes ensures that they are clean before freezing, which is essential for maintaining their overall quality.
- Peeling: Peeling the potatoes is optional when freezing them. The decision to peel depends on personal preference and the intended use of the frozen potatoes. The skin of Idaho potatoes contains nutrients and adds texture to certain dishes. If you enjoy the flavor and texture of potato skins or plan to use the frozen potatoes in recipes where the skin is desirable, you can skip the peeling process.
However, there are situations where peeling may be preferred. For example, if you plan to use the frozen potatoes in recipes that require a smooth texture, like mashed potatoes or creamy soups, peeling the potatoes before freezing can help achieve the desired consistency.
Washing the Idaho potatoes before freezing is recommended to ensure cleanliness, while peeling is optional and depends on personal preference and the specific recipe or dish in which the frozen potatoes will be used.
Step 3: Cut the Potatoes into your Preferred Shape
When freezing Idaho potatoes, it’s important to decide how you want to cut them before proceeding. Here’s why this step is included and some considerations to keep in mind:
- Preferred shape: Determine the shape in which you would like to freeze the Idaho potatoes based on your cooking preferences and the recipes you intend to use them in. Common options include whole, diced, sliced, or even wedges. The choice of shape depends on the dishes you plan to prepare with the frozen potatoes.
- Cooking time: Consider the cooking time associated with different potato shapes. Larger potato chunks or wedges will take longer to cook compared to smaller pieces like diced or sliced potatoes. If you anticipate using the frozen potatoes in dishes with shorter cooking times or quick preparations, cutting them into smaller pieces may be more convenient.
- Recipe compatibility: Think about the recipes you typically make with potatoes and how the shape of the frozen potatoes will affect the final dish. For example, if you frequently make stews or soups that require bite-sized potato pieces, dicing the potatoes before freezing would be a suitable choice. On the other hand, if you often roast or bake potatoes as a side dish, freezing them as larger wedges or slices might be more appropriate.
- Uniformity: For even cooking and consistent results, try to cut the Idaho potatoes into uniform shapes and sizes. This helps ensure that the potatoes freeze and cook evenly, preventing some pieces from being overcooked or undercooked compared to others.
By considering your preferred shape, cooking time, recipe compatibility, and aiming for uniformity in your cuts, you can customize the shape of the frozen Idaho potatoes to suit your cooking needs and preferences. This step allows for greater flexibility when using the frozen potatoes in various recipes and ensures more efficient cooking in the future.
Step 4: Blanch the Potato Pieces
Blanching is a crucial step in the process of freezing Idaho potatoes. Here’s why blanching is recommended and the steps involved:
- Preserving color, texture, and flavor: Blanching helps preserve the overall quality of the potatoes by preventing enzymatic reactions that can cause discoloration, texture changes, and flavor loss during freezing. By briefly cooking the potato pieces before freezing, you can retain their natural color, texture, and flavor, resulting in better-tasting potatoes when they are eventually cooked or reheated.
- Boiling water: Start by bringing a large pot of water to a rolling boil. The pot should be spacious enough to accommodate the potato pieces without overcrowding. Use enough water to fully submerge the potatoes during the blanching process.
- Adding the potato pieces: Carefully add the cut potato pieces to the boiling water. Ensure that they are fully submerged in the water. Depending on the size of the potato pieces, blanch them for about 3-5 minutes. Larger pieces may require slightly longer blanching times, while smaller pieces will cook more quickly.
- Ice bath: Once the blanching time is complete, promptly transfer the blanched potato pieces to an ice bath. The ice bath consists of a large bowl or basin filled with ice water. Placing the blanched potatoes in the ice bath rapidly lowers their temperature and halts the cooking process. This step is crucial in preserving the desired texture and preventing further cooking.
- Drain excess water: After the potato pieces have cooled in the ice bath for a few minutes, remove them and thoroughly drain any excess water. Pat them dry gently with a clean kitchen towel or paper towels to remove any remaining moisture. Ensuring the potato pieces are dry before freezing helps prevent the formation of ice crystals, which can negatively impact their quality during storage.
Blanching is an essential step that helps maintain the color, texture, and flavor of the Idaho potato pieces when freezing. By following the boiling water, ice bath, and drying process, you can effectively preserve the quality of the potatoes and ensure they retain their best attributes when you eventually use them in your favorite recipes.
Step 5: Drain and Pat Dry the Blanched Potatoes
After blanching the Idaho potato pieces and placing them in an ice bath, the next step is to drain and dry them thoroughly. Here’s why this step is important and how to do it:
- Removing excess water: When the blanched potatoes are in the ice bath, they absorb some water. Draining the potatoes ensures that they are not excessively moist when frozen, as excess moisture can lead to the formation of ice crystals, which can affect the quality and texture of the potatoes during storage.
- Preventing ice crystals: Patting the blanched potatoes dry with a clean kitchen towel or paper towels helps remove any remaining water on the surface. This step is essential to minimize the presence of moisture on the potato pieces, as excess moisture can contribute to the formation of ice crystals when frozen. By removing the excess water, you help maintain the integrity and quality of the potatoes throughout the freezing process.
How to drain and pat dry:
- Remove the blanched Idaho potato pieces from the ice bath, allowing any excess water to drain off naturally.
- Place the blanched potatoes on a clean kitchen towel or a layer of paper towels.
- Gently pat the potato pieces with the towel or paper towels to absorb the remaining moisture. Avoid applying excessive pressure that may cause the potatoes to break or become mushy.
- Continue patting until the potato pieces are relatively dry and no visible moisture remains on the surface.
By draining and patting dry the blanched Idaho potato pieces, you ensure that excess moisture is removed before freezing. This step helps maintain the quality, texture, and flavor of the potatoes, contributing to a better overall result when using them in your favorite dishes after freezing.
Step 6: Arrange the Potato Pieces for Freezing
Once the blanched and dried Idaho potato pieces are ready, the next step is to arrange them properly on a baking sheet or tray before freezing. Here’s why this step is important and how to do it:
- Preventing sticking: Placing the blanched and dried potato pieces in a single layer on a baking sheet or tray ensures that they don’t touch each other during freezing. This prevents the potato pieces from sticking together, making it easier to portion them out later when you need to use a specific amount. Sticking can also result in a clumped mass of potatoes, making it challenging to separate them without causing damage.
- Even freezing: Arranging the potato pieces in a single layer allows for more efficient and even freezing. When the potatoes freeze individually and are not in contact with each other, the freezing process is faster and more consistent. This helps maintain the quality and texture of the potatoes, reducing the likelihood of freezer burn and preserving their overall taste.
How to arrange the potato pieces:
- Take a baking sheet or tray that is large enough to accommodate the potato pieces in a single layer without overcrowding.
- Place the blanched and dried Idaho potato pieces on the baking sheet or tray, making sure they are spread out and not touching each other.
- If you have a large quantity of potatoes, you may need to use multiple baking sheets or trays to ensure they are arranged in a single layer.
- Ensure there is enough space between each potato piece to prevent them from sticking together. This can be achieved by spacing them evenly on the baking sheet or tray.
By arranging the blanched and dried Idaho potato pieces in a single layer, you prevent them from sticking together and promote even freezing. This step contributes to maintaining the individual integrity of each potato piece, ensuring that they freeze well and can be easily portioned out when needed for future use.
Step 7: Flash-Freeze the Potato Pieces
After arranging the blanched and dried Idaho potato pieces on a baking sheet or tray, the next step is to flash-freeze them. Flash-freezing refers to rapidly freezing the potatoes to preserve their texture and prevent them from sticking together. Here’s why this step is important and how to do it:
- Preserving texture: Flash-freezing the potato pieces helps preserve their texture. By freezing them quickly, ice crystals are formed in smaller sizes, minimizing cell damage and preventing the formation of large ice crystals that can affect the texture and quality of the potatoes. This process helps maintain the desired texture, ensuring that the potatoes remain firm and retain their structure after freezing.
- Preventing sticking: Flash-freezing the potato pieces individually helps prevent them from sticking together during the freezing process. When the potatoes freeze quickly and separately, they are less likely to clump together, making it easier to portion out the desired amount of frozen potatoes later without having to thaw a large frozen mass.
How to flash-freeze the potato pieces:
- Once the potato pieces are arranged on the baking sheet or tray, place the baking sheet or tray in the freezer.
- Make sure the freezer temperature is set to 0°F (-18°C) or below for optimal freezing.
- Allow the potato pieces to freeze for about 1-2 hours or until they are firm. The exact freezing time may vary depending on the size and thickness of the potato pieces.
- To check if the potato pieces are frozen, touch them gently. They should feel firm and solid.
By flash-freezing the potato pieces, you ensure that they freeze quickly and individually, preserving their texture and preventing sticking. This step helps maintain the quality of the potatoes and makes it easier to portion out the desired amount when you need to use them in recipes after freezing.
Step 8: Package and Seal the Potato Pieces
After the Idaho potato pieces have been flash-frozen and are firm, the next step is to properly package and seal them for long-term storage in the freezer. Here’s why this step is important and how to do it:
- Preserving quality: Proper packaging and sealing are essential to maintain the quality of the frozen potato pieces. Packaging them in freezer-safe containers or resealable bags protects them from moisture loss and exposure to air, which can cause freezer burn and deteriorate the texture and flavor of the potatoes over time.
- Preventing freezer burn: Freezer burn occurs when the surface of frozen food is exposed to air, causing dehydration and a deterioration in quality. To prevent freezer burn, it’s crucial to remove excess air from the packaging. Oxygen is the primary culprit for freezer burn, so minimizing its presence helps preserve the taste and texture of the potato pieces.
How to package and seal the potato pieces:
- Prepare freezer-safe containers or resealable bags for packaging the potato pieces. Make sure they are clean and in good condition.
- Portion out the desired amount of frozen potato pieces into each container or bag, depending on your anticipated usage. This step allows you to easily access and use the desired quantity without having to thaw the entire batch.
- Press out any excess air from the packaging. For containers, ensure the lids are securely closed, while for resealable bags, gently press out the air and seal them tightly. Removing excess air helps minimize the risk of freezer burn.
- If using resealable bags, consider double-bagging for added protection. Place the filled bag inside another bag and seal both bags tightly to provide an extra layer of insulation.
By properly packaging and sealing the potato pieces, you ensure they are protected from freezer burn and maintain their quality during long-term storage. The labeled containers or bags make it easy to identify and retrieve the frozen potatoes when needed, without compromising the quality of the remaining portions.
Step 9: Label and Date the Packages
After packaging and sealing the Idaho potato pieces for freezing, it is important to label and date each package. Here’s why this step is important and how to do it:
- Storage organization: Labeling and dating the packages allow for easy organization and identification of the frozen potato pieces. When stored in the freezer, it can be challenging to differentiate between different packages or remember when they were frozen. By clearly indicating the contents and date of freezing, you can quickly locate and retrieve the specific package you need, minimizing guesswork and potential waste.
- Storage time tracking: Knowing the date of freezing is crucial for monitoring the storage time of the frozen potato pieces. Different foods have varying recommended freezer storage times for optimal quality and safety. By labeling the packages, you can keep track of how long the potatoes have been in the freezer and ensure you use them within the recommended time frame.
How to label and date the packages:
- Use a permanent marker or labels to write the contents of the package on each container or bag. Clearly indicate that the package contains Idaho potato pieces.
- Write the date of freezing on the package, specifying the month, day, and year. This information will help you track the storage time of the potatoes and determine their freshness.
- Place the label or write the information in a visible area on the package, ensuring it won’t smudge or be easily rubbed off during storage.
By labeling and dating the packages, you establish an organized system for storing and retrieving the frozen potato pieces. This step ensures that you can easily identify the contents and track the storage time, promoting efficient use and preventing potential food waste.
Step 10: Store in the Freezer
After properly packaging and labeling the Idaho potato pieces, the final step is to store them in the freezer. Here’s why this step is important and how to ensure optimal storage conditions:
- Freezer temperature: Ensure that your freezer is set to a temperature of 0°F (-18°C) or below. Maintaining a sufficiently low temperature is crucial for preserving the quality and safety of the frozen potatoes. A lower temperature helps prevent the growth of bacteria and slows down enzymatic reactions that can degrade the potatoes over time.
- Optimal storage duration: Frozen Idaho potato pieces can be stored for up to 12 months. However, for the best quality and taste, it is recommended to consume them within 8 months. While the potatoes will remain safe to eat beyond this timeframe, their texture and flavor may gradually decline. Keeping track of the storage time through proper labeling allows you to ensure you use the oldest packages first and minimize any potential loss of quality.
How to store in the freezer:
- Place the sealed packages of Idaho potato pieces in the freezer. Ensure they are arranged in a way that allows for efficient use of space and easy access.
- Avoid overcrowding the freezer or placing items on top of the potato packages. Adequate air circulation is important for maintaining a consistent freezing temperature.
- Be mindful of the freezing order. If you are freezing multiple batches or packages, place the newest packages at the back of the freezer and the older ones towards the front. This organization helps ensure the proper rotation and usage of the potatoes.
By storing the sealed packages of Idaho potato pieces in the freezer at the appropriate temperature, you maintain the quality and safety of the potatoes for an extended period. Following the recommended storage duration and proper freezer organization allows you to enjoy the best-tasting potatoes when you eventually use them in your favorite dishes.
How long can Idaho potatoes last in the freezer?
Idaho potatoes can last in the freezer for up to 12 months. While they may remain safe to eat beyond this timeframe, their quality and flavor may gradually deteriorate. For the best results, it is recommended to consume frozen Idaho potatoes within 8 months to ensure optimal taste and texture.
Other related questions
How do you defrost Idaho potatoes?
To defrost Idaho potatoes, transfer the frozen potato pieces from the freezer to the refrigerator and allow them to thaw slowly overnight or for approximately 24 hours. Alternatively, for quicker defrosting, place the frozen potato pieces in a sealed plastic bag and submerge them in cold water. Change the water every 30 minutes until the potatoes are thawed. Avoid using hot water or microwaving as these methods can lead to uneven thawing and affect the texture of the potatoes.
Can you refreeze Idaho potatoes?
Refreezing Idaho potatoes is generally not recommended as it can affect their texture and quality. Once thawed, the potato pieces may become mushy or lose their original taste. It is best to use the thawed potatoes promptly or cook them before refreezing to maintain their desired characteristics.
How do I know if the Idaho potatoes have gone bad after being frozen?
To determine if frozen Idaho potatoes have gone bad, look for signs such as off-smell, excessive freezer burn, or a change in texture. If the potatoes have a strong, unpleasant odor or show signs of mold growth, they should be discarded. Additionally, if the potato pieces have significant freezer burn or a mushy consistency, it is an indication that their quality has deteriorated and they are no longer suitable for consumption.
Can I freeze Idaho potatoes for making potato chips or crisps?
Yes, you can freeze Idaho potatoes for making potato chips or crisps, but it may not yield the desired results. Freezing can cause the cell structure of the potatoes to change, resulting in a softer texture that may not be suitable for making crispy chips. It is generally recommended to use fresh potatoes for making homemade potato chips or crisps to achieve the desired crispiness.
Can I freeze Idaho potatoes for making gnocchi or potato pancakes later?
Yes, you can freeze Idaho potatoes for making gnocchi or potato pancakes later. Start by cooking the potatoes until they are tender, then allow them to cool. Peel and mash the potatoes, ensuring no lumps remain, and shape them into the desired form. Place the prepared gnocchi or potato pancakes on a baking sheet lined with parchment paper, freeze until solid, and transfer them to airtight freezer bags or containers.
Can I freeze Idaho potatoes for use in casseroles or shepherd’s pie?
Yes, you can freeze Idaho potatoes for use in casseroles or shepherd’s pie. Start by cooking the potatoes until they are tender, then allow them to cool. Slice or mash the potatoes according to your recipe’s requirements, and place them in airtight freezer bags or containers.
Can I freeze Idaho potatoes for future canning or preserving?
No, freezing Idaho potatoes is not suitable for future canning or preserving purposes. Potatoes have a high water content, and freezing can cause their cell structure to change, resulting in a mushy texture when thawed. Canning or preserving methods such as canning jars or pickling are more suitable for long-term storage of potatoes.

