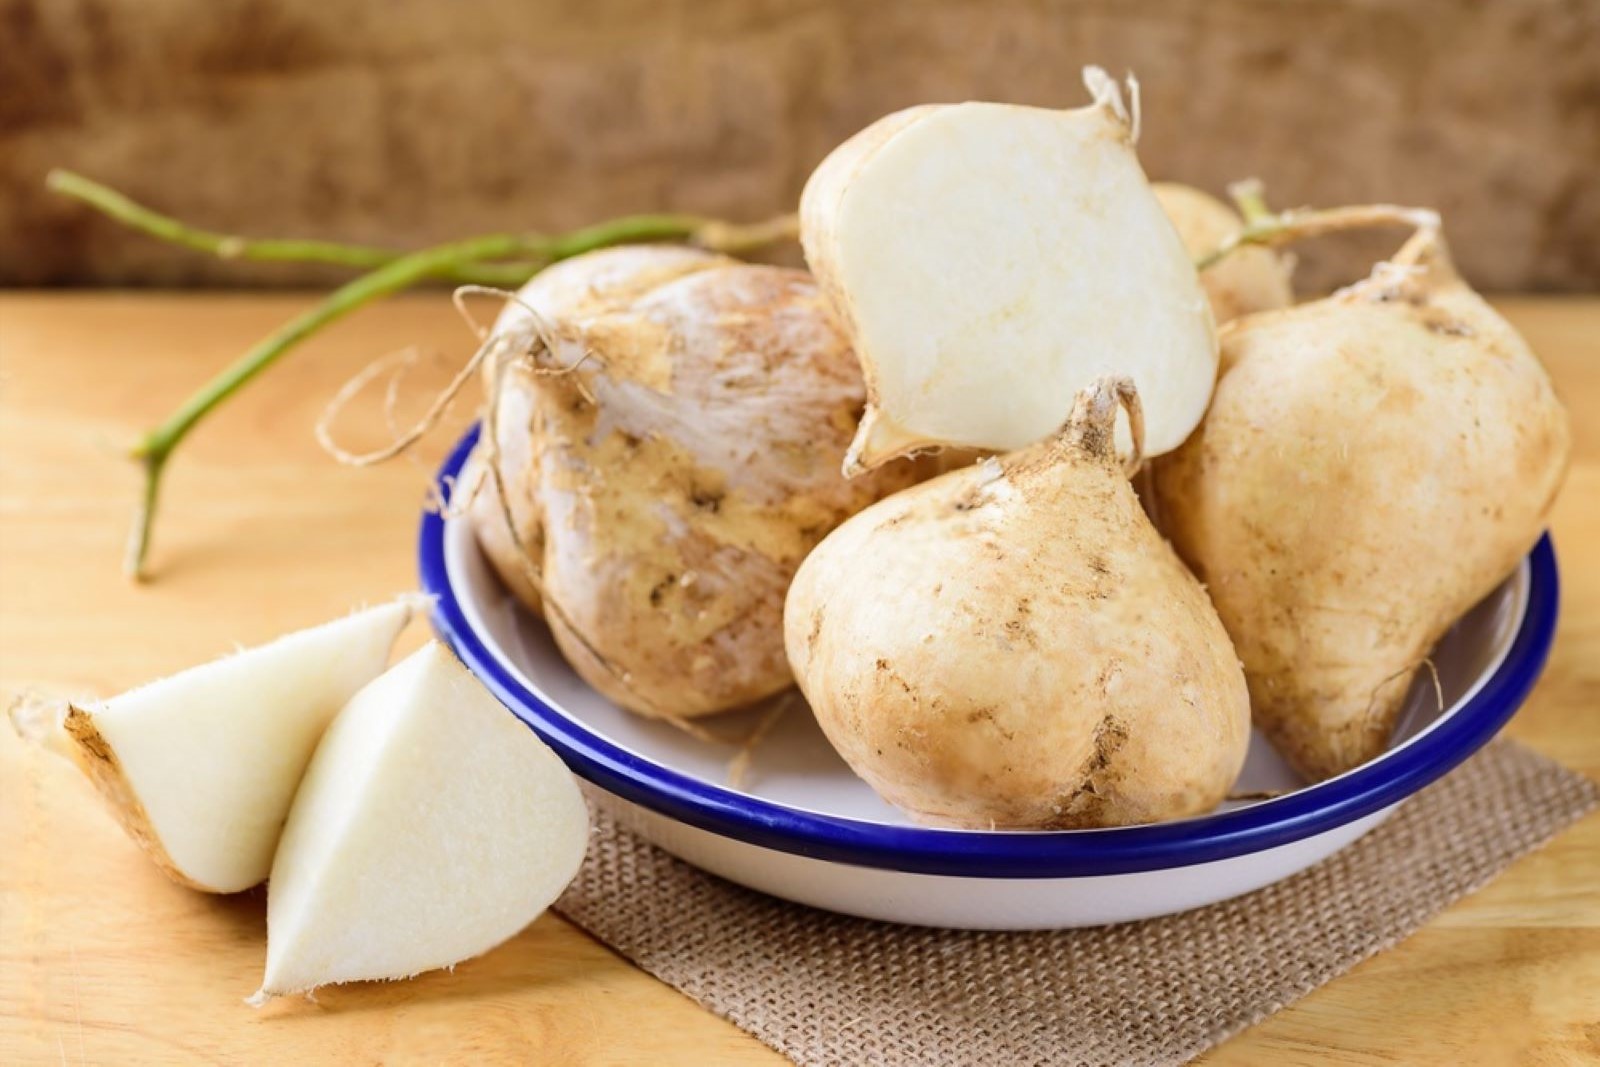
Jicama is a root vegetable known for its crunchy texture and mild, slightly sweet flavor. It is often used in salads, stir-fries, and as a raw snack. If you have a surplus of jicama or want to preserve its freshness for future use, freezing is a great option. Freezing jicama allows you to enjoy this versatile vegetable even when it’s out of season. With a few simple steps, you can freeze jicama while maintaining its desired texture and flavor. This article provides a comprehensive guide on how to freeze jicama properly to ensure its optimal quality when you’re ready to use it.
Here’s a guide on how to freeze jicama:
- Step 1: Select fresh jicama
- Step 2: Wash and peel the jicama
- Step 3: Cut the jicama into desired shapes
- Step 4: Blanch the jicama
- Step 5: Drain and dry the jicama
- Step 6: Arrange the jicama for freezing
- Step 7: Flash-freeze the jicama
- Step 8: Package and seal the jicama
- Step 9: Label and date the packages
- Step 10: Store in the freezer
Step 1: Select fresh jicama
When freezing jicama, it is crucial to start with fresh and high-quality produce. Choosing the right jicama ensures that the frozen result will have a better texture and flavor when you eventually use it.
Fresh jicama should be firm to the touch and free from blemishes or soft spots. Gently press the jicama with your fingers – it should feel solid and heavy for its size. A firm texture indicates that the jicama is at its peak freshness.
Avoid selecting jicama that shows signs of decay, such as mold, discoloration, or mushy areas. These are clear indicators that the jicama is past its prime and may not freeze well. Additionally, avoid jicama that feels soft or spongy, as it indicates that the vegetable has become dehydrated or is starting to spoil.
Can I freeze jicama that has already been cooked or seasoned?
Yes, you can freeze jicama that has already been cooked or seasoned. However, keep in mind that the texture may slightly change upon freezing and thawing. Cooked or seasoned jicama may become softer after freezing, so it is best to use it in dishes where texture is less important, such as soups, stews, or stir-fries. Additionally, consider that some seasonings or flavors may intensify during freezing, so adjust the seasoning accordingly when using previously cooked or seasoned jicama.
Step 2: Wash and peel the jicama
Before freezing jicama, it is important to wash and peel it properly. This step helps to remove any dirt, bacteria, or residue that may be present on the outer skin of the vegetable.
Start by rinsing the jicama under cool running water. Use your hands to gently rub the surface, ensuring that all sides of the jicama are cleaned thoroughly. This helps to eliminate any dirt or debris that might have accumulated during storage or transportation.
Once the jicama is clean, it’s time to peel off the outer skin. You can use a vegetable peeler or a sharp knife for this task. Begin by cutting off a thin slice from the top and bottom ends of the jicama to create a stable base. Then, grip the jicama firmly and carefully slide the peeler or knife downward to remove the skin. Ensure that you remove the thin layer of brown skin completely, as it can have a slightly bitter taste.
Peeling the jicama not only removes any potential contaminants but also enhances its overall appearance and texture. The peeled jicama will have a clean, creamy-white interior, ready to be sliced or cut into your desired shapes for freezing.
Step 3: Cut the jicama into desired shapes
After washing and peeling the jicama, the next step in freezing it is to cut it into the desired shapes. This allows you to customize the jicama pieces according to your preferences and intended uses.
There are various options for cutting jicama into different shapes. Common choices include sticks, cubes, or thin rounds. The shape you choose depends on how you plan to use the jicama in your recipes or snacking habits.
If you enjoy snacking on jicama as a refreshing and crunchy treat, cutting it into sticks or thin rounds is ideal. These shapes are easy to pick up and munch on. You can also consider cutting it into smaller cubes if you prefer bite-sized pieces.
For recipes that call for jicama as an ingredient, consider the size and shape that would work best. For example, if you plan to add jicama to a stir-fry or a salad, cutting it into thin matchstick-like shapes or small cubes can provide a nice texture and blend well with other ingredients.
Choosing the size and shape of the jicama pieces is a matter of personal preference and practicality. Consider the intended use of the jicama and select a shape that will be convenient and enjoyable for your future recipes or snacking purposes.
Step 4: Blanch the jicama
Blanching is a crucial step in freezing jicama as it helps preserve its texture, color, and flavor. The blanching process involves briefly cooking the jicama in boiling water, followed by rapid cooling in an ice bath to halt the cooking process.
To blanch jicama, start by bringing a pot of water to a rolling boil. The pot should be large enough to comfortably accommodate the jicama pieces without overcrowding. The boiling water serves to quickly heat the jicama and prepare it for freezing.
Carefully add the jicama pieces to the boiling water and let them cook for about 2 to 3 minutes. This brief cooking time is sufficient to inactivate enzymes present in the jicama that could potentially cause texture and color deterioration during freezing. Blanching also helps to reduce any microbial load that might be present on the surface of the vegetable.
After the blanching time is complete, promptly transfer the jicama pieces to an ice bath. The ice bath consists of a bowl or basin filled with ice-cold water. Placing the blanched jicama in the ice bath rapidly cools it down, preventing further cooking and preserving its crispness and color.
The blanching process helps to maintain the jicama’s texture by partially cooking it, which can prevent it from becoming mushy when frozen and thawed. Blanching also helps to retain the natural vibrant color of the jicama and preserve its overall visual appeal. Additionally, blanching helps to lock in the flavor of the jicama, ensuring it remains delicious even after freezing.
Can I freeze jicama without blanching it first?
Yes, you can freeze jicama without blanching it first. Unlike some vegetables, jicama does not require blanching before freezing. Simply peel and cut the jicama into desired shapes, such as slices or cubes, and transfer them directly into airtight freezer bags or containers. Blanching is not necessary for jicama as it helps preserve its texture and quality during freezing.
Step 5: Drain and dry the jicama
After blanching and cooling the jicama, it is important to remove excess moisture before freezing. Draining and drying the jicama helps prevent freezer burn and the formation of ice crystals, ensuring that the frozen jicama maintains its quality and texture.
Once the jicama has been blanched, carefully remove it from the ice bath and allow any excess water to drain off. You can use a colander or a strainer to facilitate the draining process. Give the jicama a gentle shake to remove as much water as possible.
After draining, it is crucial to pat the jicama dry using a clean kitchen towel or paper towels. Moisture on the surface of the jicama can lead to the formation of ice crystals during freezing, which can negatively impact its texture and flavor. By removing the moisture, you minimize the risk of freezer burn and maintain the integrity of the jicama.
Gently pat the jicama pieces with the towel, absorbing any remaining moisture. Ensure that the jicama is thoroughly dry before proceeding to the next step of the freezing process.
By draining and drying the jicama, you are taking proactive measures to preserve its quality during freezing. Removing excess water helps to prevent the formation of ice crystals, which can cause cellular damage and affect the texture and taste of the jicama when thawed. Properly dried jicama is more likely to retain its crispness and flavor, ensuring a satisfying culinary experience when used later on.
Step 6: Arrange the jicama for freezing
To ensure proper freezing and prevent the jicama pieces from sticking together, it is essential to arrange them in a single layer on a baking sheet or tray lined with parchment paper.
Start by preparing a baking sheet or tray by lining it with parchment paper. The parchment paper prevents the jicama from sticking to the surface and makes it easier to remove them once frozen.
Next, spread the blanched and dried jicama pieces in a single layer on the prepared baking sheet or tray. It is important to avoid overcrowding and ensure that the pieces are not touching each other. This spacing allows for proper airflow around each piece during freezing and prevents them from freezing together in a clump.
When the jicama pieces are frozen individually and not touching, it becomes easier to remove the desired amount when you only need a portion. Additionally, the individual freezing ensures that each piece retains its shape, texture, and flavor without sticking to one another.
Step 7: Flash-freeze the jicama
After arranging the jicama pieces in a single layer on a baking sheet or tray, the next step is to flash-freeze them. Flash-freezing involves placing the tray with the jicama into the freezer and allowing them to freeze quickly for about 1 to 2 hours, or until they become firm.
Flash-freezing is an important technique when freezing fruits and vegetables, including jicama. By freezing the jicama pieces individually and quickly, it prevents them from clumping together in the freezer. This is beneficial because it allows for easy portioning and prevents the pieces from becoming stuck or difficult to separate when you want to use them later on.
During flash-freezing, the quick freezing process helps to preserve the quality of the jicama. It minimizes the formation of large ice crystals, which can cause cell damage and affect the texture and flavor of the vegetable. Flash-freezing helps to maintain the jicama’s natural crispness and overall integrity.
Placing the baking sheet or tray with the jicama into the freezer allows the cold air to circulate around each piece, ensuring even freezing and maintaining their individual shapes. The duration of 1 to 2 hours is generally sufficient for the jicama to become firm and fully frozen.
Step 8: Package and seal the jicama
Once the jicama pieces are flash-frozen and firm, it’s time to package and seal them properly to maintain their quality during freezer storage. Transferring the jicama into freezer-safe bags or airtight containers is essential for protecting them from freezer burn and preserving their freshness.
Start by preparing freezer-safe bags or airtight containers specifically designed for freezing food. These containers help to create a barrier against moisture and air, preventing freezer burn and maintaining the quality of the jicama.
Transfer the flash-frozen jicama pieces into the bags or containers, ensuring that they are evenly distributed and not overcrowded. It’s advisable to divide the jicama into portion sizes that you’re likely to use in one go, to avoid repeated thawing and refreezing.
Before sealing the bags or containers, it’s important to squeeze out any excess air. Air trapped inside the packaging can lead to freezer burn, which affects the texture and taste of the jicama. Press the bags or containers gently to remove as much air as possible, then seal them tightly to create a secure and airtight seal.
By removing excess air and sealing the packaging tightly, you create a controlled environment that minimizes the exposure of the jicama to oxygen and moisture. This helps to maintain the jicama’s freshness, texture, and flavor during freezer storage.
Proper packaging and sealing of the jicama are key factors in preventing freezer burn. Freezer burn occurs when the surface of the food comes into contact with air, causing dehydration and affecting the overall quality of the jicama. By using freezer-safe bags or airtight containers and removing excess air, you significantly reduce the risk of freezer burn and ensure that the jicama remains in excellent condition until it is ready to be used.
Step 9: Label and date the packages
To maintain organization and ensure the proper rotation of frozen jicama, it is essential to label each package with the contents and the date of freezing. Using a permanent marker, clearly write the necessary information on the package.
Labeling the packages serves multiple purposes. Firstly, it helps you identify the contents easily without having to open each package. This is especially important if you have multiple types of frozen vegetables in your freezer. By clearly labeling the jicama packages, you can quickly locate them when needed.
Secondly, including the date of freezing on the package allows you to keep track of the storage duration. Frozen jicama can typically maintain its quality for around 8 to 12 months, but it’s still beneficial to know the exact freezing date. This ensures that you use the oldest packages first, minimizing any potential food waste and maximizing the freshness of the jicama.
Additionally, by dating the packages, you can make informed decisions about the duration of storage and ensure that the jicama is used within the recommended time frame. This practice promotes food safety and helps you maintain the best possible quality of the frozen jicama.
Remember to use a permanent marker for labeling, as it will not fade or smudge over time. Place the label in a visible location on the package for easy identification.
Step 10: Store in the freezer
Once you have labeled and dated the jicama packages, it’s time to store them in the freezer. Proper storage is crucial for maintaining the quality, flavor, and texture of the frozen jicama.
When placing the jicama packages in the freezer, ensure they are kept in a flat position. This allows for even freezing and helps prevent the packages from shifting or toppling over, which could lead to damage or an uneven freeze. Placing them flat also maximizes the use of space in the freezer.
It’s important to store the jicama packages away from strong-smelling foods. Jicama has a mild and delicate flavor, and it can easily absorb odors from other foods in the freezer. To prevent flavor transfer, it’s best to store the jicama away from pungent or strongly scented items. Consider using separate compartments or freezer bags to isolate the jicama from other foods.
Maintaining proper storage conditions in the freezer is essential to preserve the quality of the jicama. Keep the freezer temperature consistently set at or below 0°F (-18°C) to ensure optimal freezing and maintain the jicama’s texture and taste.
By storing the labeled jicama packages in a flat position and away from strong-smelling foods, you are taking steps to maintain the integrity and flavor of the frozen jicama. This ensures that when you retrieve the jicama from the freezer, it will be in the best possible condition for your future culinary creations or snacking.
How long can I store frozen jicama?
Frozen jicama can be stored for up to 12 months without significant loss in quality. However, for the best flavor and texture, it is recommended to consume it within 6 to 8 months. Proper storage is crucial to maintain its quality during this period. Ensure the jicama is tightly sealed in airtight containers or freezer bags to prevent freezer burn and moisture loss. Label the containers with the date of freezing to keep track of its storage time.
Other related questions
How do I properly defrost jicama?
To defrost jicama, transfer the frozen jicama from the freezer to the refrigerator and allow it to thaw overnight. This slow thawing method helps preserve the texture and flavor of the jicama. Once thawed, drain any excess liquid and pat dry before using it in your desired recipe. Avoid using heat or microwaving to defrost jicama, as it can result in a mushy texture.
Can I refreeze previously thawed jicama?
It is generally not recommended to refreeze previously thawed jicama. Once jicama has been thawed, its texture and quality may deteriorate, and refreezing can further compromise its taste and texture. Additionally, the process of thawing and refreezing increases the risk of bacterial growth and food safety issues. To maintain the best quality and safety, it is advised to only thaw the amount of jicama you plan to use and consume it within a reasonable time frame.
How do I know if my frozen jicama has gone bad?
There are a few signs to look out for to determine if your frozen jicama has gone bad. First, check for any visible signs of freezer burn, such as discoloration or dry, shriveled patches on the surface. If the jicama appears excessively mushy or has an off-putting odor, it is likely spoiled. Additionally, if there are any signs of mold or an unusual texture, it is best to discard the jicama to ensure food safety. Trust your senses and use your best judgment when assessing the quality of frozen jicama.
Can I use frozen jicama with the fresh ones?
Yes, you can use frozen jicama with fresh ones, but it’s important to keep in mind the differences in texture and moisture content. Frozen jicama may have a slightly softer texture compared to fresh jicama, which can affect the overall dish. It is best to thaw and drain the frozen jicama before using it in recipes to minimize any excess moisture. You can combine fresh and frozen jicama in salads, stir-fries, or other dishes, adjusting the cooking time and seasoning as needed to accommodate the frozen jicama.
How does freezing affect the texture of jicama?
Freezing can cause some changes in the texture of jicama. When thawed, the previously crisp and crunchy texture of jicama may become slightly softer. This is due to the formation of ice crystals during freezing, which can break down the cell structure of the vegetable. However, the flavor and overall taste of jicama are not significantly affected by freezing.
Can I freeze jicama and other vegetables together in the same container?
Yes, you can freeze jicama and other vegetables together in the same container. However, it is important to consider the compatibility of the vegetables in terms of texture and flavor. Some vegetables freeze better than others, so it’s best to choose vegetables that have similar freezing characteristics. Additionally, ensure that all the vegetables are properly prepared, such as peeled and cut into appropriate sizes, before freezing them together.

