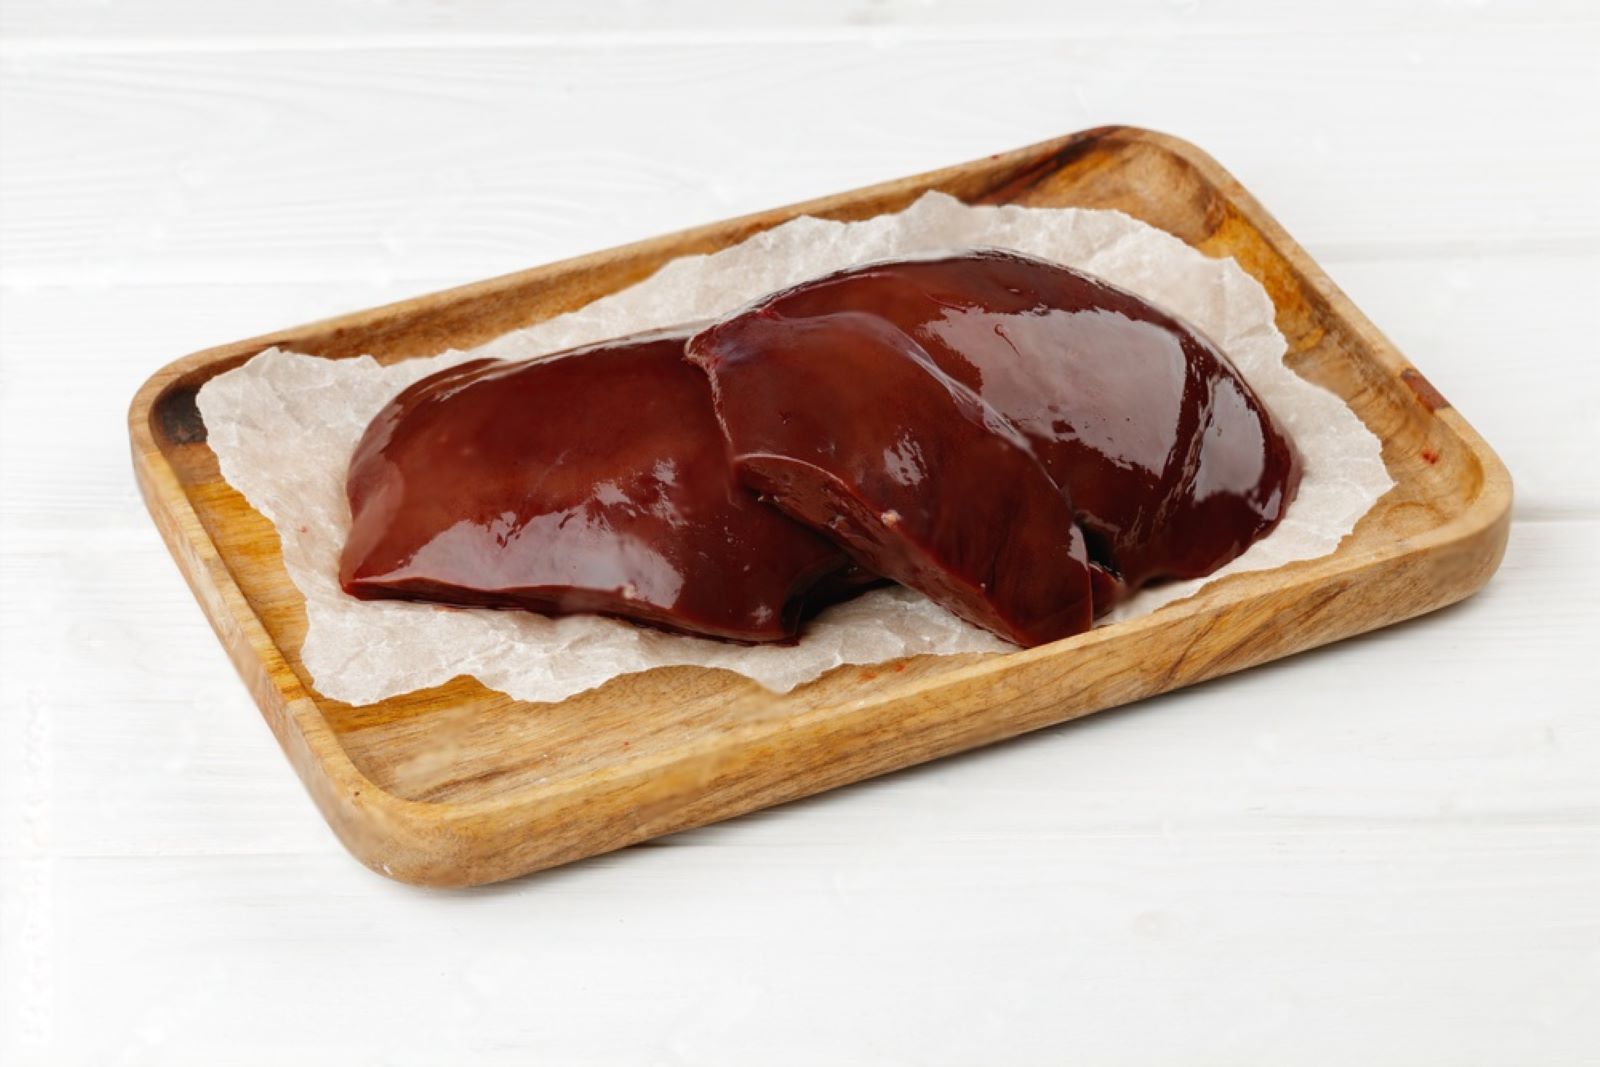
Liver, a nutrient-rich organ meat, has been a part of human diets for centuries, valued for its high protein content, essential vitamins, and minerals. Available from various animals such as beef, chicken, pork, and lamb, liver is a versatile ingredient that holds a significant place in various culinary traditions around the world. From classic dishes like liver pâté and liver and onions to modern interpretations in stir-fries and stews, liver boasts a distinctive and hearty flavor that appeals to a wide range of palates. However, when purchasing liver in larger quantities or preparing for special occasions, excess servings may accumulate, leading to the question of how to best preserve this prized organ meat. Freezing liver emerges as a practical and reliable method to extend its shelf life, maintaining its taste and nutritional value until it’s ready to be cooked and savored. In this guide, we will explore the best techniques for freezing liver, ensuring that its rich flavor, tender texture, and essential nutrients are lovingly retained, ready to add a touch of culinary sophistication and nourishment to your meals whenever you desire, without the need to compromise on taste or quality.
Here are the simple steps to freeze liver:
Step 1: Select Fresh Liver
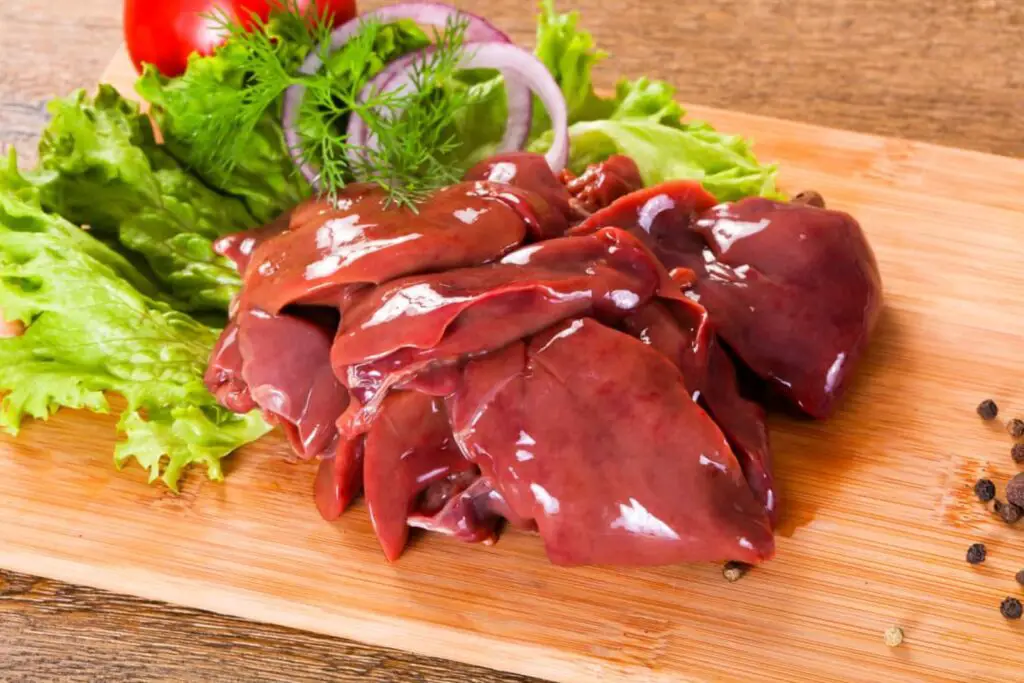
The first and crucial step in freezing liver successfully is to begin with fresh, high-quality liver. The quality of the liver you choose will significantly impact the taste and texture of the end product after thawing and cooking. Here’s why selecting fresh liver is so important:
- Preserving Taste and Flavor: Fresh liver has a distinct and rich flavor that sets it apart from other meats. By starting with fresh liver, you ensure that its natural taste is preserved during the freezing process. Freezing can alter the taste of food slightly, so beginning with top-notch liver ensures you’ll still enjoy its delicious taste when you decide to use it later.
- Maintaining Texture: High-quality liver is firm and moist, with a smooth texture. When you freeze liver that is fresh and in its prime condition, you increase the likelihood of maintaining its texture after thawing. This is especially crucial for dishes where texture matters, as freezing old or low-quality liver might result in a less appealing texture.
- Avoiding Off-putting Odors: Liver that is not fresh or has begun to spoil may emit strong and unpleasant odors. These odors can affect the overall quality of the frozen liver and any other food stored nearby. Selecting fresh liver that is free from any off-putting smells ensures a pleasant cooking and eating experience.
- Choice of Animal Source: Liver is available from various animals, including beef, chicken, pork, and lamb. Each type of liver has its unique flavor and characteristics. Choosing the liver from the animal you prefer or the one best suited for your recipe will enhance your culinary experience.
When buying fresh liver, pay attention to its appearance and smell. Look for a liver that is free from any discoloration, blemishes, or signs of spoilage. It should be slightly moist and have a vibrant color. Avoid liver with a dull or overly dry surface, as it might indicate that it has been sitting for too long or is not of the best quality.
Starting with fresh, high-quality liver is the foundation for successful freezing. By carefully selecting a liver that is firm, moist, and free from any off-putting odors, you set the stage for a delightful culinary experience when you use the frozen liver in your favorite dishes.
Step 2: Clean and Trim the Liver
Cleaning and trimming the liver before freezing is an essential step to ensure the best possible results when you use it later. Here’s why it’s crucial to follow this process:
- Removing Impurities: Like any organ meat, liver may contain impurities or residues that need to be eliminated before freezing. Rinsing the liver under cold water helps remove any dirt, blood, or other surface contaminants that might have accumulated during handling or storage.
- Enhancing Taste and Texture: Cleaning the liver not only improves its appearance but also contributes to its taste and texture. By getting rid of impurities, you prevent any undesirable flavors that may arise during the freezing and thawing process, preserving the liver’s natural taste.
- Improving Hygiene: Properly cleaning the liver is a matter of good hygiene and food safety. It reduces the risk of bacterial growth during storage, which is particularly important when dealing with organ meats like liver.
- Eliminating Excess Fat and Connective Tissue: Trimming the liver involves removing any excess fat or tough connective tissue. These components can adversely affect the texture and mouthfeel of the cooked liver. By trimming away these unwanted parts, you ensure a more tender and enjoyable eating experience.
Here’s a step-by-step guide on how to clean and trim the liver:
- Rinse under cold water: Place the liver under gently running cold water and rinse it thoroughly. Use your fingers to lightly rub the surface, ensuring you remove any visible impurities.
- Pat dry with paper towels: After rinsing, use paper towels to pat the liver dry. This step helps to remove excess moisture that may interfere with the freezing process.
- Remove excess fat: Check the liver for any large pieces of fat. Trim off these fatty portions using a sharp knife. Some fat marbling is normal and can contribute to the flavor, so you don’t need to remove all of it.
- Trim connective tissue: Examine the liver for any tough or sinewy parts. Trim these off as they can become chewy and unappetizing after cooking.
Once the liver is cleaned and trimmed, you’re ready to proceed with portioning and packaging for freezing. Properly cleaned and trimmed liver will maintain its quality during freezing and retain its delicious taste and texture when you decide to cook it later.
Step 3: Portion the Liver
Portioning the liver into smaller pieces before freezing offers several practical advantages and ensures a more convenient and efficient cooking experience. Here’s why it’s essential to consider cutting the liver into smaller portions or slices:
- Controlled Thawing: Freezing the liver in smaller portions allows you to defrost only the amount you need for a particular meal, rather than having to thaw the entire liver at once. This prevents unnecessary waste and ensures that you can use the liver more flexibly based on your cooking requirements.
- Faster Thawing: Smaller portions of liver thaw more quickly than a large, uncut piece. This can be especially beneficial when you want to prepare a meal in a hurry or have limited time for thawing.
- Even Cooking: Uniformly-sized liver portions cook more evenly, resulting in consistent taste and texture. If the liver is frozen in one large piece, the outer portions may thaw and cook faster than the center, potentially leading to uneven results.
- Versatility in Recipes: Pre-cut liver portions allow you to experiment with various recipes and cooking techniques without committing to a whole liver. It’s easier to adapt the liver to different dishes when it’s already portioned.
Here’s how to portion the liver effectively:
- Slice the liver: Using a sharp knife, carefully slice the liver into smaller portions or slices. The size of the portions can vary based on your preferences and typical cooking needs. Commonly, you can cut the liver into thin slices or divide it into manageable chunks.
- Separate the portions: Arrange the sliced or chunked liver on a tray or plate, ensuring they don’t touch one another. This prevents the liver pieces from sticking together during freezing, making it easier to retrieve individual portions later.
- Flash-freeze (optional): For an additional step, consider flash-freezing the liver portions before placing them in the final storage container. Flash-freezing involves spreading the portions on a baking sheet and freezing them for about an hour. This prevents them from clumping together and allows for easy portioning when you transfer them to the storage container.
- Transfer to storage container: Once the liver portions are individually frozen, transfer them to an airtight container or freezer-safe bags. Label the container with the contents and the date of freezing for easy identification later on.
By portioning the liver before freezing, you maximize its utility and ensure that you can enjoy its delectable taste and texture in a variety of dishes, without any waste or inconvenience during the thawing and cooking process.
Step 4: Wrap the Liver
Properly wrapping the liver before freezing is essential to protect it from freezer burn and maintain its quality during storage. The goal is to minimize exposure to air, which can lead to moisture loss and affect the liver’s taste and texture. Here’s why wrapping the liver tightly in plastic wrap, aluminum foil, or using freezer-safe ziplock bags is crucial:
- Prevent Freezer Burn: Freezer burn occurs when food comes into contact with cold, dry air in the freezer. It causes dehydration, leading to changes in taste and texture. Wrapping the liver tightly creates a protective barrier that helps prevent freezer burn and keeps the liver in better condition.
- Maintain Freshness: Liver is an organ meat with high water content. Wrapping it tightly before freezing helps retain its moisture and freshness, ensuring it remains tender and flavorful when you’re ready to cook it.
- Avoid Odor Absorption: Liver can easily absorb odors from other foods in the freezer if not properly wrapped. Using airtight wrapping materials helps keep the liver’s flavor intact and prevents it from taking on unwanted odors.
- Convenient Portioning: Wrapping the liver individually allows you to freeze it in separate portions, making it easier to thaw only the amount you need for a specific meal. This prevents waste and allows for more efficient meal planning.
Here’s how to properly wrap the liver for freezing:
- Cut into Portions: If you haven’t already done so, slice or chunk the liver into individual portions before wrapping. This will make it easier to defrost and use the liver later on.
- Plastic Wrap or Aluminum Foil: For each portion of liver, tightly wrap it in plastic wrap or aluminum foil, ensuring there are no gaps where air can enter. Make sure to cover the liver completely.
- Freezer-Safe Ziplock Bags: Alternatively, you can use freezer-safe ziplock bags for wrapping the liver. Remove as much air as possible before sealing the bag, and consider using a double-bagging method for extra protection.
- Label and Date: For easy identification, label each wrapped portion or bag with the contents and the date of freezing. This allows you to keep track of how long the liver has been frozen and helps you prioritize its use.
By properly wrapping the liver before freezing, you ensure it stays in excellent condition, free from freezer burn, and ready to be enjoyed in various recipes whenever you decide to use it.
Step 5: Place in Airtight Containers
When freezing liver in containers, ensuring they are airtight is crucial to maintaining the quality and flavor of the liver over an extended period. Additionally, labeling the containers with the date of freezing offers several practical benefits. Here’s why these steps are important:
- Prevent Freezer Burn: Freezer burn occurs when air comes into contact with the surface of frozen food. It can cause dehydration and oxidation, leading to changes in taste and texture. By using airtight containers, you create a protective barrier that prevents air from reaching the liver, reducing the risk of freezer burn.
- Retain Freshness: Airtight containers help preserve the natural moisture content of the liver, keeping it tender and succulent even after prolonged freezing. This is especially important for organ meats like liver, which can become dry if exposed to air.
- Avoid Odor Contamination: Liver can absorb odors from other foods in the freezer, affecting its taste and overall quality. By using airtight containers, you prevent the transfer of odors and keep the liver’s flavor intact.
- Easy Organization: Labeling the containers with the date of freezing allows you to keep track of how long the liver has been frozen. It helps you prioritize the use of older liver portions, ensuring that you rotate your stock and avoid forgetting about any frozen liver.
Here’s how to properly place the liver in airtight containers and label them:
- Choose Suitable Containers: Opt for freezer-safe, airtight containers that are designed for long-term storage. Glass or plastic containers with tight-fitting lids work well for freezing liver.
- Leave Space for Expansion: When placing the liver portions in the containers, leave some space at the top to allow for expansion as the liver freezes. This prevents the containers from cracking or breaking due to increased pressure.
- Seal the Containers Tightly: Ensure the lids are securely fastened to create an airtight seal. If using plastic bags, remove as much air as possible before sealing them.
- Label the Containers: Use adhesive labels or write directly on the containers with a marker to indicate the date of freezing. Include a brief description of the contents for easy identification later on.
- Store in the Freezer: Place the labeled, airtight containers in the coldest part of the freezer. Keeping the liver at a consistently low temperature further preserves its quality.
By placing the airtight containers, you’ll safeguard the liver from freezer burn and ensure it remains in optimal condition until you’re ready to use it. Properly storing the liver in airtight containers and labeling them allows for efficient organization and easy access to this nutritious and flavorful organ meat whenever you need it.
Step 6: Freeze the Liver
Freezing the liver correctly is essential to preserve its quality, taste, and texture for an extended period. Here’s why it’s crucial to place the wrapped or containerized liver in the coldest part of your freezer and avoid overcrowding:
- Quick and Even Freezing: Placing the liver in the coldest part of the freezer ensures that it freezes rapidly and uniformly. A quick freeze helps to retain the liver’s moisture content and prevents the formation of large ice crystals that could negatively impact its texture.
- Preserve Nutritional Value: Rapid freezing helps lock in the liver’s nutrients, ensuring that it remains as nutritious as possible for future consumption. Slow freezing can lead to nutrient degradation over time.
- Minimize Freezer Burn: Freezer burn occurs when food is exposed to air for an extended period. By positioning the liver in the coldest part of the freezer, you reduce the likelihood of temperature fluctuations that could cause freezer burn.
- Allow Proper Air Circulation: Overcrowding the freezer can hinder proper air circulation, leading to uneven freezing and potential temperature fluctuations. To avoid this, leave enough space between the liver packages or containers to ensure adequate air circulation.
Here’s how to freeze the liver properly:
- Arrange in the Coldest Area: Once the liver is wrapped or placed in airtight containers, find the coldest part of your freezer. This is typically the back or bottom shelf of the freezer. Position the liver packages or containers in this area for optimal freezing.
- Avoid Overcrowding: Make sure not to overload the freezer with too many items, as this can impede proper air circulation. Leave enough space around the liver packages or containers to allow air to circulate freely.
- Don’t Freeze Hot Foods: Avoid placing hot liver directly in the freezer, as this can raise the temperature inside and affect the other frozen items. Allow the liver to cool to room temperature or refrigerate it before freezing.
- Maintain Consistent Freezer Temperature: Keep the freezer temperature consistent at or below 0°F (-18°C) for optimal freezing. Fluctuations in temperature can impact the liver’s quality and increase the risk of freezer burn.
By freezing the liver, you ensure that the liver freezes quickly and evenly, preserving its taste, texture, and nutritional value. Proper freezing is key to having high-quality liver available whenever you need it for your favorite dishes.
How long can liver last in the freezer?
Liver can last in the freezer for approximately 2 to 3 months without significant loss of quality. For optimal taste and texture, it is best to consume frozen liver within this time frame. After this period, the liver may still be safe to eat but could experience some degradation in flavor and texture.
Step 7: Thaw the Frozen Liver
Thawing frozen liver correctly is essential to ensure it remains safe to eat and maintains its optimal taste and texture. The gentle thawing process helps preserve the liver’s moisture and prevents any potential quality loss. Here’s why it’s crucial to plan ahead and use the refrigerator for thawing:
- Safe Thawing: Thawing liver at room temperature or using quick thawing methods like microwaving can lead to uneven thawing and create hotspots where bacteria could grow. Thawing in the refrigerator is the safest method, as it keeps the liver at a consistent and safe temperature throughout the process.
- Preserve Texture and Moisture: Slow thawing in the refrigerator allows the liver to defrost gently and gradually, minimizing any moisture loss. This helps preserve the liver’s tenderness and prevents it from becoming dry or tough during cooking.
- Maintain Quality: Quick thawing methods can negatively impact the liver’s quality, resulting in changes in taste and texture. Thawing in the refrigerator helps retain the liver’s original flavor and overall quality, ensuring it tastes as good as when it was frozen.
Here’s how to properly thaw frozen liver in the refrigerator:
- Plan Ahead: Thawing in the refrigerator takes time, so plan ahead and take the liver out of the freezer well in advance of when you plan to cook it. It’s recommended to thaw the liver overnight or for at least 8-24 hours, depending on the size and thickness of the liver portions.
- Use Proper Packaging: If the liver is wrapped in plastic wrap or aluminum foil, you can leave it in the original wrapping during the thawing process. If it’s stored in airtight containers or bags, it’s a good idea to transfer them to a plate or tray to catch any potential drips as the liver thaws.
- Place in the Refrigerator: Put the frozen liver in the refrigerator on a lower shelf where the temperature is consistently cool. This helps prevent cross-contamination with other foods in the refrigerator.
- Avoid Room Temperature Thawing: Thawing the liver at room temperature is not recommended, as it can lead to bacterial growth and food safety risks.
By thawing the frozen liver correctly, you can safely thaw frozen liver while maintaining its taste, texture, and overall quality. Thawing in the refrigerator is a slow but reliable method that ensures your liver is ready to be cooked to perfection when you’re ready to enjoy it.
Other related questions
Can you refreeze liver?
Refreezing liver is generally not recommended. Once the liver has been thawed, it should be cooked and consumed promptly. Refreezing can lead to a decline in quality, potential bacterial growth, and compromise food safety. It’s best to portion the liver before freezing to only thaw what you need for a particular meal.
How do I know if the liver has gone bad after being frozen?
To determine if frozen liver has gone bad, look for signs of spoilage such as an off-putting odor, unusual texture, or discoloration. If the liver has developed a sour or rancid smell, or if it appears slimy or has an odd color, it may have deteriorated. Trust your senses and discard any frozen liver that exhibits these signs to avoid potential foodborne illnesses.
Can you freeze liver in a marinade or brine for added flavor?
Yes, you can freeze liver in a marinade or brine for added flavor. Marinating or brining liver before freezing allows the flavors to infuse into the meat, enhancing its taste. Store the marinated or brined liver in airtight containers or freezer-safe bags, ensuring it is fully cooled before freezing, to preserve the flavor and prevent any freezer odors from affecting it. Thaw the frozen liver in the refrigerator when needed and cook it as desired for a flavorful dish.
Can I freeze liver with added herbs or spices for extra taste?
Yes, you can freeze liver with added herbs or spices for extra taste. The herbs and spices will infuse into the liver during freezing, enhancing its flavor. Ensure the liver is fully cooled before freezing, and store it in airtight containers or freezer-safe bags to maintain its taste and prevent any freezer odors from affecting it. Thaw the frozen liver in the refrigerator when needed and cook it as desired for a flavorful dish.
Can you freeze liver in a broth or liquid base for easy incorporation into dishes?
Yes, you can freeze liver in a broth or liquid base for easy incorporation into dishes. Freezing liver in a broth or liquid helps preserve its moisture and flavor during freezing and thawing. Store the liver in the broth or liquid in airtight containers or freezer-safe bags, and label with the date for easy identification in the freezer. Thaw the frozen liver in the refrigerator when needed and cook it in the liquid base for a delicious and convenient addition to various recipes.
Can you freeze liver with onions, garlic, or other aromatics for added flavor?
Yes, you can freeze liver with onions, garlic, or other aromatics for added flavor. Freezing liver with these aromatics allows their flavors to infuse into the meat, enhancing its taste. Store the liver with onions, garlic, or other aromatics in airtight containers or freezer-safe bags, ensuring it is fully cooled before freezing to preserve the flavors and prevent any freezer odors from affecting it. Thaw the frozen liver in the refrigerator when needed and cook it as desired for a flavorful dish.
Can you freeze liver that has been stuffed or filled with other ingredients?
Freezing liver that has been stuffed or filled with other ingredients is possible, but it may affect the texture and taste of the filling after thawing. The filling could become softer or change in consistency due to the freezing and thawing process. To ensure the best quality, freeze the liver and filling separately, and then combine them before cooking or serving. Store the stuffed or filled liver in airtight containers or freezer-safe bags, and label with the date for easy identification in the freezer. Thaw the frozen liver in the refrigerator when needed, and cook it as desired for a flavorful and delicious dish.
Can frozen liver be used for pet food or other non-human consumption purposes?
Frozen liver can be used for pet food or other non-human consumption purposes, but it’s essential to ensure the liver is safe and suitable for the specific animal’s dietary needs. Check with a veterinarian or animal nutritionist to determine the appropriate portion size and preparation method for the animal’s diet. Remember that some seasonings or ingredients used for human recipes may not be suitable for pets, so it’s crucial to use plain frozen liver without any added seasonings or flavorings when preparing pet food.


