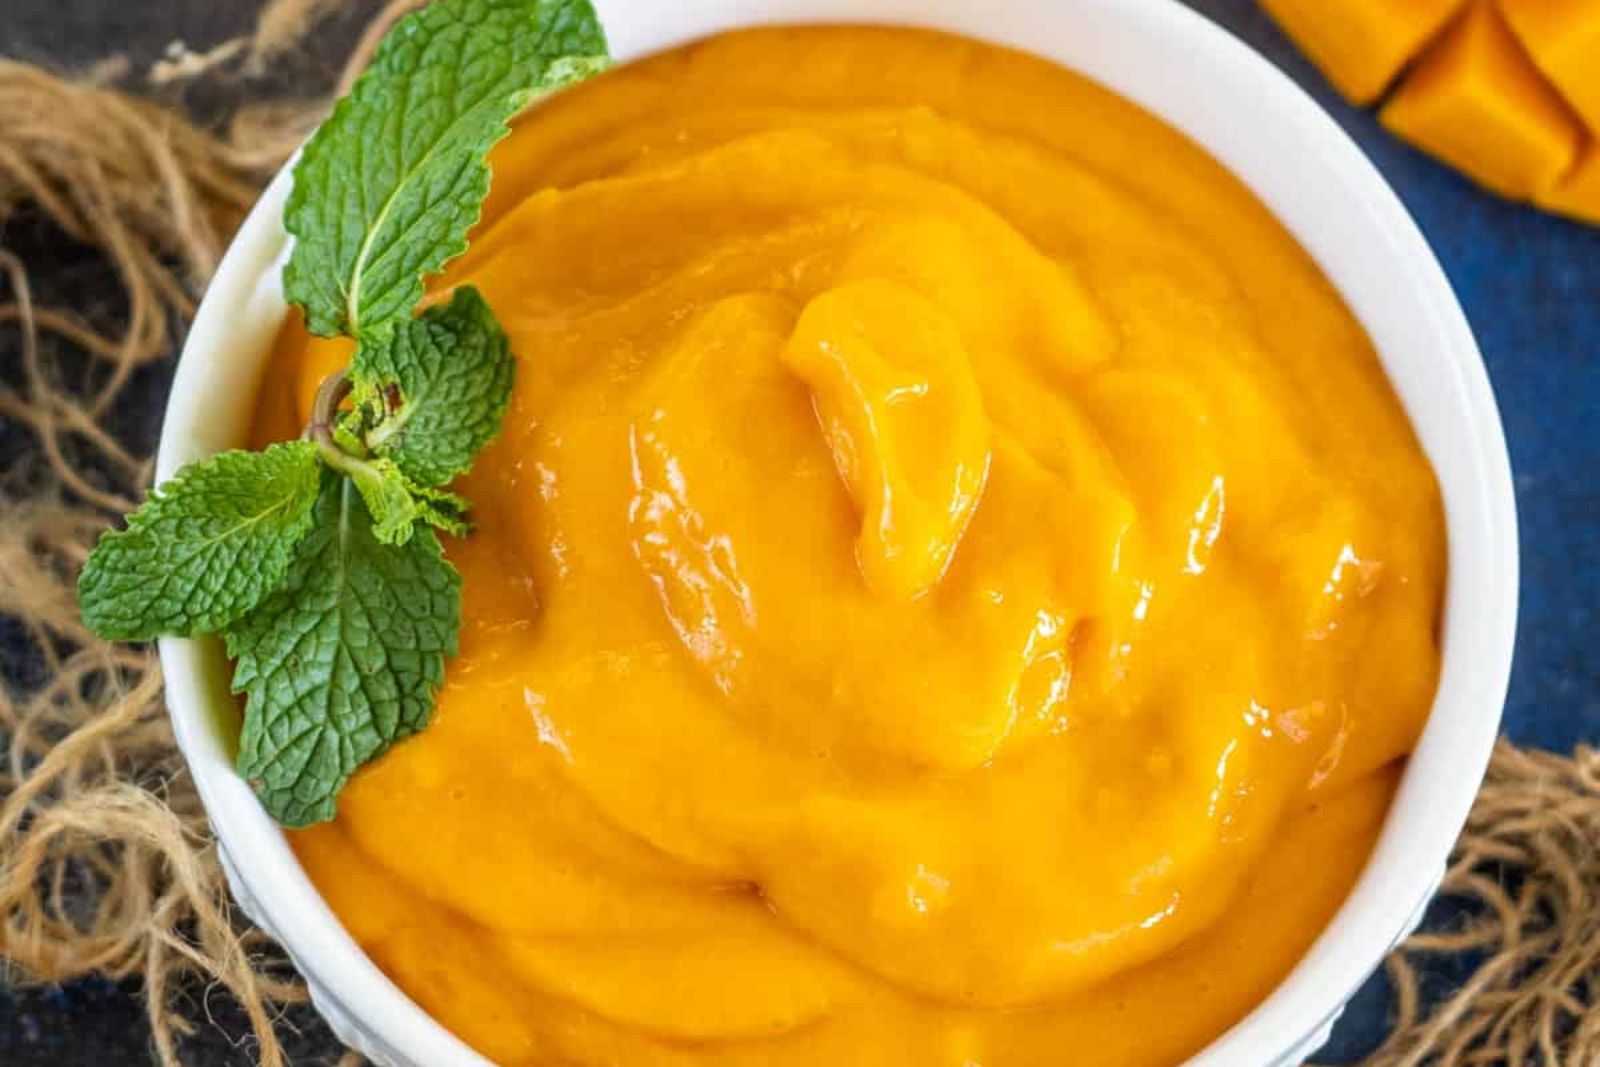
Mango puree is a delightful and versatile ingredient that can be used in a wide range of dishes, from smoothies and desserts to marinades and sauces. Mangoes, known for their sweet and tropical flavor, are at their peak during specific seasons. However, you can extend their availability by freezing mango puree. With the right techniques, you can preserve the vibrant color and delectable taste of mango puree for future culinary adventures. In this article, we’ll provide you with a step-by-step guide on how to freeze mango puree, ensuring it remains in perfect condition for your future culinary endeavors.
Here’s a guide on how to freeze mango puree:
Step 1: Select ripe mangoes
The first and most crucial step in freezing mango puree is selecting ripe mangoes. The choice of mangoes at this stage will significantly impact the flavor and quality of your frozen puree. Here’s why it’s important:
- Ripeness equals sweetness: Ripe mangoes are naturally sweeter. They have a higher sugar content, which contributes to the delicious, tropical flavor that mangoes are known for. When you use ripe mangoes, your frozen puree will retain the same sweetness, making it perfect for a wide range of recipes, from desserts to savory dishes.
- Texture matters: Ripe mangoes are not only sweeter but also softer and easier to work with. Their flesh is more delicate and smooth, which is ideal for creating a silky puree. Using unripe mangoes can result in a grainy or fibrous texture, which may not be desirable in many recipes.
- Aromatic appeal: Ripe mangoes emit a fragrant, fruity aroma that is irresistible. This aroma is indicative of their optimal ripeness. It’s not just about taste; it’s about the sensory experience. The aroma of ripe mangoes will infuse your puree, enhancing the overall appeal of your dishes.
To identify ripe mangoes, gently press them with your fingers. Ripe mangoes will yield slightly to the pressure without feeling overly soft or mushy. Additionally, a ripe mango will emit a strong, sweet, and tropical fragrance when you bring it close to your nose.
Choosing ripe mangoes at the outset is the foundation for creating a delectable mango puree that you can enjoy throughout the year. So, take your time to pick the best, and you’ll be rewarded with a high-quality puree that can elevate your culinary creations.
Step 2: Peel and remove the flesh
Now that you’ve carefully selected ripe mangoes for your mango puree, it’s time to move on to the next step – peeling and extracting the juicy mango flesh. This step is essential in preparing the mangoes for the puree-making process. Here’s how to do it:
- Mango Preparation: Start by washing the mangoes thoroughly under running water to remove any dirt or contaminants from the skin. Even though you will be removing the skin, it’s essential to have clean mangoes to ensure the highest quality of puree.
- Gather Your Tools: You’ll need a sharp knife and a cutting board for this part of the process. Make sure your knife is clean and preferably has a long, sharp blade for easier and more precise cutting.
- Slice Off the Top: Place the mango on the cutting board with the stem end facing up. With a sharp knife, slice off the top part of the mango, just below the stem. This will create a flat surface.
- Cut Around the Pit: Mangoes have a flat, oblong pit in the center. Hold the mango with the flat end down and slice along one side of the pit, following the contour of the pit. Repeat the process for the other side. You’ll be left with two large mango “cheeks.”
- Score the Flesh: Take one of the mango cheeks and carefully score the flesh in a crisscross pattern, being careful not to cut through the skin. This will make it easier to separate the flesh from the skin later.
- Invert and Slice: Gently invert the scored mango cheek so that the cubes of mango flesh pop outward. Hold the mango at the base and slice off the cubes of flesh with the knife, keeping the blade as close to the skin as possible. The cubes will fall away easily.
- Remove Any Remaining Flesh: After removing the cubes, you can also scrape any additional flesh from around the pit using the knife. Be sure to utilize as much of the mango flesh as possible.
- Discard the Pit and Skin: The pit and the skin can be discarded, leaving you with a pile of juicy mango cubes ready for pureeing.
By carefully following these steps, you’ll efficiently peel the mangoes and obtain as much mango flesh as possible. This is a crucial step as it sets the stage for creating a smooth, delicious mango puree that you can enjoy year-round. With the ripe mangoes prepared and the flesh extracted, you’re now ready to move on to the pureeing process.
Step 3: Puree the mango
Now that you’ve successfully peeled and extracted the juicy mango flesh, it’s time to transform it into a smooth and delectable mango puree. This step is where the magic happens, and you’ll create the foundation for a wide range of mango-infused dishes. Here’s how to do it:
- Choose Your Appliance: To puree the mango, you can use either a blender or a food processor. Both appliances work well, so use whichever you have on hand or prefer.
- Load the Mango Flesh: Place the extracted mango flesh into your chosen appliance. Ensure that you’ve added all the mango cubes you obtained in the previous step.
- Blend Until Smooth: Start the appliance at a low speed and gradually increase it to high. Blend the mango flesh until it transforms into a creamy and perfectly smooth puree. You may need to pause and scrape down the sides of the appliance to ensure that all the mango is incorporated.
- Optional Enhancements: While this step is primarily about creating mango puree, you have the option to enhance the flavor. If you desire a bit of tanginess, you can add a small amount of lemon juice to the puree. This not only brightens the flavor but also helps preserve the vibrant color of the mango. Additionally, you can add a touch of sugar if your mangoes weren’t as sweet as you’d like. These enhancements are entirely optional and should be adjusted to your personal taste.
- Adjust the Consistency: The puree’s consistency is key to its versatility in recipes. If you’re using it for drinks or sauces, a smoother, thinner puree may be ideal. For dessert applications or thicker sauces, you can leave it slightly thicker. You have full control over the puree’s thickness by adjusting the blending time and, if needed, adding a small amount of water to thin it out.
By following these steps, you’ll have created a silky and flavorful mango puree that’s ready to elevate your culinary creations. Whether you’re making mango smoothies, salad dressings, or a mouthwatering mango salsa, your homemade mango puree will serve as the star ingredient. With the puree ready, you can proceed to portion and freeze it, ensuring you can enjoy the taste of ripe mangoes throughout the year.
Can I mix other fruits with mango before freezing?
Yes, you can mix mango with other fruits before freezing to create unique fruit blends. Ensure the fruits you combine freeze well together and that the resulting mix aligns with your intended recipes. Mixing fruits can add diversity to your frozen puree and offer new flavor profiles in your dishes.
Step 4: Portion the puree
Now that you’ve successfully created a velvety mango puree bursting with flavor, it’s time to prepare it for storage. Portioning the puree is a vital step to ensure you have the right amount on hand when you need it, without the hassle of thawing more than necessary. Here’s how to portion your mango puree for easy access:
- Determine Serving Sizes: Consider how you plan to use the mango puree in your recipes. Whether it’s for smoothies, sauces, or other dishes, think about the typical serving size you’ll need. This will help you determine how much puree to portion.
- Choose Your Portioning Tools: There are several methods you can use to divide the mango puree into convenient portions. Some popular options include ice cube trays, silicone molds, or a measuring cup. Ice cube trays and silicone molds work exceptionally well for small, individual servings, while a measuring cup is suitable for larger quantities.
- Using Ice Cube Trays or Silicone Molds: If you opt for ice cube trays or silicone molds, simply pour the mango puree into the individual compartments. These compartments are typically small, making them perfect for single servings. Smooth the surface with a spatula or the back of a spoon for even portions.
- Measuring Cup: For larger quantities, use a measuring cup to portion the puree into the desired amount. A measuring cup is a versatile choice, allowing you to adapt the portion size to your specific recipes. Ensure you have a steady hand to avoid any spillage.
- Consider Recipe Flexibility: Keep in mind that some recipes may require a specific amount of mango puree. Therefore, it’s helpful to portion the puree in a way that aligns with your common recipe requirements, making it easier to follow your favorite dishes.
- Prepare for Freezing: Once you’ve portioned the mango puree, prepare it for freezing. If you’re using ice cube trays or silicone molds, cover them with plastic wrap or a freezer-safe lid to prevent any contamination or freezer odors from affecting the puree. If you’ve measured out portions using a measuring cup, transfer them to airtight containers or freezer-safe bags.
By portioning your mango puree, you make it convenient to access the right amount for your recipes, whether it’s a single cube for a smoothie or a cupful for a sauce. This step simplifies the thawing process and minimizes food waste, ensuring you can enjoy the vibrant flavor of mangoes throughout the year. With the portions ready, you’re now prepared to proceed to the freezing step.
Step 5: Freeze the portions
With your mango puree expertly portioned and ready, it’s time to move on to the freezing stage. Proper freezing ensures that the mango puree maintains its quality and is easy to use in your recipes when needed. Here’s how to do it:
- Prepare a Flat Surface: Begin by finding a flat surface, such as a baking sheet or a large tray, that can fit inside your freezer. This surface will serve as a temporary holding area for the mango puree portions as they freeze.
- Arrange the Portions: Carefully place the portions of mango puree on the flat surface. Make sure they are arranged in a single layer, leaving some space between each portion. This ensures that the puree freezes evenly and prevents portions from sticking together.
- Rapid Freezing: The goal here is to facilitate rapid freezing. This helps maintain the texture and flavor of the mango puree. Place the flat surface with the mango portions into your freezer. Be sure that the surface is level to prevent any spillage or uneven freezing.
- Monitor the Freezing Time: The time it takes for the mango puree portions to freeze solid can vary depending on the size of your portions and the efficiency of your freezer. Typically, it takes a few hours for small portions in an average home freezer.
- Be Patient: It’s essential to be patient during this step. Avoid opening the freezer unnecessarily, as this can introduce warm air and extend the freezing time. Allow the mango puree portions to freeze undisturbed.
- Check for Solidification: After the specified time, check the portions to ensure they are fully solidified. To do this, gently touch one portion with your fingertip. It should be hard and unyielding to the touch, indicating it’s frozen through.
By following these steps, you’ll ensure that your mango puree portions freeze efficiently and maintain their quality. Freezing them in a single layer on a flat surface promotes even and quick freezing, preventing the formation of ice crystals that can degrade the texture. With the portions frozen solid, you’re now ready to transfer them to appropriate containers for long-term storage.
Step 6: Transfer to a freezer-safe container
After successfully freezing your mango puree portions, it’s time to move them into longer-term storage to keep them fresh and delicious. Here’s how to do it:
- Prepare Freezer-Safe Containers: Gather your freezer-safe containers or airtight bags. Make sure they are clean and suitable for long-term freezing. You can use plastic containers, glass jars, or heavy-duty freezer bags, depending on your preference.
- Remove Portions from the Freezer: Carefully take the frozen mango puree portions off the flat surface in the freezer. They should be firm and fully frozen at this point.
- Portion Placement: If you’re using containers, place the portions in a single layer, leaving some space between each portion to prevent sticking. For freezer bags, lay them flat and ensure that the portions are evenly distributed, not stacked on top of each other.
- Minimize Air Exposure: For both containers and bags, it’s crucial to minimize air exposure. Excess air in the packaging can lead to freezer burn and affect the quality of the puree. If you’re using bags, gently press out as much air as possible before sealing them. With containers, place a layer of plastic wrap or parchment paper directly on the surface of the puree before sealing the container. This extra barrier helps keep the puree in top condition.
- Seal Tightly: Securely seal the containers or bags to prevent any air from getting in. Be sure to label each container or bag with the date of freezing to help you keep track of its freshness.
- Store in the Freezer: Place the sealed containers or bags in your freezer. Ensure that they are well-organized to make it easy to find the specific amount you need for your recipes.
By transferring your frozen mango puree portions into suitable containers and minimizing air exposure, you are taking important steps to preserve the flavor and quality of your puree. Proper packaging prevents freezer burn and maintains the vibrant color and taste of the mango. With the portions securely sealed, you’re now ready for the next step – labeling and dating the packages for easy identification in the future.
Can I freeze mango puree in glass jars?
Yes, you can freeze mango puree in glass jars, but it’s important to leave some headspace to allow for expansion as the puree freezes. Additionally, ensure the jar is freezer-safe and has a tight-sealing lid to prevent freezer burn.
Step 7: Label and date the containers
Properly labeling and dating your containers or bags of mango puree is an essential step in the freezing process. It helps you stay organized, keep track of freshness, and ensures you can use your puree before any decline in quality. Here’s how to label and date your mango puree containers:
- Use Permanent Marker: Make sure you have a permanent marker on hand, as it won’t smear or fade in the freezer.
- Identify the Contents: Clearly write “Mango Puree” or “Mango Puree Portions” on the label. This provides a quick reference to what’s inside the container or bag.
- Add the Date: Write the date you prepared and froze the mango puree. This is crucial for managing its freshness. Mango puree can generally be stored in the freezer for up to 6 to 12 months without significant loss of quality. The date helps you keep track of how long it’s been stored.
- Include Portion Size (Optional): If you want to take your organization a step further, consider including the portion size on the label. This can be particularly helpful if you’ve varied the portion sizes for different recipes.
- Place the Label Clearly: Make sure the label is placed on the container or bag in a visible and easily accessible location. It should be legible and not obscured by frost or condensation.
- Check and Double-Check: Before placing the container or bag in the freezer, double-check to ensure that all the necessary information is on the label. This will prevent any confusion when you’re looking for specific portions in the future.
By labeling and dating your mango puree containers, you make the organization and management of your frozen food more efficient. This simple step ensures that you can easily identify the contents and assess the freshness of your mango puree. Whether you’re planning to use it for a fresh smoothie or a delightful dessert, having well-labeled containers in the freezer ensures you always have the perfect ingredient at your fingertips. With the labeling complete, you’re now ready to store the mango puree in the freezer for future culinary adventures.
Step 8: Store in the freezer
Now that you’ve meticulously prepared and labeled your mango puree for freezing, it’s crucial to place them in the freezer for long-term storage. Proper storage ensures that the puree maintains its quality, flavor, and texture until you’re ready to use it in your recipes. Here’s how to store your mango puree in the freezer:
- Freezer Placement: Select a suitable location within your freezer to store the containers or bags of mango puree. It’s essential to place them on a flat and stable surface to prevent any accidental tipping or shifting. For optimal air circulation and even temperature, it’s a good idea to put them on a shelf or a designated area that is not overcrowded.
- Prevent Temperature Fluctuations: Mango puree, like many frozen foods, can be sensitive to temperature fluctuations. Frequent changes in temperature can lead to freezer burn and negatively impact the texture and taste of the puree. To prevent this, avoid storing your mango puree in the freezer’s door compartments, which are prone to temperature fluctuations due to the frequent opening and closing of the freezer door.
- Keep it Organized: Ensure that your mango puree containers or bags are well-organized and easily accessible. You can stack them neatly, making the most of your freezer space while maintaining an orderly arrangement. This makes it simple to locate the desired portion when you’re ready to use it.
- Avoid Overcrowding: While you want to maximize your freezer’s capacity, it’s important not to overcrowd it. Providing adequate space between containers or bags allows for better airflow, which helps maintain consistent temperatures and reduces the risk of freezer burn.
- Be Mindful of Expiration Dates: While mango puree can be stored for 6 to 12 months with proper packaging and storage conditions, it’s still important to periodically check the labeled dates to ensure you use your puree while it’s at its best.
Proper storage in the freezer ensures that your mango puree remains in pristine condition, ready to add a burst of tropical flavor to your recipes whenever you need it. By preventing temperature fluctuations and maintaining organization, you’ll keep your puree at its peak quality, whether it’s for refreshing smoothies during the hot months or creating mouthwatering sauces and desserts throughout the year. Now that your mango puree is safely stored in the freezer, it’s all set to be a star ingredient in your culinary endeavors whenever you choose.
Other related questions
How do I defrost mango puree?
Defrosting mango puree is a simple process, and there are a few methods you can use depending on your needs and time available. Here are the two primary methods for defrosting mango puree:
Refrigerator Method (Recommended):
- Transfer the frozen mango puree container or bag from the freezer to the refrigerator.
- Place the container on a plate or in a bowl to catch any potential condensation.
- Allow the mango puree to thaw in the refrigerator. The process can take anywhere from several hours to overnight, depending on the quantity and thickness of the puree.
Room Temperature/Water Bath Method (Quick Defrost):
- If you need to defrost mango puree more quickly, you can use a room temperature or water bath method.
- Remove the sealed container or bag from the freezer.
- Submerge the sealed container or bag in a large bowl of room-temperature water. Make sure it’s fully sealed to prevent water from getting in.
- If using the room temperature method, wait for the puree to defrost. This can take 1-2 hours or more, depending on the thickness of the puree.
- If using the water bath method, you can change the water every 30 minutes to speed up the process. The puree should defrost in 30 minutes to 2 hours.
Tips:
- Never use hot water to defrost mango puree, as this can lead to a loss of quality.
- Once the mango puree is fully defrosted, it’s best to use it immediately in your recipe. If you don’t plan to use it all at once, you can store any unused portion in the refrigerator for a short time.
- Avoid defrosting and refreezing mango puree multiple times, as this can affect its texture and flavor.
Using the refrigerator method is the recommended way to defrost mango puree, as it allows for a gradual thaw that maintains the best quality. However, if you’re in a hurry, the room temperature or water bath method is a faster option.
Can I refreeze mango puree?
No, it’s generally not advisable to refreeze mango puree once it has been thawed. Repeated freezing and thawing can negatively affect the texture and flavor of the puree. To maintain its quality, it’s best to use the thawed mango puree in your recipes immediately or store it in the refrigerator for a short time if necessary.
How do I know if the mango puree has gone bad after being frozen?
Observe the mango puree for signs of spoilage, including off-putting odors, unusual texture changes (e.g., excessive ice crystals, separation, or graininess), or an unusual color (not the typical vibrant mango hue). If any of these indicators are present, the mango puree may have gone bad and should be discarded. However, if the puree appears and smells as expected, it is likely safe to use.
What are some recipes where I can use frozen mango puree?
Frozen mango puree is versatile and can be used in smoothies, sorbets, ice creams, cocktails, marinades, salad dressings, and tropical desserts. Its sweet, tropical flavor can enhance a wide range of recipes, both sweet and savory.
Can I use thawed mango puree in recipes calling for fresh mango?
Yes, you can use thawed mango puree as a substitute for fresh mango in recipes, particularly when the primary focus is the mango flavor. Adjust the quantity to match the amount of fresh mango called for in the recipe, keeping in mind that the texture may differ slightly.

