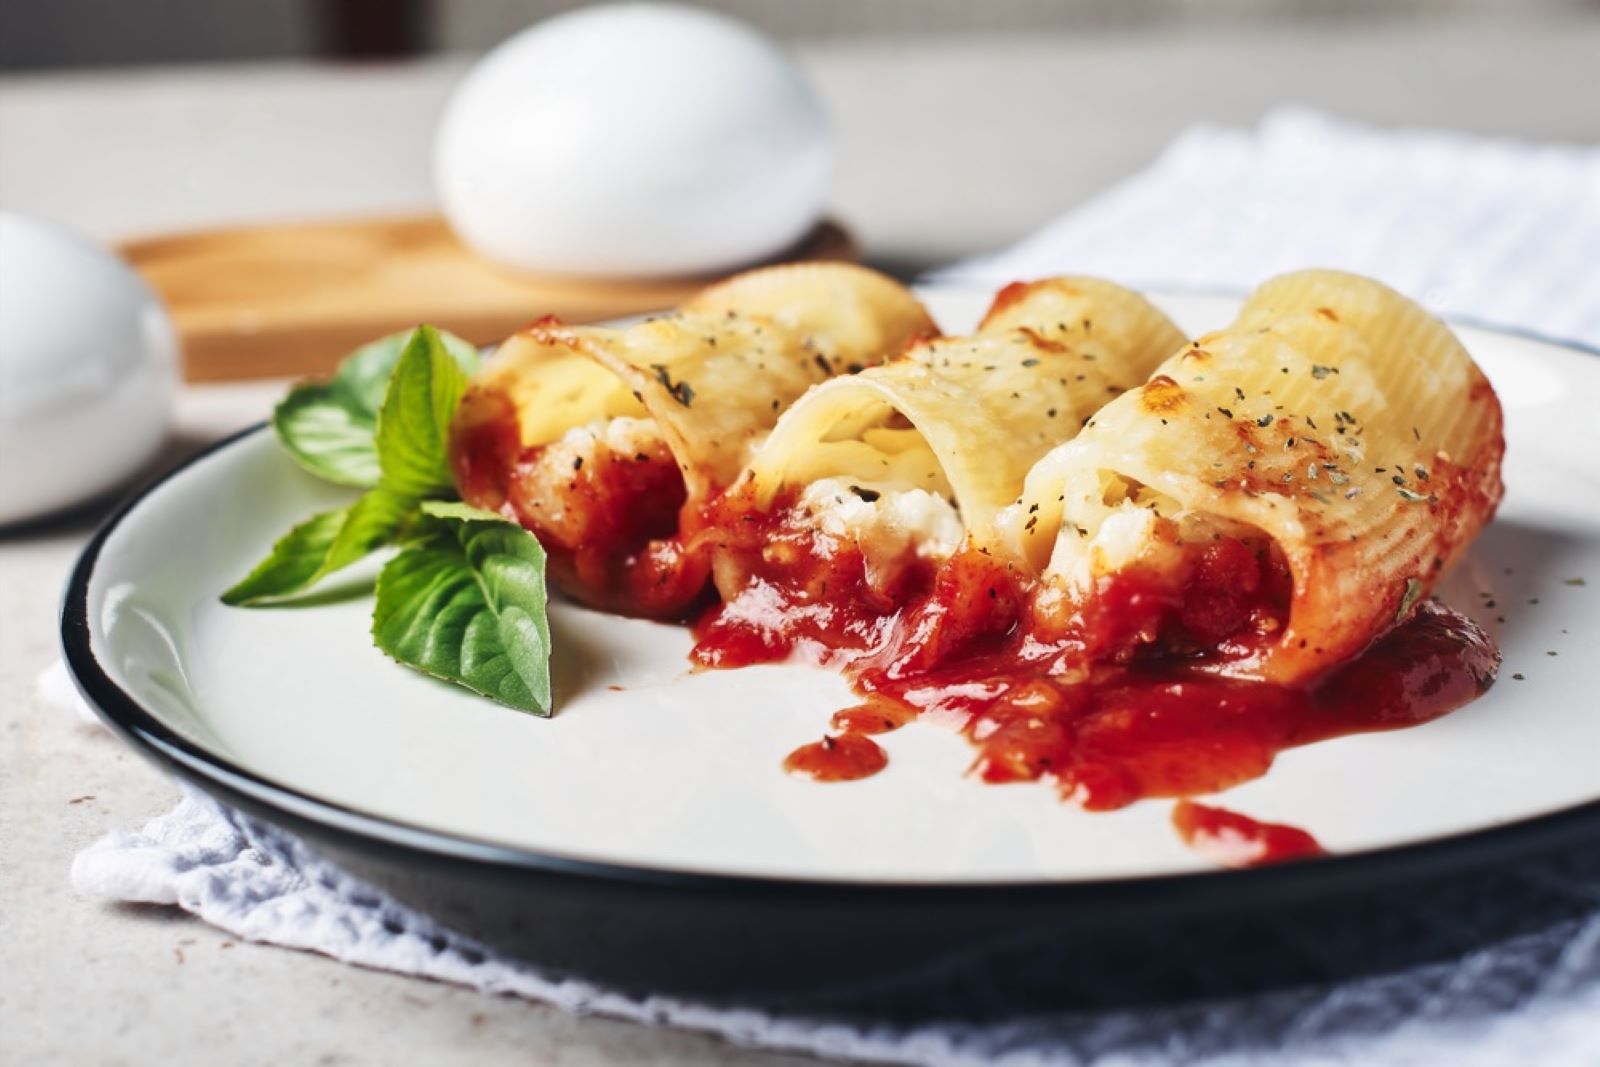
Manicotti, a mouthwatering Italian dish, has captured the hearts and palates of pasta lovers around the world. These large, tube-shaped pasta shells are typically filled with a delectable mixture of cheese, such as ricotta and mozzarella, as well as herbs and sometimes ground meat. Baked to perfection in a luscious tomato sauce and topped with gooey melted cheese, manicotti delivers a satisfying and comforting experience that satisfies even the most discerning appetites. While making a batch of manicotti can be a labor of love, it often results in more servings than can be enjoyed in one sitting. Freezing manicotti becomes a practical and efficient method to preserve its authentic taste and rich flavors, ensuring that each baked tube of pasta retains its delightful filling and savory essence, ready to be enjoyed on future occasions or as a convenient weeknight dinner option. In this guide, we will explore the best practices for freezing manicotti, allowing you to savor its Italian goodness and elevate your dining experience with the essence of this timeless and classic pasta dish, without the need to worry about wasting any leftovers or compromising its delightful taste. Get ready to indulge in the flavors of Italy, any time you desire, with perfectly frozen and ready-to-bake manicotti.
Here are the simple steps to freeze manicotti:
Step 1: Prepare the Manicotti Filling
When freezing manicotti, it is essential to start by preparing the filling that will be stuffed into the pasta shells. The filling is a crucial component of the dish as it contributes to the rich and savory flavors that make manicotti so delightful.
The traditional manicotti filling consists of a delectable blend of ricotta cheese, spinach, parmesan, mozzarella, eggs, and various seasonings. Ricotta cheese provides a creamy and smooth texture, while spinach adds a burst of color and a nutritious element to the filling. Parmesan and mozzarella cheeses enhance the overall richness and create a flavorful cheese blend that complements the pasta perfectly. The addition of eggs helps bind the ingredients together, ensuring a cohesive and creamy texture when the manicotti is baked or reheated.
To prepare the filling, start by combining all the ingredients in a large mixing bowl. Make sure to measure the ingredients accurately, as the right proportions are essential to achieving a balanced and tasty filling. Use fresh, high-quality cheeses for the best results.
Once all the ingredients are in the bowl, mix them thoroughly until they are well combined. You can use a spoon or a spatula to blend the ingredients evenly. Alternatively, you may use a hand mixer or stand mixer on low speed for a smoother and more uniform mixture.
During the mixing process, the flavors of the cheeses, spinach, and seasonings will meld together, creating a delightful harmony of tastes. The rich aroma of the filling will also fill your kitchen, making you even more excited to enjoy the finished dish later on.
After thoroughly combining the ingredients, taste the filling and adjust the seasoning if needed. Some common seasonings used in manicotti filling include salt, pepper, garlic powder, and dried Italian herbs like basil and oregano. Add more seasoning according to your taste preferences to achieve the perfect balance of flavors.
Step 2: Cook the Manicotti Shells
Cooking the manicotti shells is a crucial step in the freezing process. It involves boiling the pasta tubes until they reach the desired level of doneness, known as “al dente,” which means “to the tooth” in Italian. This cooking technique ensures that the pasta retains a slight firmness in the center, preventing it from becoming overly soft or mushy when reheated after freezing.
To start, fill a large pot with water and add a generous amount of salt. Bringing the water to a rolling boil before adding the pasta is important as it helps to season the pasta from within, enhancing its flavor. The salt also adds taste to the pasta shells, making them more enjoyable to eat.
Once the water is boiling, carefully add the manicotti shells to the pot. Stir gently to ensure that they do not stick together. Let the pasta cook according to the package instructions, but aim to cook them slightly less than the recommended cooking time. This will ensure that they are al dente when frozen and reheated later.
Cooking the pasta shells to an al dente state is essential because freezing can affect the texture of the pasta. If the shells are fully cooked before freezing, they may become too soft or lose their shape during the freezing and reheating process, resulting in a less desirable texture. By cooking them just shy of fully cooked, you are allowing room for the pasta to finish cooking when you reheat it, maintaining the ideal texture.
Once the manicotti shells are cooked to the desired level of doneness, carefully drain them in a colander. Rinse them briefly with cold water to halt the cooking process and prevent them from becoming too soft. After draining, set the shells aside to cool completely before proceeding with the next steps of the freezing process.
Cooking the manicotti shells to the al dente stage and ensuring they are properly cooled before filling and freezing will guarantee that your frozen manicotti retains its best texture and taste when you decide to enjoy it later.
Step 3: Fill the Manicotti Shells
After cooking and cooling the manicotti shells, the next step in freezing manicotti is to fill each pasta tube with the delicious cheese and spinach mixture that was prepared earlier. This step is crucial as it creates the flavorful core of the dish and ensures a delightful combination of textures and tastes in every bite.
To begin, take one of the cooled manicotti shells and hold it gently in your hand. It’s essential that the shells are fully cooled to avoid burning yourself and to make handling easier. The cooling process also helps the pasta firm up slightly, making it less likely to tear while filling.
Next, carefully spoon the prepared cheese and spinach filling into the open end of the manicotti shell. Use a spoon to gently push the filling inside, distributing it evenly along the length of the pasta. Alternatively, you can use a piping bag to fill the shells, which can make the process more precise and tidy.
The goal is to fill the manicotti evenly without overstuffing them. Overstuffing can cause the pasta shells to burst during freezing or reheating, leading to a messy and less appealing presentation. If you find that the filling is too much for the shell, you can remove some of it to achieve a better balance.
Be gentle while filling the manicotti, as they can be somewhat delicate. Take your time to ensure that each shell is adequately filled with the creamy cheese and spinach mixture. The filling not only adds flavor to the dish but also keeps the pasta moist and prevents it from becoming too dry during freezing and reheating.
As you fill each manicotti shell, place them on a clean surface or a tray, ensuring they are not touching each other. This arrangement prevents the filled manicotti from sticking together and helps maintain their individual shapes during the freezing process.
Once all the manicotti shells are filled, you can proceed to the next steps of the freezing process, such as flash-freezing and packaging. Properly filling the manicotti shells with the cheese and spinach mixture ensures that your frozen manicotti will be as delicious and satisfying as freshly made, providing a delightful meal whenever you decide to enjoy them.
Step 4: Arrange the Manicotti for Freezing
After filling the manicotti shells with the scrumptious cheese and spinach mixture, the next step is to arrange them for freezing. Proper arrangement during freezing is crucial to ensure that the manicotti freezes individually and does not stick together, making it easier to handle and reheat when you’re ready to enjoy the dish.
To begin, prepare a baking sheet or a large flat tray by lining it with parchment paper. The parchment paper prevents the filled manicotti from sticking to the surface and makes it easier to remove them once they are frozen. Additionally, it helps maintain the shape of the manicotti during freezing.
Take each filled manicotti shell and place it on the prepared baking sheet or tray in a single layer. Ensure that the manicotti shells are not touching each other. Leaving enough space between them prevents them from sticking together as they freeze, which could lead to a messy and challenging-to-separate block of pasta.
By arranging the manicotti in a single layer, each shell gets enough exposure to the cold air in the freezer, allowing them to freeze faster and more evenly. This helps preserve the texture and taste of the manicotti, ensuring they retain their quality during storage.
If you have a large batch of manicotti to freeze, you may need to use multiple baking sheets or trays to accommodate all the filled pasta shells. Make sure to leave enough space between the baking sheets in the freezer to allow proper air circulation around each tray.
Once the manicotti shells are arranged on the baking sheet or tray, place the sheet or tray in the freezer. Allow the manicotti to freeze for about 1 to 2 hours. This initial freezing period is called “flash freezing.” Flash freezing is essential because it prevents the filled manicotti from sticking together and preserves their individual shapes.
After the manicotti shells are flash-frozen, you can proceed to the next step of the freezing process, which involves packaging and storing the manicotti for longer-term storage in the freezer. By properly arranging the manicotti for freezing, you ensure that they stay in excellent condition, making it easier to handle and enjoy them whenever you want a delightful Italian pasta meal.
Step 5: Flash-Freeze the Manicotti
Flash freezing is a crucial step in the process of freezing manicotti. After filling and arranging the manicotti shells on a baking sheet or tray, the next step is to place the tray in the freezer and let the manicotti freeze rapidly for about 1 to 2 hours. This quick freezing process is known as flash freezing, and it serves several essential purposes in preserving the quality of the manicotti.
The main goal of flash freezing is to prevent the filled manicotti shells from clumping together in the freezer bags or containers. When food items freeze slowly, ice crystals have more time to form and grow, leading to larger ice crystals that can damage the texture of the food. If the filled manicotti shells were directly placed into freezer bags without flash freezing, they could stick together and fuse into a solid mass during the freezing process. This would make it difficult to separate the shells when you want to reheat them, and it might also result in a less appealing appearance.
By subjecting the manicotti to flash freezing on the baking sheet or tray, the individual pasta shells freeze rapidly and retain their distinct shapes. The initial freezing quickly forms small ice crystals, minimizing damage to the pasta’s texture and structure. This way, when you transfer the flash-frozen manicotti into freezer bags or containers, they will remain separate and not stick together.
Another benefit of flash freezing is that it helps maintain the flavor and quality of the manicotti filling. Quick freezing helps preserve the moisture content and integrity of the cheese and spinach mixture, ensuring that the flavors are retained when you reheat the dish later.
After the flash freezing process is complete, you can remove the tray from the freezer and proceed to package the manicotti in freezer-safe resealable bags or airtight containers. Be sure to label the bags or containers with the contents and the date of freezing to keep track of their storage time.
Flash freezing is a simple yet vital step that ensures your frozen manicotti remains in optimal condition, preventing them from sticking together and preserving their taste and texture. This way, you can enjoy a delicious and satisfying meal whenever you’re ready to indulge in this classic Italian dish.
Step 6: Package the Manicotti
After the manicotti shells have been flash-frozen on the baking sheet or tray, the next step is to transfer them into appropriate freezer-safe packaging. Proper packaging is essential to protect the manicotti from freezer burn and to maintain their quality and taste during storage in the freezer.
Using freezer-safe resealable bags or airtight containers is the most common and practical way to package frozen manicotti. These types of containers are specifically designed to withstand freezing temperatures and help prevent air and moisture from entering, reducing the risk of freezer burn.
To package the flash-frozen manicotti, carefully lift each individual shell from the baking sheet or tray and place them into the freezer-safe resealable bags or containers. It’s crucial to work quickly during this step to minimize the time the manicotti spends exposed to the warmer air outside the freezer.
As you place the manicotti into the bags or containers, try to remove as much air as possible before sealing them shut. Excess air in the packaging can lead to freezer burn, which causes dehydration and can negatively affect the texture and flavor of the manicotti over time.
One effective way to remove air from the bags is by using the water displacement method. Partially seal the bag, leaving a small opening. Carefully lower the bag with the manicotti into a bowl of cold water, allowing the water to push out the air. Once most of the air is out, seal the bag completely.
For airtight containers, press down the lid firmly to eliminate any trapped air inside. Make sure the containers are securely closed to maintain a tight seal.
Step 7: Label and Date the Packages
Labeling and dating the freezer bags or containers that hold the frozen manicotti is a crucial step in the freezing process. It helps you keep track of what’s inside each package and how long the manicotti have been in the freezer. This simple yet essential practice ensures that you can easily identify and use the frozen manicotti when you’re ready to enjoy them.
To label the packages, take a permanent marker and write the contents of the package on the bag or container. In this case, write “Manicotti” on the label to indicate that the package contains the frozen manicotti dish. This makes it easy to identify the specific contents without having to open each bag or container.
Additionally, it’s important to include the date of freezing on the label. Write down the date when you prepared and froze the manicotti. This way, you’ll have a clear record of how long the manicotti have been in the freezer, helping you manage their shelf life and freshness.
Properly labeling and dating the packages also allow you to implement the “first in, first out” (FIFO) method. This means that when you have multiple packages of frozen manicotti, you should use the oldest ones first. By having the dates clearly marked, you can easily prioritize which packages to use first to ensure that none of the manicotti go to waste and that you consume them before their quality starts to decline.
Additionally, labeling the packages is useful if you plan to store other items in the freezer. It helps prevent confusion and ensures that you can quickly find the manicotti when you’re in the mood for a delicious Italian meal.
Taking this simple step to label and date the packages may seem small, but it can make a significant difference in managing your frozen food inventory and ensuring that the manicotti remain in their best condition for as long as possible. Proper organization and labeling contribute to a more efficient and enjoyable cooking experience, allowing you to enjoy your frozen manicotti with ease whenever the craving strikes.
Step 8: Store in the Freezer
After labeling and dating the manicotti packages, the next step is to store them in the freezer. Proper storage is essential to maintain the quality and taste of the frozen manicotti over an extended period.
Start by placing the labeled manicotti packages in the coldest part of your freezer. The coldest section is typically near the back or bottom of the freezer. This ensures that the manicotti is exposed to the most stable and consistent cold temperature, preventing any potential thawing and refreezing, which can lead to a loss of quality.
Keeping the manicotti packages flat is essential to conserve space in the freezer and to prevent them from getting squashed or damaged. Stacking them on top of each other or allowing them to tilt can lead to misshapen manicotti or potential leaks from the bags. By storing them flat, you ensure that the manicotti maintains their individual shapes and integrity during freezing and storage.
It is also crucial to avoid overcrowding the freezer. Leave enough space between the manicotti packages and other frozen items to allow for proper air circulation. Adequate air circulation helps maintain a stable and consistent freezing temperature, reducing the risk of temperature fluctuations that can impact the quality of the frozen food.
When storing frozen manicotti, it’s essential to follow the FIFO method (first in, first out). This means using the oldest packages first and replenishing your frozen manicotti supply with newer ones. For the best quality, it is recommended to consume the frozen manicotti within 3 to 4 months. While frozen food can technically remain safe to eat for much longer, the taste and texture of the manicotti may gradually deteriorate after this period.
Other related questions
How do you defrost manicotti?
To defrost manicotti, remove the frozen packages from the freezer and place them in the refrigerator. Allow them to thaw slowly in the fridge for several hours or overnight. Alternatively, defrost manicotti quickly by using the defrost function on your microwave, following the manufacturer’s instructions to avoid uneven heating.
Can you refreeze manicotti ?
Refreezing manicotti is not recommended due to safety and quality concerns. Once frozen food, including manicotti, has been thawed, harmful bacteria can multiply, potentially causing foodborne illnesses. Additionally, the texture and taste of refrozen manicotti may deteriorate, leading to a less enjoyable dining experience. It’s best to consume the thawed manicotti within a few days or promptly after reheating, rather than attempting to refreeze it.
How do I know if the manicotti has gone bad after being frozen?
To determine if frozen manicotti has gone bad, examine its appearance, smell, and texture. If the pasta appears discolored, has ice crystals, or shows signs of freezer burn, it may have deteriorated. A foul or off-smell and a mushy or strange texture are also indicators of spoilage. When in doubt, it’s safest to discard any frozen manicotti that shows signs of spoilage to avoid the risk of foodborne illness.
Can you freeze manicotti with sauce or should it be added later?
Yes, you can freeze manicotti with sauce, but it’s essential to consider the sauce’s consistency and ingredients. Cream-based sauces may not freeze well, while tomato-based sauces usually freeze better. Before freezing, cook the manicotti, let it cool, and then add the sauce. Transfer the sauced manicotti to airtight containers or freezer-safe bags, ensuring proper sealing, and store for up to 2-3 months in the freezer for later use.
Can I freeze homemade manicotti with spinach and ricotta filling?
Yes, you can freeze homemade manicotti with spinach and ricotta filling. After assembling the manicotti, but before baking, allow it to cool completely to room temperature. Place the uncooked manicotti in an airtight container or freezer-safe bag, ensuring proper sealing and store in the freezer.
Can I freeze manicotti with added herbs and seasonings?
Yes, you can freeze manicotti with added herbs and seasonings. Before freezing, cook the manicotti and let it cool to room temperature. Place the cooked manicotti in an airtight container or freezer-safe bag, ensuring proper sealing, and store for up to 2-3 months in the freezer for later consumption. The herbs and seasonings will retain their flavor, enhancing the dish when reheated.

