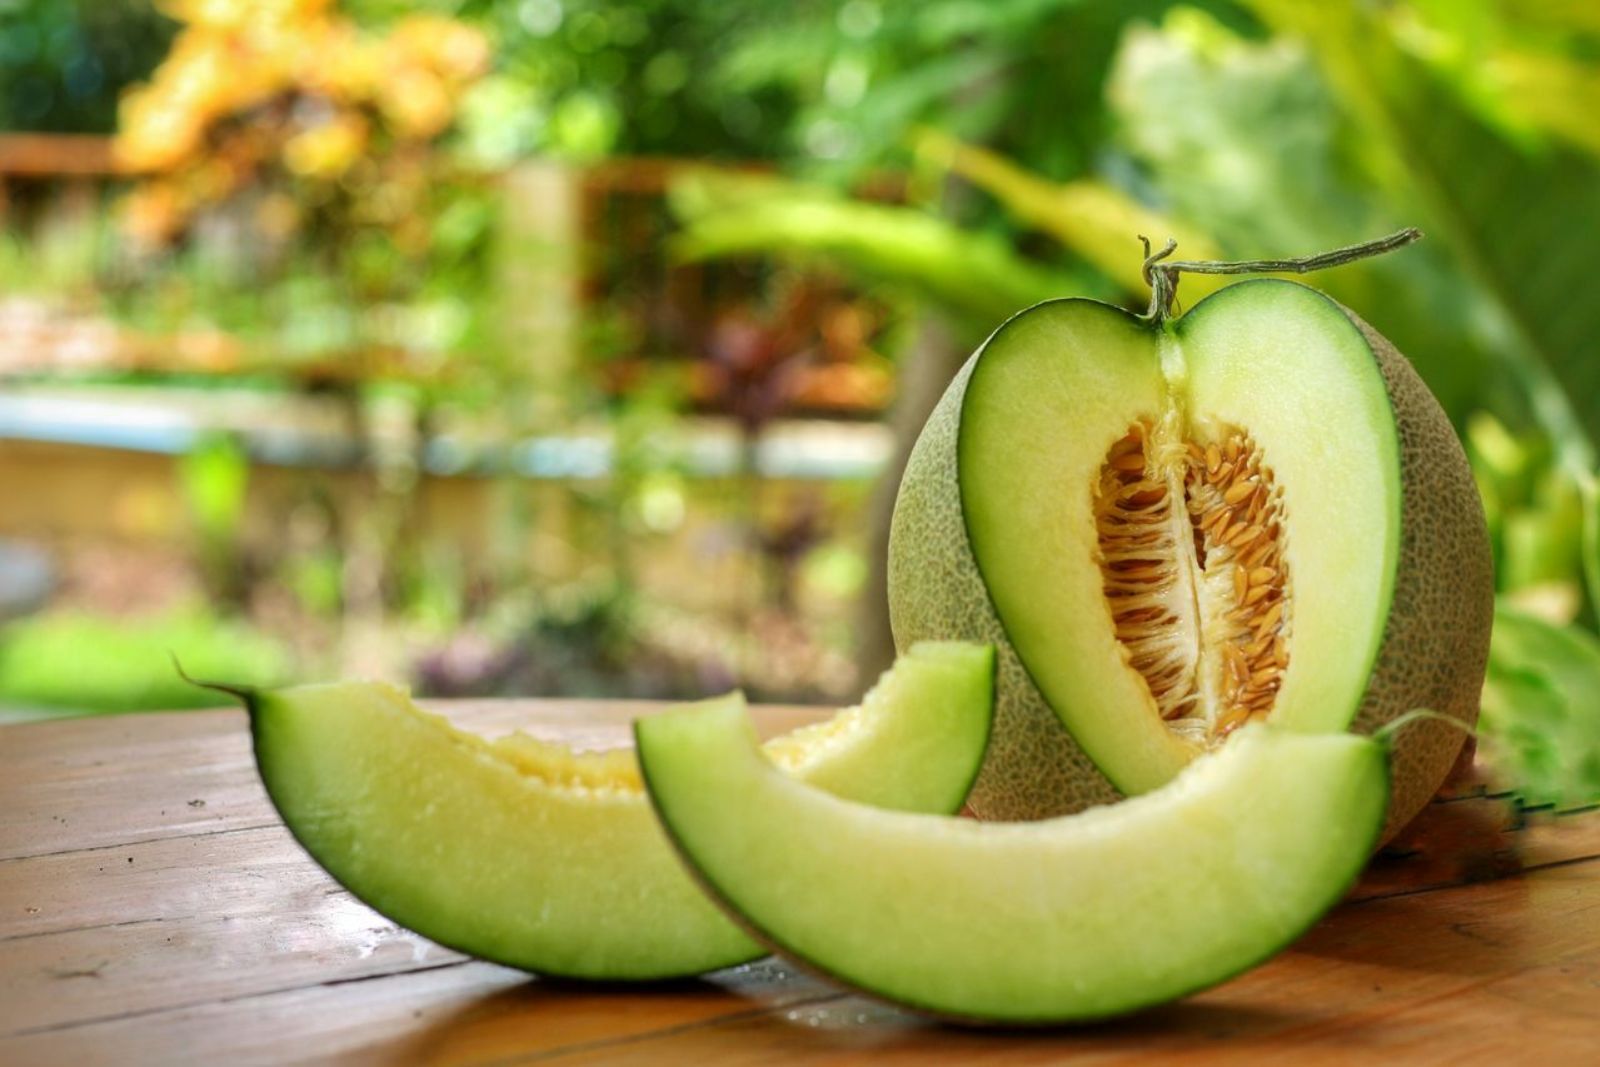
Melons are a delightful summer treat, whether you prefer the juicy sweetness of watermelon, the fragrant aroma of cantaloupe, or the exotic taste of honeydew. When melons are in season, they are at their peak flavor and quality. However, what if you could enjoy that refreshing melon goodness even when it’s out of season? Freezing melons is a simple yet effective way to preserve their flavor and versatility. In this article, we will provide you with a step-by-step guide on how to freeze melons, ensuring you can savor their taste year-round.
Here are simple steps on freezing melon:
Step 1: Choose Ripe Melons
Selecting ripe melons is a crucial first step when it comes to freezing melons. The choice of ripe and high-quality fruits directly impacts the flavor and texture of the frozen melon, ensuring a delightful experience when you eventually enjoy them. Here’s why selecting ripe melons matters:
- Flavor: Ripe melons are bursting with natural sweetness and flavor. They have had the time to develop their sugars, resulting in a more enjoyable taste. Choosing ripe melons ensures that your frozen melon pieces will be delicious and satisfying.
- Texture: Ripe melons are at their peak in terms of texture. They are firm yet tender and have the ideal juiciness. This means that when you freeze ripe melons, they are more likely to retain their appealing texture once thawed. You’ll avoid ending up with mushy or overly firm melon pieces.
- Fragrance: The aroma of a ripe melon is often one of the first indicators of its ripeness. When you select melons that are fragrant, you’re also choosing those that are likely to have a more pronounced and pleasing taste. A fragrant melon is a sign that it has matured and is ready to be enjoyed.
- Spoilage Prevention: By picking melons that are free from any signs of spoilage, you ensure that the frozen melon will remain safe to eat. Spoiled melons can negatively affect the quality of your frozen fruit and may even lead to off-flavors or odors in the freezer.
- Ripeness Peak: Melons have a finite window of peak ripeness, which is when they are the most flavorful and enjoyable. Choosing melons at this stage allows you to capture that peak quality and savor it later, even when melons are out of season.
- Nutrient Content: Ripe melons are also likely to have a higher nutrient content compared to unripe ones. They have had the opportunity to develop essential vitamins, minerals, and antioxidants, which remain intact when you freeze them.
Step 2: Wash and Prepare the Melons
Washing and preparing melons properly is a vital step in the freezing process. It ensures that your frozen melons are clean, free from contaminants, and safe to eat. Here’s a detailed explanation of why washing and preparing melons is essential:
- Removal of Surface Contaminants: Melons, like many fruits, can accumulate dirt, dust, and other contaminants on their skin during the growing and harvesting process. These contaminants can include bacteria, pesticides, and residues from handling. Washing the melons with cool running water helps remove these unwanted substances, reducing the risk of consuming harmful pathogens or chemicals.
- Food Safety: Properly washing and preparing melons contributes to food safety. Contaminated surfaces can transfer harmful microorganisms to the flesh when you cut into the melon. By cleaning the exterior, you minimize the potential for cross-contamination and ensure that the frozen melons remain safe to eat.
- Improved Taste: Washing melons also enhances their overall quality and taste. It removes any particles that might affect the flavor of the fruit. Clean melons are more enjoyable to eat, and their natural sweetness and aroma can shine through without interference from residues or dirt.
- Preservation of Flavor and Texture: Cleaning and patting dry the melons help maintain their texture and consistency. Excess moisture on the surface of the melons can lead to freezer burn or affect the texture of the frozen fruit. Drying them with a clean kitchen towel before slicing or dicing prevents unnecessary ice formation during freezing.
- Hygiene: Ensuring cleanliness in the kitchen is a fundamental aspect of food preparation. By washing and preparing melons properly, you promote good kitchen hygiene practices, reducing the risk of contamination not only for the melons but also for other ingredients and surfaces in your kitchen.
To wash and prepare melons effectively, follow these steps:
- Start with clean hands and a clean workspace.
- Rinse the melons under cool running water, using a clean brush to gently scrub the surface.
- Pay special attention to any crevices or nooks on the melon skin where contaminants might hide.
- After washing, pat the melons dry with a clean kitchen towel to remove excess moisture.
- Proceed with cutting, slicing, or dicing the melons as desired for freezing.
Step 3: Slice and Seed
Depending on the type of melon you’re working with, this step ensures that you’re left with the edible and desirable portions of the fruit while removing any unwanted seeds or inner pulp. Here’s a detailed explanation of why slicing and seeding are essential:
- Removal of Inedible Parts: Melons have seeds and, in some cases, inner pulp that is typically not consumed due to its less desirable texture and taste. By slicing and seeding the melon, you effectively remove these inedible parts, ensuring that the frozen fruit is more enjoyable to eat later.
- Enhanced Texture and Consistency: The seeds and inner pulp can be somewhat tough and less juicy than the rest of the melon. Removing them contributes to a smoother and more consistent texture in the frozen melon pieces, preventing any unpleasant surprises when you bite into them.
- Improved Aesthetic Appeal: Slicing and seeding also enhance the visual appeal of the frozen melon. Without seeds and pulp, the melon pieces look cleaner and more attractive, making them more appealing for use in salads, desserts, or garnishes.
- Versatility: By removing the seeds and inner pulp, you have more control over the final product’s use. Whether you want to create uniform melon cubes, slices, or wedges, this step allows you to tailor the shape and size of the frozen melon to your specific culinary needs.
Here’s a breakdown of the steps to slice and seed melons:
For Watermelon:
- Cut the watermelon in half.
- Use a spoon to scoop out the seeds and any attached pulp from the center.
- You can then proceed to slice or dice the watermelon into your desired shapes.
For Cantaloupe and Honeydew:
- Cut the cantaloupe or honeydew in half.
- Use a spoon to scoop out the seeds and any surrounding pulp from the center.
- After seeding, carefully separate the flesh from the rind using a knife or your hands.
- Proceed to cut the melon flesh into your preferred shapes.
Should I peel the melon before freezing it?
Peeling melon before freezing is optional. Some prefer to freeze melon with the skin on for added texture, while others may choose to peel it for a smoother consistency. The decision depends on personal preference and intended use.
Step 4: Dice or Slice
Once you’ve selected and prepared your melons, the next step in freezing melons is to decide how you’d like to cut them before freezing. This step allows you to customize the size and shape of your frozen melon pieces to best suit your culinary needs. Here’s an explanation of why dicing or slicing is an essential part of the freezing process:
- Versatility: Dicing or slicing your melon before freezing gives you versatility in how you can use the frozen fruit later. The choice of size and shape allows you to adapt the melon pieces to various recipes and occasions.
- Smoothies and Beverages: If you intend to use your frozen melon primarily for smoothies or blended beverages, dicing the melon into small cubes is a practical choice. Smaller pieces blend easily, creating a smooth and consistent texture in your drinks.
- Snacking and Fruit Salads: Larger chunks or slices of melon are perfect for snacking or adding to fruit salads. Their size makes them convenient for grabbing as a refreshing snack or incorporating into your favorite fruit medleys.
- Presentation: Consider the visual appeal of your dishes. Sliced or wedged melon pieces can add an aesthetic touch to salads, desserts, or party platters, enhancing the overall presentation of your culinary creations.
- Storage Convenience: Depending on your storage space and container options, you may find that certain sizes or shapes of melon pieces fit better in your freezer containers or bags. This consideration can make organizing and accessing your frozen melon more convenient.
To dice or slice your melons for freezing:
For Dicing:
- Take the prepared melon flesh.
- Using a sharp knife, cut it into evenly sized cubes. The size can vary depending on your preference but is typically around 1/2 to 1-inch cubes.
For Slicing or Wedging:
- Take the prepared melon flesh.
- Use a sharp knife to cut it into slices or wedges, adjusting the thickness to your liking.
Remember to keep the pieces uniform in size to ensure even freezing and consistent texture when you later use the frozen melon. By tailoring your melon to your specific culinary intentions at this stage, you set yourself up for success in creating dishes that highlight the delightful taste and texture of your frozen melon, whether you choose to enjoy it in smoothies, snacks, or a variety of recipes.
Is there a difference in freezing whole melons compared to cut melon pieces?
Freezing whole melons requires more space and time to thaw, while cut melon pieces are more convenient for immediate use. Both methods can be effective, but the choice depends on your preference and storage capacity.
Step 5: Arrange on a Baking Sheet
After you’ve diced or sliced your melon to your preferred size, it’s time to arrange the pieces on a baking sheet for the freezing process. This step is crucial for several reasons, and here’s why it’s important to lay the melon pieces in a single layer without touching:
- Even Freezing: By placing the melon pieces in a single layer with space between them, you ensure that each piece freezes evenly. Even freezing helps maintain the melon’s texture and prevents clumping, which can occur if pieces are touching and freeze together.
- Prevention of Ice Formation: When melon pieces touch during freezing, any moisture on their surfaces can cause them to stick together. This can lead to the formation of ice crystals, which may affect the texture and quality of the frozen melon. By arranging them not to touch, you minimize the risk of ice formation.
- Easy Separation: Placing parchment paper or a silicone baking mat on the baking sheet serves as a non-stick surface. It makes it easier to remove the frozen melon pieces from the sheet once they are fully frozen. This step ensures that your frozen melon doesn’t get stuck or break when you transfer it to storage containers later.
- Efficient Freezing: Laying the melon pieces in a single layer on the baking sheet promotes efficient freezing. It allows the cold air in the freezer to circulate around each piece, ensuring a quicker and more effective freezing process.
- Individual Pieces: If you plan to use the frozen melon pieces individually or in small portions, this arrangement makes it simple to grab the exact quantity you need without thawing and refreezing large clumps of fruit.
To arrange your melon pieces on a baking sheet:
- Line a baking sheet with parchment paper or a silicone baking mat to prevent sticking.
- Place the melon pieces on the sheet, ensuring they are in a single layer and not touching.
- If necessary, use multiple baking sheets to accommodate all the melon pieces without overcrowding.
Step 6: Flash-Freeze the Melon
Once you’ve carefully arranged your melon pieces on a baking sheet, the next critical step is flash-freezing. This process involves placing the baking sheet with the melon pieces in the freezer and allowing them to freeze rapidly for about 1-2 hours. Here’s why flash-freezing is essential:
- Prevents Clumping: Flash-freezing individual melon pieces is crucial for preventing them from sticking together and forming large clumps. When melon pieces freeze slowly or are stored in a crowded manner, moisture on their surfaces can cause them to stick together. Flash-freezing ensures that each piece freezes separately, making it easier to access and use them later.
- Maintains Texture: Rapid freezing helps maintain the melon’s texture. When fruits freeze slowly, ice crystals can form within the cells, potentially causing cell walls to rupture and leading to a mushy texture upon thawing. Flash-freezing minimizes the size of ice crystals and preserves the integrity of the fruit, allowing it to retain its natural texture when thawed.
- Speedy Freezing: Flash-freezing is a quick process that efficiently locks in the melon’s flavor and freshness. The faster the melon pieces freeze, the better they will maintain their taste and nutritional value.
- Convenience: Flash-frozen melon pieces are convenient to use because they are not clumped together. This makes it easy to grab the exact amount you need for your recipes, snacks, or beverages without having to thaw and separate frozen chunks.
Here’s how to flash-freeze your melon pieces:
- Place the baking sheet with the arranged melon pieces in the freezer.
- Allow the melon pieces to freeze for approximately 1-2 hours or until they are firm to the touch.
- Keep an eye on them to ensure they don’t freeze for too long, as this can lead to freezer burn or a loss of quality.
Step 7: Transfer to Freezer Bags
After successfully flash-freezing your melon pieces, it’s time to move them to a more suitable storage solution to maintain their quality over an extended period. Transferring the frozen melon pieces to airtight freezer bags is a crucial step, and here’s why it matters:
- Airtight Seal: Airtight freezer bags provide an excellent barrier against air and moisture, which are the primary culprits of freezer burn and loss of quality in frozen foods. The tight seal prevents air from coming into contact with the melon pieces, preserving their taste, texture, and overall freshness.
- Prevention of Freezer Burn: Freezer burn occurs when moisture in the frozen food is exposed to air, causing ice crystals to form on the food’s surface. This results in dried-out, discolored, and often off-flavored areas. Airtight freezer bags minimize the risk of freezer burn by creating a protective environment around the melon pieces.
- Space Efficiency: Freezer bags are typically more space-efficient than using rigid containers. They allow you to stack and store the frozen melon pieces more compactly in the freezer, optimizing your freezer space.
- Easy Portion Control: Using freezer bags allows you to portion the melon pieces as desired. You can choose to store them in smaller or larger quantities, making it convenient to access just the amount you need for your recipes, smoothies, or snacks without thawing more than necessary.
Here’s how to transfer your frozen melon pieces to airtight freezer bags:
- Remove the baking sheet with the frozen melon pieces from the freezer.
- Open the airtight freezer bags, leaving them nearby for easy access.
- Gently lift the frozen melon pieces from the baking sheet using a spatula or your fingers, being careful not to break them.
- Place the melon pieces into the freezer bags, distributing them evenly to prevent any large clumps.
- Press down on the bags to remove excess air, or use a straw to suck out the air before sealing the bags tightly.
Ensure that the bags are sealed securely to create an airtight environment. You may also consider labeling the bags with the date of freezing for better organization and to keep track of the melon’s freshness over time.
Step 8: Label and Date the Bags
Labeling and dating your freezer bags containing frozen melon is a simple yet highly beneficial practice when it comes to preserving and utilizing your melon over time. Here’s why it’s crucial to follow this step:
- Identification: Labeling the bags with the type of melon (e.g., watermelon, cantaloupe, honeydew) allows you to quickly identify the contents without having to open the bags. This is especially helpful if you have multiple types of melons or other frozen fruits in your freezer.
- Freshness Tracking: Adding the date of freezing to the label helps you keep track of how long the melon has been in the freezer. This is vital because frozen fruits, including melon, are best when consumed within a certain timeframe to maintain optimal taste and texture. Knowing when you froze them allows you to prioritize using the oldest melon first.
- Rotation: Labeling and dating the bags encourage a first-in, first-out (FIFO) approach to consumption. By using the oldest melon first, you minimize the risk of forgetting about it and inadvertently letting it sit in the freezer for too long, potentially leading to a loss in quality.
- Recipe Planning: When you’re planning meals or recipes, having labeled and dated bags makes it easier to select the right type of melon for your dishes. You can also plan your meals based on the melon’s freshness.
- Inventory Management: It helps you manage your frozen melon inventory effectively. You can assess how much of each type you have on hand and plan your future grocery shopping accordingly.
To label and date your freezer bags:
- Use a waterproof marker or a label that adheres well to plastic surfaces.
- Write the type of melon (e.g., watermelon, cantaloupe) on the bag.
- Add the date when you froze the melon. Be sure to include the month and year.
Step 9: Store in the Freezer
After taking all the necessary steps to select, prepare, freeze, and label your melon, it’s time to store it in the freezer. Proper storage is essential for maintaining the quality and safety of your frozen melon. Here’s why storing your frozen melon in the freezer is crucial:
- Preservation of Freshness: The freezer is a controlled environment with low temperatures, which helps preserve the freshness of your melon. When stored correctly, frozen melon can maintain its flavor, texture, and nutritional value for an extended period.
- Prevention of Spoilage: Freezing effectively inhibits the growth of microorganisms that can cause spoilage. By storing your melon in the freezer, you prevent bacteria, yeasts, and molds from multiplying, ensuring that your fruit remains safe to eat.
- Extended Shelf Life: Melon can be stored in the freezer for an extended period without significant loss in quality. While the exact storage duration can vary depending on factors such as the type of melon and freezer conditions, frozen melon generally remains good for 6-12 months.
- Convenience: Storing your melon in the freezer allows you to enjoy this delicious fruit year-round, even when it’s out of season. It’s a convenient way to have melon readily available for smoothies, snacks, desserts, and various culinary uses.
- Reduction of Food Waste: Freezing excess melon is an effective way to reduce food waste. Instead of letting ripe melons go to waste, you can freeze them for later use, ensuring that you get the most out of your fruit.
To store your frozen melon in the freezer:
- Place the sealed and labeled freezer bags containing your melon in the freezer. Make sure to arrange them in a way that maximizes space efficiency and keeps them organized.
- Store the melon bags away from the freezer door to minimize temperature fluctuations and exposure to warmer air when the freezer is opened frequently.
- Keep an eye on the storage duration. While frozen melon can last for several months without a significant decline in quality, it’s a good practice to use the melon within the recommended time frame to ensure the best taste and texture.
Other related questions
How do I defrost melon?
To defrost melon, follow proper food safety guidelines. Place the sealed frozen melon in the refrigerator and allow it to thaw gradually over several hours or overnight. Alternatively, you can use a microwave’s defrost setting with caution, using short intervals and checking frequently to prevent cooking. Avoid thawing at room temperature to prevent potential bacterial growth.
Can I refreeze melon?
No, it’s not recommended to refreeze melon once it has thawed. The process of thawing and refreezing can lead to a loss of quality, affecting the melon’s texture, taste, and overall freshness. It’s advisable to use thawed melon promptly or consider consuming it as is to prevent potential deterioration.
How do I know if the melon has gone bad after being frozen?
Determining if frozen melon has gone bad involves several factors. Check for any signs of freezer burn, such as ice crystals or dried-out, discolored areas, which can indicate a loss of quality. Additionally, if the melon exhibits an off-putting odor, unusual texture, or sour taste after thawing, it may have deteriorated and should not be consumed. Always rely on your senses and discard frozen melon that appears or smells questionable to ensure food safety.
Can I freeze different types of melon, like watermelon, cantaloupe, and honeydew, using the same method?
Yes, you can freeze various types of melon using the same general method explained in the article. However, be aware that the taste and texture of different melon varieties may vary slightly after freezing. Adjusting your preparation and freezing method to suit each type’s unique characteristics can help optimize results.
What are some creative ways to use frozen melon in recipes beyond snacking or smoothies?
Frozen melon can add a delightful twist to various dishes. Consider incorporating it into fruit salads, sorbets, popsicles, or even as a garnish for cocktails. Experimentation with different culinary creations can introduce exciting flavors and textures to your meals and desserts.
Can I freeze melon that’s already been cut and served, or should I freeze it immediately after purchasing?
While it’s ideal to freeze melon shortly after purchase or when it’s at its freshest, you can freeze leftover melon that has been cut and served. Just ensure that it’s properly stored in airtight containers or freezer bags, and follow the recommended freezing guidelines to maintain its quality.
What are some common mistakes to avoid when freezing melon?
Common mistakes to avoid include not properly washing and preparing the melon, neglecting to remove seeds or pulp, overexposing it to air, or freezing it without flash-freezing, which can lead to clumping and texture issues. Following the step-by-step guide in the article can help you avoid these pitfalls.


