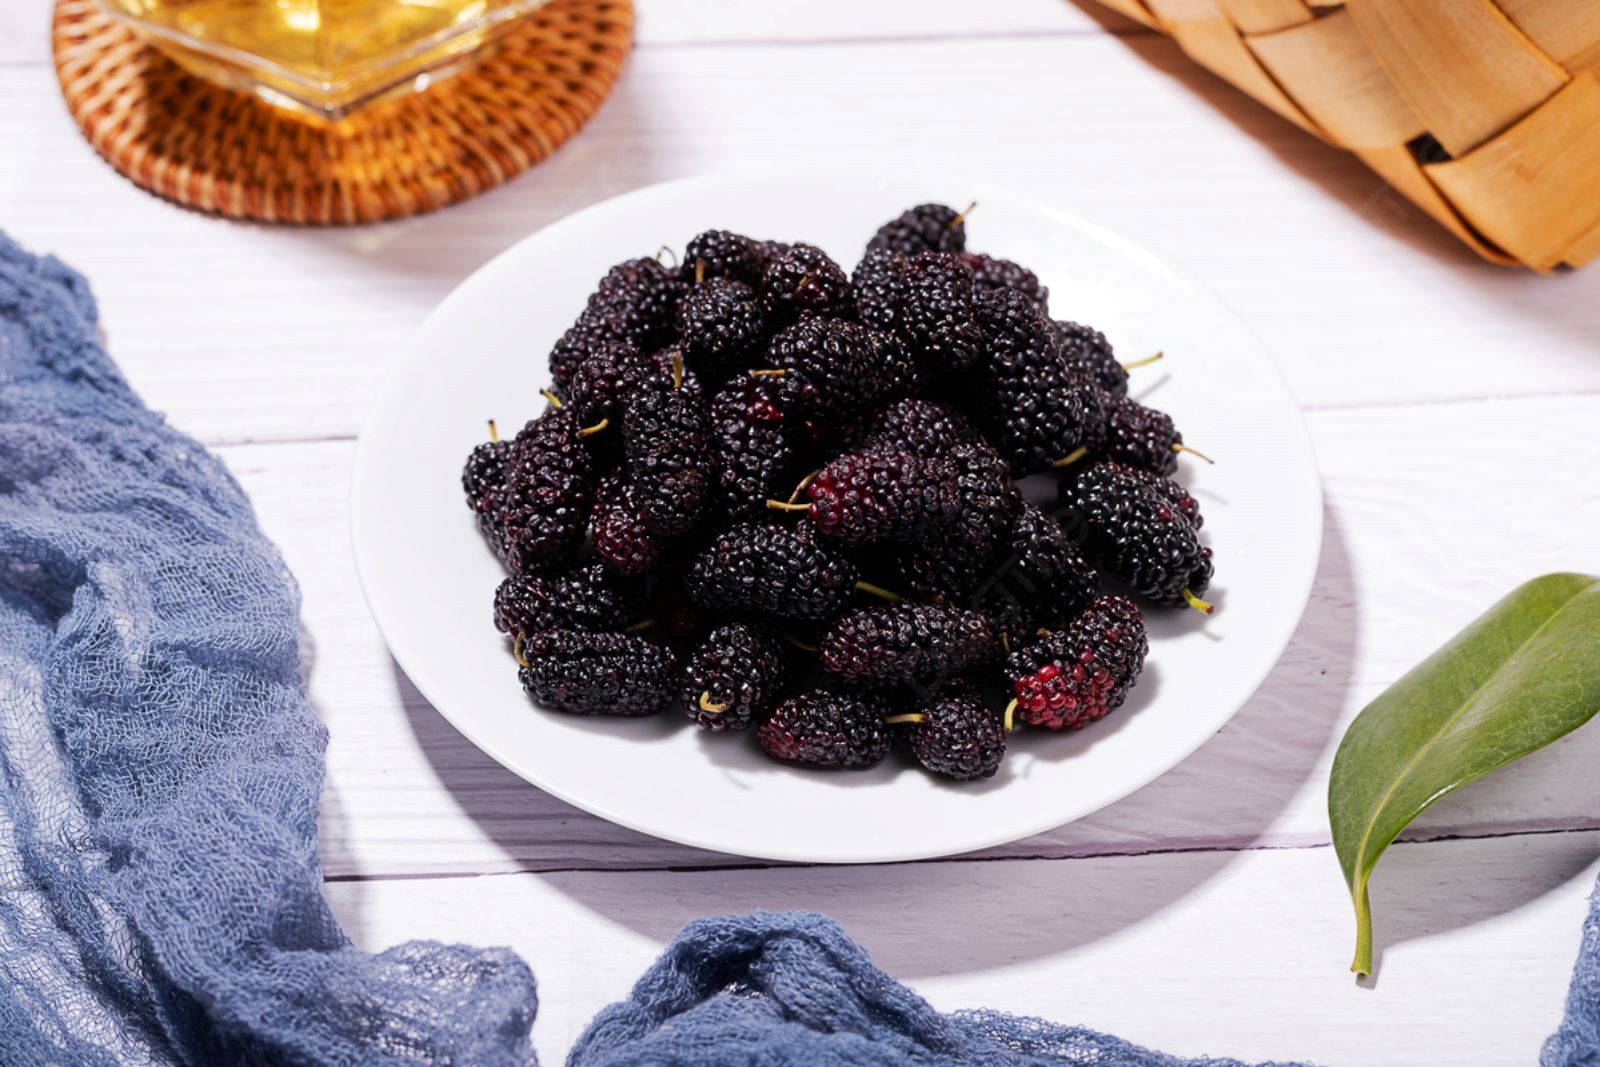
Mulberries are delightful, sweet-tart berries that grow on mulberry trees. These small, dark-purple, or sometimes red, berries are not only delicious but also packed with vitamins, minerals, and antioxidants. While mulberries are often enjoyed fresh during their short-lived season, freezing them allows you to savor their unique flavor and health benefits throughout the year. In this guide, we’ll walk you through the steps to freeze mulberries properly, ensuring they maintain their freshness and taste when you’re ready to use them.
Here’s a step-by-step guide on how to freeze mulberries:
Step 1: Select ripe mulberries
The first step in freezing mulberries is to carefully choose the right berries for the process. Selecting ripe mulberries is essential for several reasons, and it can significantly impact the quality of the frozen product.
Ripe mulberries are those that have reached their optimal level of sweetness and flavor development. When you choose ripe mulberries, you’re ensuring that the berries have fully matured and developed their sugars, making them naturally sweeter. This inherent sweetness will be preserved during the freezing process, resulting in frozen mulberries that maintain their delicious taste.
Additionally, ripe mulberries tend to have a better texture and consistency. They are plump, firm, and juicier compared to under ripe or overripe berries. These qualities make them more suitable for freezing, as they hold up well during the freezing and thawing process.
By opting for fully colored mulberries, you’re also selecting fruits that have achieved their peak ripeness. Mulberries can be dark purple or red, depending on the variety. Ensure that the berries have a uniform coloration without any green or pale spots, as these may indicate underripe fruit.
Lastly, be vigilant about inspecting the mulberries for any signs of spoilage. Discard any berries with mold, bruising, or blemishes, as they can affect the overall quality of the frozen mulberries and may even lead to the spread of spoilage to other berries during freezing.
Can I freeze mulberries if they are overripe or slightly soft?
While it’s preferable to freeze ripe mulberries for the best results, you can freeze slightly overripe ones. Just be aware that their texture may change slightly after freezing, so it’s a good idea to use them in recipes like smoothies or baked goods.
Step 2: Wash and sort the mulberries
The second step in freezing mulberries is to thoroughly wash and sort the berries. This process is crucial for ensuring the safety and quality of the frozen mulberries you’ll be enjoying later. Here’s why it’s essential:
- Removing Dirt and Residues: Even the freshest-looking mulberries may have dirt, dust, or residues on their surface from the outdoor environment where they were harvested. Washing them under cold, running water helps to eliminate these impurities, making the berries safe to consume and free from any potential contaminants.
- Ensuring Hygiene: Washing the mulberries is a hygienic practice that helps remove any potential pathogens or bacteria that might be present on the surface of the berries. This is particularly important if you’ve picked the mulberries yourself or purchased them from a local source, as they may have come into contact with various elements during harvesting and handling.
- Removing Unwanted Parts: As you wash the mulberries, it’s essential to inspect each berry individually. This allows you to identify and remove any unwanted parts, such as stems, leaves, or overripe berries. Stems and leaves are not suitable for freezing and can introduce undesirable flavors or textures to the batch. Overripe or damaged berries may not freeze well and can affect the overall quality of the frozen mulberries.
- Preventing Contamination: Sorting the mulberries ensures that only clean and well-sorted berries are included in the freezing process. This is vital because any contaminants, spoilage, or unwanted parts left in the batch can have a negative impact on the entire batch of frozen mulberries, potentially compromising their taste and safety.
Can I freeze mulberries with their stems still attached?
It is not recommended to freeze mulberries with their stems still attached. Mulberry stems can become tough and unpleasant to eat when frozen, affecting the overall texture and taste of the berries. To ensure the best quality, it’s advisable to remove stems before freezing mulberries.
Step 3: Dry the mulberries
Once you’ve washed and sorted your mulberries, the next important step in the freezing process is to ensure they are thoroughly dried. This seemingly simple step plays a crucial role in preserving the quality of your frozen mulberries, and here’s why it matters:
- Preventing Ice Crystal Formation: Excess moisture on the surface of the mulberries can lead to the formation of ice crystals when they are placed in the freezer. These ice crystals can damage the cell structure of the berries, causing them to become mushy and altering their texture. Additionally, ice crystals can contribute to freezer burn, which can negatively impact the flavor and overall quality of the frozen mulberries.
- Maintaining Texture and Flavor: Drying the mulberries helps preserve their natural texture and flavor. When you remove moisture from the surface, you prevent it from freezing and expanding within the berry’s cells. This, in turn, helps the mulberries retain their firmness and flavor, ensuring that they taste just as delicious when you decide to use them after freezing.
- Preventing Clumping: Dry mulberries are less likely to stick together when placed in the freezer. If mulberries are frozen with moisture on their surface, they can freeze together in clumps or clusters, making it challenging to use them individually when you need them for recipes or snacks.
To effectively dry the mulberries, gently place them on a clean kitchen towel or a layer of paper towels. Ensure that the berries are spread out in a single layer, allowing any remaining moisture to be absorbed by the towels. You can also pat them gently with another towel to speed up the drying process.
Taking the time to dry the mulberries properly may seem like a small detail, but it can make a significant difference in the overall quality of your frozen mulberries. By preventing ice crystal formation and preserving their texture and flavor, you’ll be ensuring that your mulberries remain a tasty and versatile ingredient for a wide range of culinary delights, from smoothies to desserts.
Step 4: Arrange the mulberries for freezing
After washing, sorting, and drying your mulberries, the next step is to arrange them for freezing. This crucial step, known as flash freezing, is essential for ensuring that your mulberries freeze individually rather than clumping together. Here’s why it’s important and how to do it effectively:
- Preventing Clumping: If you were to place wet or even dry mulberries in a container or bag and freeze them immediately, they would likely stick together. This clumping can make it difficult to use the desired quantity of mulberries when you need them for recipes, as they would freeze into a solid mass. By arranging them in a single layer, you prevent this clumping and ensure that they remain separate.
- Individual Freezing: Flash freezing allows each mulberry to freeze individually, preserving its individual shape and integrity. When mulberries freeze separately, they can be easily scooped out from a container or bag as needed, maintaining their appearance and texture.
To properly arrange the mulberries for flash freezing, follow these steps:
- Spread in a Single Layer: Lay the dried mulberries in a single layer on a baking sheet or a tray. Ensure that none of the berries are touching or overlapping. This spacing between the berries is essential to prevent them from freezing together.
- Use Parchment Paper: To prevent the mulberries from sticking to the baking sheet or tray, you can line it with parchment paper. This makes it easier to remove the frozen mulberries once they are fully frozen.
Step 5: Flash-freeze the mulberries
After arranging your mulberries in a single layer on a baking sheet or tray, the next critical step is to flash-freeze them. Flash freezing is a rapid freezing process that is essential for preserving the individual integrity of each mulberry and preventing them from sticking together. Here’s why flash freezing is important and how to do it effectively:
- Individual Freezing: Flash freezing is all about freezing each mulberry individually. When you place the mulberries in the freezer in a single layer with ample spacing between them, the cold air circulates around each berry, allowing them to freeze separately. This ensures that each mulberry retains its unique shape, texture, and flavor.
- Preventing Clumping: One of the primary objectives of flash freezing is to prevent the mulberries from clumping together. If the mulberries were simply placed in a bag or container and frozen, they would likely stick together, forming a solid mass. Flash freezing eliminates this problem, making it easier to remove individual mulberries when you need them for recipes.
Here’s how to flash-freeze the mulberries effectively:
- Place in Freezer: Once you’ve arranged the mulberries in a single layer on the baking sheet or tray, put the sheet or tray in the freezer. Make sure the mulberries are not touching each other.
- Quick Freeze: Allow the mulberries to remain in the freezer for approximately 1-2 hours or until they are firm and completely frozen. The exact time may vary depending on your freezer’s temperature and the quantity of mulberries, but the key is to freeze them as quickly as possible.
- Check for Firmness: To determine if the mulberries are ready, gently touch one of them. It should feel firm and solid. If it’s still soft or pliable, give them a bit more time in the freezer.
- Remove and Transfer: Once the mulberries are fully frozen, remove the baking sheet or tray from the freezer. At this point, they are ready to be transferred into airtight containers or freezer bags for long-term storage.
Is it necessary to flash-freeze mulberries, or can I freeze them directly in containers or bags?
Flash freezing mulberries is recommended to prevent them from sticking together and clumping during freezing. However, if you plan to use them relatively quickly, you can freeze them directly in containers or bags. Flash freezing ensures that mulberries remain individually frozen, making them easier to separate when needed for recipes or snacks.
Step 6: Package and seal the mulberries
Once your mulberries are flash-frozen and ready for long-term storage, the next step is to package and seal them properly. This step is crucial for maintaining the quality and freshness of your frozen mulberries over an extended period. Here’s why it’s important and how to do it effectively:
- Protection from Freezer Burn: Proper packaging and sealing protect the frozen mulberries from freezer burn. Freezer burn occurs when moisture in the food evaporates and forms ice crystals on the surface. This can result in a change in texture and taste, making the mulberries less appetizing. Airtight packaging prevents air and moisture from entering, keeping the mulberries in optimal condition.
- Preventing Contamination: Airtight packaging also prevents cross-contamination with other foods in the freezer. It ensures that no odors or flavors from nearby items can affect the taste of your mulberries.
- Extending Shelf Life: Properly sealed packaging extends the shelf life of the mulberries, allowing you to enjoy them for an extended period. This is especially important if you have a surplus of mulberries that you want to store for future use.
Here’s how to package and seal the mulberries effectively:
- Use Airtight Containers: Transfer the frozen mulberries into airtight containers. Ensure that the containers are clean and dry before adding the mulberries. Choose containers that are the right size for the quantity of mulberries you plan to store to minimize excess air space.
- Remove Air: When filling the containers, try to remove as much air as possible. Air can contribute to freezer burn, so pack the mulberries tightly without crushing them. You can use a spoon or the back of a spatula to press them down gently if needed.
- Consider Vacuum Sealing: If you’re using freezer bags, consider investing in a vacuum sealer. Vacuum sealing removes nearly all of the air from the bag, providing an exceptionally tight seal. This is particularly useful if you plan to store the mulberries for an extended period.
Step 7: Label and date the packages
Labeling and dating the packages in which you store your frozen mulberries is a simple yet crucial step in the freezing process. It helps you keep track of the storage time and ensures that you use the mulberries within their optimal quality window. Here’s why labeling and dating are important:
- Monitoring Freshness: By marking the date of freezing on each container or bag, you create a record of when the mulberries were preserved. This information allows you to monitor their freshness and quality over time. It’s especially useful when you have a variety of frozen foods in your freezer, and you want to keep track of their shelf life.
- Prioritizing Use: The date on the package helps you prioritize the use of the frozen mulberries. You can easily identify which packages contain the oldest mulberries and use them first. This ensures that you enjoy the mulberries at their best, as frozen fruits, like all frozen foods, can experience a decline in quality over time.
- Preventing Food Waste: Labeling and dating your packages reduce the likelihood of food waste. When you’re aware of when the mulberries were frozen, you can plan meals and recipes accordingly, preventing them from sitting in the freezer for too long and potentially becoming less flavorful or textured.
- Safety and Health: It’s also a safety and health practice. In case of any recalls or safety concerns related to frozen fruits, having a record of the freezing date allows you to identify potentially affected batches and take appropriate actions.
To label and date your packages effectively:
- Use a waterproof marker or freezer-safe labels.
- Clearly write the date of freezing on each container or bag.
- Ensure the label is visible and easily legible.
- With the date clearly marked on each package, you’ll have a well-organized freezer and a handy reference for when you need to use your frozen mulberries. This simple practice ensures that you enjoy the mulberries at their peak quality and make the most of your frozen fruit throughout the year.
Step 8: Store in the freezer
Once you’ve properly packaged and labeled your frozen mulberries, it’s time to store them in the freezer. Proper storage is essential to maintain the quality and safety of your mulberries for an extended period. Here’s why storing them in the freezer is crucial and how to do it correctly:
- Maintaining Quality: The freezer is the ideal environment for preserving the quality of your mulberries. Freezing suspends the growth of bacteria and enzymes, preventing spoilage and deterioration. Properly stored mulberries can maintain their flavor, texture, and nutritional value for an extended time.
- Preventing Freezer Burn: Placing the mulberries in the freezer at or below 0°F (-18°C) is essential for preventing freezer burn. At these low temperatures, moisture in the berries remains frozen, and air circulation is minimal. This prevents the formation of ice crystals on the mulberries’ surface, which can lead to freezer burn—a condition that negatively impacts the taste and texture of frozen foods.
- Ensuring Safety: Freezing also inhibits the growth of pathogens, ensuring that your mulberries remain safe to consume throughout their storage period. Proper storage temperatures help maintain the food’s safety by preventing the proliferation of harmful bacteria.
To store your mulberries in the freezer effectively:
- Place the sealed containers or bags in the coldest part of your freezer. This area typically has the most stable temperature and minimizes temperature fluctuations, which can contribute to freezer burn.
- Make sure the containers or bags are arranged neatly, and they don’t block the airflow inside the freezer. Proper organization allows for efficient cooling and freezing.
- Check the temperature setting of your freezer to ensure it is at or below 0°F (-18°C). Most home freezers can maintain this temperature range, but it’s a good practice to verify it periodically.
How long can mulberries last in the freezer?
Mulberries can last in the freezer for up to 12-18 months when stored properly in airtight containers or freezer bags at or below 0°F (-18°C). The duration may vary depending on factors like initial quality and storage conditions. It is recommended to label packages with the freezing date to monitor freshness.
Other related questions
How do I defrost mulberries?
Mulberries can be defrosted by transferring them from the freezer to the refrigerator. Allow them to thaw slowly for several hours or overnight. Alternatively, you can defrost mulberries quickly by placing them in a sealed bag and immersing the bag in cold water.
Can I refreeze mulberries?
Refreezing mulberries is not advisable. Once mulberries have been thawed, their texture and flavor can deteriorate, making them less desirable. Refreezing can also increase the risk of microbial growth and spoilage. It’s best to use thawed mulberries promptly or store them in the refrigerator for a short period rather than attempting to refreeze them.
How do I know if the mulberries have gone bad after being frozen?
Frozen mulberries may go bad if they exhibit signs of freezer burn, which include dry, discolored, or ice-crusted surfaces. Additionally, if they have an off-putting odor or unusual texture, such as excessive mushiness, they may have deteriorated. Proper storage and labeling with freezing dates can help monitor their quality over time.
Are there any alternative methods for preserving mulberries if I don’t have access to a freezer?
Yes, there are alternative methods for preserving mulberries if you don’t have access to a freezer. You can consider making mulberry preserves or jams by cooking them with sugar and storing them in sterilized jars. Another option is to dry mulberries to create mulberry raisins; this can be done by sun-drying or using a food dehydrator. These methods allow you to enjoy mulberries without relying on freezing for preservation.
What are some creative ways to use frozen mulberries in recipes?
Creative ways to use frozen mulberries include making mulberry smoothies, pies, muffins, sauces, and jams. Additionally, frozen mulberries can be incorporated into dessert options like sorbets, crumbles, and chia puddings. They also enhance the flavor and nutritional value of salads when added as a colorful ingredient.

