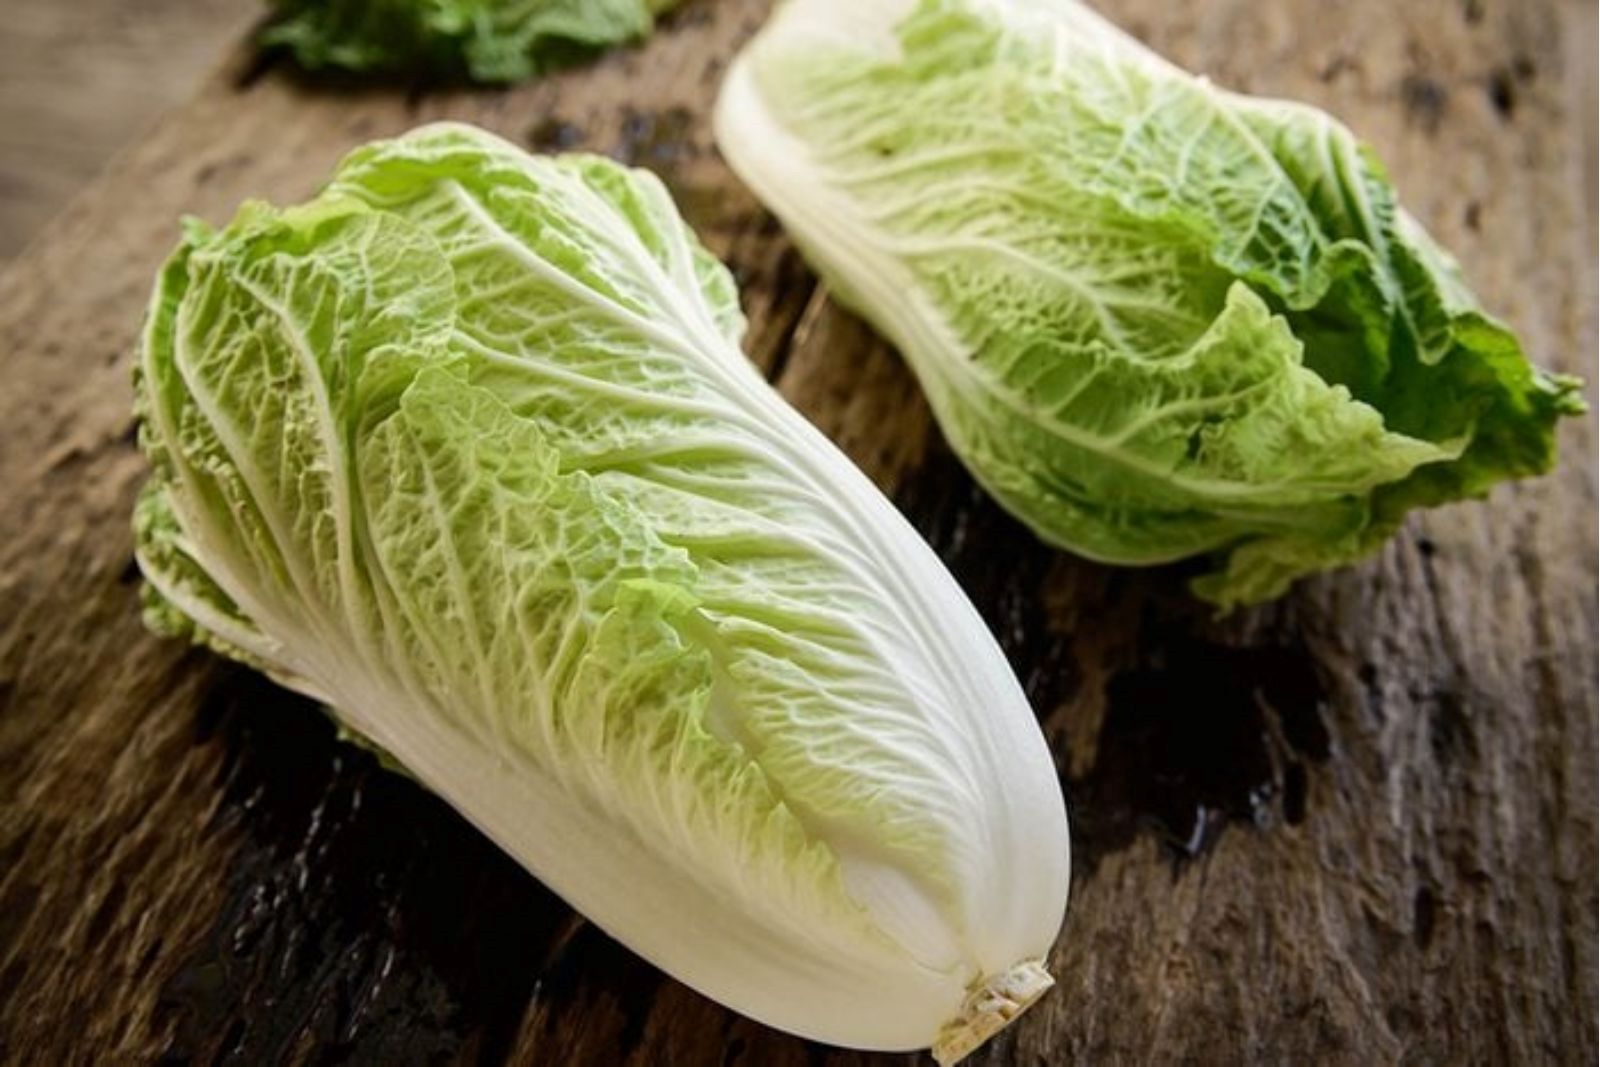
Napa cabbages, also known as Chinese cabbages, are leafy vegetables with a crisp texture and a mild, slightly sweet taste. They are commonly used in Asian cuisine and are versatile enough to be enjoyed raw or cooked. Freezing napa cabbages is a great way to preserve their freshness and extend their shelf life, allowing you to enjoy them even when they are out of season. This article provides a step-by-step guide on how to freeze napa cabbages while maintaining their desirable texture and flavor.
Here’s a guide on how to freeze napa cabbages:
- Step 1: Select fresh napa cabbages
- Step 2: Wash and trim the cabbages
- Step 3: Separate the leaves
- Step 4: Blanch the cabbage leaves
- Step 5: Cool and drain the cabbage leaves
- Step 6: Arrange the cabbage leaves for freezing
- Step 7: Flash-freeze the cabbage leaves
- Step 8: Package and seal the cabbage leaves
- Step 9: Label and date the packages
- Step 10: Store in the freezer
Step 1: Select fresh napa cabbages
When freezing napa cabbages, it’s crucial to start with fresh, high-quality produce to ensure the best results. Here’s why selecting fresh napa cabbages is important:
- Freshness: Fresh napa cabbages have a firm texture and vibrant color. They are full of flavor and offer the best taste experience when consumed. By choosing fresh cabbages, you can preserve these desirable qualities even after freezing.
- Texture: Napa cabbages with crisp leaves are ideal for freezing because they retain their texture better during the freezing and thawing process. Wilted or limp cabbages may not freeze as well and can result in a mushy texture when thawed.
- Color: Vibrant green color in napa cabbages indicates that they are at their peak freshness. The color of the cabbage leaves can fade during freezing, so starting with vibrant green cabbages ensures that they will still look appealing after thawing.
- Quality: By selecting napa cabbages free from any signs of wilting or discoloration, you can avoid using cabbages that may have already started to deteriorate. Fresh cabbages have higher nutritional value and are less likely to develop off-flavors during freezing.
Step 2: Wash and trim the cabbages
Before freezing napa cabbages, it’s important to wash and trim them properly. This step ensures that the cabbages are clean and free from any dirt, debris, or potential contaminants. Here’s why washing and trimming are necessary:
- Removal of dirt and debris: Napa cabbages are grown in soil and may have dirt, sand, or other debris clinging to their leaves. Washing them under cold running water helps to remove these impurities, ensuring that the cabbages are clean and safe to consume.
- Hygiene and food safety: Washing the cabbages minimizes the risk of bacterial contamination. While freezing can slow down bacterial growth, it doesn’t eliminate it entirely. By washing the cabbages, you reduce the chances of bacteria surviving and potentially causing foodborne illnesses.
- Tough outer leaves: Napa cabbages have outer leaves that are thicker and tougher than the inner leaves. Trimming off these outer leaves is important because they can have a chewier texture and may not freeze as well as the tender inner leaves. Removing the tough outer leaves helps ensure a more consistent texture and quality when the cabbage is thawed and used in dishes.
- Damage and blemishes: Inspecting the cabbages during the washing process allows you to identify any damaged or blemished parts. It’s important to remove these portions as they can affect the overall quality of the cabbage and potentially introduce spoilage organisms. Trimming off damaged or blemished areas helps to preserve the freshness and flavor of the cabbage.
Step 3: Separate the leaves
When freezing napa cabbages, it’s important to separate the leaves before proceeding with blanching and freezing. This step helps to ensure that the individual leaves remain intact and can be handled easily during the freezing process. Here’s why separating the leaves is necessary:
- Even blanching: Blanching is a crucial step in the freezing process as it helps to preserve the color, texture, and nutrients of the cabbage. By separating the leaves, you create an even surface area for blanching. This ensures that each leaf is exposed to the boiling water evenly, resulting in consistent blanching and uniform freezing.
- Faster blanching: Separating the leaves allows for quicker blanching. When the leaves are tightly packed together, it takes longer for the boiling water to penetrate and blanch them thoroughly. By separating the leaves, you promote efficient blanching, saving time during the overall freezing process.
- Ease of handling: Separated cabbage leaves are much easier to handle during blanching and freezing. They can be individually dipped into the boiling water and removed without disturbing the rest. This makes the process more convenient and helps to maintain the integrity of the leaves.
- Even freezing and portioning: Separated cabbage leaves freeze more uniformly compared to a tightly packed cabbage head. This is important when it comes to thawing and using the cabbage later on, as it allows for easier portioning. You can easily take out the desired amount of leaves without having to thaw the entire head of cabbage.
Step 4: Blanch the cabbage leaves
Blanching is a crucial step in the process of freezing napa cabbage leaves. It involves briefly immersing the leaves in boiling water before freezing them. Here’s why blanching is important and how to do it properly:
- Color and texture preservation: Blanching helps retain the vibrant green color and crisp texture of the napa cabbage leaves. The brief exposure to boiling water helps to deactivate enzymes that can cause discoloration and texture deterioration during freezing. By blanching the leaves, you ensure that they maintain their appealing appearance and texture even after being frozen and thawed.
- Nutrient retention: Blanching also helps preserve the nutritional value of the cabbage leaves. Heat-sensitive vitamins and minerals can be lost during the freezing process, but blanching minimizes nutrient loss by inactivating enzymes that degrade them. It helps to lock in the valuable nutrients present in the leaves, making them more nutritious when consumed later.
- Enzyme inactivation: Napa cabbage contains enzymes that are responsible for various biochemical reactions, including those that lead to spoilage and flavor changes. Blanching at high temperatures deactivates these enzymes, preventing the loss of flavor and the breakdown of the cabbage’s cellular structure during freezing.
The blanching process:
- Bring a large pot of water to a rolling boil. The pot should be large enough to accommodate the cabbage leaves comfortably.
- Carefully add the separated cabbage leaves to the boiling water. Submerge them fully and make sure they are not overcrowded. You may need to blanch the leaves in batches if you have a large quantity.
- Blanch the cabbage leaves for about 1 to 2 minutes. The exact timing may vary slightly depending on the size and thickness of the leaves. Keep a close eye on them to avoid overcooking.
Can I freeze Napa cabbage without blanching?
While blanching is the preferred method for freezing Napa cabbage, you can skip the blanching step if you plan to use the cabbage solely for cooked dishes like soups or stir-fries. However, be aware that freezing without blanching may result in a slightly different texture and color compared to blanched and frozen Napa cabbage.
Step 5: Cool and drain the cabbage leaves
After blanching the napa cabbage leaves, it’s important to cool them down and remove excess moisture before freezing. This step helps to preserve the texture and quality of the leaves during freezing. Here’s why cooling and draining the cabbage leaves is necessary:
- Halting the cooking process: By transferring the blanched cabbage leaves to a bowl of ice water, you rapidly cool them down. This helps to halt the cooking process and prevent them from becoming overcooked or losing their desired texture. Cooling the leaves quickly also helps to preserve their vibrant green color.
- Preserving texture: Cooling the cabbage leaves in ice water helps to retain their crispness and crunchiness. The sudden change in temperature helps to set the structure of the leaves, maintaining their desirable texture when they are later thawed and used in recipes.
- Removing excess moisture: Drainage is crucial to remove excess moisture from the cabbage leaves. Excess moisture can lead to the formation of ice crystals during freezing, which can negatively impact the texture and quality of the leaves. By draining the leaves thoroughly, you minimize the risk of freezer burn and maintain the integrity of the leaves.
- Preventing clumping: Draining the cabbage leaves also helps to prevent them from sticking together during freezing. Individual leaves are easier to handle and separate when they are frozen separately. This allows for better portioning and convenience when using the frozen leaves later on.
The cooling and draining process:
- Using a slotted spoon or tongs, transfer the blanched cabbage leaves from the boiling water to a bowl filled with ice water. Make sure all the leaves are submerged.
- Allow the cabbage leaves to sit in the ice water for a few minutes, or until they have cooled down completely. This helps to set their color and texture.
- Once the leaves are cooled, remove them from the ice water and place them on a clean kitchen towel or paper towels.
- Gently pat the leaves with the towel or paper towels to remove excess moisture. Ensure that the leaves are thoroughly drained before proceeding with the next steps of the freezing process.
Step 6: Arrange the cabbage leaves for freezing
When freezing napa cabbage leaves, proper arrangement is essential to ensure that they freeze evenly and remain separate. This step involves laying the drained cabbage leaves in a single layer on a baking sheet or tray lined with parchment paper.
The arrangement process:
- Ensure that the drained cabbage leaves are not overlapping or sticking together.
- Line a baking sheet or tray with parchment paper to prevent the leaves from sticking to the surface.
- Lay the cabbage leaves in a single layer on the parchment paper, making sure they are evenly spaced and not touching.
- If you have a large quantity of leaves, you can use multiple baking sheets or trays to accommodate them all.
Step 7: Flash-freeze the cabbage leaves
Flash-freezing is a crucial step when freezing napa cabbage leaves individually. It involves placing the baking sheet or tray with the arranged leaves in the freezer and allowing them to freeze until firm. Flash-freezing the cabbage leaves individually offers several benefits. Here’s why this step is important:
- Preventing clumping: Flash-freezing the cabbage leaves individually helps prevent them from clumping together during freezing. When leaves are frozen individually, they maintain their separate form and are easier to handle and separate when needed. This ensures that you can remove only the desired amount of leaves without thawing the entire batch.
- Maintaining quality: Flash-freezing helps to preserve the quality of the cabbage leaves. By freezing them quickly, you minimize the formation of large ice crystals, which can degrade the texture and quality of the leaves. Flash-freezing preserves the freshness, color, and texture of the individual leaves, resulting in better quality when they are thawed and used later.
- Faster freezing: Flash-freezing allows for faster freezing of the cabbage leaves. When the leaves are spread out in a single layer, cold air can circulate around them more efficiently, accelerating the freezing process. Quick freezing helps to lock in the flavors, nutrients, and overall quality of the cabbage leaves.
- Easy portioning: Flash-frozen cabbage leaves are individually frozen and separate from one another. This makes it easier to take out only the desired amount of leaves when needed. You can remove a few leaves at a time without thawing the entire batch, providing convenience and reducing waste.
The flash-freezing process:
- Place the baking sheet or tray with the arranged cabbage leaves in the freezer. Ensure that the leaves are spread out in a single layer and not touching each other.
- Allow the cabbage leaves to freeze for a few hours or until they are firm to the touch. The exact freezing time may vary depending on your freezer’s temperature and the thickness of the leaves.
- Once the cabbage leaves are completely frozen and firm, they can be transferred to airtight freezer-safe containers or freezer bags for long-term storage.
Step 8: Package and seal the cabbage leaves
After flash-freezing the cabbage leaves, it’s essential to properly package and seal them to maintain their quality during long-term storage in the freezer. Here’s why packaging and sealing are important and how to do it effectively:
- Preserving quality: Packaging the cabbage leaves in airtight containers or freezer bags helps to protect them from freezer burn. Freezer burn occurs when air comes into contact with the frozen food, causing moisture loss and the development of undesirable textures and flavors. By removing as much air as possible and sealing the packaging tightly, you minimize the risk of freezer burn and maintain the quality of the cabbage leaves.
- Preventing odor transfer: Airtight packaging also prevents the transfer of odors from the cabbage leaves to other foods in the freezer. This is especially important if you have other items stored in close proximity. Proper packaging ensures that the cabbage leaves retain their natural flavors and do not impart any unwanted odors to other frozen items.
- Organized storage: Packaging the cabbage leaves in containers or bags allows for better organization and efficient use of freezer space. You can stack the packages neatly, making it easier to locate and access the desired amount of leaves when needed. Properly sealed packaging also prevents the leaves from absorbing any off-flavors or odors from other items in the freezer.
The packaging and sealing process:
- Transfer the flash-frozen cabbage leaves to airtight freezer bags or containers. Use containers or bags specifically designed for freezer storage.
- Remove as much air as possible from the packaging. One way to do this is by gently pressing on the bag or container to release excess air before sealing. Alternatively, you can use a vacuum sealer if available.
- Seal the bags or containers tightly to ensure a proper airtight seal. Double-check that there are no openings or gaps that could allow air to enter.
- If using freezer bags, consider double-bagging for added protection against freezer burn.
Step 9: Label and date the packages
Labeling and dating the packages of frozen Napa cabbage leaves is an important step to maintain organization and keep track of their storage time. By using a permanent marker to label each package with the contents (Napa cabbage leaves) and the date of freezing, you can easily identify and prioritize the usage of the oldest leaves. Here’s why labeling and dating are beneficial:
- Storage tracking: Labeling the packages allows you to keep track of the contents and distinguish them from other items in the freezer. This is particularly useful if you have multiple types of frozen foods or ingredients stored. By clearly indicating that the package contains Napa cabbage leaves, you can quickly locate and retrieve them when needed.
- Rotation and freshness: Adding the date of freezing on the packages helps you implement a first-in, first-out (FIFO) system. By using the oldest packages first, you ensure that none of the cabbage leaves go unused for an extended period, helping to minimize food waste. Additionally, knowing the freezing date enables you to monitor the freshness of the leaves and use them within a reasonable time frame for the best flavor and quality.
- Efficient meal planning: With labeled and dated packages, you can easily incorporate the frozen Napa cabbage leaves into your meal planning. By knowing how long they have been frozen, you can factor them into your recipes and ensure they are used before their quality starts to decline. This way, you can optimize your meal preparation and make the most of the frozen cabbage leaves.
- Inventory management: Labeling and dating the packages of Napa cabbage leaves also assist in inventory management. You can keep a record or inventory list of the frozen items in your freezer, including the quantity and date of freezing. This allows you to maintain an organized freezer inventory, helping you plan your meals and restock when needed.
The labeling and dating process:
- Once the packages of frozen Napa cabbage leaves are sealed and ready, use a permanent marker to write “Napa cabbage leaves” on each package.
- Add the date of freezing, including the month, day, and year, to indicate when the leaves were initially frozen.
- Ensure that the labeling is clear and legible, making it easy to read and identify later on.
- Consider placing the labels in a visible location on the package for quick reference.
Step 10: Store in the freezer
After properly labeling and dating the packages of frozen Napa cabbage leaves, it’s time to store them in the freezer. The way you store them can affect their overall quality and longevity. Here’s how to store them effectively:
- Temperature consistency: Choose a section in your freezer where the temperature remains consistent. Fluctuating temperatures can compromise the quality of the frozen Napa cabbage leaves. Avoid storing them near the freezer door, as this area is more susceptible to temperature fluctuations due to frequent opening and closing of the door. Instead, opt for a spot in the interior of the freezer where the temperature remains more stable.
- Freezer organization: Proper freezer organization is essential for easy access and minimizing potential damage to the frozen Napa cabbage leaves. Ensure that the packages are placed in an upright position and are not stacked too tightly. This allows for adequate airflow around the packages, promoting even freezing and maintaining their quality.
- Protection from odors: Store the packages of frozen Napa cabbage leaves away from strong-smelling foods or items in the freezer. This helps prevent the absorption of unwanted odors and flavors, ensuring that the cabbage leaves maintain their natural taste and aroma.
Tips for effective storage:
- Place the labeled and sealed packages of frozen Napa cabbage leaves in a designated section of your freezer.
- Choose a location away from the freezer door to minimize temperature fluctuations.
- Keep the packages in an upright position, allowing for proper airflow and even freezing.
- Avoid stacking the packages too tightly to maintain their shape and prevent crushing.
- Store the cabbage leaves separately from strong-smelling foods to prevent odor transfer.
- Regularly organize and rotate your freezer inventory, using the oldest packages first.
How long can I store frozen Napa cabbage leaves?
Properly stored frozen Napa cabbage leaves can last for up to 10 to 12 months in the freezer. However, for the best flavor and texture, it is advisable to consume them within 6 to 8 months.
Other related questions
How do I defrost napa cabbages?
To defrost Napa cabbages, it is best to follow these steps:
- Transfer the frozen Napa cabbages from the freezer to the refrigerator. Place them in a container or on a plate to catch any moisture that may accumulate during thawing.
- Allow the Napa cabbages to thaw slowly in the refrigerator. This method ensures a gradual thawing process, preserving the quality and texture of the leaves. Thawing times may vary, but it generally takes around 24 to 48 hours for the cabbages to fully defrost.
- Once fully thawed, carefully remove the Napa cabbages from the refrigerator. Gently pat them dry with paper towels to remove any excess moisture before using them in your desired recipes.
It is important to note that thawed Napa cabbages may be more suitable for cooked dishes rather than raw applications, as freezing can affect the texture. Always inspect the leaves for any signs of spoilage or off-flavors before consuming.
Can I refreeze napa cabbages?
It is generally not recommended to refreeze Napa cabbages once they have been thawed. The process of thawing and refreezing can negatively impact the quality, texture, and taste of the cabbage leaves. It is best to use the thawed Napa cabbage within a reasonable timeframe to ensure optimal freshness and flavor.
How do I know if the napa cabbages have gone bad after being frozen?
After being frozen, if Napa cabbages exhibit signs of freezer burn, such as dry, discolored, or shriveled leaves, it indicates a loss in quality. Additionally, if there are any foul or off-putting odors emanating from the cabbage, it could be a sign of spoilage. Lastly, a significant change in texture, such as mushiness or excessive ice crystals, suggests that the cabbage may have gone bad and is no longer suitable for consumption.
Can I freeze Napa cabbage for kimchi?
If you intend to use Napa cabbage for making kimchi, it is recommended to ferment the cabbage instead of freezing it. Fermented Napa cabbage retains its crunch and develops a tangy flavor. Freezing Napa cabbage alters its texture and may not produce the desired results for traditional kimchi recipes.
Can I freeze Napa cabbage rolls or stuffed cabbage?
Yes, you can freeze Napa cabbage rolls or stuffed cabbage. Prepare the rolls or stuffed cabbage according to your recipe, then freeze them before cooking. When ready to consume, thaw the rolls in the refrigerator and follow the recipe’s cooking instructions. Keep in mind that freezing and thawing may affect the texture of the cabbage, so it’s advisable to slightly undercook the cabbage leaves before freezing for the best results.
Can I freeze Napa cabbage that has been seasoned or marinated?
It is generally better to freeze plain Napa cabbage without seasonings or marinades. Seasonings and marinades can affect the texture and flavor of the cabbage when frozen and thawed. If you want to add seasonings or marinades to the cabbage, it’s best to do so after thawing, just before using it in your recipes.
Can I freeze Napa cabbage that has been cooked in a dish?
Yes, you can freeze Napa cabbage that has been cooked as part of a dish. Make sure the dish has cooled down to room temperature before transferring it to freezer-safe containers or bags. When reheating the dish, keep in mind that the texture of the cabbage may be softer compared to fresh cabbage.

