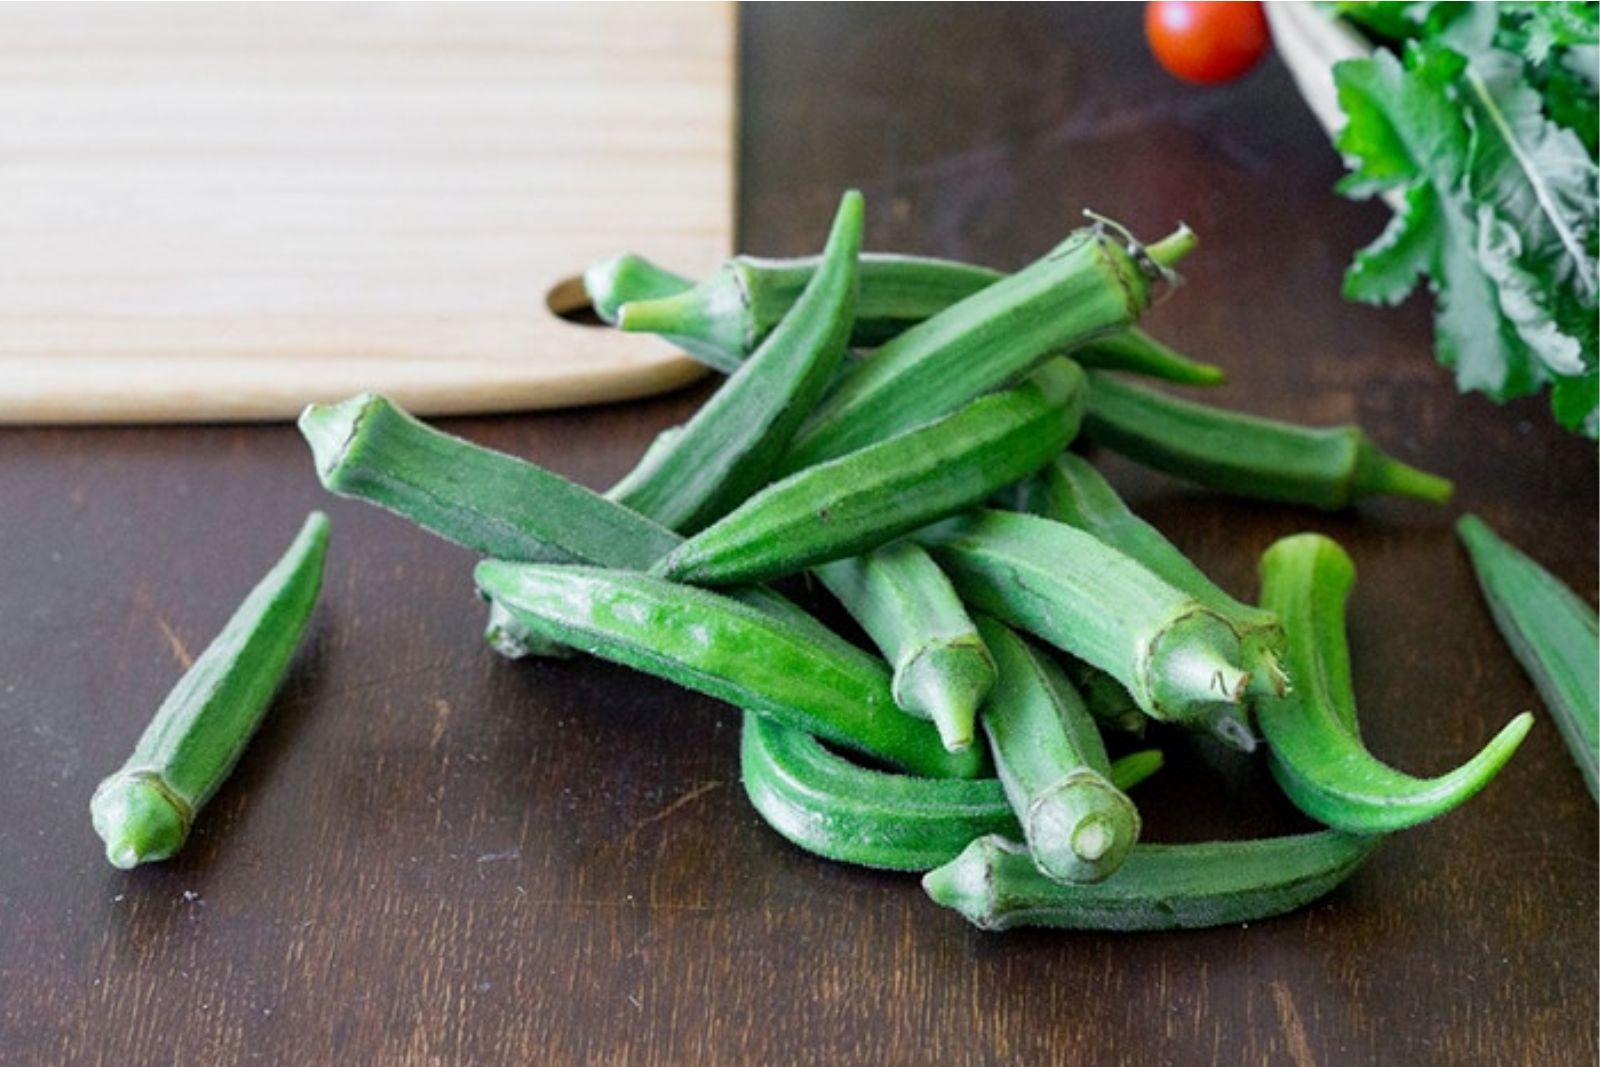
Okra, with its distinctive shape and unique texture, is a beloved vegetable in many culinary traditions. Whether you prefer it fried, sautéed, or added to gumbo, okra’s versatility in the kitchen is hard to beat. But what do you do when you have an abundance of fresh okra, and you want to enjoy it during the off-season? Freezing okra is the answer! With a few simple steps, you can preserve the flavor and texture of this delightful vegetable. In this article, we’ll guide you through the process of freezing okra to ensure it stays at its best for future culinary adventures.
Here’s a step-by-step guide on how to freeze okra:
Step 1: Select Fresh Okra
Selecting fresh okra is the crucial first step in ensuring the best results when freezing this versatile vegetable. The quality of the okra you choose will greatly influence the taste and texture of the final product. Here’s why selecting fresh okra matters:
- Firmness: Fresh okra should feel firm to the touch. When you gently squeeze it, it should not yield too easily. This firmness is a sign that the okra is at its peak ripeness and will freeze well.
- Vibrant Green Color: Look for okra pods that are a vibrant, bright green. This color indicates that the okra is young and has not started to mature or develop tough fibers. Green okra is also a sign of freshness and optimal flavor.
- No Signs of Mold or Decay: Inspect each pod carefully for any signs of mold, soft spots, or decay. Moldy or decaying okra can release unpleasant flavors and spoil the entire batch when frozen. It’s essential to discard any pods that show these signs.
- Seasonal Timing: The best time to freeze okra is when it’s in season, typically during the summer and early fall. This is when okra is most abundant and at its freshest. Freezing okra during its peak season ensures you capture its natural flavors and nutrients.
Step 2: Wash and Trim the Pods
Now that you’ve carefully chosen your fresh okra, it’s time to prepare it for freezing. This step involves washing and trimming the pods, ensuring they are clean and ready for preservation. Here’s how to do it:
- Wash Thoroughly: Start by placing the fresh okra under cold, running water. Use your hands to gently scrub the pods, making sure to remove any dirt, residue, or surface impurities. This cleansing step is crucial to eliminate any potential contaminants that could affect the quality of the frozen okra.
- Trim the Stems and Tips: After washing, it’s time to address the stems and tips of the okra pods. Take a sharp knife and carefully trim off the stem ends and any woody tips. Trimming the okra not only enhances its appearance but also helps ensure even cooking and a pleasing texture when you use it in future dishes.
- Choose Your Cutting Style: At this stage, you have the option to decide how you want to freeze your okra. You can leave the pods whole if you prefer larger pieces for specific recipes, such as stuffed okra. Alternatively, you can slice the okra into smaller rounds or even cut it into bite-sized pieces. Your choice depends on your intended use and personal preference.
Step 3: Blanch the Okra
Blanching is a vital step in the process of freezing okra, and it serves several essential purposes in preserving the vegetable’s color, texture, and flavor. Here’s why blanching is crucial and how to do it effectively:
- Preserving Color: Okra’s vibrant green color is not only visually appealing but also indicative of its freshness. However, this color can quickly fade during freezing due to enzymatic activity and natural degradation processes. Blanching halts these enzymatic reactions, preserving the okra’s green hue and overall visual appeal.
- Maintaining Texture: Blanching helps maintain the okra’s desirable texture. It softens the cell walls slightly, which can be beneficial when cooking later on. Without blanching, okra may become mushy or overly tough during freezing and cooking.
- Flavor Retention: Okra’s unique flavor can be affected by enzymes that break down its natural compounds. Blanching inhibits these enzymes, ensuring that the vegetable retains its characteristic taste and doesn’t develop off-flavors during freezing.
How to Blanch Okra:
- Boil Water: Begin by bringing a large pot of water to a rolling boil. The pot should be big enough to accommodate the amount of okra you’re blanching comfortably.
- Prepare Ice Water: While the water is heating up, fill a large bowl with ice water. This will serve as an ice bath to cool the okra quickly after blanching.
- Blanch the Okra: Carefully drop the trimmed okra pods into the boiling water. Allow them to blanch for approximately 3 minutes. It’s essential to keep a close eye on the time to prevent over-blanching, which can lead to loss of quality.
- Ice Bath: Using a slotted spoon or tongs, quickly transfer the blanched okra from the boiling water to the ice water bath. This rapid cooling process stops the cooking immediately and locks in the color, texture, and flavor.
- Drain and Dry: After the okra has cooled in the ice water for a few minutes, remove it from the bath and drain it thoroughly. Excess moisture on the okra can lead to the formation of ice crystals during freezing, which can affect its quality.
Can I freeze okra without blanching it first?
Freezing okra without blanching it first is possible but may lead to changes in texture and flavor. Blanching helps preserve the okra’s quality by halting enzymatic activity and destroying harmful microorganisms. While unblanched okra can be frozen, it’s recommended to blanch it briefly before freezing for optimal results in terms of taste and texture.
Step 4: Drain and Dry the Okra
Once you’ve successfully blanched your okra and cooled it in an ice water bath, the next crucial step is to ensure that it is thoroughly drained and dried. This seemingly simple process plays a significant role in preserving the quality of your frozen okra. Here’s why it’s so important and how to do it effectively:
- Preventing Ice Crystal Formation: Moisture is the enemy when it comes to freezing vegetables like okra. Excess moisture can lead to the formation of ice crystals during freezing, which, in turn, can negatively impact the texture and flavor of the vegetable. When water freezes, it expands, and the ice crystals can rupture cell walls, resulting in a mushy or less desirable texture upon thawing.
- Ensuring Even Freezing: Drying the okra thoroughly also helps ensure that each piece freezes individually. If there’s excess moisture on the pods, they can stick together in clumps in the freezer, making it challenging to separate them when you need only a portion for your recipes.
- Preventing Freezer Burn: Moisture on the surface of the okra can contribute to freezer burn, which occurs when water molecules on the food’s surface evaporate and re-freeze. Freezer burn can lead to a dry, off-flavored texture and negatively impact the overall quality of the okra.
How to Drain and Dry Okra Effectively:
- Remove from Ice Water: After the okra has spent a few minutes in the ice water bath, carefully remove it using tongs or a slotted spoon. Ensure you give it a gentle shake to remove any excess water.
- Drain on a Rack or Colander: Place the blanched okra on a rack or in a colander to allow any remaining water to drip off. Elevating the okra slightly helps ensure that it drains well and doesn’t sit in pooled water.
- Pat Dry with Towels: Once most of the excess water has drained, use clean kitchen towels or paper towels to gently pat the okra pods dry. Be careful not to apply too much pressure or handle the okra roughly to avoid damaging its delicate texture.
- Allow Air Drying: To ensure thorough drying, you can also leave the okra on a clean kitchen towel or paper towels for a few extra minutes in a cool, dry place. This allows any remaining moisture to evaporate.
Step 5: Arrange the Okra for Freezing
After washing, trimming, blanching, and thoroughly drying your okra, the next important step is to prepare them for freezing. Arranging the okra on a baking sheet or tray in a single layer might seem like a small detail, but it has significant benefits for the overall quality of your frozen okra. Here’s why this step is essential and how to do it correctly:
- Individual Freezing: Placing the okra in a single layer on a baking sheet or tray ensures that each pod freezes individually. When vegetables freeze individually, they are less likely to stick together, which makes it easier to portion out what you need for your recipes without thawing the entire batch.
- Preventing Clumping: If the okra pods are touching or crowded together when placed in the freezer bags or containers, they can clump together as they freeze. This can lead to difficulties when you want to use just a portion of the frozen okra, as they may come out in a solid block. By arranging them in a single layer initially, you minimize the risk of clumping.
- Faster Freezing: Okra arranged in a single layer freezes more quickly and efficiently. Rapid freezing helps preserve the okra’s texture and prevents the formation of large ice crystals, which can affect the quality of the vegetable.
How to Arrange Okra for Freezing:
- Use a Baking Sheet or Tray: Select a clean baking sheet or tray that will fit in your freezer. You can line it with parchment paper or a silicone baking mat to prevent the okra from sticking to the surface.
- Single Layer Placement: Lay the blanched and dried okra pods on the baking sheet or tray in a single layer. Ensure they are not touching or overlapping. If you have a large quantity of okra, you may need to use multiple trays or work in batches.
- Allow Space: Leave some space between each okra pod to ensure they freeze individually. This spacing prevents them from sticking together during the initial freezing phase.
- Pre-Freeze: Place the baking sheet or tray with the okra in your freezer. Allow them to pre-freeze for a few hours until they are solid. This step, known as flash-freezing, prepares the okra for packaging without clumping.
Step 6: Flash-Freeze the Okra
Flash-freezing is a critical step in the process of freezing okra and other fruits and vegetables. It’s a method that involves quickly freezing the individual pieces of okra before storing them in freezer bags or containers. This process is essential for several reasons, and here’s why it’s crucial and how to execute it effectively:
- Preserving Individual Pieces: Flash-freezing ensures that each piece of okra freezes separately. This prevents the pods from sticking together and forming a solid mass when you store them in freezer bags or containers. Individual freezing makes it easy to take out just the amount you need for your recipes, preserving the quality of the remaining okra.
- Maintaining Texture: Rapid freezing at lower temperatures helps maintain the texture of the okra. When water molecules freeze slowly, they can form large ice crystals that may rupture cell walls and lead to a mushy texture when thawed. Flash-freezing minimizes ice crystal formation, preserving the okra’s crispness and taste.
- Ensuring Faster Freezing: Flash-freezing is a quick process that ensures the okra freezes rapidly. This is crucial for preserving the freshness and nutritional content of the vegetable. Slow freezing can result in the deterioration of flavors and nutrients.
How to Flash-Freeze Okra:
- Prepare the Baking Sheet or Tray: Ensure your baking sheet or tray with the arranged okra is ready for the freezer. Make sure it’s level to prevent the okra from sliding or shifting during freezing.
- Place in the Freezer: Carefully place the baking sheet or tray with the okra into the freezer. Position it in a way that allows for good airflow around the okra to facilitate even freezing.
- Allow Several Hours for Freezing: Leave the okra in the freezer for a few hours or until they are completely frozen solid. The exact time may vary depending on your freezer’s temperature and the quantity of okra, but typically it takes a few hours.
- Check for Solidity: To confirm that the okra is flash-frozen, you can gently touch one piece. It should feel hard and frozen throughout.
- Transfer to Freezer Bags or Containers: Once the okra is solidly frozen, quickly transfer them to airtight freezer bags or containers for long-term storage. Be sure to remove as much air as possible before sealing to prevent freezer burn.
Step 7: Package and Seal the Okra
Now that your okra is flash-frozen and ready for long-term storage, it’s time to package and seal it properly to preserve its quality and protect it from freezer burn. Proper packaging is crucial to ensure that your okra remains fresh and flavorful until you’re ready to use it. Here’s why this step is essential and how to do it effectively:
- Preventing Freezer Burn: Freezer burn occurs when food is exposed to air inside the freezer. It leads to the evaporation of moisture from the food’s surface, resulting in dry, discolored, and off-flavored patches. To prevent freezer burn, it’s crucial to package your okra in a way that minimizes air exposure.
- Maintaining Freshness: Airtight packaging not only prevents freezer burn but also helps maintain the freshness of your okra. It keeps out any unwanted odors or flavors from the freezer, ensuring that your okra tastes as delicious as the day you froze it.
- Preserving Texture: Properly sealed containers or bags also help preserve the texture of the okra. It prevents moisture loss, which can lead to the formation of ice crystals and a mushy texture upon thawing.
How to Package and Seal Okra Effectively:
- Choose Airtight Containers or Bags: Select high-quality freezer bags or containers specifically designed for long-term food storage. These should be airtight and capable of withstanding freezing temperatures.
- Portion Control: Consider portioning your okra before packaging if you plan to use it in specific quantities. This makes it easier to take out just what you need for your recipes without thawing the entire batch.
- Remove Excess Air: When using freezer bags, remove as much air as possible before sealing. You can do this by gently pressing on the bag to push out the air while sealing it. For containers, choose a size that fits the quantity of okra closely to minimize air space.
- Label and Date: Don’t forget to label the bags or containers with the current date and a description of the contents. This will help you keep track of the freezing date and easily identify the okra in your freezer.
- Seal Securely: Ensure that your freezer bags or containers are securely sealed. Double-check the seals to confirm that they are airtight. For added security, you can use a vacuum sealer if you have one available.
Step 8: Label and Date the Packages
Labeling and dating your frozen okra packages may seem like a small detail, but it’s a crucial step in the freezing process. Proper labeling ensures organization and helps you keep track of the contents in your freezer. Here’s why this step is important and how it can benefit you:
- Tracking Freezing Date: Knowing when you froze the okra is essential for managing your freezer’s contents efficiently. Different foods have varying shelf lives in the freezer, and labeling with the freezing date allows you to prioritize items for use before they become less optimal in quality.
- Easy Identification: A clear label helps you quickly identify the contents of each package. When you open your freezer, you won’t have to guess what’s inside each bag or container, saving you time and effort.
- Preventing Food Waste: By dating your frozen okra packages, you can plan your meals better. You’ll be more aware of how long the okra has been stored, reducing the likelihood of accidentally letting it go to waste.
- Rotation: Labeling enables you to practice FIFO (First In, First Out) inventory management. You can use the oldest frozen okra first, ensuring that none of it remains in the freezer for extended periods, which could affect its quality.
How to Label and Date Packages Effectively:
- Use Waterproof Markers: Use waterproof markers or freezer labels to write on your freezer bags or containers. Regular ink may smudge or become illegible due to condensation in the freezer.
- Include Key Information: Write down the freezing date and a brief description of the contents. For example, you can write “Okra – 09/06/2023” to indicate that the package contains okra frozen on September 6, 2023.
- Be Clear and Legible: Ensure that your handwriting is clear and easy to read. This will help avoid confusion when you’re searching for specific items in your freezer.
- Place Labels on the Front: Stick labels on the front of your packages where they are easily visible. This allows you to quickly identify the contents without having to move or open the packages.
- Update Labels When Needed: If you remove some okra from a package but leave the rest in the freezer, update the label with the new quantity and date if necessary.
Step 9: Store in the Freezer
After completing all the previous steps to wash, trim, blanch, dry, arrange, flash-freeze, package, label, and date your okra, the final and most important step is to store it properly in the freezer. This step ensures that your frozen okra maintains its quality and stays fresh for an extended period. Here’s why this step is crucial and how to do it effectively:
- Preservation of Quality: Storing your okra in the freezer at the appropriate temperature maintains its quality by keeping it frozen. This prevents the growth of bacteria and slows down enzymatic reactions that can affect flavor, texture, and color.
- Minimizing Freezer Burn: Placing your okra in the coldest part of the freezer and sealing it in airtight bags or containers helps prevent freezer burn. Freezer burn occurs when air comes into contact with the food, causing moisture loss and affecting taste and texture.
- Organization: Proper storage allows you to maintain an organized freezer. By placing your okra in a designated spot and arranging it by freezing date, you can easily find what you need and reduce the risk of items getting lost or forgotten.
- Longevity: If stored correctly, frozen okra can remain of high quality for up to 12 months. This extended storage period allows you to enjoy the vegetable well beyond its peak season, providing flexibility in your meal planning.
How to Store Okra in the Freezer Effectively:
- Choose the Coldest Part: Identify the coldest part of your freezer, usually near the back or bottom. This is where your okra should be stored to maintain the lowest possible temperature.
- Stack Carefully: If you have multiple bags or containers of okra, stack them neatly to maximize the use of space. Ensure that they are stable and won’t topple over and potentially damage other items in the freezer.
- Keep Like Items Together: Group your frozen okra with similar items or ingredients. This makes it easier to find what you need when you’re planning your meals.
- Regularly Check and Rotate: Periodically check your freezer to ensure that the oldest items are used first. Practice FIFO (First In, First Out) to avoid letting your frozen okra sit in the freezer for too long.
Other related questions
How do I defrost okra?
To defrost okra, place it in the refrigerator for several hours or overnight. Alternatively, you can use the defrost function on your microwave, but be cautious to avoid cooking it. Once thawed, pat it dry to remove excess moisture before using in your recipes.
Can I use frozen okra directly in recipes, or should I thaw it first?
You can use frozen okra directly in recipes that involve cooking, such as gumbo, stews, or stir-fries, without thawing it first. The cooking process will naturally thaw the okra as it heats up. However, for recipes that require a crisp texture, like fried okra, it’s best to thaw the frozen okra and pat it dry before frying to achieve the desired crunchiness.
Can I refreeze okra?
Refreezing okra is generally not recommended due to potential quality and safety concerns. Okra may suffer from textural changes and flavor deterioration when thawed and refrozen. Moreover, there is a risk of bacterial growth if okra is left at unsafe temperatures during the thawing and refreezing process, which could pose food safety issues. It’s advisable to thaw only the amount of okra you plan to use and avoid refreezing for best results.
How do I know if the okra has gone bad after being frozen?
Determining if frozen okra has gone bad involves checking for signs of freezer burn, off-odors, and changes in texture. If the okra displays visible ice crystals, freezer burn patches, or a dry, discolored appearance, it may be past its prime. Additionally, a sour or off-putting odor could indicate spoilage. Lastly, any significant changes in texture, such as mushiness or extreme sogginess, suggest that the okra has degraded in quality and may not be suitable for consumption.
Is it safe to reuse the blanching water for other purposes?
Reusing blanching water for other purposes is not recommended for safety reasons. The blanching process involves heating the water to kill bacteria and enzymes present on the vegetables. Reusing this water for cooking or other purposes may reintroduce harmful microorganisms and contaminants, posing food safety risks. It’s advisable to discard the blanching water and use fresh, clean water for cooking or other culinary needs.
What are some popular recipes to make with frozen okra?
Popular recipes using frozen okra include Gumbo, a Creole stew; okra and tomato casserole; Indian Bhindi Masala curry; fried okra; and various vegetable stir-fries, soups, and stews. Frozen okra’s versatility allows it to be used in diverse culinary creations, from Southern comfort food to international dishes. Its characteristic texture and flavor make it a valuable addition to a wide range of recipes.
Can I use frozen okra in smoothies or juicing?
Using frozen okra in smoothies or juicing is possible, but it may not provide the desired texture or flavor compared to using fresh okra. Frozen okra can be somewhat mushy when thawed, which can affect the consistency of your smoothie or juice. Fresh okra is typically preferred for these purposes to achieve a smoother and more vibrant result in your beverages.

