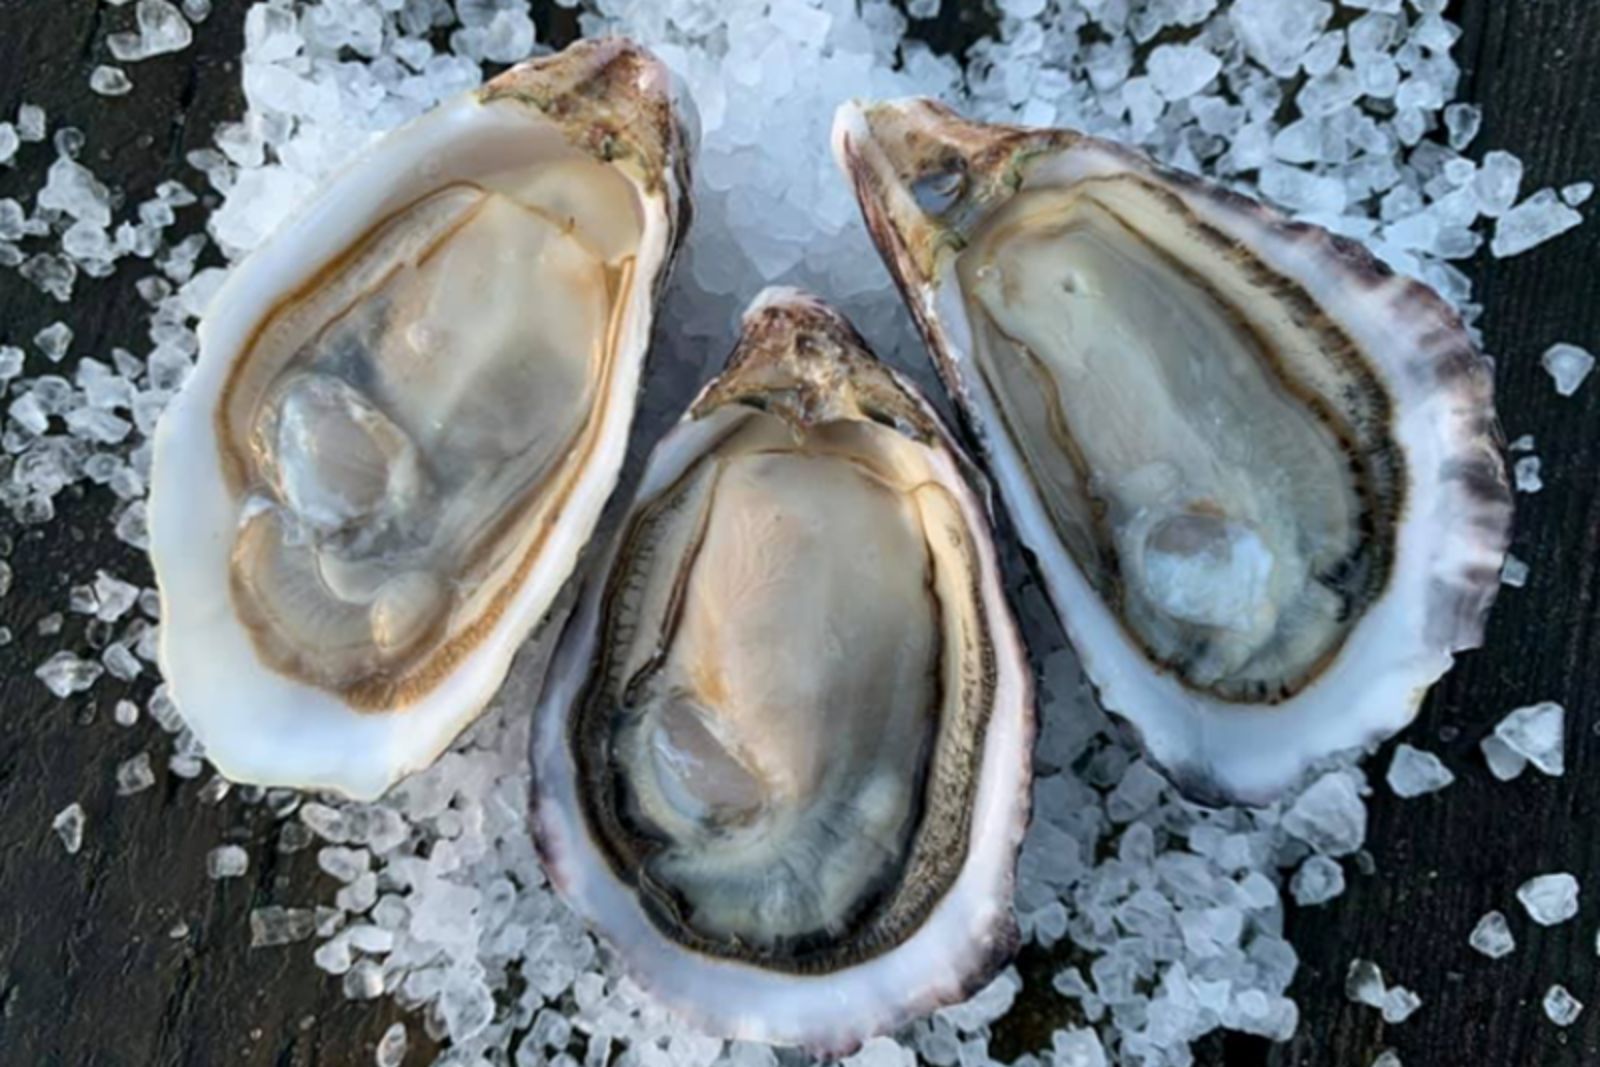
Oysters are a delicacy known for their unique briny flavor and smooth texture. Whether you’ve acquired a fresh batch or want to extend their shelf life, knowing how to properly freeze oysters can be beneficial. Freezing oysters not only allows you to enjoy them at your convenience but also helps preserve their taste and quality. In this article, we will guide you through the process of freezing oysters, ensuring that they retain their freshness and are ready to be enjoyed whenever you desire.
Here is a step-by-step guide on how to freeze oysters:
Step 1: Shuck the oysters
To freeze oysters, the first step is to shuck them, which means removing them from their shells. Shucking oysters requires a bit of skill and the right tools, such as an oyster knife or a similar tool designed specifically for this purpose.
When shucking oysters, it’s important to handle them carefully to avoid any injuries and to preserve the integrity of the oyster meat. Here’s how to shuck oysters properly:
- Gather your tools: Make sure you have an oyster knife or a sturdy knife with a short, strong blade. You may also want to have a kitchen towel or glove to protect your hand from accidental slips.
- Clean the oysters: Before shucking, rinse the oysters under cold water to remove any dirt or debris from their shells. This step ensures that you’re working with clean oysters.
- Hold the oyster securely: To shuck an oyster, you need to hold it firmly. Use a kitchen towel or an oyster glove to grip the oyster firmly, ensuring it doesn’t slip while you’re applying pressure.
- Locate the hinge: The hinge is the point where the two shells of the oyster are connected. It’s usually located on the narrower end of the oyster. Orient the oyster so that the hinge is facing toward you.
- Insert the knife: With the tip of the oyster knife, carefully and gently insert it into the hinge. Apply gentle pressure and wiggle the knife to loosen the shell.
- Pry open the shell: Once the knife is inserted, use a twisting motion to pry open the shell. As you do this, you should feel the shell starting to give way. Continue to apply steady and controlled pressure until the shell pops open.
- Separate the shells: Once the shell is open, slide the knife along the inside of the top shell to detach the oyster from it. Be cautious not to damage the oyster meat during this process. Lift the top shell away and discard it.
- Detach the oyster: Now, run the knife carefully underneath the oyster to detach it from the bottom shell. Ensure you’re separating the oyster meat from the shell without losing any of its juices.
- Check for shell fragments: Before proceeding, inspect the oyster meat for any shell fragments. Remove any pieces that may have fallen into the oyster during shucking. This step is crucial to avoid any unwanted crunch when consuming the oyster later.
- Repeat the process: Continue shucking the remaining oysters using the same technique. Take your time and work steadily to shuck all the oysters you intend to freeze.
Can I freeze oysters in their shells?
It is not recommended to freeze oysters in their shells. Freezing oysters in their shells can cause the shells to crack or break due to the expansion of the oyster meat as it freezes. Additionally, shucking the oysters before freezing allows for better preservation and ensures the oyster meat’s quality and flavor. Therefore, it is best to shuck the oysters and freeze them without the shells for optimal results.
Can I freeze raw oysters?
It is generally not recommended to freeze raw oysters. Freezing raw oysters can negatively impact their texture and taste, as the delicate texture of raw oysters may become mushy or lose its natural brininess upon thawing. Raw oysters are best enjoyed when they are fresh and consumed shortly after shucking. If you have raw oysters that you want to preserve, it is preferable to cook them before freezing as cooked oysters freeze better and can be safely stored for longer periods.
Should I blanch the oysters before freezing them?
It is not necessary to blanch oysters before freezing them. Blanching is a common technique used to partially cook and preserve the quality of certain foods before freezing, but it is not recommended for oysters. Oysters are best frozen in their raw state, as blanching can alter their delicate texture and natural flavors.
Step 2: Store the oysters in their liquid
After successfully shucking the oysters, it is essential to store them in their own liquid, known as oyster liquor. This step is crucial for preserving the flavor, texture, and overall quality of the oysters during the freezing process. Here’s why storing the oysters in their liquid is important:
- Preserve flavor and freshness: Oyster liquor is a natural briny liquid that surrounds the oyster meat inside the shell. It contains a combination of seawater, oyster juices, and other natural elements that contribute to the distinctive flavor of oysters. By storing the shucked oysters in their own liquor, you can retain the authentic taste of the oysters even after they have been frozen.
- Prevent dehydration: Oyster liquor helps to keep the shucked oysters moist and prevents them from drying out. Without the protective layer of oyster liquor, the oysters may lose their moisture during freezing, resulting in a loss of texture and juiciness. Storing them in their liquid helps maintain their natural moisture content.
- Maintain texture: Oyster liquor plays a crucial role in preserving the delicate texture of the oysters. It helps prevent the oyster meat from becoming tough or rubbery during freezing. The natural brine in the liquor helps maintain the ideal texture of the oysters, ensuring a pleasant eating experience once they are thawed and prepared.
To store the shucked oysters in their liquid:
- Choose a suitable container or sealable bag: Select a container or bag that is large enough to accommodate the shucked oysters and their liquor comfortably. Ensure that the container or bag is food-safe and airtight to prevent any leakage or contamination.
- Place the shucked oysters in the container or bag: Gently transfer the shucked oysters into the container or bag. Arrange them in a single layer if possible, to ensure they are evenly coated with the oyster liquor.
- Add enough oyster liquor to cover the oysters: Pour the oyster liquor into the container or bag until it completely covers the shucked oysters. The oysters should be fully submerged in the liquid to maintain their freshness and flavor.
- Seal the container or bag tightly: Securely seal the container or bag to prevent any air or moisture from entering. This will help maintain the quality of the oysters and prevent freezer burn.
Step 3: Seal the container or bag tightly
Properly sealing the container or bag that holds the shucked oysters is essential to protect them from freezer burn and maintain their quality throughout the freezing process. Freezer burn occurs when air comes into contact with the surface of the food, causing it to dehydrate and develop unpleasant textures and flavors. Follow these guidelines to seal the container or bag tightly:
Using a container:
- Choose a freezer-safe container with a secure lid. Glass or plastic containers with airtight seals are suitable for storing shucked oysters.
- Place the shucked oysters and their liquid in the container, ensuring they are fully submerged in the oyster liquor.
- Press the lid firmly onto the container, making sure it forms a tight seal. Check for any gaps or openings and adjust the lid if necessary.
- Verify that the lid is securely fastened by gently shaking or pressing down on it. If it feels loose or there is air movement, reseal the container.
Using a sealable bag:
- Choose a high-quality, thick plastic bag specifically designed for freezer storage. Freezer bags are more durable and less prone to punctures.
- Place the shucked oysters and their liquid in the bag, ensuring they are fully immersed in the oyster liquor.
- Slowly lower the bag into a basin of water, leaving the opening above the water level. This technique, known as the water displacement method, helps remove excess air from the bag.
- Seal the bag, starting from one end and working your way to the other. Press out as much air as possible while sealing. This will help minimize the chances of freezer burn.
- Double-check the seal by running your fingers along the closure to ensure it is secure. If needed, use a twist tie or clip to further secure the bag.
Step 4: Label and date the package
Labeling and dating the package containing the frozen oysters is an important step in keeping your freezer organized and ensuring that you use the oysters within the recommended time frame. Here’s why labeling and dating are important:
- Tracking storage duration: By labeling the container or bag with the current date, you can easily track how long the oysters have been in the freezer. This information is crucial for determining their freshness and quality. Different types of food have varying recommended storage durations, and knowing the freezing date helps you adhere to those guidelines.
- Maintaining quality: Oysters are best enjoyed when they are at their peak freshness. Over time, frozen foods may undergo changes in texture, flavor, and overall quality. By dating the package, you can ensure that you use the oysters within a reasonable timeframe to maximize their taste and maintain their desirable attributes.
- Rotation and organization: Labeling the package allows you to easily identify and rotate your frozen oysters. This practice ensures that older batches are used first, reducing the chances of food waste. Organizing your freezer with properly labeled packages also enables you to locate specific items quickly and efficiently.
To label and date the package:
- Use a waterproof marker or a label: Choose a method that will withstand the freezer environment and won’t smudge or fade over time. Waterproof markers or adhesive labels specifically designed for freezer use are recommended.
- Write the date: On the container or bag, clearly write the current date when the oysters were frozen. Include the day, month, and year to provide accurate information.
- Additional information (optional): If desired, you can add additional information to the label, such as the type of oysters or any specific notes related to their preparation or source. This can be helpful for future reference or if you have different batches of oysters with varying characteristics.
- Attach the label: Place the label in a visible and easily accessible area on the container or bag. Ensure it is securely attached to prevent it from getting lost or damaged.
Step 5: Place the oysters in the freezer
After properly preparing the shucked oysters and sealing them in a container or bag, it’s time to freeze them. Correct placement in the freezer is important to maintain the oysters’ quality and prevent any mishaps. Here’s why proper placement is crucial:
- Prevent leakage and shifting: Placing the sealed container or bag flat in the freezer helps prevent any leakage of the oyster liquor or shifting of the contents. Freezing the oysters in a level position ensures that the liquid remains contained and does not spill or leak onto other items in the freezer.
- Stability and organization: Placing the container or bag on a tray or baking sheet provides additional stability and prevents it from getting knocked over or disturbed. This is especially useful if your freezer has wire racks or limited space. The tray or baking sheet also makes it easier to move the oysters within the freezer and keeps them organized.
- Easy retrieval: Choosing a suitable spot in the freezer allows for easy retrieval of frozen oysters when you’re ready to use them. Consider placing them in a location that is convenient for you and won’t be obstructed by other items. This ensures that you can access the oysters without any difficulty or risk of damaging them or other frozen goods.
To place the oysters in the freezer:
- Find a suitable spot: Look for a flat surface in your freezer that can accommodate the size of the container or bag. Clear out any obstructions or rearrange items to make space for the oysters.
- Place the container or bag flat: Carefully position the sealed container or bag on the flat surface, ensuring that it lies flat and level. This helps maintain the integrity of the oysters and prevents any spills or leaks.
- Consider using a tray or baking sheet: If desired, place the container or bag on a tray or baking sheet for added stability. This helps prevent any accidental movement or tipping over of the oysters while in the freezer. It also makes it easier to handle and retrieve them later.
- Close the freezer: Once the oysters are placed in the freezer, close the door securely to maintain a consistent freezing temperature.
Step 6: Thaw and enjoy
After properly freezing the shucked oysters, it’s important to thaw them correctly to ensure their texture and flavor are preserved. Thawing them slowly in the refrigerator is the recommended method. Here’s why proper thawing and the subsequent enjoyment of the oysters is important:
- Preserve texture and quality: Thawing the frozen oysters slowly in the refrigerator helps maintain their texture and overall quality. Rapid thawing methods, such as using hot water or the microwave, can lead to uneven thawing, resulting in a loss of moisture and a change in texture. Slow thawing in the refrigerator allows the oysters to thaw gently, preserving their natural juiciness and tenderness.
- Food safety: Thawing the oysters in the refrigerator is a safe method that minimizes the risk of bacterial growth. The controlled temperature of the refrigerator inhibits the growth of harmful bacteria that can multiply quickly in warmer conditions. This ensures that the oysters remain safe to consume.
To thaw the frozen oysters properly:
- Retrieve the container or bag from the freezer: Carefully remove the sealed container or bag of frozen oysters, ensuring it is still sealed to prevent any potential contamination.
- Transfer to the refrigerator: Place the sealed container or bag in the refrigerator. Make sure to position it on a plate or tray to catch any condensation that may occur during thawing. Thawing in the refrigerator may take several hours or overnight, depending on the size and thickness of the oysters.
- Allow for slow thawing: Let the oysters thaw slowly in the refrigerator without any heat source. This gradual thawing process helps preserve the quality of the oysters, maintaining their flavor and texture.
- Check for full thawing: Once the oysters have completely thawed, they will appear plump and moist. Gently press on an oyster to check if it has thawed thoroughly. It should feel soft and yield slightly to the touch.
- Use the thawed oysters: Once thawed, the oysters can be used in a variety of delicious dishes. Popular options include oyster stews, po’boys, fried preparations, or grilled delicacies. Follow your favorite recipes or get creative with different culinary preparations to fully enjoy the flavors of the thawed oysters.
Other related questions
How long can I store frozen oysters in the freezer?
Frozen oysters can be stored in the freezer for up to three months without a significant decline in quality. However, it is best to consume them within the first month of freezing to ensure optimal taste and texture. Over time, frozen oysters may develop a slightly mushy texture or lose some of their natural brininess. To maintain the best quality, ensure the oysters are properly sealed to prevent freezer burn and store them at a constant freezing temperature. Always check for any signs of freezer burn or off-flavors before using frozen oysters beyond the recommended storage period.
Can I refreeze previously thawed oysters?
It is generally not recommended to refreeze previously thawed oysters. When oysters are thawed, their texture and quality may be affected, and refreezing them can further diminish their taste and texture. Additionally, each thawing and refreezing cycle increases the risk of bacterial growth, potentially compromising food safety. It is best to plan the amount of oysters you need and thaw only what you intend to use to maintain their freshness and quality. If you have already thawed oysters but cannot consume them, it is advisable to find alternative uses or recipes that can make the most of them before they spoil.
How do I know if my frozen oysters have gone bad?
To determine if your frozen oysters have gone bad, there are a few signs to look for. First, check for any noticeable changes in color. If the oysters have developed a gray or brown discoloration, it could indicate spoilage. Secondly, pay attention to the smell. If the oysters emit a strong, unpleasant odor, it is a clear indication of spoilage. Additionally, examine the texture of the thawed oysters. If they appear excessively mushy or slimy, it is a sign that they have gone bad. Finally, trust your taste buds. If the oysters have an off or rancid taste, it’s best to discard them to avoid any risk of foodborne illness.
Can I use frozen oysters with fresh ones?
It is generally not recommended to mix frozen oysters with fresh ones. Mixing frozen and fresh oysters can lead to uneven cooking times and inconsistent results. Frozen oysters may have a slightly different texture and flavor compared to fresh ones, which can affect the overall taste and quality of the dish. It is best to use either all fresh oysters or all frozen oysters to ensure consistent cooking and flavor. If you have both frozen and fresh oysters, it’s better to prepare separate dishes or use them in different recipes to fully appreciate their unique characteristics.
Can I freeze oysters in their liquid without shucking them?
It is possible to freeze oysters in their liquid without shucking them, but it is not the recommended method. Freezing oysters in their shells helps to preserve their flavor and texture more effectively. When oysters are frozen in their liquid, the expanding ice can cause the shells to crack, leading to potential contamination. Shucking the oysters before freezing allows for better preservation and reduces the risk of spoilage. Therefore, it is generally advised to shuck the oysters before freezing for optimal results.
Can I freeze oysters that have been marinated in a sauce or dressing?
It is generally not recommended to freeze oysters that have been marinated in a sauce or dressing. Freezing can affect the texture and consistency of the marinade, potentially leading to undesirable changes in flavor and quality. If you plan to freeze oysters, it is best to do so in their natural state without any added marinades or dressings and add the marinade or dressing after thawing for optimal results.
Can I freeze oysters that have been breaded or coated with a batter?
It is possible to freeze oysters that have been breaded or coated with a batter, but it is important to follow some considerations. Firstly, it is recommended to partially cook the breaded or battered oysters before freezing to ensure they retain their texture upon thawing. Secondly, allow the breaded or battered oysters to cool completely before freezing to prevent moisture buildup and maintain their crispness. Lastly, properly package and seal the breaded or battered oysters to prevent freezer burn and maintain their quality during storage.


