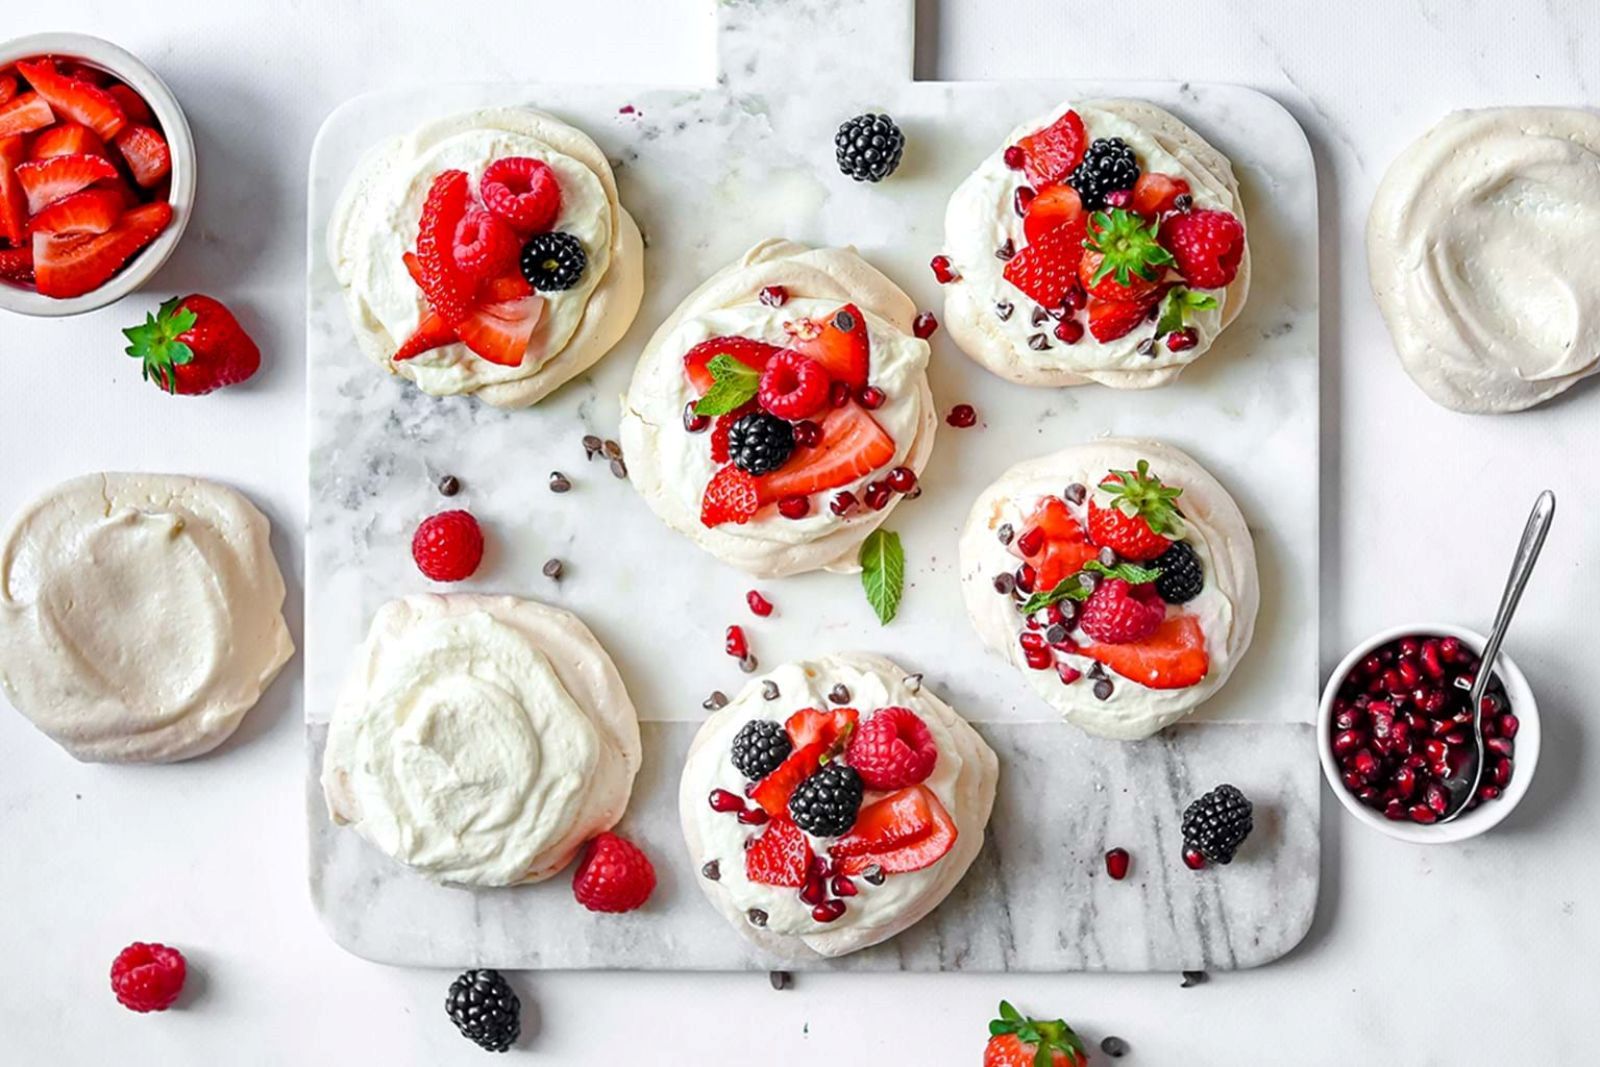
Pavlova is a delightful dessert that consists of a crisp meringue base topped with whipped cream and fresh fruits. It is a popular treat known for its light and airy texture. If you have made a large pavlova or have leftovers that you want to preserve for later enjoyment, freezing is an excellent option. Freezing pavlova allows you to extend its shelf life and savor its deliciousness at a later time. In this article, we will guide you through the process of freezing pavlova, ensuring that it maintains its taste and texture when you’re ready to indulge.
Follow these steps to freeze pavlova:
Step 1: Prepare the pavlova
Before you freeze your pavlova, it’s essential to ensure that it is completely cooled. This step is crucial because freezing a warm or partially cooled pavlova can result in condensation, which can make the meringue base soggy and affect its texture.
When you first remove your pavlova from the oven, it will have a crisp exterior and a soft, marshmallow-like interior. Allowing it to cool at room temperature for at least an hour allows the meringue to firm up and stabilize, making it easier to handle and package for freezing.
During the cooling process, the residual heat from the pavlova dissipates, preventing excessive moisture buildup when you place it in the freezer. It also helps to retain the integrity of the whipped cream topping and any fresh fruits you may have added.
Step 2: Cut into portions
When freezing a large pavlova, it is beneficial to cut it into individual portions before packaging. This step helps in several ways, making it easier to serve and thaw the pavlova later on.
Firstly, cutting the pavlova into individual portions allows for more efficient storage. It enables you to freeze only the amount you need at a given time, reducing waste and ensuring that each portion maintains its quality. It also makes it easier to retrieve and thaw individual servings without having to defrost the entire pavlova.
Secondly, cutting the pavlova into desired serving sizes makes it more convenient for serving after thawing. It eliminates the need to slice or break apart a large pavlova, which can be messy and potentially damage its delicate structure. With pre-cut portions, you can simply take out the desired number of servings and allow them to thaw, ensuring each portion retains its shape and presentation.
To cut the pavlova, use a sharp knife or a serrated knife for a clean and precise cut. Take into consideration the size of your desired portions and make sure each piece is evenly sized for consistent serving sizes.
Can I freeze pavlova that has been cut into slices?
Yes, you can freeze pavlova that has been cut into slices. Wrap each slice individually with plastic wrap and place them in a freezer-safe container. Freezing sliced pavlova allows for easy portioning and thawing as needed.
Step 3: Wrap each portion
After cutting your pavlova into individual portions, it is essential to wrap each piece tightly with plastic wrap before freezing. This step is crucial to protect the pavlova from exposure to air and prevent any moisture loss or freezer burn, which can adversely affect its texture and flavor.
By wrapping each portion tightly with plastic wrap, you create a barrier that seals in the moisture within the meringue. This helps to maintain the pavlova’s light and airy texture during freezing and thawing. It also prevents the formation of ice crystals on the surface, which can lead to a soggy or grainy texture.
To ensure effective wrapping, start by placing the individual portion of pavlova on a sheet of plastic wrap. Carefully fold the sides of the plastic wrap over the pavlova, making sure to cover the entire surface, including the top and sides. Press gently to remove any air pockets before sealing the wrap.
The tight seal created by the plastic wrap helps to minimize the contact between the pavlova and the surrounding air, reducing the risk of oxidation and maintaining the freshness of the dessert. It also helps to preserve the flavors and prevent any potential transfer of odors from other foods in the freezer.
Properly wrapped portions of pavlova can be stored in the freezer for an extended period without compromising their taste or texture. When you’re ready to enjoy them, the plastic wrap can be easily removed, allowing the pavlova to thaw without any interference to its structure.
Step 4: Place in a freezer-safe container
Once you have wrapped each portion of pavlova tightly with plastic wrap, the next step is to transfer them into a freezer-safe container. This step is crucial for maintaining the quality and protecting the pavlova from freezer burn or moisture during storage.
Choosing a freezer-safe container is important because it provides an additional layer of protection against air and moisture. Containers specifically designed for freezer storage are typically made of durable materials such as plastic or glass, which can withstand low temperatures without cracking or breaking.
A freezer-safe container should have a secure seal to prevent any air or moisture from seeping into the pavlova. This helps to maintain the pavlova’s texture, flavor, and overall quality during its time in the freezer.
By placing the wrapped pavlova portions in a freezer-safe container, you create a controlled environment that minimizes the risk of freezer burn. Freezer burn occurs when moisture evaporates from the food’s surface and forms ice crystals, leading to a dry and unpleasant texture. The container acts as a barrier, shielding the pavlova from direct contact with cold air and reducing the chances of freezer burn.
Furthermore, using a container helps to organize and protect the pavlova portions from getting crushed or damaged by other items in the freezer. It also makes it easier to stack or arrange the portions, maximizing the available freezer space.
When selecting a container, consider its size to accommodate the wrapped pavlova portions without excessive empty space, as this can contribute to freezer burn. Additionally, ensure that the container is clean and dry before placing the pavlova inside to maintain its freshness.
Step 5: Label and date
After placing the wrapped pavlova portions in a freezer-safe container, it’s important to label the container with the date of freezing. This simple step is essential for keeping track of your frozen pavlova and ensuring that you consume it within a reasonable time frame.
Labeling the container with the date of freezing allows you to easily determine the freshness of the pavlova. Over time, frozen foods can lose quality, flavor, and texture. By knowing the date it was frozen, you can ensure that you consume the pavlova while it is still at its best.
Moreover, labeling helps in organizing your freezer and preventing any confusion or mix-up with other frozen items. It allows you to identify the pavlova quickly without needing to open multiple containers or unwrap each portion to inspect its contents.
When labeling the container, use a permanent marker or freezer-safe label that can withstand low temperatures without smudging or fading. Clearly write the date of freezing on the container’s surface or label, making it easily visible.
Additionally, if you have multiple batches of frozen pavlova or different flavors/varieties, you can also include brief descriptions or identifiers on the label to differentiate them. This further aids in meal planning and ensures that you select the desired pavlova when retrieving it from the freezer.
Step 6: Freeze the pavlova
Once you have labeled and dated the container with the wrapped pavlova portions, it’s time to freeze them. Proper freezing is essential to maintain the pavlova’s shape, texture, and overall quality. Follow these steps to freeze the pavlova effectively:
- Carefully place the container in the freezer: Find a suitable spot in your freezer where the container can sit undisturbed. Make sure there is enough space for the container to lie flat without any obstructions. This ensures that the pavlova portions maintain their shape during freezing.
- Flat position for stability: Placing the container in a flat position is important to prevent any movement or shifting of the pavlova portions as they freeze. This helps to preserve the pavlova’s delicate structure and prevents any potential damage or deformation.
- Avoid stacking or overcrowding: It is advisable not to stack or overcrowd the containers to allow proper airflow around each portion. Sufficient airflow aids in maintaining an even and consistent freezing temperature, ensuring that the pavlova freezes evenly and retains its desired texture.
- Freezing time: The exact freezing time can vary depending on the size and thickness of the pavlova portions, as well as the temperature and efficiency of your freezer. Generally, pavlova should be frozen for a minimum of 2-3 hours, but longer freezing times may be required for larger or thicker portions.
How long can I keep frozen pavlova in the freezer?
Frozen pavlova can be stored in the freezer for up to 2-3 months while maintaining its quality. Beyond this timeframe, the pavlova may still be safe to consume but could experience a decline in texture and flavor. It’s best to label and date the containers to keep track of the pavlova’s storage time and prioritize consumption within the recommended time frame.
Step 7: Thaw and serve
When the time comes to indulge in your frozen pavlova, it’s essential to thaw it properly to preserve its texture and flavor. Follow these steps to thaw and serve your pavlova:
- Retrieve the desired portions: Remove the container with the wrapped pavlova portions from the freezer. Identify the number of portions you wish to thaw and enjoy. Keep the remaining portions stored in the freezer for later use.
- Thaw in the refrigerator: Transfer the selected portions from the freezer to the refrigerator. Place them on a plate or a shallow dish to catch any potential moisture as they thaw. Thawing in the refrigerator allows for a slow and controlled process, minimizing any drastic temperature changes that can affect the pavlova’s structure.
- Allow time for thawing: The thawing time will depend on the size and thickness of the pavlova portions. Generally, it is recommended to thaw pavlova in the refrigerator for a few hours or overnight. This gradual thawing process helps to maintain the pavlova’s texture and prevent any excessive moisture accumulation.
- Serve with desired toppings: Once the pavlova portions have thawed completely, they are ready to be served. Transfer each portion to a serving plate and decorate it with your favorite toppings, such as whipped cream, fresh fruits, or a drizzle of chocolate sauce. Get creative and personalize it to your taste preferences.
Thawing the pavlova in the refrigerator ensures that it remains firm and retains its light and airy texture. This gentle thawing method helps to prevent any potential loss of moisture or collapsing of the meringue structure, resulting in a visually appealing and delicious dessert.
It’s important to note that once the pavlova has been thawed, it should be consumed within a reasonable time frame to maintain its freshness. Avoid refreezing thawed pavlova, as it can lead to changes in texture and compromise the overall quality of the dessert.
Other related questions
How do I know if the pavlova has gone bad after being frozen?
After being frozen, you can determine if pavlova has gone bad by observing its appearance, texture, and odor. Look for signs of freezer burn, such as discoloration or dryness on the surface of the meringue. If the pavlova has become overly soft, mushy, or has an off-putting smell, it may indicate spoilage and should not be consumed. When in doubt, it’s safer to discard the pavlova to avoid the risk of foodborne illness.
Can I freeze pavlova with toppings and decorations?
Yes, you can freeze pavlova with toppings and decorations. However, it’s important to note that certain toppings like fresh fruits or delicate garnishes may become soggy or lose their texture after freezing. It’s recommended to add toppings and decorations after thawing the pavlova for the best presentation.
Can I freeze leftover pavlova?
Yes, you can freeze leftover pavlova. Simply wrap the remaining portions tightly in plastic wrap, place them in a freezer-safe container, and follow the same freezing process outlined in the article. Freezing leftovers allows you to enjoy the pavlova at a later time without wasting any delicious dessert.
Can I freeze pavlova made with alternative sweeteners or egg substitutes?
Yes, pavlova made with alternative sweeteners or egg substitutes can be frozen following the same process. However, keep in mind that the texture and taste of the pavlova may differ slightly from traditional recipes. It’s recommended to consult the specific instructions and recommendations for the alternative ingredients used.
Can I freeze pavlova that has been flavored with extracts or additional ingredients?
Yes, you can freeze pavlova that has been flavored with extracts or additional ingredients. The freezing process does not significantly alter the flavors incorporated into the pavlova. However, it’s important to note that the intensity of some flavors may slightly diminish during freezing and thawing.

