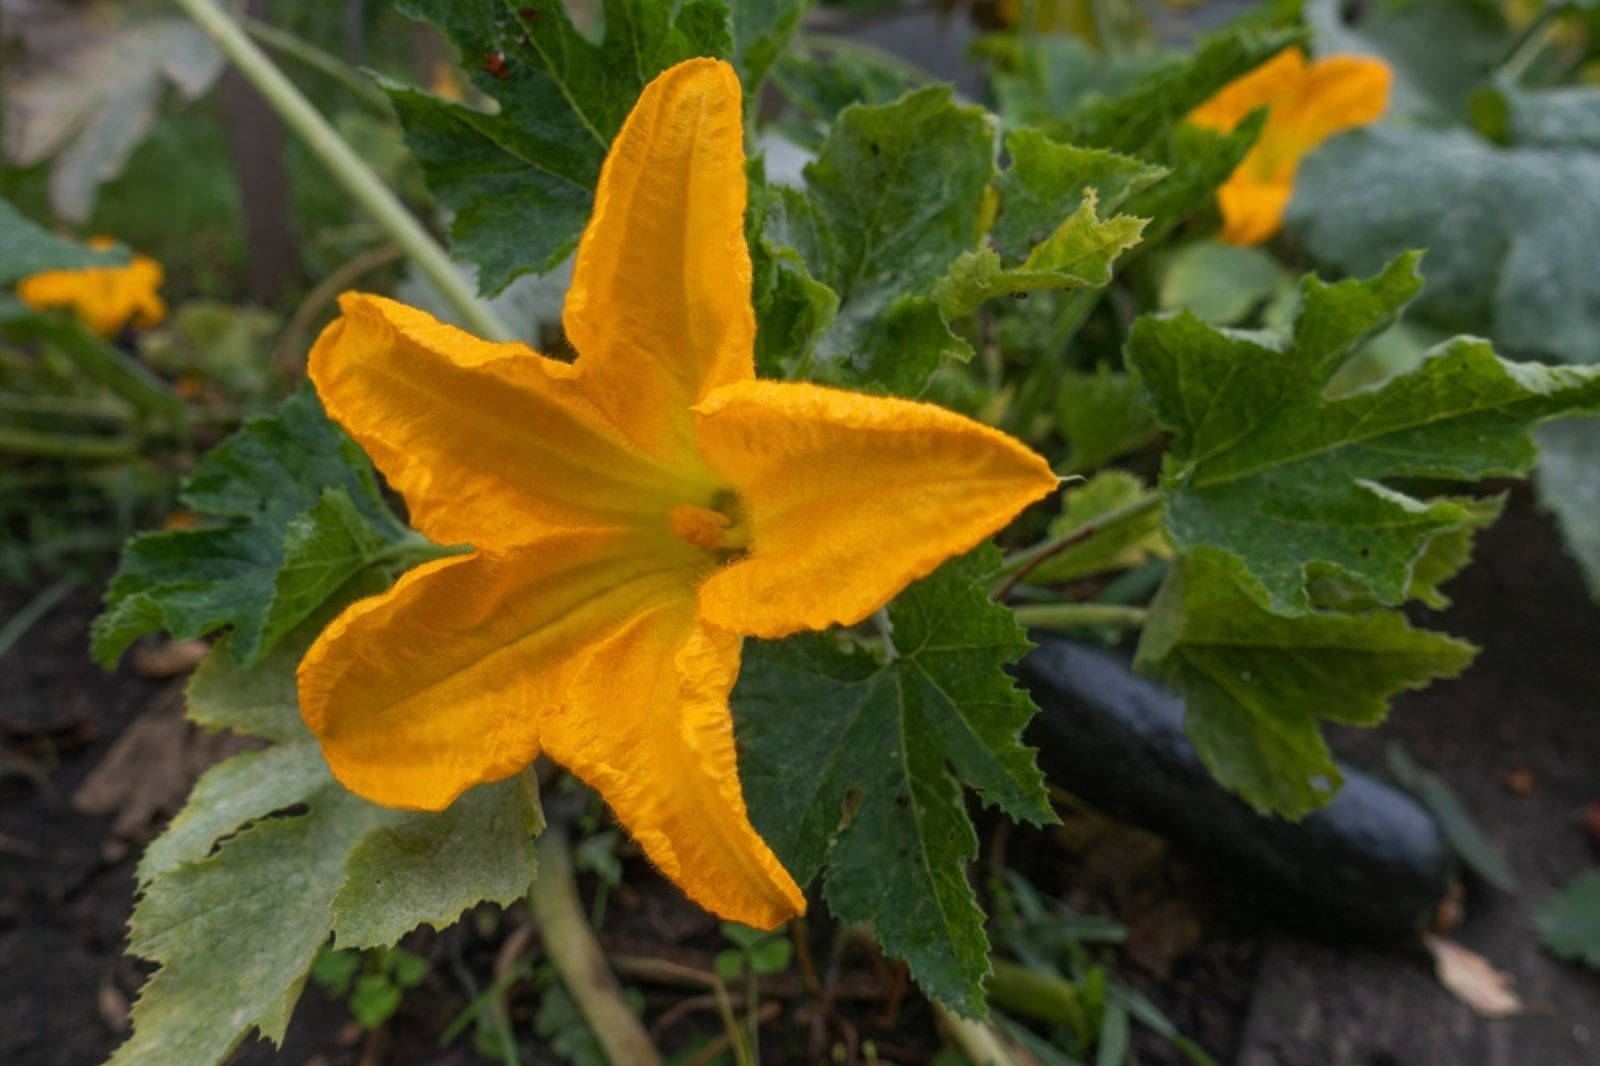
Pumpkin blossoms, also known as pumpkin flowers, are a delightful and edible treasure often overlooked in the world of culinary delights. These delicate, bright yellow-orange flowers grow on the vine of the pumpkin plant and possess a subtle, sweet flavor. While they are a fleeting treat during the pumpkin growing season, there’s a way to savor their unique taste all year round – freezing! By mastering the art of freezing pumpkin blossoms, you can preserve their beauty and flavor, ensuring you have a supply of these tender blooms to add a touch of elegance and delectable essence to your dishes whenever you desire. In this guide, we will explore the best methods for freezing pumpkin blossoms, keeping their vibrant color and delicate taste intact, making them a versatile addition to your culinary repertoire. Get ready to embark on a freezing adventure and discover the secret to enjoying the magic of pumpkin blossoms in every season.
Here are the simple steps to freeze pumpkin blossoms:
- Step 1: Choose Fresh Pumpkin Blossoms
- Step 2: Clean and Trim the Blossoms
- Step 3: Blanch the Pumpkin Blossoms
- Step 4: Drain and Dry the Blossoms
- Step 5: Arrange the Blossoms for Freezing
- Step 6: Flash-Freeze the Pumpkin Blossoms
- Step 7: Package and Seal the Pumpkin Blossoms
- Step 8: Label and Date the Packages
- Step 9: Store in the Freezer
Step 1: Choose Fresh Pumpkin Blossoms
Selecting fresh pumpkin blossoms is essential to ensure the best possible results when freezing them. The quality of the blossoms at the time of freezing directly impacts their taste, texture, and overall appeal when you decide to use them later in dishes.
When choosing pumpkin blossoms, look for ones that are vibrant in color and free from any wilting or browning. Vibrant colors indicate that the blossoms are at their peak freshness and have not started to deteriorate. Wilting or browning could be signs of age or damage, and freezing such blossoms may lead to a loss of flavor and texture.
The reason behind using fresh and undamaged pumpkin blossoms is that freezing is a preservation method rather than a revitalization one. Freezing helps retain the existing quality of the food item at the time of freezing, but it cannot improve the quality of already damaged or less fresh produce. Therefore, starting with the best quality pumpkin blossoms ensures that you preserve their delicious flavor, vibrant color, and delicate texture throughout the freezing process.
If you have access to a pumpkin patch or farmer’s market, consider handpicking the pumpkin blossoms yourself. This way, you can personally inspect and select the freshest ones available. If you’re purchasing from a store, examine the blossoms carefully before making your choice.
The first step of freezing pumpkin blossoms involves choosing the freshest and most visually appealing ones. By doing so, you set the foundation for a successful freezing process that will maintain the quality of the pumpkin blossoms, allowing you to enjoy their unique taste and appearance in your culinary creations whenever you desire.
Step 2: Clean and Trim the Blossoms
Cleaning and trimming the pumpkin blossoms is a crucial step in the freezing process, as it ensures that the blossoms are free from any dirt, insects, or other debris that may have accumulated on them. Additionally, trimming the stems helps make the blossoms more manageable and allows them to fit neatly into the containers you’ve chosen for freezing.
To clean the pumpkin blossoms, gently rinse them under cold running water. The use of cold water is essential because it helps maintain the freshness and crispness of the blossoms. It also helps remove any surface dirt or dust without causing damage to the delicate petals.
When rinsing the blossoms, it’s crucial to handle them with care since they are fragile and can easily bruise or tear. Avoid applying too much pressure while cleaning, as excessive force can lead to damage.
After cleaning, you’ll want to trim the stems slightly. The purpose of this step is twofold: First, it ensures that the blossoms can fit into the freezing containers without being cramped or bent, which could affect their appearance and texture. Second, trimming the stems helps the pumpkin blossoms stand more upright, making them easier to arrange in the freezing containers and preventing them from getting tangled or sticking together during freezing.
When trimming the stems, use sharp and clean kitchen scissors or a knife. Cut off just a small portion of the stem, about half an inch to an inch, depending on the size of your chosen freezing containers.
Taking the time to clean and trim the pumpkin blossoms not only helps maintain their visual appeal but also ensures that they freeze more efficiently. Removing dirt and debris minimizes the chances of spoilage or off-flavors during freezing, while trimming the stems allows for better organization and optimal use of freezer space.
Step 3: Blanch the Pumpkin Blossoms
Blanching is a crucial and widely used technique in food preservation, especially when it comes to freezing vegetables and delicate produce like pumpkin blossoms. The main purpose of blanching is to halt enzyme activity in the food, which can lead to quality deterioration over time. By blanching the pumpkin blossoms before freezing, you can preserve their color, texture, and flavor, ensuring they remain appetizing and enjoyable even after prolonged storage in the freezer.
Here’s how to blanch pumpkin blossoms:
- Bring a pot of water to a boil: Fill a large pot with enough water to completely submerge the pumpkin blossoms. Place the pot on the stove over high heat and bring the water to a rolling boil.
- Prepare an ice bath: While waiting for the water to boil, prepare a bowl or basin filled with cold water and ice cubes. This ice bath will be used to rapidly cool down the blanched pumpkin blossoms and stop the cooking process.
- Submerge the cleaned and trimmed blossoms: Carefully place the cleaned and trimmed pumpkin blossoms into the boiling water. It’s essential to work in batches, so you don’t overcrowd the pot. Blanch the blossoms for about 1 to 2 minutes. The exact blanching time may vary slightly depending on the size and thickness of the blossoms, but aim for a quick blanch to avoid overcooking.
- Transfer to the ice bath: Using a slotted spoon or a sieve, immediately remove the blanched pumpkin blossoms from the boiling water and transfer them to the ice bath. The ice bath rapidly cools down the blossoms, stopping the cooking process and preserving their vibrant color and delicate texture.
The blanching process is highly effective in deactivating enzymes that can lead to quality degradation during freezing. Enzymes are naturally occurring substances present in fruits and vegetables that can cause color changes, texture softening, and flavor loss over time. By blanching the pumpkin blossoms briefly, you can effectively neutralize these enzymes and maintain the blossoms’ quality during freezing.
Step 4: Drain and Dry the Blossoms
After blanching the pumpkin blossoms, it’s essential to remove any excess water to prevent ice crystal formation during freezing. Properly draining and drying the blossoms will help maintain their texture and prevent them from becoming mushy or losing their quality while stored in the freezer.
Here’s how to drain and dry the pumpkin blossoms:
- Drain the blossoms: Using a slotted spoon or a sieve, carefully remove the blanched pumpkin blossoms from the ice bath or boiling water. Allow them to drain thoroughly to get rid of any excess water. You can gently shake the sieve or let the blossoms sit on a clean kitchen towel to help remove the water.
- Pat them dry gently with paper towels: After draining, gently pat the pumpkin blossoms dry with paper towels. Avoid pressing too hard to prevent damaging the delicate petals. The goal is to remove any remaining water from the blanching process.
The primary reason for draining and drying the pumpkin blossoms is to avoid the formation of ice crystals during freezing. If excess water remains on the blossoms, it can turn into ice when frozen. Ice crystals can damage the cell structure of the blossoms, leading to a loss of texture and overall quality when they are thawed and used in dishes later on.
By patting the blossoms dry with paper towels, you also reduce the risk of freezer burn. Freezer burn occurs when food is exposed to air and becomes dehydrated, resulting in the formation of dry, discolored patches. Properly drying the pumpkin blossoms helps create a protective barrier and minimizes the chances of freezer burn, preserving their appearance and flavor.
Properly drained and dried pumpkin blossoms are ready to be arranged for freezing, as explained in the next step. By following this crucial step, you ensure that the freezing process maintains the quality and delicacy of the pumpkin blossoms, allowing you to enjoy their vibrant color and unique flavor whenever you choose to incorporate them into your culinary creations.
Step 5: Arrange the Blossoms for Freezing
At this stage of the freezing process, you have two main options for how to arrange and freeze the blanched and dried pumpkin blossoms. The decision will depend on your preference and how you plan to use the blossoms in your future culinary endeavors.
Freeze the blossoms individually on a baking sheet
This method involves spreading the blanched and dried pumpkin blossoms out in a single layer on a baking sheet. Ensure that the blossoms do not touch each other to prevent them from sticking together during freezing.
To do this:
- Line a baking sheet with parchment paper or a silicone baking mat to prevent the blossoms from sticking to the surface.
- Place the blanched and dried pumpkin blossoms on the baking sheet, making sure they are not touching or overlapping.
- Carefully transfer the baking sheet to the freezer and let the blossoms freeze individually for about 1 to 2 hours. This process is known as “flash freezing,” and it helps keep the blossoms separate and prevents them from forming a solid mass.
- Once the pumpkin blossoms are flash-frozen, you can transfer them to a freezer-safe container or freezer bag. This way, the blossoms will be conveniently separated and easy to measure out when you need to use them in specific quantities for your recipes.
Pack the blossoms loosely into freezer-safe containers
Alternatively, you can pack the blanched and dried pumpkin blossoms loosely into freezer-safe containers or freezer bags.
To do this:
- Take a freezer-safe container or bag and place the blanched and dried pumpkin blossoms inside.
- Arrange the blossoms loosely without compacting them to avoid squishing or damaging the delicate petals.
- Seal the container or bag, removing as much air as possible to minimize the risk of freezer burn.
- This method is suitable if you plan to use larger quantities of pumpkin blossoms in your recipes. Packing them loosely in a container or bag allows you to take out the desired amount easily without the need to thaw the entire batch.
By deciding on your preferred freezing method and properly arranging the pumpkin blossoms, you ensure that they freeze efficiently and maintain their individual form and quality. This step sets the stage for effortless use and enjoyment of these delightful blossoms in your dishes, adding a burst of color and unique flavor long after their peak season has passed.
Step 6: Flash-Freeze the Pumpkin Blossoms
Flash-freezing is a quick and effective freezing method used to individually freeze small or delicate food items, such as pumpkin blossoms, to prevent them from sticking together in a solid mass during long-term storage in the freezer.
Here’s how to flash-freeze the pumpkin blossoms:
- If you have chosen the option to freeze the blossoms individually on a baking sheet, ensure that the blanched and dried pumpkin blossoms are arranged in a single layer on the parchment paper or silicone baking mat. Make sure they are not touching or overlapping.
- Place the baking sheet with the arranged pumpkin blossoms into the freezer. It’s essential to put the baking sheet in a flat position to avoid any tilting or unevenness during freezing.
- Let the pumpkin blossoms flash-freeze for about 1 to 2 hours. The exact freezing time may vary slightly depending on the temperature of your freezer and the size of the blossoms. The objective is to freeze them quickly and efficiently.
Flash-freezing is essential for preserving the individual structure of the pumpkin blossoms. When foods freeze slowly, ice crystals tend to form inside the cells, causing damage to the cellular structure. This can lead to mushy or soggy textures when the food is thawed. However, when you flash-freeze the pumpkin blossoms, the rapid freezing process forms smaller ice crystals, reducing the chances of cell damage and maintaining the blossoms’ delicate texture.
By freezing the pumpkin blossoms individually and preventing them from sticking together, you can easily take out the desired quantity whenever you need them in your recipes. This prevents the need to thaw the entire batch when you only require a few blossoms, ensuring that they remain fresh and retain their quality.
Step 7: Package and Seal the Pumpkin Blossoms
After the flash-freezing process is complete, it’s time to package and seal the individually frozen pumpkin blossoms to ensure their long-term freshness and quality during storage in the freezer. Proper packaging is crucial to prevent freezer burn and maintain the flavor, texture, and vibrant color of the blossoms.
Here’s how to package and seal the pumpkin blossoms:
- Gather airtight freezer bags or containers: Choose high-quality freezer-safe bags or containers designed to keep food fresh in the freezer. These should be airtight and resistant to moisture, which helps prevent freezer burn and ice crystal formation.
- Transfer the frozen blossoms: Carefully move the individually frozen pumpkin blossoms from the baking sheet (if flash-frozen individually) into the freezer bags or containers. If you opted to pack the blossoms loosely in a container, no additional transfer is needed.
- Remove excess air: As you place the pumpkin blossoms in the freezer bags or containers, try to remove as much air as possible from the packaging. Excess air can lead to freezer burn, which can negatively impact the flavor and texture of the blossoms over time. One way to do this is to press down on the bags gently or use a straw to suck out the air before sealing them. For containers, press down on the blossoms slightly to release trapped air.
- Seal the packaging tightly: Once the excess air is removed, seal the freezer bags or containers tightly to create an airtight seal. Make sure the seal is secure to prevent any air or moisture from entering, which could compromise the quality of the frozen pumpkin blossoms.
By using airtight packaging and removing excess air, you create a protective environment for the pumpkin blossoms inside the freezer. This minimizes the risk of freezer burn and preserves the delicate flavor and texture of the blossoms for an extended period.
Step 8: Label and Date the Packages
Labeling and dating the freezer bags or containers is a crucial final step in the freezing process that helps you keep track of the pumpkin blossoms’ contents and their storage duration. Properly labeling the packages enhances organization and ensures you can easily identify and use the frozen pumpkin blossoms when needed.
Here’s why labeling and dating are essential:
- Contents identification: By labeling the packages with the name of the contents, in this case, “Pumpkin Blossoms,” you avoid any confusion in the freezer. This is particularly helpful if you have multiple types of frozen foods stored, as it ensures you can quickly find the specific ingredient you’re looking for without having to open each container or bag.
- Tracking shelf life: Adding the date of freezing to the label allows you to track how long the pumpkin blossoms have been in the freezer. Knowing the freezing date helps you prioritize the use of older packages, ensuring that you consume the oldest ones first and maintain a rotation of frozen goods to avoid waste.
- Quality control: While frozen foods generally remain safe to eat indefinitely if stored at 0°F (-18°C) or below, the quality of the food can deteriorate over time. By dating the packages, you can keep an eye on how long the pumpkin blossoms have been in the freezer and aim to use them within a reasonable time frame to enjoy them at their best quality.
- Planning and meal preparation: Having clear labels with contents and dates allows you to plan your meals and recipes more efficiently. You can easily assess what frozen ingredients you have available and incorporate them into your cooking, eliminating the guesswork and making meal preparation more convenient.
- Avoiding waste: Properly labeled packages also help you avoid waste. With clear identification and dates, you can manage your frozen ingredients better, reducing the likelihood of forgetting about certain items and letting them go to waste.
With the packages properly labeled and dated, you have completed all the necessary steps to freeze the pumpkin blossoms successfully. The organized and well-labeled packages allow you to enjoy the vibrant color, delicate flavor, and unique appeal of the pumpkin blossoms in your dishes throughout the year, making them a delightful addition to your culinary creations anytime you desire.
Step 9: Store in the Freezer
Storing the properly packaged and labeled pumpkin blossoms in the freezer is the final step in the freezing process. The freezer provides a controlled environment that keeps the pumpkin blossoms at a consistent low temperature, preserving their quality and freshness for an extended period.
Here’s why proper freezer storage is crucial:
- Temperature control: The freezer’s low temperature, typically at or below 0°F (-18°C), slows down the deterioration of the pumpkin blossoms, effectively preserving their texture, flavor, and nutritional value. The colder temperature inhibits the growth of microorganisms and enzymes that can lead to spoilage or quality degradation.
- Optimal preservation: Placing the sealed packages of pumpkin blossoms in the coldest part of the freezer ensures that they freeze rapidly and remain at a consistent low temperature throughout their storage. This contributes to the optimal preservation of the blossoms, allowing them to maintain their vibrant color and delicate texture.
- Extended shelf life: When stored in the freezer at the correct temperature, pumpkin blossoms can remain in good condition for about 8 to 10 months. However, it’s essential to adhere to the “first in, first out” principle, using the oldest packages first to ensure that you consume the frozen blossoms within their recommended storage duration.
- Preventing freezer burn: The airtight packaging and removal of excess air help minimize the risk of freezer burn, which occurs when food is exposed to air in the freezer, leading to dehydration and loss of quality. Proper freezer storage, including sealing the packages tightly and avoiding temperature fluctuations, helps prevent freezer burn and maintains the blossoms’ taste and appearance.
- Efficient use of space: Organizing the freezer by arranging the labeled packages in a systematic manner helps maximize the available space. This allows for better visibility and accessibility, making it easier to locate and retrieve the pumpkin blossoms when needed for your recipes.
By storing the frozen pumpkin blossoms properly, you can enjoy their delightful flavor and vibrant appearance in your dishes for an extended period. The freezer serves as a reliable preservation tool, enabling you to savor the seasonal essence of these delicate blossoms even when they are not readily available in their fresh form.
Other related questions
How do you defrost pumpkin blossoms?
To defrost pumpkin blossoms, remove the sealed package from the freezer and place it in the refrigerator. Allow the blossoms to thaw slowly in the fridge, ensuring they retain their texture and flavor. Avoid using heat or warm water for defrosting, as it may lead to loss of quality.
Can you refreeze pumpkin blossoms?
It is generally not recommended to refreeze pumpkin blossoms once they have been thawed. Refreezing can lead to a loss of texture, flavor, and overall quality due to the formation of ice crystals during the first freezing and subsequent thawing. To maintain optimal freshness, it is best to use the thawed pumpkin blossoms promptly and avoid refreezing them.
How do I know if the pumpkin blossoms have gone bad after being frozen?
To determine if frozen pumpkin blossoms have gone bad, look for signs of freezer burn, discoloration, or changes in texture. Freezer burn may appear as dry, discolored patches on the surface of the blossoms. If the blossoms have an off odor or taste, they may have deteriorated in quality. When in doubt, it is best to discard any frozen pumpkin blossoms that show signs of spoilage to ensure food safety and enjoyable culinary experiences.
What dishes can I make with frozen pumpkin blossoms?
Frozen pumpkin blossoms can be used in a variety of dishes, such as soups, stews, and pasta dishes, adding a unique flavor and texture. They can be stuffed with cheese or other fillings before incorporating them into recipes. Popular dishes include pumpkin blossom quesadillas, risotto with pumpkin blossoms, and pumpkin blossom fritters.
Can I freeze pumpkin blossoms that have been stuffed with cheese or other fillings?
Yes, you can freeze pumpkin blossoms that have been stuffed with cheese or other fillings. However, it is recommended to partially cook the stuffed blossoms before freezing to retain their texture and flavor better upon thawing. Place the prepared blossoms on a baking sheet lined with parchment paper, freeze until firm, then transfer them to an airtight container or freezer bag for storage.
Can I freeze pumpkin blossoms along with other vegetables for a mixed freezer bag?
Yes, you can freeze pumpkin blossoms along with other vegetables in a mixed freezer bag. However, it’s important to blanch the pumpkin blossoms and other vegetables separately before freezing to preserve their quality and prevent spoilage. Once blanched, cool them quickly in ice water, pat dry, and then pack them together in an airtight freezer bag or container, removing as much air as possible before sealing. This will ensure that the frozen mixed vegetables, including pumpkin blossoms, maintain their freshness and flavor during storage.

