Pumpkin seeds are a delicious and nutritious snack that can be enjoyed year-round. Whether you want to preserve the seeds for future use or have an abundance of leftover seeds from carving pumpkins, freezing is an excellent method to maintain their freshness and flavor. Freezing pumpkin seeds is a simple process that can be done in a few easy steps. By following these guidelines, you can ensure that your pumpkin seeds remain crispy and ready for snacking whenever you desire. This article provides a comprehensive guide on freezing pumpkin seeds, allowing you to enjoy their delightful crunch even when they are not in season.
Here’s a step-by-step guide on how to freeze pumpkin seeds:
- Step 1: Select fresh pumpkin seeds
- Step 2: Clean and separate the seeds
- Step 3: Preheat the oven and roast the seeds (optional)
- Step 4: Arrange the seeds for freezing
- Step 5: Flash-freeze the pumpkin seeds
- Step 6: Package and seal the pumpkin seeds
- Step 7: Label and date the packages
- Step 8: Store in the freezer
Step 1: Select fresh pumpkin seeds
To freeze pumpkin seeds successfully, it’s important to start with fresh, high-quality seeds. Choosing ripe and unblemished pumpkin seeds will ensure that they retain their flavor and texture during the freezing process.
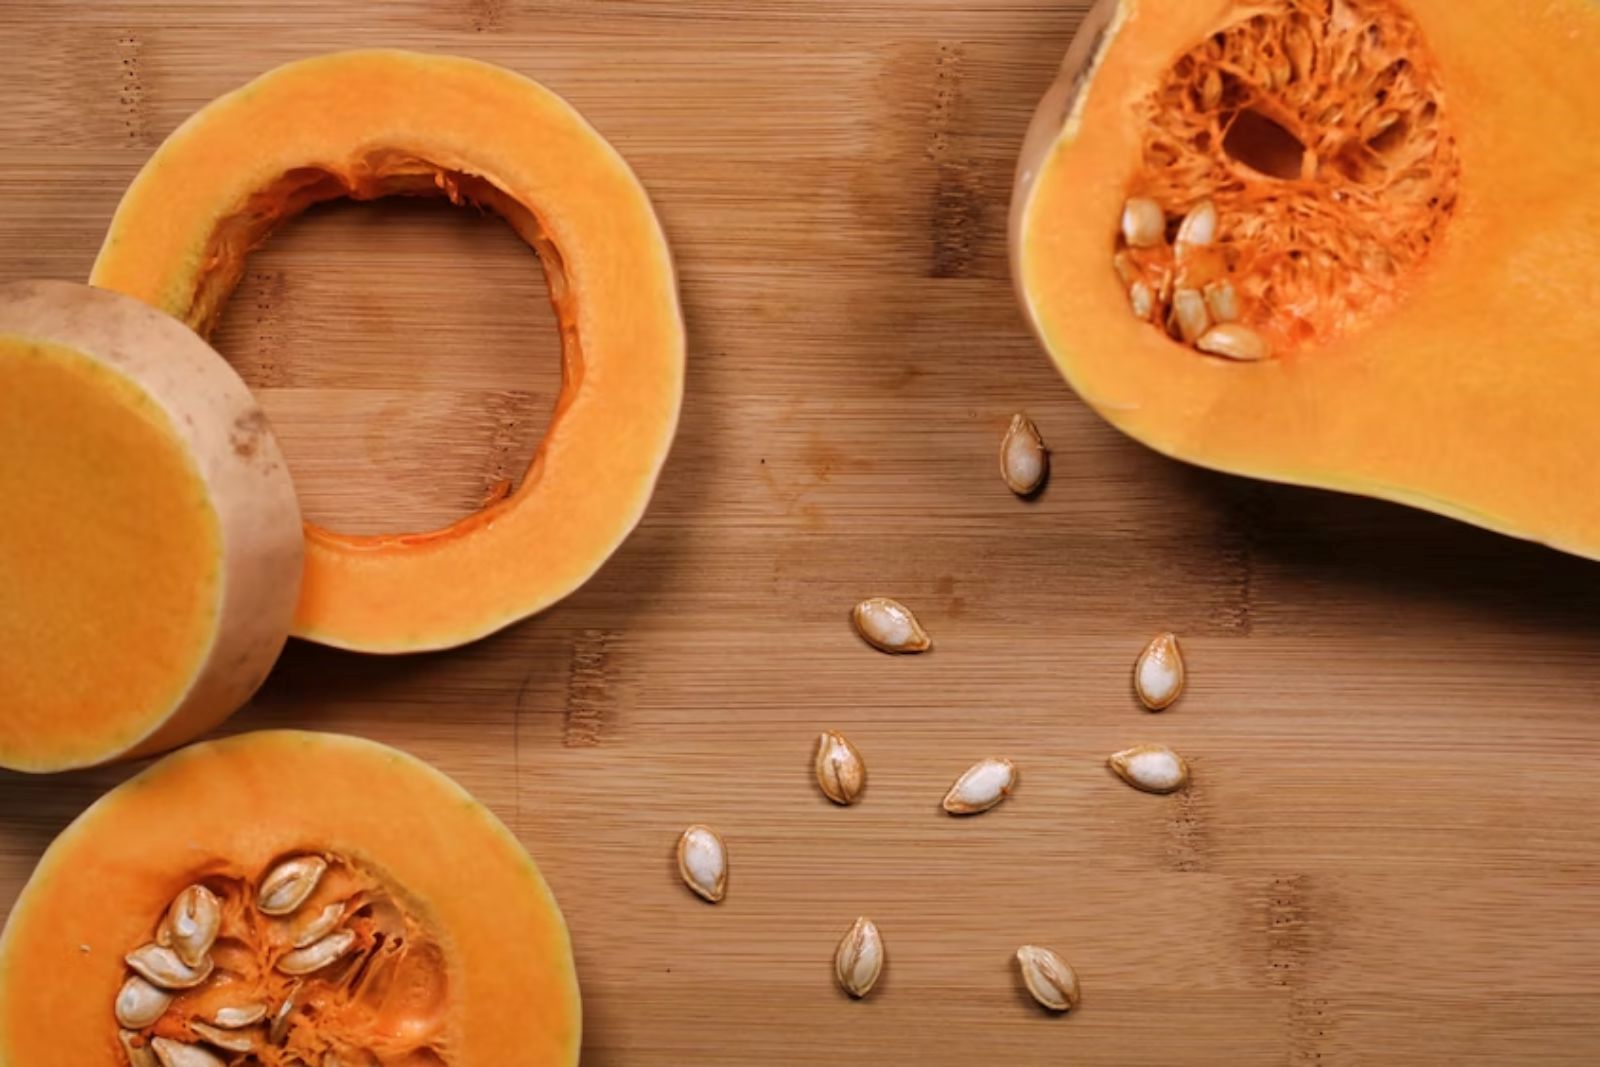
If you’ve recently carved a pumpkin, you can use the seeds from that as long as they are in good condition. Simply scoop out the seeds from the pumpkin’s interior and separate them from any pulp or stringy parts. If you don’t have access to freshly carved pumpkin seeds, you can easily find fresh pumpkin seeds at your local grocery store or farmers’ market.
Opting for fresh pumpkin seeds is essential because older or damaged seeds may have already started to deteriorate, compromising their taste and texture. Fresh seeds are more likely to produce better results when frozen and will yield a satisfying crunch when you eventually enjoy them.
When selecting fresh pumpkin seeds, look for seeds that are plump, firm, and without any signs of mold or decay. They should have a vibrant color and a clean appearance. By starting with high-quality pumpkin seeds, you’re setting yourself up for success when it comes to freezing and later using them for snacking or cooking purposes.
Remember, the quality of the initial ingredients greatly impacts the overall outcome, so take the time to choose the best pumpkin seeds available to you.
Step 2: Clean and separate the seeds
Before freezing your pumpkin seeds, it’s essential to clean and separate them properly. This step ensures that any remaining pulp, strings, or debris from the pumpkin are removed, resulting in clean and ready-to-freeze seeds.
To clean the pumpkin seeds, start by separating them from the pulp. If you’ve just carved a pumpkin, you can remove the seeds by scooping them out using a spoon or your hands. Separate the seeds from any attached pumpkin flesh or stringy parts, placing them in a bowl or colander.
Once you have the seeds separated, it’s time to rinse them thoroughly under cold water. Place the seeds in a colander and run cold water over them, gently stirring them around with your hands. This rinsing process helps to remove any remaining pulp, dirt, or other debris that may be present on the seeds.
As you rinse, continue to stir and agitate the seeds to ensure that all surfaces are thoroughly cleaned. The water running through the colander will carry away any impurities, leaving behind clean seeds.
After rinsing, it’s important to dry the seeds before freezing them. Use a paper towel to pat them dry, removing any excess moisture. Drying the seeds helps prevent the formation of ice crystals during freezing, which can affect their texture and overall quality.
Can I freeze pumpkin seeds without washing them?
It is recommended to wash and thoroughly dry pumpkin seeds before freezing to remove any debris or contaminants. Washing helps ensure cleanliness and prevents any unwanted substances from affecting the quality of the frozen seeds.
Step 3: Preheat the oven and roast the seeds (optional)
Roasting pumpkin seeds can add a delicious, crispy element to your snacking experience. While this step is optional, it can enhance the flavor and texture of the seeds before they are frozen. If you enjoy the taste of roasted pumpkin seeds, here’s how you can do it:
- Preheat the oven: Start by preheating your oven to 350°F (175°C). This temperature provides a good balance for achieving a golden brown and crispy result without overcooking the seeds.
- Prepare the seeds: Take the cleaned and dried pumpkin seeds and place them in a bowl. Add a little olive oil and your preferred seasonings to the bowl. Common seasonings for roasted pumpkin seeds include salt, cinnamon, garlic powder, or even a sprinkle of chili powder for a spicy kick. Toss the seeds gently in the bowl to evenly coat them with the oil and seasonings.
- Spread the seeds: Next, spread the seasoned pumpkin seeds in a single layer on a baking sheet. Make sure they are evenly distributed and not overcrowded. This allows for even roasting and helps the seeds to crisp up nicely.
- Roast in the oven: Place the baking sheet with the pumpkin seeds in the preheated oven. Let them roast for about 15-20 minutes, or until they turn a golden brown color. Keep an eye on them during the last few minutes of roasting to prevent them from burning.
- Cool the roasted seeds: Once the seeds have achieved the desired golden brown color, remove them from the oven and allow them to cool completely. This cooling process ensures that the seeds become crispy and provides a pleasant texture when you bite into them.
Roasting the pumpkin seeds before freezing them can intensify their flavor and provide an enjoyable crunch. However, if you prefer the natural taste and texture of raw pumpkin seeds, you can skip this optional step and proceed directly to the next step for freezing.
Remember, once the roasted pumpkin seeds have cooled completely, you can proceed with the freezing process to preserve their delightful qualities for future snacking or use in various recipes.
Step 4: Arrange the seeds for freezing
After roasting and allowing the pumpkin seeds to cool completely, it’s time to arrange them for freezing. Properly arranging the seeds ensures that they freeze individually and don’t clump together, making it easier to portion and use them later.
To arrange the seeds for freezing:
- Get a baking sheet or large plate: Choose a baking sheet or a large plate that will fit comfortably in your freezer. It’s essential to have a flat surface with enough space to accommodate the pumpkin seeds in a single layer.
- Spread the seeds out: Take the cooled pumpkin seeds and spread them out on the baking sheet or plate. Make sure to arrange them in a single layer, ensuring that none of the seeds are touching each other.
- Maintain space between the seeds: It’s important to leave some space between the individual pumpkin seeds. This prevents them from sticking together as they freeze. If the seeds are too close, they may freeze in clumps, making it challenging to separate them later.
By spreading the pumpkin seeds out and keeping them separate, you create optimal conditions for freezing. Each seed can freeze individually, preserving its texture and preventing any undesirable sticking or clumping.
Properly arranging the seeds also facilitates easier portioning when you need to retrieve a specific amount for snacking or for adding to recipes. It eliminates the need to thaw and separate frozen seed clusters, saving you time and effort when you eventually use them.
Step 5: Flash-freeze the pumpkin seeds
Flash-freezing is a crucial step in the process of freezing pumpkin seeds. It involves rapidly freezing the seeds at a very low temperature to preserve their quality and prevent the formation of large ice crystals. This method ensures that the seeds freeze quickly and evenly, resulting in better texture and taste when they are thawed and consumed.
To flash-freeze the pumpkin seeds:
- Prepare the seeds for freezing: Once you have spread the pumpkin seeds in a single layer on a baking sheet or plate, ensuring they are not touching each other, they are ready for flash-freezing.
- Place in the freezer: Carefully transfer the baking sheet or plate with the arranged seeds to the freezer. Find a flat surface where the seeds can be placed without being disturbed.
- Allow them to freeze: Let the pumpkin seeds remain in the freezer for about 1-2 hours, or until they become firm and solid. The exact freezing time may vary depending on the temperature of your freezer and the quantity of seeds being frozen.
By flash-freezing the pumpkin seeds, you ensure that they freeze quickly and maintain their quality. The rapid freezing process prevents the formation of large ice crystals, which can lead to a loss of texture and moisture in the seeds. Instead, flash-freezing helps to preserve the seeds’ natural crunchiness and flavor.
Remember, flash-freezing is an important technique for preserving the quality of the pumpkin seeds. It allows you to enjoy their delightful taste and texture even after an extended period in the freezer.
Step 6: Package and seal the pumpkin seeds
Once the pumpkin seeds have been flash-frozen and are firm and solid, it’s time to package and seal them for long-term storage. Proper packaging is essential to maintain the quality, flavor, and texture of the frozen pumpkin seeds. Here’s how to do it:
- Choose appropriate containers: Select airtight containers or resealable freezer bags specifically designed for freezing. These containers should be made of durable materials that can withstand freezing temperatures without cracking or breaking.
- Transfer the frozen seeds: Carefully transfer the frozen pumpkin seeds from the baking sheet or plate into the chosen containers or bags. It’s important to do this quickly to prevent any thawing of the seeds.
- Remove excess air: Before sealing the containers or bags, make sure to remove any excess air. Air exposure can lead to freezer burn, which can negatively affect the quality of the pumpkin seeds over time. Press out as much air as possible from the containers or bags before sealing them tightly.
- Seal the containers or bags: Ensure that the containers or bags are securely sealed to create an airtight environment. This prevents moisture from entering and freezer burn from occurring, preserving the taste, texture, and freshness of the pumpkin seeds.
Proper packaging and sealing of the frozen pumpkin seeds are essential for long-term storage. It helps to maintain the integrity of the seeds, preventing the absorption of unwanted odors and flavors from other items in the freezer. Additionally, it protects the seeds from moisture loss and exposure to air, which can degrade their quality.
Can I freeze pumpkin seeds in ice cube trays?
Freezing pumpkin seeds in ice cube trays is possible, especially if you want to portion them for future use. Place cleaned and dried pumpkin seeds in the compartments of the ice cube tray, then fill each compartment with water to cover the seeds. Once frozen, transfer the seed-filled ice cubes to a freezer-safe bag or container.
Step 7: Label and date the packages
Labeling and dating the packages containing the frozen pumpkin seeds is an important step in the freezing process. It helps you keep track of the contents and the duration of storage, ensuring that you use the seeds within a reasonable time frame. Here’s why labeling is crucial:
- Easy identification: By labeling each container or bag with the contents (pumpkin seeds), you can easily identify them among other items in the freezer. This prevents confusion and allows you to locate the specific seeds you need without rummaging through multiple packages.
- Track freshness: Adding the date of freezing to the label enables you to track the freshness of the pumpkin seeds. Over time, the quality of frozen foods can decline, so knowing the date of freezing helps you gauge how long the seeds have been stored and plan for their consumption accordingly.
- Rotation and usage: Labeling and dating the packages facilitate a first-in, first-out (FIFO) system. By clearly marking the date of freezing, you can prioritize using older packages before newer ones. This practice ensures that you consume the oldest pumpkin seeds first, maintaining the best quality throughout their storage period.
- Avoid waste: Properly labeled packages help prevent unnecessary waste. If you have multiple containers or bags of frozen pumpkin seeds, you can easily identify and use them before they exceed their recommended storage time. This reduces the likelihood of forgetting about the seeds and having to discard them due to prolonged freezer storage.
Using a permanent marker, write the contents (pumpkin seeds) and the date of freezing on each container or bag. Place the labels in a visible location to ensure they remain legible throughout the storage period.
Step 8: Store in the freezer
After properly labeling and dating the packages of pumpkin seeds, it’s time to store them in the freezer. Freezing provides a stable and low-temperature environment that preserves the quality of the seeds for an extended period. Here’s how to store the pumpkin seeds effectively:
- Temperature considerations: Ensure that your freezer is set at a temperature of 0°F (-18°C) or below. This temperature range is ideal for long-term storage of frozen foods, including pumpkin seeds. It helps to maintain the texture, flavor, and nutritional value of the seeds.
- Freezer placement: Find a suitable spot in the freezer where the labeled packages can be stored without being crushed or damaged. Avoid placing them near the freezer door or in areas prone to temperature fluctuations, as these can impact the quality of the seeds over time.
- Proper organization: Arrange the packages in a way that allows for easy access and prevents them from being buried or lost among other frozen items. Keeping them visible and organized ensures that you can retrieve them without hassle when needed.
- Storage duration: Frozen pumpkin seeds can generally be stored for up to 12 months without significant loss of flavor or texture. However, it’s best to consume them within the first 6 to 8 months for the best quality. Regularly check the packages for any signs of freezer burn or deterioration, and prioritize using older packages before newer ones to maintain freshness.
By storing the labeled packages of pumpkin seeds in the freezer at the recommended temperature, you create an optimal environment for long-term preservation. The low temperature prevents bacterial growth, enzymatic reactions, and moisture loss, effectively preserving the taste, texture, and nutritional value of the seeds.
When you’re ready to use the frozen pumpkin seeds, simply remove the desired amount from the freezer, reseal the package, and promptly return the remaining seeds to the freezer for continued storage.
Proper storage in the freezer ensures that you can enjoy the flavorful and nutritious pumpkin seeds even when they are out of season. With these guidelines, you can confidently store the frozen pumpkin seeds and have a convenient supply on hand for various culinary creations or enjoyable snacking.
Other related questions
How do I defrost pumpkin seeds?
To defrost pumpkin seeds, follow these steps:
- Retrieve the desired amount: Remove the package of frozen pumpkin seeds from the freezer. Take out the amount you need for your intended use. It’s important to defrost only the quantity you plan to use to avoid repeated thawing and refreezing, which can affect the quality of the remaining seeds.
- Thaw at room temperature: Place the desired amount of frozen pumpkin seeds in a bowl or on a plate. Allow them to thaw at room temperature for about 15-30 minutes. During this time, the seeds will gradually defrost.
- Stir or toss occasionally: Occasionally stir or toss the thawing pumpkin seeds gently with a spoon or fork. This helps to evenly distribute the temperature and speed up the thawing process. Be careful not to crush or damage the seeds while doing so.
- Check for readiness: After about 15-30 minutes, check if the pumpkin seeds have fully thawed. They should be pliable and no longer frozen in the center. If you find any seeds that are still frozen, give them a little more time to thaw.
- Use as desired: Once the pumpkin seeds have thawed completely, they are ready to be used in your preferred recipes or enjoyed as a snack. Incorporate them into dishes like salads, granola bars, or bread, or simply savor them on their own.
Can I refreeze pumpkin seeds?
No, it is not recommended to refreeze pumpkin seeds. Once thawed, it is best to use the pumpkin seeds immediately or store them in the refrigerator for a short period. Refreezing pumpkin seeds can negatively affect their texture, taste, and overall quality.
How do I know if the pumpkin seeds have gone bad after being frozen?
To determine if frozen pumpkin seeds have gone bad, look for signs of freezer burn, such as dry, discolored, or shriveled appearance. Rancid or off smells are also indicators of spoilage. Additionally, taste a small portion of the seeds; if they taste stale, bitter, or have an unpleasant flavor, it is likely that they have deteriorated and should not be consumed.
Can I freeze pumpkin seeds from different varieties together?
Yes, you can freeze pumpkin seeds from different varieties together. Mixing seeds from different pumpkin varieties will not affect the freezing process or the quality of the frozen seeds. Just ensure they are properly cleaned and dried before freezing.
Can I freeze pumpkin seeds that have been boiled?
It is not necessary to boil pumpkin seeds before freezing. Boiling the seeds may affect their texture and make them softer. It’s best to skip the boiling step and freeze the raw seeds directly after cleaning and drying them.
Can I freeze pumpkin seeds for planting purposes?
Freezing pumpkin seeds for planting is not recommended. Freezing can affect the viability and germination of the seeds. It’s best to store pumpkin seeds for planting in a cool, dry place at room temperature instead.
Can I freeze pumpkin seeds for bird feed?
Yes, you can freeze pumpkin seeds for bird feed. Simply clean and dry the seeds thoroughly before freezing. Frozen pumpkin seeds can provide a nutritious and convenient snack for birds during colder months. Store them in a freezer-safe container and use as needed.

