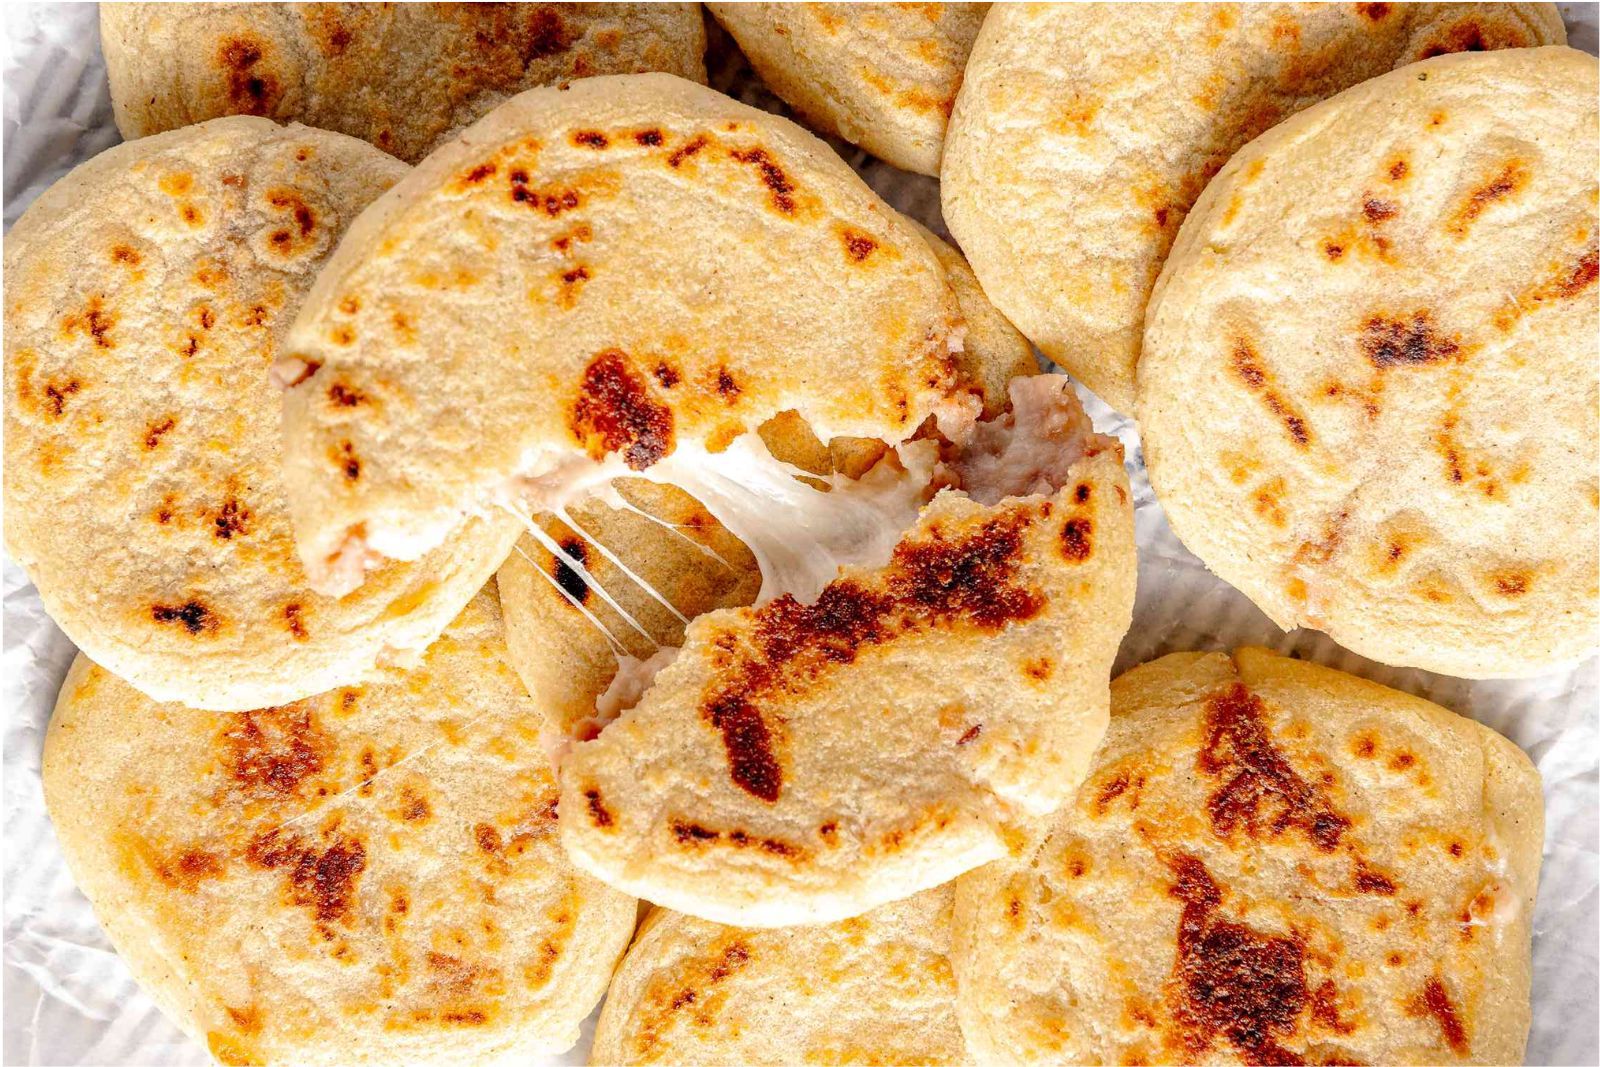
Pupusas are a traditional Salvadoran dish made of thick corn tortillas filled with various ingredients such as cheese, beans, or meat. They are a popular and delicious treat that can be enjoyed on their own or with salsa and curtido, a pickled cabbage relish. If you have a batch of pupusas and want to preserve them for later consumption, freezing is an excellent option. Freezing pupusas properly will help maintain their taste, texture, and overall quality. In this article, we will provide you with a step-by-step guide on how to freeze pupusas to ensure they stay fresh and flavorful.
Here’s a guide on how to freeze pupusas:
Step 1: Prepare the pupusas
Before freezing pupusas, it’s crucial to properly prepare them to ensure optimal texture and flavor. Follow these steps to prepare the pupusas for freezing:
- Cook the pupusas: Prepare the pupusas according to your preferred recipe. Typically, pupusas are made by forming a dough from masa harina (cornmeal), water, and salt. The dough is then filled with various ingredients such as cheese, beans, meat, or vegetables. Cook the pupusas on a hot griddle or skillet until they are golden brown and cooked through. Ensure that the filling is also fully cooked.
- Let them cool completely: After cooking, allow the pupusas to cool completely at room temperature. Cooling is essential to prevent condensation from forming inside the packaging, which can lead to freezer burn and affect the texture of the pupusas. It’s recommended to let them cool for about an hour or until they reach room temperature. To cool the pupusas efficiently, you can transfer them to a wire rack or a clean, flat surface. This allows air to circulate around them, helping them cool more quickly.
Step 2: Wrap each pupusa individually
To ensure that your pupusas remain separate and retain their shape during the freezing process, it’s important to wrap each pupusa individually. Here’s why this step is necessary and how to do it:
- Prevent sticking together: Wrapping each pupusa individually helps prevent them from sticking together in the freezer. Without proper wrapping, the pupusas can freeze into a solid mass, making it difficult to separate them later. Individually wrapping them creates a barrier between each pupusa, preventing them from sticking together.
- Maintain shape and texture: By wrapping each pupusa tightly, you help maintain its shape and texture. This is particularly important if your pupusas have a filling. The wrapping keeps the filling intact and prevents it from spreading or getting squished during freezing.
- Minimize freezer burn: Wrapping each pupusa tightly with plastic wrap or freezer-safe cling film helps minimize the risk of freezer burn. Freezer burn occurs when air comes into contact with the surface of frozen food, causing it to become dehydrated and develop off-flavors. A tight wrap acts as a protective barrier, reducing the chances of freezer burn and preserving the quality of the pupusas.
To wrap each pupusa individually:
- Allow the pupusas to cool completely after cooking.
- Place a sheet of plastic wrap or freezer-safe cling film on a clean surface.
- Take one pupusa and place it in the center of the plastic wrap.
- Fold the sides of the plastic wrap over the pupusa, covering it completely. Ensure that there are no exposed areas.
- Gently press and shape the plastic wrap around the pupusa, ensuring it is tightly sealed.
- Repeat this process for each pupusa, wrapping them individually.
Step 3: Place pupusas in a freezer-safe container
After individually wrapping each pupusa, it’s time to store them in a freezer-safe container or resealable freezer bags. Here’s why this step is important and how to do it correctly:
- Protection from freezer burn: Placing the wrapped pupusas in a freezer-safe container or bag provides an additional layer of protection against freezer burn. While the plastic wrap offers some level of protection, the container or bag acts as an extra barrier, minimizing the exposure of the pupusas to air and helping to maintain their quality.
- Easy organization and portioning: Using a container or bag allows for better organization and portioning of the pupusas. It keeps them in one place, making it easier to locate and retrieve individual portions when needed. Additionally, if you want to freeze different flavors or fillings of pupusas, using separate containers or bags can help avoid mixing them up.
- Space-saving: Placing the wrapped pupusas in a container or bag helps optimize the use of freezer space. By arranging them in a single layer or stacking them with some space between each pupusa, you can make the most of the available freezer space. Just ensure not to overcrowd or crush the pupusas, as it may affect their shape and texture.
To place the pupusas in a freezer-safe container or bag:
- Choose a sturdy, airtight container or resealable freezer bag specifically designed for freezer storage. These containers or bags should be made from materials that can withstand low temperatures without cracking or breaking.
- Open the container or bag and carefully place the wrapped pupusas inside. If using a container, arrange them in a single layer or stack them with a small gap between each pupusa.
- If using a resealable freezer bag, place the wrapped pupusas in the bag, squeeze out as much air as possible, and seal it tightly. Consider using multiple bags if needed to prevent overcrowding.
Step 4: Seal the container or bag
Sealing the container or bag in which you store the wrapped pupusas is a crucial step in preserving their quality and taste during freezing. Here’s why sealing is important and how to ensure a secure seal:
- Prevent air exposure: When pupusas are exposed to air during freezing, it can lead to freezer burn, which can result in the deterioration of texture, taste, and overall quality. By securely sealing the container or bag, you create a barrier that helps minimize air exposure, keeping the pupusas fresh.
- Maintain moisture levels: Proper sealing also helps retain the moisture within the pupusas. Moisture loss can occur when air enters the container or bag, leading to dryness and potentially affecting the taste and texture of the pupusas when thawed and reheated. A tight seal helps prevent moisture loss, ensuring the pupusas stay moist and flavorful.
To ensure a secure seal:
- For containers: Ensure that the lid or cover of the container is securely fitted. Press down firmly on the lid to confirm that it locks in place and forms a tight seal. If using containers with snap-on lids, double-check that all sides are properly aligned and snapped shut.
- For resealable freezer bags: After placing the wrapped pupusas inside the bag, carefully press out any excess air, as it can contribute to freezer burn. Then, seal the bag tightly by running your fingers along the seal to remove any trapped air and ensure a complete closure.
- Check for leaks or gaps: After sealing the container or bag, inspect it carefully for any signs of leaks or gaps. Ensure that there are no visible openings or areas where air or moisture could enter. If you notice any issues, reseal or transfer the pupusas to a new container or bag.
Step 5: Label and date the packaging
Labeling and dating the packaging of your frozen pupusas is an important step to help you identify them and keep track of their freshness. Here’s why this step is necessary and how to do it effectively:
- Easy identification: When you have multiple items stored in the freezer, labeling the packaging helps you quickly identify the pupusas without having to unwrap each one. This is especially helpful if you have different flavors or fillings of pupusas or if you have other frozen foods stored alongside them.
- Prevent waste: By labeling and dating the packaging, you can easily keep track of the freezing date. This allows you to prioritize consuming older batches of pupusas first, reducing the risk of them going to waste. Additionally, it helps you manage your freezer inventory and plan meals accordingly.
- Maintain quality: Pupusas are best enjoyed when they are fresh. By labeling and dating the packaging, you can ensure that you consume the pupusas within a reasonable time frame, maintaining their optimal quality and taste. This step is particularly important if you freeze a large batch and want to avoid keeping them in the freezer for too long.
To effectively label and date the packaging:
- Use a marker or adhesive labels: Choose a marker with permanent ink or adhesive labels that adhere well to the packaging material. Ensure that the marker or labels are freezer-safe to prevent smudging or fading over time.
- Write the contents: Clearly write “Pupusas” or a specific flavor/filling description on the packaging. This helps you identify the contents at a glance and avoid confusion with other frozen items.
- Date of freezing: Write the date on which the pupusas were frozen. Include the month, day, and year to provide accurate information for future reference.
- Placement: Place the label or write directly on a visible area of the packaging. Avoid placing it on the edge or fold where it may get damaged or covered.
Step 6: Place in the freezer
Once you have properly sealed the container or bag of pupusas, it’s time to put them in the freezer. Proper placement and handling in the freezer are important to maintain the shape and quality of the pupusas. Here’s why this step is crucial and how to do it correctly:
- Protect against damage: Choose a spot in the freezer where the sealed container or bag of pupusas won’t be easily crushed or disturbed. Placing them in an area with minimal movement or traffic helps prevent any accidental damage to the pupusas, such as getting squished or deformed.
- Maintain shape and texture: Pupusas have a specific shape and texture that you want to preserve. Avoid placing heavy items on top of the sealed container or bag, as the weight can flatten or distort the pupusas. Maintaining their original shape ensures that they will be visually appealing and enjoyable to eat after freezing.
- Temperature consistency: Ensure that the freezer maintains a consistently low temperature. Fluctuating temperatures can affect the texture and quality of the pupusas. Avoid placing the pupusas near the freezer door or in areas where they may be exposed to warmer air when the freezer is opened frequently.
- Proper airflow: Allow sufficient space around the container or bag for proper airflow in the freezer. Good air circulation helps maintain an even freezing temperature and prevents the formation of ice crystals on the pupusas. This ensures that the pupusas freeze uniformly and maintain their texture and taste.
To properly place the sealed container or bag in the freezer:
- Choose a flat and stable surface in the freezer where the pupusas can sit securely without the risk of tipping or shifting.
- If you have a freezer with removable shelves, consider placing the container or bag on a shelf that is not too close to the door or a frequently accessed area.
- If your freezer does not have removable shelves, find a spot where the pupusas can rest undisturbed, ensuring they are not squeezed between other items.
- Carefully place the sealed container or bag in the designated spot, ensuring it is level and has enough space around it for proper airflow.
How long can I keep frozen pupusas in the freezer?
Pupusas can last in the freezer for up to 3 months without significant loss of quality. However, for the best taste and texture, it is recommended to consume them within 1 to 2 months of freezing. Proper packaging, including airtight containers or freezer bags, can help extend their freezer storage life.
Step 7: Thaw and reheat
When the time comes to enjoy your frozen pupusas, proper thawing and reheating methods will help ensure they are heated through and maintain their delicious flavors. Follow these steps to thaw and reheat your pupusas:
Thawing the pupusas:
- Remove the desired number of pupusas from the freezer. Keep in mind how many portions you want to thaw and consume.
- Thaw in the refrigerator: The recommended method for thawing pupusas is to transfer them from the freezer to the refrigerator. Place the wrapped pupusas on a plate or in a container to catch any condensation and prevent cross-contamination. Allow them to thaw overnight or for several hours until completely thawed.
- Microwave defrosting: If you’re short on time, you can use the defrost setting on your microwave to thaw the pupusas. Follow the manufacturer’s instructions for your specific microwave model. Be cautious not to overheat the pupusas during this process, as it may result in uneven reheating or a change in texture.
Reheating the pupusas:
- Preheat a skillet or griddle: Place a skillet or griddle over medium heat and allow it to preheat. This ensures that the pupusas will heat evenly and develop a crispy exterior.
- Remove the plastic wrap: Unwrap the thawed pupusas and discard the plastic wrap.
- Reheat on the skillet or griddle: Place the pupusas on the preheated skillet or griddle. Cook them for a few minutes on each side, flipping occasionally, until they are heated through and the cheese (if included in the filling) is melted. The exact cooking time will depend on the size and thickness of the pupusas.
- Check for doneness: To ensure the pupusas are thoroughly reheated, you can use a meat thermometer to check the internal temperature. The recommended temperature for reheating cooked foods is 165°F (74°C).
- Serve and enjoy: Once the pupusas are heated through and the desired level of crispiness is achieved, remove them from the skillet or griddle. Serve them hot and enjoy!
Other related questions
Can I refreeze pupusas?
Refreezing pupusas is generally not recommended as it can negatively impact their quality and safety. When frozen food is thawed, bacteria can multiply, and refreezing can lead to further bacterial growth and potential foodborne illness. It is best to consume pupusas in one go or thaw only the amount you intend to eat to ensure food safety and preserve their taste and texture.
How do I know if the pupusas have gone bad after being frozen?
To determine if frozen pupusas have gone bad, examine their appearance, smell, and texture. If the pupusas show signs of freezer burn, such as discoloration, dryness, or the presence of ice crystals, their quality may have deteriorated. Additionally, a sour or off-putting odor or a slimy or mushy texture can indicate spoilage. When in doubt, it’s best to err on the side of caution and discard any pupusas that exhibit these signs to avoid potential foodborne illness.
Can I freeze pupusas with different fillings?
Yes, you can freeze pupusas with a variety of fillings. Whether it’s cheese, beans, meat, or vegetables, the freezing process remains the same. Just ensure that the fillings are fully cooked before freezing.

