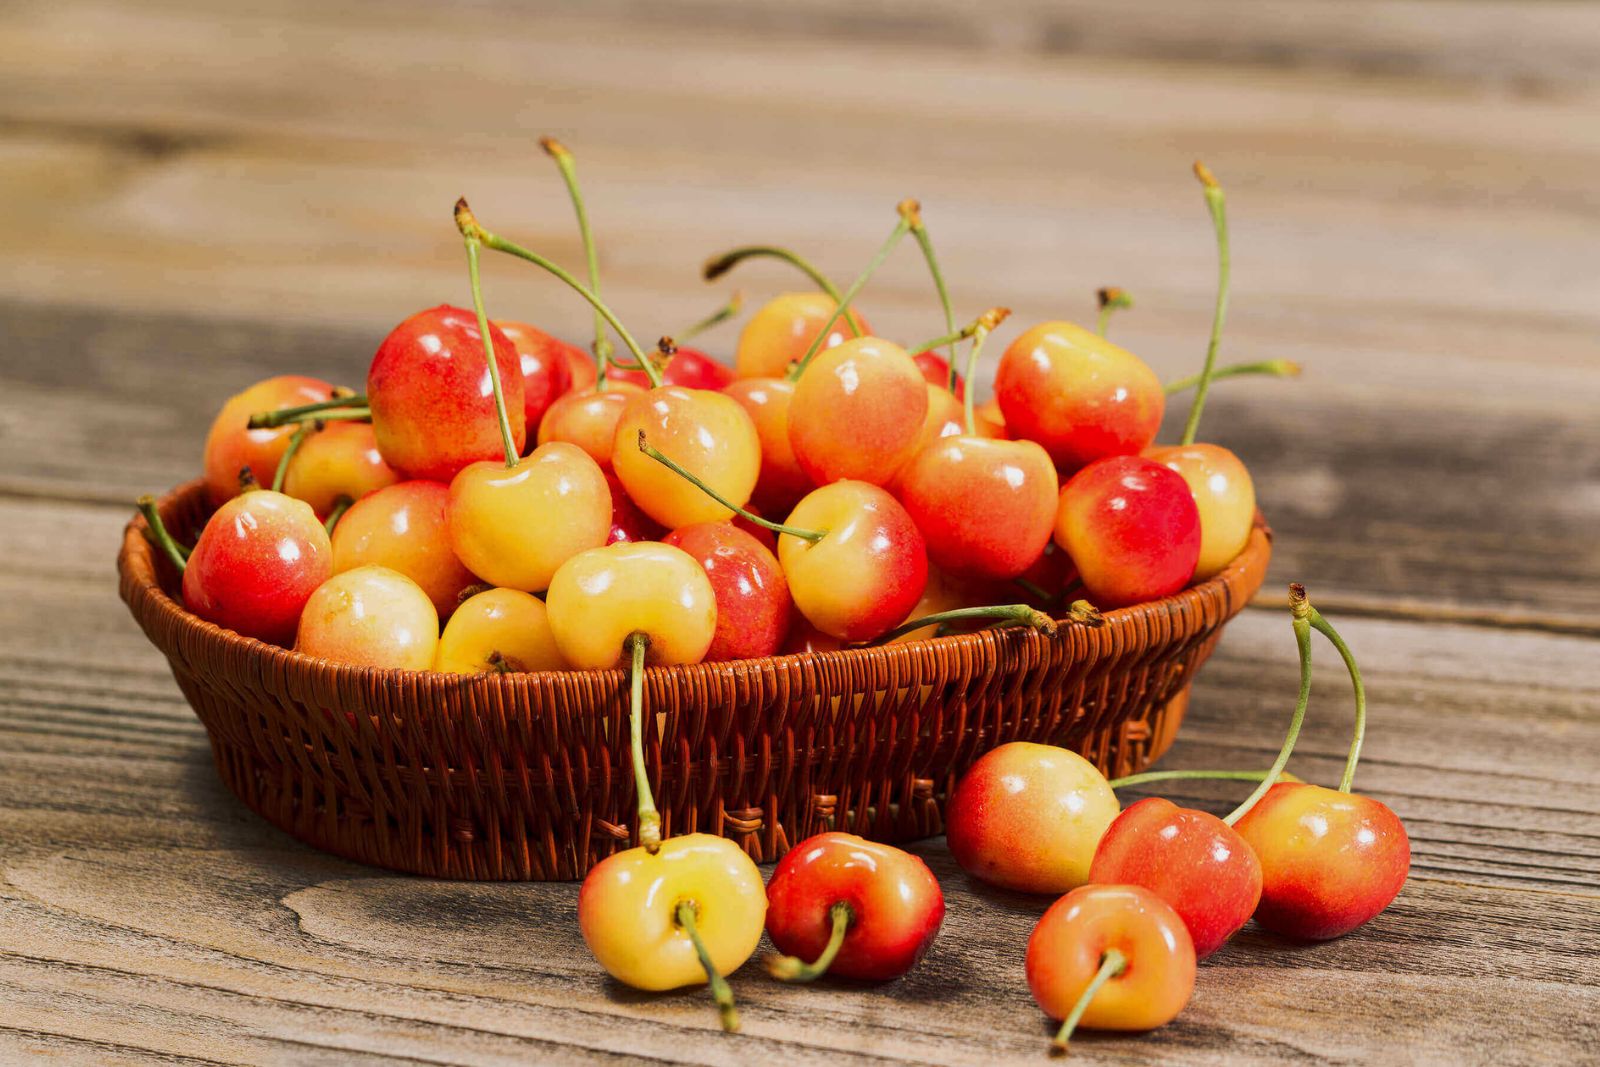
Rainier cherries, with their stunning golden-yellow hue and succulent flesh, are a delightful summer treat. These cherries are cherished for their delicate sweetness and are often enjoyed fresh. However, when you find yourself with an abundance of Rainier cherries, freezing them can be an excellent way to extend their shelf life and enjoy their flavor even during the colder months. This article walks you through a comprehensive process to freeze Rainier cherries while preserving their exceptional taste and texture.
Learn how to freeze Rainier cherries using the following steps:
- Step 1: Choose the finest Rainier cherries
- Step 2: Wash and pit the cherries
- Step 3: Prepare a simple syrup (optional)
- Step 4: Dip cherries in lemon juice (optional)
- Step 5: Arrange cherries on a baking sheet
- Step 6: Flash-freeze the cherries
- Step 7: Package the cherries
- Step 8: Label and date the packages
- Step 9: Store in the freezer
Step 1: Choose the finest Rainier cherries
Freezing Rainier cherries begins with a crucial step: selecting the best-quality cherries. The taste and texture of your frozen cherries largely depend on the condition of the fruit you start with. Here’s why choosing ripe, blemish-free Rainier cherries is essential for successful freezing.
Rainier cherries are known for their distinct golden-yellow color, delicate sweetness, and juicy flesh. When selecting cherries for freezing, opt for those that are fully ripe. Ripe cherries have reached their peak sweetness and flavor, ensuring that your frozen cherries will retain that delightful taste even after they’ve been preserved.
Inspect the cherries for any blemishes, bruises, or signs of decay. These imperfections can negatively impact the quality of the frozen cherries. Blemish-free cherries will freeze more evenly and maintain their texture better than damaged ones.
Look for plump cherries with a firm texture. Cherries that are slightly soft to the touch might be overripe and could become mushy when frozen and thawed. On the other hand, overly firm cherries might not have developed their full sweetness yet. Aim for a balance between firmness and ripeness.
The vibrant yellow color of Rainier cherries is not just visually appealing; it’s also an indicator of their flavor and maturity. Cherries that have a rich, golden hue are more likely to be at their prime. Avoid cherries with dull or greenish tinges, as they might not have fully ripened.
Quality cherries will yield the best results when it comes to freezing. Their natural sweetness, vibrant color, and firm texture will be better preserved during the freezing process. Starting with top-notch cherries sets the foundation for creating frozen Rainier cherries that are a true delight to enjoy, whether on their own or as part of various dishes.
Can I freeze Rainier cherries that have started to wrinkle or soften?
It’s generally best to freeze Rainier cherries at their peak freshness. Cherries that have started to wrinkle or soften might not freeze as well and can have altered texture after thawing. To ensure the highest quality when thawed, freeze cherries that are still in good condition and at their prime ripeness.
Step 2: Wash and pit the cherries
After selecting the finest Rainier cherries, the next crucial step in the freezing process is to wash and pit the cherries. This step ensures that your frozen cherries remain clean, safe to eat, and ready for various culinary uses. Here’s why washing and pitting are important and how to do it effectively.
- Washing the Cherries:
Rinsing the cherries under cold water serves multiple purposes. First and foremost, it removes any dirt, debris, or residues that might be present on the fruit’s surface. Rainier cherries, like any fresh produce, can come into contact with contaminants during growth, harvesting, and transportation. Washing them helps eliminate potential sources of bacteria or foreign particles that could affect the cherries’ quality and safety during freezing.
- Pitting the Cherries:
Pitting involves removing the seeds or pits from the cherries. While some fruits can be frozen with their seeds intact, cherry pits can impart a slightly bitter taste to the fruit, and their texture can change when frozen and thawed. Pitting the cherries before freezing not only prevents this undesirable flavor alteration but also makes the cherries more versatile for various recipes.
- There are two common methods for pitting cherries: using a cherry pitter or a small knife. A cherry pitter is a specialized tool designed for this purpose. It quickly and efficiently removes the pits while minimizing the risk of damaging the fruit. Alternatively, a small knife can be used to carefully cut around the pit and remove it. Whichever method you choose, take care to keep the cherries intact and avoid any unnecessary waste.
- Enhancing the Freezing Process:
Pitting the cherries before freezing enhances the overall freezing process. Without pits, the cherries freeze more uniformly, reducing the likelihood of clumping together. This makes it easier to portion out the desired amount of cherries when you’re ready to use them. Additionally, pitted cherries thaw more evenly, maintaining a consistent texture and flavor.
Can I freeze Rainier cherries with pits intact?
It’s recommended to pit Rainier cherries before freezing. Pitting prevents bitterness and enhances freezing. Frozen cherries with pits might have altered texture and taste upon thawing.
Step 3: Prepare a simple syrup (optional)
When it comes to freezing Rainier cherries, there’s an optional step that can significantly enhance the overall quality of the frozen fruit: preparing a simple syrup. A simple syrup is a mixture of water and sugar that, when added to the cherries before freezing, helps preserve their flavor, texture, and natural sweetness. Here’s why this step is beneficial and how to make and use a simple syrup effectively.
- Preserving Flavor and Texture:
Cherries contain a high water content, which means that when frozen, they can develop ice crystals that affect their texture and taste. By immersing the cherries in a simple syrup before freezing, you create a protective barrier around the fruit. This barrier minimizes the formation of large ice crystals, which can lead to a loss of the cherries’ natural juiciness and texture.
- Maintaining Natural Sweetness:
Rainier cherries are prized for their delicate and naturally sweet flavor. The simple syrup not only helps with texture but also preserves the cherries’ inherent sweetness. The sugar in the syrup acts as a natural preservative, helping to prevent the fruit from developing freezer burn or becoming overly icy. This ensures that when you eventually thaw the cherries, they maintain their delectable taste, making them just as enjoyable as when they were fresh.
How to Prepare a Simple Syrup:
- In a saucepan, combine equal parts water and granulated sugar. For example, you can use 1 cup of water and 1 cup of sugar.
- Heat the mixture over medium heat, stirring until the sugar completely dissolves.
- Allow the syrup to come to a gentle boil, then reduce the heat and let it simmer for a couple of minutes.
- Remove the saucepan from heat and let the syrup cool to room temperature.
- Once the syrup is cool, it’s ready to be used for preserving the cherries.
Using the Simple Syrup:
Place the prepared Rainier cherries in a container or resealable bag suitable for freezing. Pour the cooled simple syrup over the cherries, ensuring they are fully submerged. Leave some space at the top of the container or bag to allow for expansion during freezing. The syrup will create a protective layer around the cherries, preventing them from sticking together and helping to maintain their overall quality.
While preparing a simple syrup is an optional step, it can make a significant difference in the quality of your frozen Rainier cherries. The added protection against ice crystals and the preservation of natural sweetness ensure that your frozen cherries will be a true delight to enjoy, whether eaten on their own or incorporated into various recipes.
Step 4: Dip cherries in lemon juice (optional)
As you continue on the journey of freezing Rainier cherries, there’s another optional step that can help maintain the appearance of the cherries and their overall quality: dipping them in lemon juice or an ascorbic acid solution. This extra precaution prevents the cherries from darkening during the freezing process. Here’s why this step is valuable and how to implement it effectively.
- Preventing Darkening:
Cherries, like many fruits, are prone to a natural process called enzymatic browning. This occurs when the fruit’s enzymes react with oxygen in the air, causing the fruit to turn brown over time. While browning doesn’t necessarily indicate spoilage, it can impact the appearance of the cherries and might give the impression of less freshness.
- Using Lemon Juice or Ascorbic Acid:
Lemon juice is a popular choice for preventing browning in fruits due to its natural acidity. The citric acid in lemon juice helps inhibit the enzymatic browning process. Alternatively, you can use an ascorbic acid solution, which is simply a mixture of water and vitamin C powder. Ascorbic acid, also known as vitamin C, has antioxidant properties that can slow down browning.
- When to Consider This Step:
Dipping the cherries in lemon juice or an ascorbic acid solution is particularly useful if you plan to use the frozen cherries for recipes where their appearance matters. For example, if you intend to use the cherries as a topping for desserts, in fruit salads, or as a garnish, maintaining their vibrant color becomes more important. This step is less critical if you’re planning to use the cherries in recipes where their appearance is less noticeable, such as smoothies or baked goods where the color changes won’t affect the final outcome.
How to Dip Cherries:
- Prepare a mixture of lemon juice or ascorbic acid solution. For lemon juice, you can use freshly squeezed lemon juice or bottled lemon juice. For the ascorbic acid solution, dissolve vitamin C powder in water according to the package instructions.
- Gently dip each cherry into the lemon juice or ascorbic acid solution. Ensure that the cherries are fully coated, but avoid soaking them excessively.
- Allow the cherries to air-dry for a few minutes before proceeding with the freezing process.
Step 5: Arrange cherries on a baking sheet
As you move forward in the process of freezing Rainier cherries, it’s time to focus on an essential step that ensures proper freezing and convenient future use: arranging the prepared cherries on a baking sheet. This step might seem simple, but its impact on the quality of your frozen cherries is significant. Here’s why this step is crucial and how it contributes to successful freezing.
- Preventing Clumping and Sticking:
When cherries are frozen in a clumped or stuck-together arrangement, they can be challenging to separate when you need to use them. This can result in the need to thaw more cherries than you actually require. Arranging the cherries in a single layer on a baking sheet before freezing prevents them from sticking together. This means you can easily access and portion out the exact amount of cherries you need for a particular recipe without any fuss.
- Even Freezing:
Properly arranged cherries freeze more quickly and evenly. When cherries freeze evenly, they develop smaller ice crystals, which helps maintain their texture and juiciness when thawed. Uneven freezing, on the other hand, can lead to larger ice crystals forming within the fruit, potentially compromising their overall quality.
How to Arrange Cherries:
- After washing, pitting, and optionally dipping the cherries, prepare a clean and dry baking sheet.
- Lay a piece of parchment paper or a silicone baking mat on the baking sheet. This helps prevent the cherries from sticking to the sheet.
- Place the cherries in a single layer on the baking sheet, ensuring they don’t touch each other. This might require multiple batches if you have a large quantity of cherries.
- If you’re using a simple syrup, you can either pour a small amount over the cherries on the baking sheet or drizzle it over them.
Additional Tips:
- Leave a bit of space between each cherry to ensure that they don’t freeze together.
- Try to avoid overcrowding the baking sheet, as this can slow down the freezing process.
Step 6: Flash-freeze the cherries
As you proceed with freezing Rainier cherries, the technique of flash-freezing takes center stage. Flash-freezing is a vital step that goes beyond standard freezing methods. This process contributes to the ultimate quality and convenience of your frozen cherries. Let’s delve into the significance of flash-freezing and why it’s a game-changer in preserving the excellence of your Rainier cherries.
- The Essence of Flash-Freezing:
Flash-freezing involves exposing the cherries to extremely cold temperatures in a quick and efficient manner. This rapid freezing technique is markedly different from conventional freezing. Instead of slowly freezing the cherries over time, flash-freezing ensures that each cherry freezes individually and swiftly. The result is smaller ice crystals forming within the cherries, which in turn maintains their integrity when thawed.
- Preventing Clumping and Enhancing Portion Control:
One of the chief benefits of flash-freezing is preventing cherries from clumping together during freezing. When cherries freeze individually, they don’t adhere to one another. This is crucial for future use, as you can effortlessly retrieve the exact number of cherries you need without defrosting an entire batch. Whether you’re adding cherries to recipes, enjoying them as a snack, or using them as a topping, the ability to control portions adds a new level of culinary convenience.
- Maintaining Texture and Flavor:
Flash-freezing preserves the natural texture and flavor of the Rainier cherries. Smaller ice crystals formed during rapid freezing minimize cell damage within the fruit. This means that when you thaw the cherries, they’re more likely to retain their juiciness and firmness, mirroring the delightful qualities of fresh cherries. Your culinary creations will benefit from the same vibrant taste and mouthfeel you expect from Rainier cherries.
The Flash-Freezing Process:
- After arranging the cherries in a single layer on a baking sheet, place the sheet in the freezer.
- Allow the cherries to remain in the freezer for a relatively short period, typically around 1 to 2 hours. The exact time may vary based on the size of the cherries and the temperature of your freezer.
- Once the cherries are fully frozen, transfer them to airtight freezer-safe containers or resealable bags for prolonged storage.
Flash-Freezing Tips:
- Space out the cherries on the baking sheet to ensure even freezing.
- If you’re using a simple syrup, you can add it either before or after flash-freezing.
Can I freeze Rainier cherries without flash-freezing?
Flash-freezing is recommended to prevent clumping and maintain quality. While you can freeze cherries without this step, they might stick together and develop larger ice crystals affecting texture.
Step 7: Package the cherries
With your Rainier cherries now individually frozen through the flash-freezing process, it’s time to transition to the packaging stage. Packaging plays a vital role in maintaining the quality and longevity of your frozen cherries. Here’s why this step is essential and how to package your cherries effectively.
- Preserving Freshness and Preventing Freezer Burn:
Once cherries are exposed to air in the freezer, they can develop freezer burn, which can degrade their texture and taste. Proper packaging minimizes the exposure of cherries to air, helping preserve their freshness and preventing freezer burn. Airtight containers or resealable plastic bags act as protective barriers against air and moisture, ensuring that your frozen cherries remain in optimal condition.
- Using Airtight Containers or Resealable Bags:
When packaging frozen cherries, opt for airtight freezer-safe containers or resealable plastic bags designed for freezer use. These containers are designed to withstand low temperatures and keep out air and moisture. Using regular containers or bags not intended for freezing can result in freezer burn and deterioration of the cherries’ quality.
- Consider Simple Syrup (If Prepared):
If you’ve prepared a simple syrup to help preserve the cherries’ flavor and texture, you can choose to add it to the packaging. Gently pour the syrup over the cherries before sealing the container or bag. The simple syrup will create an additional layer of protection against freezer burn and maintain the cherries’ natural sweetness.
- Leave Space for Expansion:
When sealing your containers or bags, be sure to leave some space at the top. This space accommodates the expansion that occurs as the cherries freeze completely. Failing to leave room for expansion could cause containers to crack or bags to burst, compromising the packaging’s integrity.
Packaging Tips:
- Try to remove as much air as possible from resealable bags before sealing them to minimize air exposure.
- If using containers, press plastic wrap directly against the surface of the cherries before sealing to further reduce air contact.
Step 8: Label and date the packages
As you near the final stages of freezing Rainier cherries, a small yet critical step involves labeling and dating the packages containing your frozen cherries. This seemingly simple act holds practical significance in maintaining the quality of your frozen fruit and streamlining your culinary endeavors. Let’s delve into why this step is important and how it contributes to your overall freezing process.
- Tracking Freshness and Rotation:
Labeling and dating your frozen cherry packages is akin to creating a roadmap for your culinary journey. As time passes, it’s easy to lose track of when different batches of cherries were frozen. By clearly marking the date of freezing on each container or bag, you establish a reference point. This helps you keep track of the freshness of your cherries and enables you to prioritize using older batches before newer ones. This practice is especially crucial if you intend to store the cherries for an extended period.
- Ensuring Optimal Flavor and Texture:
- Rainier cherries, known for their exquisite taste and texture, deserve to be enjoyed at their finest, even after freezing. Over time, frozen food can undergo subtle changes in flavor and texture due to factors like temperature fluctuations in the freezer. By dating your cherry packages, you empower yourself to make informed decisions about which batches to use first. This, in turn, allows you to savor the cherries while they’re still at their peak, ensuring that your culinary creations continue to dazzle.
- Streamlining Culinary Planning:
Imagine effortlessly locating the perfect batch of cherries to complement a recipe you’re excited to try. Properly labeled packages simplify the process of selecting cherries for specific dishes. Instead of guessing or potentially being disappointed by unexpected changes in texture or flavor, you can confidently pick the cherries that match your culinary vision.
How to Label and Date:
Using a permanent marker or adhesive labels, write the date of freezing on each container or bag of cherries. Place the label in a visible location to ensure easy identification. For example, on a resealable bag, you might write “Frozen on MM/DD/YYYY” at the top. If you’ve prepared multiple batches of cherries, consider numbering the packages for further organization.
Additional Tips:
- If you have limited space on the package, you can also create a small inventory sheet with dates and batch numbers for quick reference.
- Use a consistent labeling method to avoid confusion later on.
Step 9: Store in the freezer
Congratulations, you’ve successfully navigated through the process of freezing Rainier cherries! As you approach the final step of your journey, it’s time to ensure that your efforts culminate in a delicious and lasting reward. Storing your frozen cherries properly is key to maintaining their quality and allowing you to enjoy their sweetness for an extended period. Here’s why this step is pivotal and how it safeguards your frozen cherries.
- Preserving Quality and Freshness:
After all the careful preparation and steps you’ve taken, the last thing you want is to compromise the quality of your frozen Rainier cherries. Proper storage is the bridge that connects your efforts to the long-term preservation of the cherries’ flavor, texture, and juiciness. The cold temperatures of the freezer halt the growth of microorganisms that can lead to spoilage, allowing your cherries to remain as delightful as the day they were frozen.
- Choosing the Coldest Part:
The location within your freezer matters when it comes to maintaining the optimal quality of frozen food. The coldest part of the freezer is typically towards the back and near the bottom, as these areas are less prone to temperature fluctuations when you open the freezer door. Placing your labeled cherry packages in this section ensures a consistently cold environment, reducing the risk of temperature variations that could compromise the cherries’ integrity.
- Longevity of Frozen Rainier Cherries:
Properly stored frozen Rainier cherries can maintain their quality for up to a year. During this time, the cherries will remain safe to eat, but it’s important to note that the longer they are stored, the more the quality might gradually decline. While they won’t necessarily spoil, they might experience some changes in texture, flavor, or appearance over extended periods. To enjoy the best taste and texture, it’s advisable to use them within the first 6 months of freezing.
How to Store:
- Place your labeled and well-sealed cherry packages in the coldest part of your freezer.
- Ensure the cherries are positioned so that they are protected from potential damage. Avoid placing heavy items on top of the cherry packages.
- If you have multiple batches of cherries, consider organizing them by date or batch number for easy access.
Additional Tips:
- Keep the freezer temperature at or below 0°F (-18°C) for optimal preservation.
- Avoid frequent thawing and refreezing, as this can affect the cherries’ quality.
Other related questions
How do I defrost Rainier cherries?
To defrost Rainier cherries, transfer them from the freezer to the refrigerator and let them thaw slowly for several hours or overnight. Alternatively, you can place the frozen cherries in a sealed plastic bag and immerse them in cold water for quicker thawing. Avoid using heat or microwave to defrost as it may compromise texture and taste.
Should I thaw frozen Rainier cherries before using them in recipes?
Thawing frozen Rainier cherries depends on the recipe. For cooked dishes like pies and jams, using frozen cherries directly is often acceptable. However, for salads or recipes where texture matters, slight thawing might be preferred. Consider the intended use and adjust accordingly for the best culinary outcome.
Can I refreeze Rainier cherries?
Refreezing Rainier cherries is not recommended as it can lead to a decline in quality. Once thawed, cherries undergo textural changes due to moisture loss during the initial freezing-thawing process. Refreezing further degrades their texture and flavor, affecting overall enjoyment.
How do I know if the Rainier cherries have gone bad after being frozen?
Signs of spoiled frozen Rainier cherries include freezer burn, noticeable ice crystals, changes in color or texture, and off-putting odors. If the cherries appear mushy, discolored, or emit an unusual smell, they may have degraded in quality. It’s essential to trust your senses and discard any cherries that show signs of spoilage.
What recipes can I use frozen Rainier cherries for?
Frozen cherries are versatile for smoothies, desserts, jams, and more. Their vibrant taste and color make them a delightful addition to both sweet and savory dishes.
Are frozen Rainier cherries as nutritious as fresh ones?
Frozen Rainier cherries retain a significant portion of their nutritional value when compared to fresh ones. Freezing effectively preserves vitamins, minerals, and antioxidants. While there might be a slight loss in texture due to freezing, the overall nutritional benefits remain, making frozen Rainier cherries a convenient and nutritious option even when they’re out of season.
Can I use the liquid from thawed Rainier cherries in recipes?
Yes, the liquid from thawed Rainier cherries can be a valuable ingredient in various recipes. It’s infused with the natural flavors and sweetness of the cherries. You can use it to make sauces, syrups, beverages, or enhance the flavor of desserts and baked goods, adding an extra layer of deliciousness to your culinary creations.

