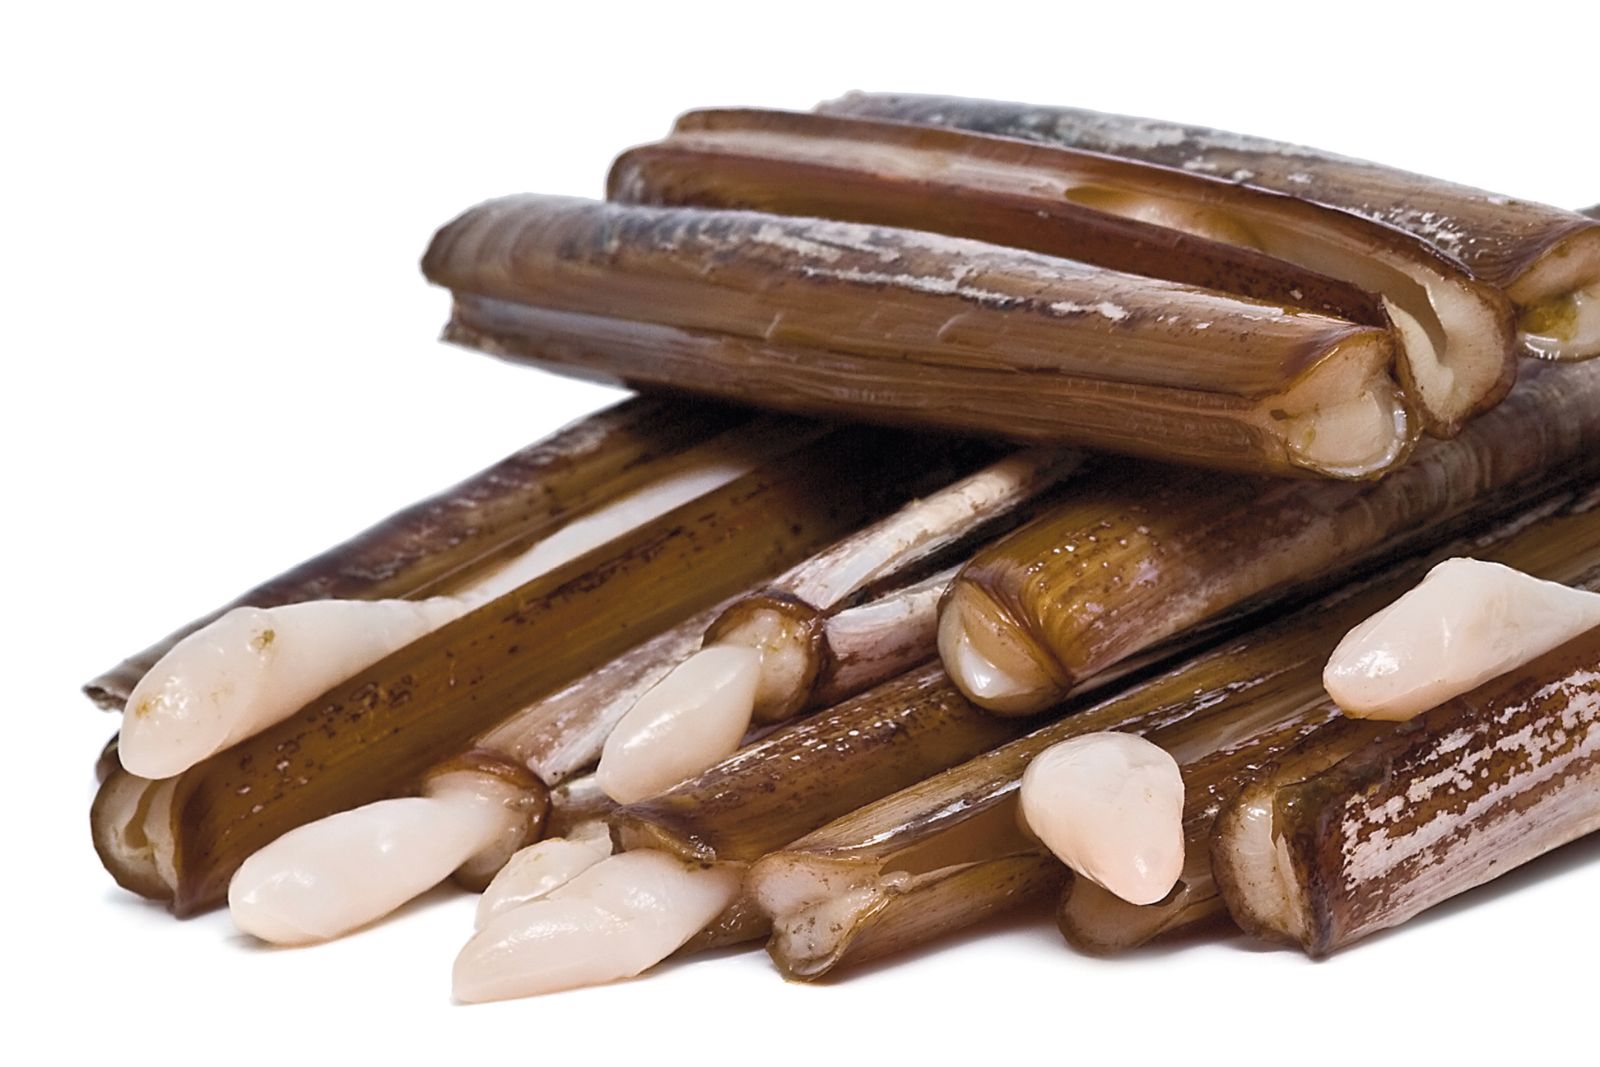
Razor clams are a prized delicacy of the coastal regions, renowned for their distinct shape and exquisite flavor. These long, slender shellfish burrow themselves in the sandy ocean floors, and their tender, sweet meat is highly sought after by seafood enthusiasts. Razor clams have a unique taste that is often described as slightly briny with a hint of sweetness, making them a versatile ingredient in various culinary preparations. Whether steamed, sautéed, or incorporated into soups and chowders, razor clams offer a delightful seafood experience
If you have a bountiful harvest of razor clams or want to savor their exquisite taste throughout the year, freezing can be an effective method to preserve their freshness and prolong their enjoyment. Freezing razor clams allows you to have these delectable shellfish readily available, allowing you to relish their flavors even when they are out of season. In the following section, we will explore the process of freezing razor clams and provide tips for maintaining their texture and taste after thawing.
Here is a step-by-step guide on how to freeze razor clams:
Step 1: Clean the razor clams
Cleaning razor clams is an essential step before freezing them to ensure that you remove any sand, debris, or unwanted particles that may affect their taste and texture. Here’s why cleaning the razor clams is important:
- Removing sand and debris: Razor clams are filter feeders, meaning they ingest sand and other particles as they burrow into the ocean floor. Cleaning them helps eliminate any grit or sand that may be trapped inside their shells. Rinsing the clams under cold water and gently scrubbing the shells with a brush helps dislodge and remove these unwanted elements.
- Enhancing flavor: By cleaning the razor clams, you eliminate any potential contaminants or unpleasant tastes that may be present on the shell or inside the clam. This ensures that the natural flavor of the clam shines through when you eventually cook or consume them.
- Promoting food safety: Proper cleaning of razor clams helps minimize the risk of consuming harmful bacteria or toxins. Discarding any cracked or damaged clams is crucial as these may indicate spoilage or the presence of pathogens. Ensuring that only healthy clams are frozen helps maintain food safety standards.
To clean razor clams effectively, it is recommended to rinse them under cold running water, using your hands or a brush to gently remove any visible sand or debris. Pay attention to the crevices and edges of the shell, as these areas may trap particles. Once the clams are thoroughly cleaned, you can proceed to the next steps of freezing or further preparation.
Step 2: Cook the razor clams
Cooking razor clams before freezing them serves several purposes and ensures that they are properly prepared for storage. Here’s why cooking razor clams is an important step:
- Opening the shells: Razor clams have tightly closed shells when they are raw. Cooking them briefly in boiling water causes the shells to open, making it easier to remove the clam meat from the shell if desired. This step is particularly useful if you plan to freeze the clam meat separately or use it in specific recipes later on.
- Ensuring food safety: Cooking razor clams helps eliminate any potential bacteria, parasites, or pathogens that may be present in the raw clams. By subjecting them to high temperatures, harmful microorganisms are destroyed, reducing the risk of foodborne illnesses.
- Enhancing texture and flavor: Cooking razor clams for a short period helps to maintain their natural texture and flavor. It prevents the clams from becoming tough or rubbery when you eventually thaw and cook them after freezing. The brief cooking time ensures that the clams retain their tenderness and delicate taste.
To cook razor clams, follow these steps:
- Bring a large pot of water to a boil: Fill a pot with enough water to fully submerge the clams. Make sure the pot is large enough to accommodate the clams comfortably without overcrowding.
- Add the clams: Once the water is boiling, carefully add the razor clams to the pot. Be cautious to avoid any splashing or hot water spills.
- Cook for 2 to 3 minutes: Allow the clams to cook in the boiling water for approximately 2 to 3 minutes. This duration is generally sufficient to open the shells and cook the clam meat partially.
- Remove from heat and cool: Using a slotted spoon or tongs, carefully remove the cooked razor clams from the boiling water. Immediately transfer them to a bowl of ice water. The ice water helps cool the clams rapidly, halting the cooking process and preventing them from overcooking.
Can I freeze razor clams directly without cooking them first?
It is not recommended to freeze razor clams directly without cooking them first. Freezing raw razor clams can lead to a loss in texture, flavor, and overall quality. Cooking the clams before freezing helps to preserve their taste and texture, ensuring a better culinary experience when they are eventually thawed and prepared.
Step 3: Shell the razor clams (optional)
Shelling razor clams before freezing is an optional step that offers convenience and flexibility in handling and using the clams later on. Here’s why shelling the razor clams can be beneficial:
- Easier storage: Removing the razor clams from their shells before freezing allows for more compact and efficient storage. The clam meat takes up less space compared to the whole clams, which can be advantageous if you have limited freezer space. Shelled razor clams can be packed tightly in freezer bags or containers, optimizing the use of available storage.
- Quicker preparation: Shelled razor clams thaw and cook faster than clams in their shells. Removing the shells beforehand saves time during meal preparation as you don’t have to spend additional effort opening the shells or removing the clam meat before cooking. Shelled razor clams are ready to be incorporated into your favorite recipes without any extra steps.
- Versatile usage: Shelled razor clams offer versatility in terms of their culinary applications. You can use the clam meat in various dishes such as soups, stews, pasta, or sautés. By separating the clam meat from the shells, you have the flexibility to experiment with different recipes and cooking techniques without being limited by the shell’s presence.
If you decide to shell out the razor clams before freezing, here’s how to do it:
- Once the cooked razor clams have cooled down, carefully remove the clam meat from the shells. Gently pry open the shells using a knife or your fingers, being cautious not to damage the meat.
- Slide the knife or your fingers between the shell and the clam meat to detach them. Slowly and carefully work your way around the clam to separate the meat completely from the shell.
- After shelling the razor clams, you can proceed to the packaging and freezing steps as mentioned earlier.
Remember, shelling the razor clams is an optional step, and you can choose to freeze them with or without their shells based on your preference and intended use.
Can I freeze razor clams with their shells on?
Yes, you can freeze razor clams with their shells on. Freezing razor clams with their shells intact helps protect the delicate flesh during freezing and thawing. The shells provide a natural barrier that helps maintain the clams’ moisture and integrity, preserving their quality until they are ready to be cooked or consumed.
Step 4: Package the razor clams
After the razor clams have cooled down, it’s crucial to package them properly for freezing. The packaging method you choose depends on whether you shelled the clams or prefer to freeze them in the shell. Here’s why packaging is important and how to do it effectively:
- Preventing freezer burn: Freezer burn can occur when food is exposed to air and moisture in the freezer. It can lead to changes in texture, taste, and overall quality. Using airtight packagings, such as freezer bags or containers, creates a barrier that helps protect the razor clams from freezer burn. This ensures that they retain their freshness and taste when you eventually thaw and cook them.
- Maintaining quality: Proper packaging helps maintain the quality of the razor clams during their time in the freezer. It prevents them from absorbing odors from other foods in the freezer, minimizes the risk of freezer burn, and keeps them safe from potential contaminants.
Here’s how to package the razor clams based on your preferred method:
If you shelled the clams:
- Place the shelled razor clam meat in airtight freezer bags or containers.
- Squeeze out excess air from the bags before sealing them.
- Seal the bags tightly or ensure the lids on the containers are securely closed to maintain an airtight seal.
If you prefer to freeze them in the shell:
- Place the whole razor clams inside airtight freezer bags or containers.
- If using bags, try to arrange the clams in a single layer to prevent them from being squished or crowded together.
- Squeeze out as much air as possible from the bags before sealing them. If using containers, make sure the lids are tightly closed.
Can I freeze razor clams in a vacuum-sealed bag?
Yes, you can freeze razor clams in a vacuum-sealed bag. Vacuum-sealing removes excess air from the bag, helping to prevent freezer burn and maintain the quality of the clams. Ensure the razor clams are properly cleaned, cooked, and cooled before vacuum-sealing them. The vacuum-sealed bags can be placed directly in the freezer for long-term storage.
Are there any alternatives to plastic wrap and aluminum foil for packaging razor clams?
Yes, there are alternative options to plastic wrap and aluminum foil for packaging razor clams. One option is to use reusable silicone bags or containers specifically designed for freezing. These options provide an airtight seal and can be washed and reused. Another alternative is freezer paper, which is coated with a thin layer of plastic on one side, offering moisture resistance and protection against freezer burn.
Step 5: Remove excess air and seal
Before storing the packaged razor clams in the freezer, it’s important to remove as much air as possible from the bags or containers. This step is crucial for minimizing the risk of freezer burn and maintaining the quality of the clams. Here’s why removing excess air and sealing the packaging tightly is essential:
- Preventing freezer burn: Freezer burn occurs when food is exposed to air in the freezer, causing moisture to evaporate from the surface of the food. This can lead to changes in texture, taste, and overall quality. By removing excess air from the packaging, you reduce the amount of air that can come into contact with the razor clams, minimizing the risk of freezer burn.
- Maintaining freshness: Trapped air inside the packaging can contribute to the oxidation process, leading to a loss of freshness and potential degradation of the razor clams’ quality. Removing excess air helps create a vacuum-like environment within the package, reducing the exposure to oxygen and preserving the clams’ freshness for a longer period.
- Optimizing space: Removing air from the packaging also allows for more efficient use of freezer space. By minimizing the size of the package, you can arrange the razor clams more effectively in the freezer, maximizing storage capacity and preventing them from being squished or overcrowded.
To remove excess air and seal the packaging tightly:
For freezer bags:
- Place the packaged razor clams on a flat surface, ensuring they are arranged in a single layer if possible.
- Starting from one end of the bag, gently press out the air while simultaneously sealing the bag.
- Continue pressing out the air until the bag is tightly sealed. You can use your hands or a rolling pin to aid in the process.
- Ensure that the seal is secure and airtight, providing a barrier against air and moisture.
For containers:
- Place the lid on the container and press it down firmly to create a tight seal.
- Make sure all sides of the lid are securely closed, leaving no gaps or openings that can allow air to enter.
Step 6: Label and date the packages
Labeling and dating the packages of frozen razor clams is a crucial final step in the freezing process. It helps you keep track of the contents and freezing date, ensuring that you use the clams within their recommended storage period. Here’s why labeling and dating are important:
- Tracking storage time: Freezing is not a permanent preservation method, and frozen foods have a limited storage life. By labeling the packages with the date of freezing, you establish a reference point for tracking how long the razor clams have been stored in the freezer. This information allows you to prioritize the use of older packages, ensuring that you consume the clams before they potentially lose their quality.
- Maintaining freshness and taste: Over time, frozen foods can undergo changes in flavor, texture, and overall quality. Labeling the packages helps you monitor the storage duration and encourages timely consumption, so you can enjoy the razor clams at their best. By using the oldest packages first, you minimize the chances of the clams becoming freezer-burned or developing off-flavors due to prolonged storage.
- Organizational convenience: Labeling the packages with the contents (razor clams) makes it easier to identify them in a crowded freezer. It prevents confusion and allows you to locate the desired package quickly. Additionally, if you have different batches or types of razor clams, labeling ensures that you can differentiate between them for specific cooking purposes or preferences.
When labeling the packages of frozen razor clams, consider the following steps:
- Use waterproof and freezer-safe labels or markers that won’t smear or fade in low temperatures.
- Clearly write “Razor Clams” on the label to identify the contents at a glance.
- Indicate the date of freezing, specifying the month, day, and year. This will help you determine the storage duration accurately.
- If you have different batches or preparations, you can include additional details, such as “Shelled Razor Clams” or “Whole Razor Clams,” to further differentiate them.
Step 7: Place in the freezer
After properly packaging and labeling the razor clam packages, the final step is to place them in the freezer for long-term storage. How you position and arrange the packages in the freezer is important to maintain the quality of the razor clams. Here’s why proper placement is crucial:
- Even freezing: Ensuring that the packages of razor clams are placed on a flat surface helps facilitate even freezing. This allows the clams to freeze uniformly throughout, preventing any potential variations in texture or quality. Flat placement also minimizes the risk of packages tipping over and causing leaks or damage.
- Avoiding overcrowding: It’s essential to avoid overcrowding the freezer with too many packages or other frozen items. Overcrowding can obstruct the flow of cold air within the freezer, leading to uneven freezing and potential temperature fluctuations. Adequate air circulation is crucial for maintaining optimal freezing conditions and preserving the quality of the razor clams.
- Preventing cross-contamination: To preserve the distinct flavors of the razor clams and prevent cross-contamination, it’s important to ensure that the packages are not in direct contact with other frozen items. Strong flavors from other foods can permeate the packaging and affect the taste of the razor clams. Keep the razor clam packages separate from pungent or aromatic frozen items to maintain their authentic flavor.
Consider the following tips for placing the razor clam packages in the freezer:
- Find a flat surface or freezer shelf where the packages can sit evenly.
- If possible, arrange the packages in a single layer to promote even freezing.
- Avoid stacking the packages directly on top of each other to prevent compression or damage to the clams.
- Leave some space between packages to allow for proper air circulation.
- Place the razor clam packages away from strong-smelling or strongly flavored frozen items to avoid flavor transfer.
What is the ideal freezing temperature for freezing razor clams?
The ideal freezing temperature for freezing razor clams is at or below 0°F (-18°C). This low temperature ensures that the clams freeze quickly and effectively, preserving their quality. It is important to maintain a consistent and sufficiently cold freezer temperature to prevent any thawing and refreezing cycles, which can negatively impact the texture and taste of the razor clams.
Other related questions
How do I thaw frozen razor clams?
To thaw frozen razor clams, it is best to transfer them from the freezer to the refrigerator. Place the packaged razor clams in a shallow dish or on a plate to catch any liquid that may accumulate during thawing. Allow the clams to thaw slowly in the refrigerator for approximately 24 hours or until completely thawed. Once thawed, the razor clams can be used in your desired recipe or cooked according to your preferred method. Avoid thawing razor clams at room temperature or using hot water, as rapid thawing can affect the texture and quality of the clams.
How long can I store frozen razor clams?
Frozen razor clams can be stored for up to 3 months without significant loss in quality. However, it’s best to consume them within the first month for optimal taste and texture. Proper packaging, labeling, and storage conditions are essential for maintaining their quality throughout the storage period. Ensure the razor clams are stored in a consistently cold freezer at or below 0°F (-18°C) to preserve their freshness. Regularly check the packages for any signs of freezer burn or deterioration, and prioritize using older packages first.
Can I refreeze razor clams that have been previously thawed?
It is generally not recommended to refreeze razor clams that have been previously thawed. Each time the clams go through the freezing and thawing process, their texture and quality can be affected. Refreezing can further degrade the texture, leading to a loss of flavor and tenderness. It is best to plan your portions accordingly and only thaw the amount of razor clams you intend to use at one time to minimize the need for refreezing. If you have thawed razor clams that you do not plan to use, it is advisable to cook them first and then freeze the cooked clams for later consumption.
How do I know if my frozen razor clams have gone bad?
To determine if your frozen razor clams have gone bad, there are a few key indicators to look for. First, inspect the packaging for any signs of damage, such as tears or punctures, which could indicate potential contamination. Next, examine the appearance of the clams. If they have developed an off-color, unusual texture, or have a strong unpleasant odor, it may be an indication of spoilage. Lastly, if you observe any signs of freezer burn, such as dry, discolored areas on the clams, it is a clear indication that the quality has deteriorated. When in doubt, it is always best to err on the side of caution and discard any frozen razor clams that appear questionable or have an unpleasant odor.
Can I use frozen razor clams with fresh ones?
Yes, you can use frozen razor clams alongside fresh ones in recipes. However, it’s important to consider the differences in texture and moisture content between the two. Frozen razor clams may have a slightly different texture after thawing compared to fresh ones. To ensure even cooking, you may need to adjust the cooking time or method when using a combination of fresh and frozen clams. It’s also advisable to thaw frozen clams separately before incorporating them into a dish with fresh clams to maintain consistent cooking results.
Can I freeze razor clam leftovers?
Yes, you can freeze razor clam leftovers for later use. Ensure that the leftovers are cooled down completely before freezing them. Transfer the leftovers to airtight freezer-safe containers or bags, remove as much air as possible, and label them with the contents and date. When properly stored, frozen razor clam leftovers can be enjoyed within a few months while maintaining their quality.
Can I freeze razor clams in a marinade or sauce?
It is generally not recommended to freeze razor clams in a marinade or sauce. Freezing can alter the texture and flavor of the marinade or sauce, potentially affecting the overall taste of the razor clams. It is better to freeze the razor clams separately and then prepare the marinade or sauce fresh when you’re ready to cook and serve the clams.

