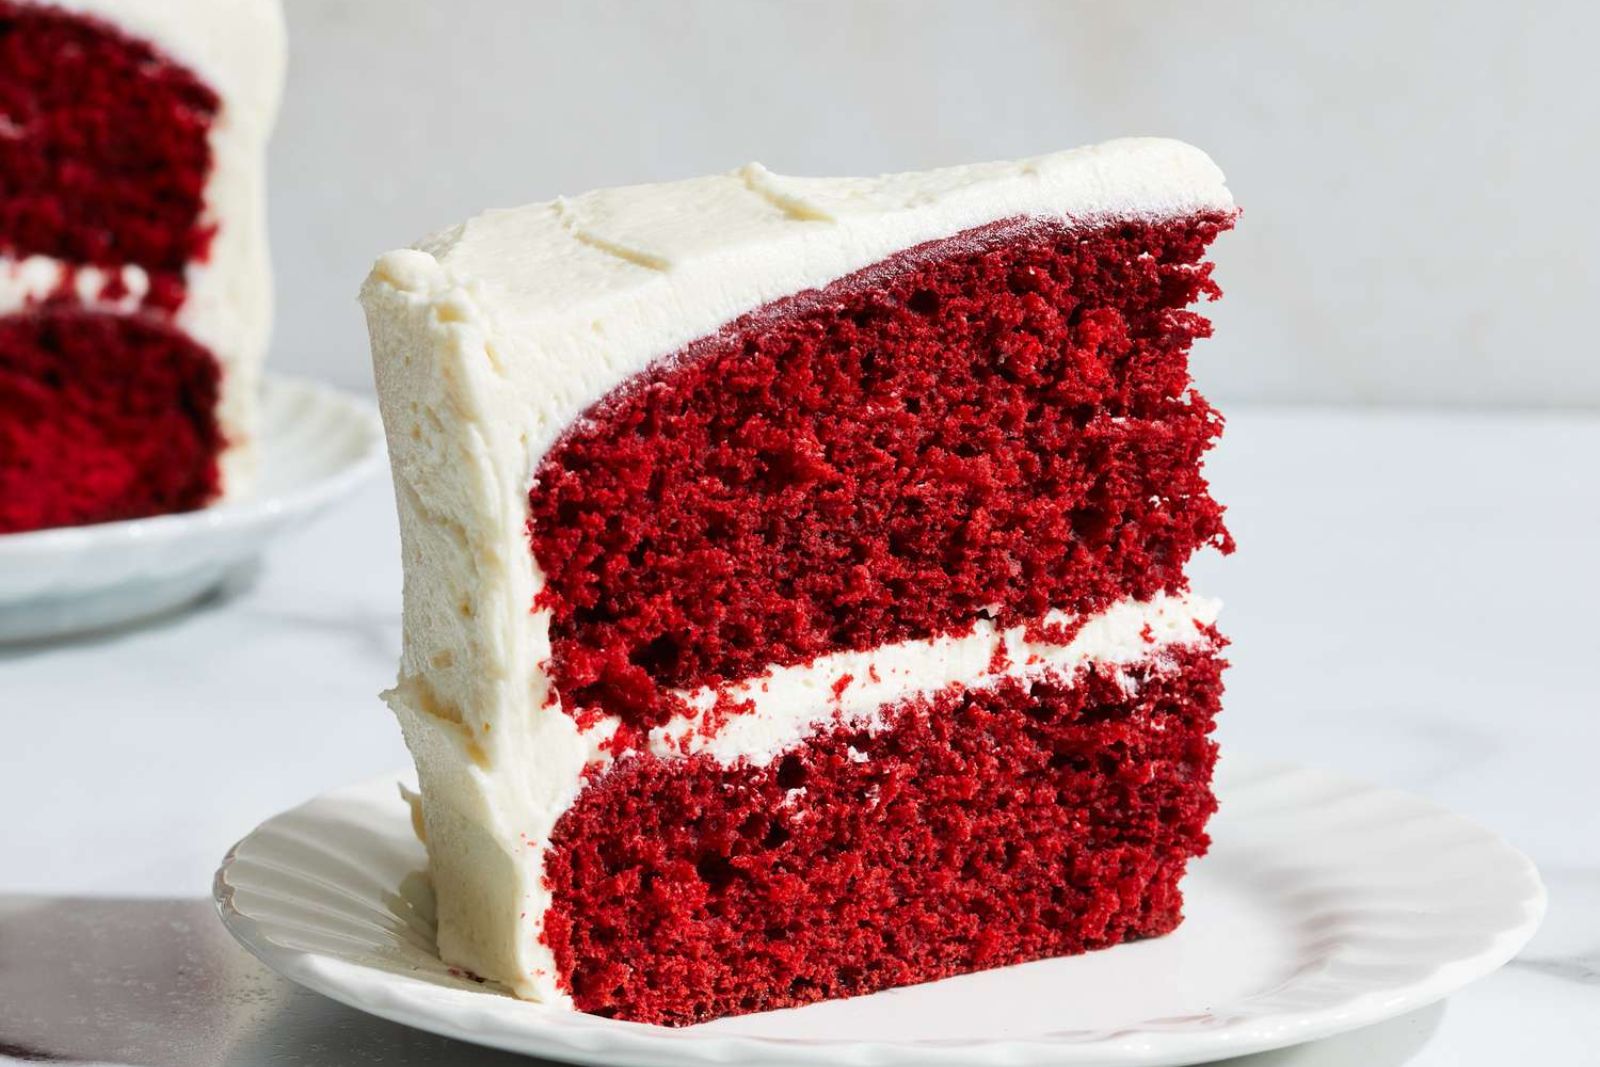
Red velvet cake is a popular dessert known for its distinctive reddish-brown hue and moist, tender crumb. Often adorned with creamy frosting, this cake has become a staple for various celebrations and gatherings. Whether you’ve baked an extra cake or received one too many slices, freezing red velvet cake can be a smart strategy to extend its shelf life and savor its deliciousness at a later time. In this article, we will walk you through the step-by-step process of freezing red velvet cake while ensuring its flavor and texture remain intact.
Here’s a comprehensive guide on how to freeze red velvet cake:
Step 1: Allow the Cake to Cool
Before you proceed with freezing your red velvet cake, it’s crucial to ensure that the cake has cooled down completely. This step might seem simple, but it plays a significant role in maintaining the cake’s quality during the freezing process.
When a cake comes out of the oven, its internal temperature is considerably higher than the surrounding environment. If you were to immediately wrap and freeze the cake while it’s still hot, you would create conditions conducive to the formation of condensation and ice crystals. Here’s why allowing the cake to cool is important:
- Prevents Moisture Buildup: As a cake cools, residual moisture from its interior tends to migrate toward the surface. If you were to trap this moisture by wrapping the cake prematurely, it would lead to the accumulation of water vapor within the wrapping. This trapped moisture can later freeze and result in unappetizing ice crystals on the cake’s surface.
- Maintains Texture: Rapid temperature changes can negatively impact the texture of baked goods. Placing a hot cake in the freezer can lead to uneven cooling, causing the cake to contract and potentially become denser or even collapse.
- Preserves Flavor: Allowing the cake to cool properly before freezing helps maintain its original flavor profile. Rapid temperature changes and moisture buildup can alter the taste and make the cake less enjoyable when you decide to thaw and eat it.
To ensure your red velvet cake remains delicious and visually appealing after freezing, it’s best to exercise patience at this stage. Depending on the size of the cake, this cooling process may take anywhere from 1 to 2 hours. You can expedite the cooling by placing the cake on a wire rack, which allows air to circulate around it, facilitating faster and more even cooling.
Step 2: Portion the Cake
When it comes to freezing a large red velvet cake, the process becomes even more efficient and convenient if you take the time to slice the cake into individual portions before freezing. This step might seem like an extra effort, but it offers several practical advantages that enhance the overall freezing and thawing experience.
Here’s why you should consider portioning the cake before freezing:
- Even Thawing: Freezing an entire large cake as a single unit can lead to uneven thawing. The outer layers might thaw faster than the inner ones, resulting in an inconsistent texture and taste throughout the cake. By slicing the cake into individual portions, you enable each slice to thaw more uniformly, ensuring that the cake retains its original moistness and flavor.
- Customizable Servings: Portioning the cake allows you to retrieve and thaw only the number of slices you need. This prevents wastage and gives you the flexibility to enjoy a single serving of red velvet cake whenever you desire, without having to defrost the entire cake.
- Reduced Thawing Time: Smaller portions thaw faster than a large cake. If you suddenly have a craving for red velvet cake, you won’t have to wait as long to enjoy your treat when you portion the cake before freezing.
- Easy Handling: Handling smaller portions of cake is much easier, both during freezing and thawing. It’s simpler to wrap and reseal individual slices, and they take up less space in your freezer compared to a whole cake.
- Preserves Cake Structure: Cutting the cake into portions before freezing minimizes the risk of damaging the cake’s structure. Slicing a frozen cake can be challenging and may lead to crumbled or uneven slices. Portioning before freezing avoids this issue altogether.
To execute this step effectively, use a sharp knife to cut the cake into slices of your desired thickness. It’s a good practice to maintain uniform slice sizes for consistent thawing and serving. After slicing, wrap each individual portion securely with plastic wrap, and then place them in resealable plastic bags for extra protection.
Step 3: Wrap Each Slice
As you prepare your red velvet cake slices for freezing, the critical step of individually wrapping each slice with plastic wrap plays a pivotal role in maintaining the cake’s quality and preventing freezer burn. This simple layer of protection offers several benefits that contribute to preserving the taste, texture, and appearance of your cake during its time in the freezer.
Here’s why you should take the time to wrap each slice of red velvet cake before freezing:
- Moisture Sealing: Moisture is a key factor in maintaining the freshness and delectability of baked goods. By wrapping each slice with plastic wrap, you create a barrier that seals in the cake’s inherent moisture. This is especially important because freezer air tends to be dry, and without proper protection, your cake slices can become dry and less enjoyable upon thawing.
- Prevents Freezer Burn: Freezer burn occurs when the moisture in food migrates to the surface and forms ice crystals, which then sublimate back into the freezer air. This process can lead to the development of ice crystals on the cake’s surface, resulting in a compromised texture and flavor. Individually wrapping each slice creates a protective layer that minimizes the exposure of the cake to the dry freezer air, reducing the risk of freezer burn.
- Maintains Visual Appeal: Wrapped slices are less susceptible to discoloration and drying out. The plastic wrap acts as a shield against the cold, dry environment of the freezer, helping to retain the vibrant color of your red velvet cake.
- Easy Handling and Stacking: Wrapped slices are easier to handle and stack in the freezer. The plastic wrap keeps the slices intact and prevents them from sticking to each other, making it simpler to retrieve a single slice without disturbing the rest.
- Preserves Aroma and Flavor: Properly sealed plastic wrap also helps to preserve the cake’s aroma and flavor. Unwrapped cake slices in the freezer can absorb unwanted odors from other foods, affecting the overall taste.
When wrapping each slice, ensure that the plastic wrap is tightly sealed around the cake to create an airtight barrier. Pay attention to covering all exposed surfaces, including the sides and cut edges. If you’re concerned about maintaining the frosting’s appearance, you can apply an additional layer of plastic wrap or parchment paper before enclosing the slice in a resealable plastic bag.
Step 4: Double Wrap for Protection
When it comes to freezing your precious red velvet cake slices, taking an additional step of double wrapping them by placing the wrapped slices inside resealable plastic bags offers an extra layer of protection. This practice might seem like a bit of extra work, but it significantly enhances the preservation of your cake’s flavor, texture, and overall quality while it’s stored in the freezer.
Here’s why you should consider double wrapping your red velvet cake slices before freezing:
- Enhanced Barrier: While the initial plastic wrap layer provides a primary barrier against moisture and freezer air, adding another layer through the resealable plastic bag creates an enhanced shield. This extra barrier reduces the risk of moisture loss and freezer burn, further safeguarding your cake slices from potential damage.
- Minimized Odor Absorption: Resealable plastic bags not only protect against freezer air but also help prevent your cake slices from absorbing unwanted odors from other items in the freezer. This ensures that your red velvet cake maintains its original aroma and taste, untainted by any surrounding scents.
- Efficient Air Removal: Squeezing out as much air as possible from the resealable plastic bags before sealing them is crucial. Air contains moisture that can contribute to freezer burn. By minimizing the amount of air trapped within the bag, you create an environment that’s less conducive to ice crystal formation and moisture loss.
- Easy Organization: Storing your individually wrapped cake slices in resealable bags makes for neat and organized freezer storage. The bags help prevent slices from shifting around, sticking together, or becoming damaged, allowing you to easily retrieve the exact number of slices you need without disturbing the rest.
- Longer Storage Duration: The double wrapping technique, combining plastic wrap with resealable bags, extends the potential storage time of your red velvet cake slices. It helps maintain the cake’s freshness and quality for a more extended period, ensuring that each slice remains as delightful as the day it was frozen.
When placing the wrapped slices into the resealable bags, make sure to press out as much air as possible before sealing the bags shut. This hermetic seal prevents the intrusion of air and moisture, preserving the optimal conditions for your red velvet cake slices during their time in the freezer.
Step 5: Label and Date
As you continue the process of freezing your red velvet cake slices, the step of labeling and dating each plastic bag might seem like a small detail, but it holds significant importance in helping you manage your frozen desserts effectively. Keeping track of when you froze the cake slices ensures that you’re consuming them at their best quality and safety while minimizing the risk of potential food waste.
Here’s why labeling and dating each plastic bag is a crucial step in freezing red velvet cake slices:
- Rotation and Consumption: Freezer storage can be a dynamic environment with various items coming and going. By clearly marking the date of freezing on each bag, you establish a rotation system. This means you’ll consume the oldest cake slices first, ensuring that you enjoy them at their peak quality and flavor.
- Quality Control: Red velvet cake slices, like any frozen food, have a limited storage life before their texture and taste begin to degrade. By having the freezing date labeled, you’re empowered to gauge the quality of the slices and decide when it’s best to enjoy them. This prevents accidentally keeping cake slices in the freezer for extended periods, which can lead to freezer burn and diminished taste.
- Food Safety: While frozen foods are generally safe to eat indefinitely as long as freezer burn is avoided, it’s still advisable to consume them within recommended time frames. Labeling with the freezing date helps you adhere to safe storage guidelines and maintain optimal food safety.
- Inventory Management: Whether you’re freezing multiple batches of cake slices or a variety of frozen foods, labeling and dating allow you to keep an organized inventory. This prevents overstocking the freezer and helps you plan your meals more effectively.
- Convenience: Knowing the freezing date without having to open each bag or container saves you time and effort. You can quickly identify the slices you want to thaw and enjoy, streamlining your freezer usage.
When labeling the bags, use a permanent marker or adhesive labels that are resistant to freezer conditions. Write the date of freezing clearly on each bag to eliminate any confusion. If you’re freezing multiple batches, you can also include a brief description like “Red Velvet Cake Slices” to differentiate them from other frozen items.
Step 6: Arrange in the Freezer
As you approach the final stages of freezing your red velvet cake slices, how you arrange them in the freezer can significantly impact their overall quality and the ease of accessing them later. Properly arranging the wrapped and labeled slices is a practical step that promotes efficient freezing and maintains the integrity of your cake.
Here’s why arranging your red velvet cake slices in the freezer matters:
- Uniform Freezing: Placing the slices flat on the freezer shelves ensures that they freeze uniformly. This prevents uneven freezing, which can lead to varying textures and moisture content among different portions of the cake slices.
- Quick Freezing: Arranging the slices in a single layer, with space between each slice, promotes faster freezing. This is important because the quicker food freezes, the smaller the ice crystals that form within it. Smaller ice crystals help maintain the cake’s texture and prevent cellular damage.
- Air Circulation: Leaving space between the slices allows for proper air circulation within the freezer. Cold air needs to circulate around the slices to maintain a consistent freezer temperature. Adequate airflow helps in preserving the cake’s freshness and prevents temperature fluctuations.
- Ease of Retrieval: Proper arrangement facilitates easy access to individual cake slices when you want to thaw and enjoy them. You won’t have to move other slices around, reducing the risk of damage or unnecessary thawing.
- Preventing Sticking: Placing slices flat and not stacked on top of each other minimizes the risk of them sticking together. Stuck slices can be challenging to separate without damaging their texture or appearance.
When arranging the wrapped and labeled cake slices in the freezer, ensure they are laid out flat on the shelves. You can use baking sheets or trays to line the shelves, providing a clean and flat surface for the slices. Leave a small gap between each slice to allow for efficient air circulation.
It’s also beneficial to keep a space in the freezer dedicated to your frozen cakes or desserts. This designated area makes it easier to manage your freezer inventory and prevents other items from being stacked on top of your cake slices.
How long can I keep frozen red velvet cake slices?
Frozen red velvet cake slices stay best for 2-3 months. Beyond that, quality may decline due to freezer burn or flavor changes. Optimal wrapping helps preserve their taste.
Step 7: Thaw the frozen red velvet cake
As the time comes to savor your frozen red velvet cake slices, the thawing process becomes a crucial step in preserving the cake’s original texture, flavor, and overall quality. While it might be tempting to rush the thawing process, opting for a gradual and controlled approach ensures that your cake slices emerge from the freezer as delectable as they were when you first froze them.
Here’s why thawing the frozen red velvet cake slices in the refrigerator overnight is the recommended method:
- Preservation of Moisture: The refrigerator provides a controlled and consistent temperature environment for thawing. This gradual thawing process prevents the sudden influx of heat that can lead to moisture loss. By thawing in the refrigerator, your red velvet cake slices retain their moisture content, ensuring a tender and moist texture upon consumption.
- Avoiding Texture Changes: Rapid temperature changes can alter the texture of baked goods. Thawing at room temperature or using heat sources like microwaves can cause uneven thawing and potential condensation, resulting in a soggy or unevenly textured cake. The refrigerator’s slow thawing method helps maintain the cake’s original texture.
- Flavor Preservation: The gradual thawing process in the refrigerator helps preserve the original flavors of the red velvet cake. Abrupt thawing methods can affect the taste, whereas slower thawing allows the flavors to develop naturally.
- Food Safety: Thawing in the refrigerator is a safe method that prevents the growth of harmful bacteria. Bacteria multiply quickly in the temperature danger zone (40°F to 140°F or 4.4°C to 60°C). By using the refrigerator, you keep your cake slices within safe temperature limits.
- Convenient Planning: Thawing in the refrigerator overnight requires minimal effort and planning. You can take the desired number of cake slices from the freezer and place them in the refrigerator before you go to bed. They’ll be ready to enjoy the next day.
To thaw your frozen red velvet cake slices, remove the desired number of slices from their plastic bags and place them on a plate or container to catch any potential condensation. Keep them covered loosely with plastic wrap or a clean kitchen towel. Placing the cake slices on a plate prevents any moisture from dripping onto other foods in the refrigerator.
Can I thaw frozen cupcakes at room temperature?
Yes, you can thaw frozen cupcakes at room temperature. However, using the refrigerator for controlled thawing is recommended to prevent bacterial growth and maintain cupcake quality. If using room temperature, place them in a covered container to avoid contamination.
Other related questions
Can I refreeze red velvet cake?
Refreezing red velvet cake is not recommended. Thawed cake experiences moisture loss and texture degradation during the first thawing process. Refreezing further compromises quality, affecting taste and consistency.
How do I know if the red velvet cake has gone bad after being frozen?
Inspect for signs of freezer burn, like dry or discolored areas. Check for changes in texture, like excessive moisture or sogginess. A sour or off smell and noticeable flavor changes indicate spoilage.
Can I freeze cream cheese frosting along with the cake?
Freezing cream cheese frosting with cake is feasible but may alter texture upon thawing. Frosting can become softer due to moisture. Applying frosting after thawing is recommended for best results.
Can I freeze red velvet cupcakes using the same method?
Yes, you can freeze red velvet cupcakes using the same method as freezing cake slices. Wrap each cupcake individually, place in a resealable bag, and label with the freezing date. Thaw in the fridge for best results.


