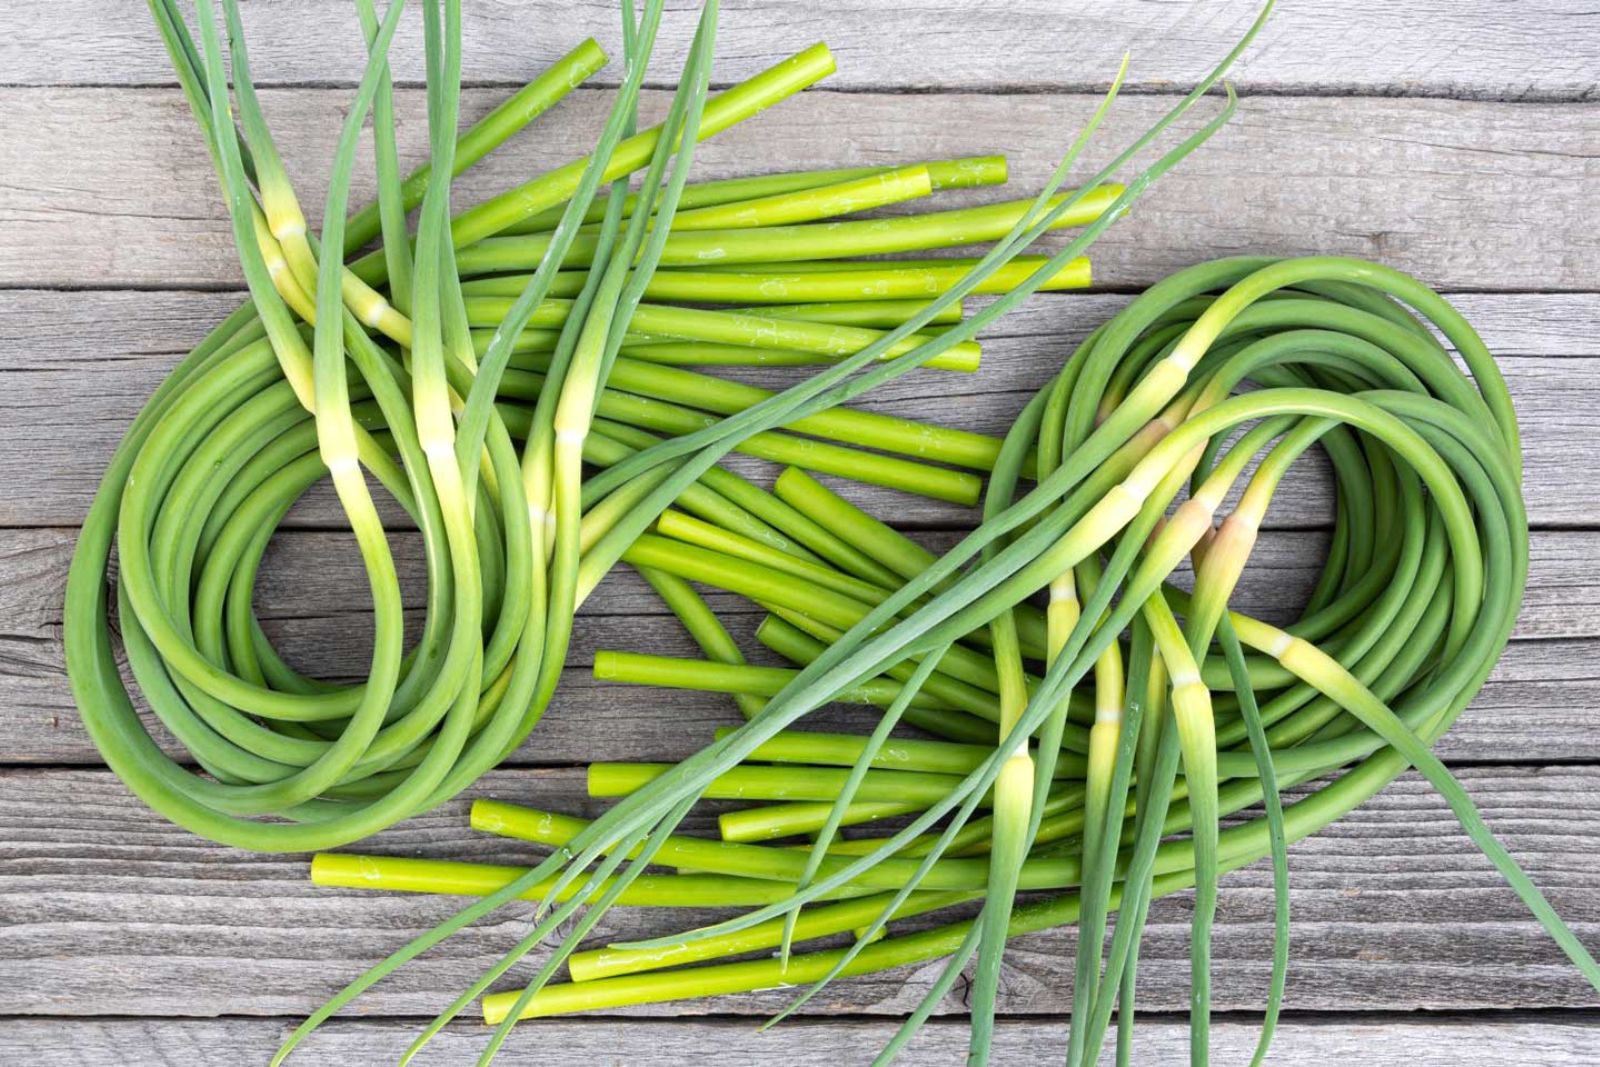
Scapes are the elegant, curly flower stalks that emerge from garlic and some other allium plants. These vibrant and flavorful scapes are a delightful addition to various dishes. Whether you enjoy them in stir-fries, pesto, or simply grilled, preserving their unique taste through freezing allows you to savor their goodness throughout the year. To freeze scapes effectively while maintaining their taste and texture, follow these straightforward steps in this comprehensive guide.
Here are the simple steps to freeze scapes:
Step 1: Choose fresh and tender scapes
When it comes to freezing scapes, selecting fresh and tender ones is of utmost importance to ensure the best quality and flavor after thawing. Fresh scapes are not only more delicious but also retain their nutritional value during the freezing process. Here’s why it’s crucial to choose the right scapes for freezing:
- Optimal Flavor: Fresh scapes have a vibrant, delicate flavor that intensifies many dishes. They add a mild garlic taste with a hint of sweetness, making them a delightful ingredient in various culinary creations.
- Textural Appeal: Tender scapes have a pleasing crunch and succulent texture that adds a lovely contrast to cooked dishes or raw preparations. Freezing fresh scapes preserves their texture, allowing you to enjoy their crispness even after they have been thawed.
- Nutritional Benefits: Scapes are packed with essential nutrients, including vitamins (A, C, and K), minerals (such as folate and potassium), and antioxidants. Choosing fresh scapes ensures you retain these valuable nutrients, making them a wholesome addition to your meals.
- Minimal Deterioration: Scapes, like many vegetables, begin to lose their quality and nutritional value shortly after harvest. As they age, their texture becomes tough, and their flavor diminishes. By freezing fresh scapes at their peak, you lock in their natural goodness for later consumption.
- Seasonal Availability: Scapes are typically available in late spring and early summer when garlic plants send up their flower stalks. Freezing them during their peak season allows you to enjoy their unique taste and attributes throughout the year, even when they are no longer readily available fresh.
To ensure you get the best scapes for freezing, look for bright green stalks that are firm to the touch. Avoid scapes that show any signs of wilting, browning, or damage, as they may have already started to deteriorate. Ideally, choose scapes that have tightly closed flower buds, as this indicates their freshness.
Step 2: Clean and trim the scapes
Preparing scapes for freezing involves essential cleaning and trimming steps to ensure that they are free from any impurities and retain their best qualities during storage. Here’s why cleaning and trimming scapes is crucial before freezing:
- Removing Dirt and Debris: Scapes, like most vegetables, can accumulate dirt, dust, or other debris during harvest and transportation. Rinsing them under cool running water helps to remove any surface impurities, ensuring that you freeze them in a clean and hygienic state.
- Preserving Quality: Cleaning the scapes is vital to prevent any unwanted flavors or textures in the final frozen product. If dirt or debris is left on the scapes, it may lead to an unpleasant taste or affect their overall quality during storage.
- Ensuring Food Safety: Properly cleaning the scapes reduces the risk of any potential contaminants that may be present on the surface. This is especially important if the scapes were grown using pesticides or other chemicals. Washing them thoroughly under running water helps minimize any residues.
- Trimming for Optimal Texture: Trimming the tough ends of the scapes is essential to ensure a uniform texture when you use them in recipes after thawing. The lower parts of the scapes can be fibrous and more challenging to cook to the desired tenderness. By trimming just above the point where the flower begins to curl, you remove the tougher section, leaving behind the tender and flavorful parts that are ideal for freezing.
- Reducing Waste: Being mindful not to cut too much of the scapes while trimming helps reduce waste. Preserving the tender portions for freezing ensures that you get the most out of your fresh produce and avoid discarding edible parts unnecessarily.
Properly cleaned and trimmed scapes are more visually appealing and provide a better eating experience. Additionally, they are easier to work with when using them in various dishes, whether it’s sautéing, roasting, or incorporating them into sauces or soups.
Taking the time to clean and trim the scapes before freezing not only ensures their optimal quality but also contributes to the overall success of the freezing process. With clean, trimmed, and well-prepared scapes, you can confidently proceed with the subsequent steps, knowing that your frozen produce will shine in flavor and texture when it’s time to enjoy them later.
Can I freeze scapes with the flowers intact?
It’s best to trim off the tough ends just above the point where the flower begins to curl before freezing. Removing the flowers helps maintain the scapes’ desirable texture and prevents potential bitterness that might occur during freezing.
Step 3: Blanch the scapes
Blanching is a critical technique in the process of freezing scapes, and it involves briefly immersing them in boiling water before rapidly cooling them down in an ice water bath. This step serves several essential purposes that contribute to maintaining the scapes’ color, flavor, and texture during freezing. Here’s why blanching is crucial:
- Enzyme Inactivation: Scapes, like many vegetables, contain enzymes that are responsible for breaking down their natural pigments, flavors, and textures over time. Blanching deactivates these enzymes, preventing the loss of color and flavor that can occur during freezing and storage.
- Preserving Color: By blanching the scapes, their bright green hue is retained, making them visually appealing even after freezing. This is particularly important as the vibrant color enhances the overall presentation and attractiveness of dishes in which the scapes are used.
- Maintaining Freshness: The blanching process helps preserve the fresh taste and crisp texture of the scapes. It partially cooks them, eliminating any raw or grassy taste, but still leaves them with a pleasant crunch, ensuring they remain enjoyable to eat after thawing.
- Reducing Microbial Load: Briefly exposing the scapes to boiling water helps reduce the number of potentially harmful microorganisms present on their surface. While blanching is not a sterilization process, it does contribute to better food safety during freezing and storage.
- Stopping the Cooking Process: After the blanching time is complete, transferring the scapes to an ice water bath promptly halts the cooking process. This step is essential to prevent overcooking, which could lead to the scapes becoming mushy or losing their texture.
To blanch the scapes effectively, use a large pot of vigorously boiling water to ensure even and thorough blanching. Depending on the thickness of the scapes, blanching typically takes around 2 to 3 minutes. Keep in mind that over-blanching can result in loss of flavor and nutritional value, so it’s essential to follow the recommended blanching time.
After blanching, the scapes must be immediately cooled down in an ice water bath. This rapidly lowers their temperature and halts the cooking process, preserving their desired texture and preventing any carryover cooking that could occur if left to cool slowly.
Can I freeze scapes without blanching them first?
While it’s possible to freeze scapes without blanching, blanching is highly recommended as it helps preserve their color, flavor, and texture during freezing. Blanching inactivates enzymes that can lead to deterioration over time and ensures better overall quality.
Step 4: Drain and dry the scapes
After blanching and cooling the scapes in an ice water bath, the next crucial step in the freezing process is draining and drying them thoroughly. Properly draining and removing excess moisture from the scapes is essential to ensure the best freezing results and maintain their quality over time. Here’s why draining and drying the scapes is crucial:
- Preventing Ice Crystal Formation: Excess moisture on the surface of the scapes can lead to the formation of ice crystals when they are frozen. These ice crystals can cause cell damage within the scapes, leading to a loss of texture, flavor, and overall quality during freezing and thawing.
- Maintaining Texture: By removing excess water, you help preserve the desirable texture of the scapes. When ice crystals form, they can rupture the cell walls, resulting in a mushy and less appealing product after thawing. Dry scapes freeze more evenly and maintain their crunchiness better upon thawing.
- Avoiding Freezer Burn: Freezer burn occurs when moisture on the surface of food evaporates and then re-condenses into ice crystals, leading to dehydration and the development of off-flavors. Properly drying the scapes helps prevent freezer burn, ensuring they retain their original taste and appearance.
- Preventing Clumping: If the scapes are frozen while still wet, they may stick together and form clumps in the freezer. Thoroughly drying them before freezing prevents this issue, making it easier to take out individual pieces when you need them for cooking.
To drain the scapes, simply remove them from the ice water bath and let them sit in a colander or on a clean kitchen towel. Allow the excess water to drain off completely for a few minutes. Then, gently pat the scapes dry with paper towels or a clean kitchen towel to remove any remaining moisture.
It’s essential to handle the scapes gently during this step to avoid damaging their structure. Delicate handling ensures that they freeze as separate, intact pieces and retain their appealing appearance and texture after thawing.
Step 5: Arrange and flash-freeze the scapes
After blanching, draining, and drying the scapes, the next step is to arrange and flash-freeze them. Flash-freezing is a technique used to freeze food quickly, ensuring that individual pieces freeze rapidly without forming large ice crystals. This process helps to maintain the quality and integrity of the scapes during freezing. Here’s why arranging and flash-freezing the scapes is essential:
- Preventing Clumping: By laying the scapes in a single layer on a baking sheet, you ensure that they freeze individually without sticking together. If the scapes freeze in clumps, it becomes challenging to separate them when you only need a portion, and they may also suffer from freezer burn due to increased surface area exposure.
- Preserving Shape and Texture: Flash-freezing the scapes at a very low temperature for a short period helps them retain their original shape and texture. This way, they won’t become mushy or lose their crunch, which can happen if they freeze slowly or in large clumps.
- Portion Control: If you plan to use the scapes in specific quantities for your recipes, arranging them in portion-sized groups on the baking sheet allows for easier handling later. You can take out only the required amount without defrosting the entire batch.
- Reducing Freezing Time: Flash-freezing ensures that the scapes freeze quickly and efficiently. This not only helps preserve their quality but also reduces the time they spend in the freezer, which can be important if you have limited freezer space.
To flash-freeze the scapes, lay them out on a baking sheet in a single layer, ensuring they are not touching each other. If you prefer portion-sized groups, you can use small containers or freezer-safe bags to keep the scapes separated before freezing. Once arranged, place the baking sheet in the freezer and let the scapes freeze for about 1 to 2 hours.
The relatively short freezing time at a very low temperature ensures that the scapes freeze rapidly and uniformly. Flash-freezing prevents the formation of large ice crystals, which can damage the cell structure and negatively impact the quality of the scapes.
Step 6: Package and seal the scapes
After flash-freezing the scapes, it’s crucial to package and seal them properly to preserve their quality and protect them during long-term storage in the freezer. The packaging process involves transferring the flash-frozen scapes into airtight containers or freezer-safe bags. Here’s why this step is essential:
- Preventing Freezer Burn: Freezer burn occurs when food is exposed to air in the freezer, leading to dehydration and the development of off-flavors. By using airtight containers or freezer bags and removing excess air from the packaging, you significantly reduce the risk of freezer burn on the scapes.
- Maintaining Texture and Flavor: Properly sealed packaging prevents moisture loss and helps the scapes retain their texture, flavor, and nutritional value throughout their time in the freezer. It ensures that they taste just as fresh and delicious when you decide to use them in your recipes.
- Protection from Odors: Airtight packaging also safeguards the scapes from absorbing unwanted odors from other items stored in the freezer. This is especially important as scapes are known for their delicate flavor, and any absorbed odors could alter their taste when thawed and cooked.
To package the flash-frozen scapes, you have two primary options: airtight freezer-safe containers or heavy-duty freezer bags. Both choices are effective in preventing air and moisture from coming into contact with the scapes.
If you opt for containers, make sure they are specifically designed for freezer use, as regular containers may not be airtight enough to prevent freezer burn. Fill the containers with the scapes, leaving some headspace to account for any expansion during freezing.
For freezer bags, use heavy-duty, thick bags that are specifically designed for freezing. Squeeze out as much air as possible from the bag before sealing it tightly. You can also use a straw to remove excess air from the bag for even better results.
Step 7: Label and date the packages
Labeling and dating the packages is a crucial final step in the freezing process of scapes. This simple yet essential task helps you keep track of the contents in your freezer, ensuring you can use the scapes before their quality starts to decline. Here’s why labeling and dating the packages is so important:
- Tracking Freshness: Scapes, like many frozen foods, have a limited shelf life in the freezer. While they remain safe to eat indefinitely if stored at 0°F (-18°C) or below, their quality gradually diminishes over time. By labeling the packages with the date of freezing, you can easily determine how long the scapes have been stored and ensure you use the oldest ones first.
- Optimal Flavor and Texture: By labeling the packages, you can prioritize using the oldest scapes when they are likely to be at their peak quality.
- Reducing Food Waste: Accurate labeling helps you avoid unintentionally keeping frozen scapes for too long, leading to potential food waste. Knowing when the scapes were frozen enables you to plan your meals and incorporate them into your recipes in a timely manner.
- Organizing the Freezer: Labeling the packages with the contents and date makes it easier to locate specific items in your freezer without having to open multiple packages. An organized freezer reduces the time spent searching for ingredients and ensures efficient meal planning.
When labeling the packages, use waterproof and freezer-safe markers or labels. Write the contents (e.g., “Flash-Frozen Scapes”) and the date of freezing clearly on each package. If you have arranged the scapes into portion-sized groups, you can also note the quantity in each package for easier portion control.
Step 8: Store in the freezer
The last step in freezing scapes is to store the properly packaged and labeled containers in the freezer. Proper storage is essential to maintain the scapes’ quality, flavor, and nutritional value over an extended period. Here’s why storing the scapes in the freezer at the right temperature is crucial:
- Preserving Quality: Freezing scapes at a temperature of 0°F (-18°C) or below helps preserve their quality and prevents the growth of harmful microorganisms. A consistently low temperature slows down any chemical reactions that can degrade the scapes’ flavor, texture, and nutritional content.
- Preventing Freezer Burn: Storing the scapes at the proper temperature helps prevent freezer burn, which occurs when food is exposed to air and experiences dehydration. Freezer burn can negatively impact the taste and texture of the scapes, reducing their overall appeal.
- Maintaining Freshness: The low temperature of the freezer maintains the scapes in a state of suspended animation, so to speak. This means that their cellular activity slows down significantly, preserving their freshness and preventing spoilage.
- Longer Storage Period: By storing the scapes at the recommended temperature, you can extend their storage life. While scapes can be safely stored indefinitely at 0°F (-18°C) or below, it’s best to use them within 8 to 12 months for optimal flavor and quality.
- Efficient Freezer Organization: Storing the scapes in the coldest part of the freezer and keeping them well-organized allows for easier access and prevents them from getting buried under other items. An organized freezer ensures you can quickly find and use the scapes when needed.
When placing the labeled packages in the freezer, ensure they are arranged in a way that allows for proper air circulation. Avoid over-packing the freezer to allow cold air to flow freely around the scapes, maintaining a consistent temperature.
Also, avoid frequently opening the freezer door unnecessarily, as this can cause temperature fluctuations, affecting the quality of the frozen items, including the scapes.
Other related questions
How do I defrost scapes?
To defrost scapes, transfer the frozen packages from the freezer to the refrigerator. Allow them to thaw slowly in the refrigerator for several hours or overnight. Avoid using quick methods like microwaving or warm water, as they may result in uneven thawing and compromise the scapes’ texture and flavor.
Can I refreeze scapes?
It is generally not recommended to refreeze scapes once they have been thawed. Refreezing can compromise their quality, leading to potential texture and flavor changes. It is best to use the thawed scapes within a few days after thawing or cook them before refreezing to maintain their taste and overall appeal.
How long do I know if the scapes have gone bad after being frozen?
After being frozen, scapes can remain safe to eat indefinitely if stored at 0°F (-18°C) or below. However, their quality may start to decline after 8 to 12 months. Signs of spoilage in frozen scapes include off-odors, discoloration, excessive ice crystals, or a noticeable change in texture. If any of these signs are present, it’s best to discard the scapes.
What can I use frozen scapes for in recipes?
Frozen scapes can be used in various dishes just like fresh ones. They are great in stir-fries, soups, sauces, and pesto. You can also grill or roast them for a delicious side dish. The possibilities are endless!
Can I freeze scapes from the grocery store or farmers’ market?
Yes, you can freeze scapes from the grocery store or farmers’ market following the same steps for homegrown ones. Make sure to select fresh and tender scapes for the best results, regardless of the source.
Can I freeze scapes in recipes like pesto or sautéed with other vegetables?
It’s best to freeze scapes individually before incorporating them into recipes. Flash-freezing individual scapes ensures they don’t stick together and allows you to use them in specific quantities when needed.
Can I freeze scapes that have been cooked or used in recipes?
It’s generally not recommended to freeze scapes that have been cooked or used in recipes. The freezing process can alter their texture and taste. It’s best to freeze fresh, blanched scapes individually and use them in recipes after thawing.
Are there any safety precautions I should take when freezing scapes?
Ensure that the scapes are thoroughly washed before blanching to remove any dirt or contaminants. Use a timer to avoid over-blanching, as it can affect their taste and texture. Always handle the scapes gently during the freezing process to preserve their integrity.

