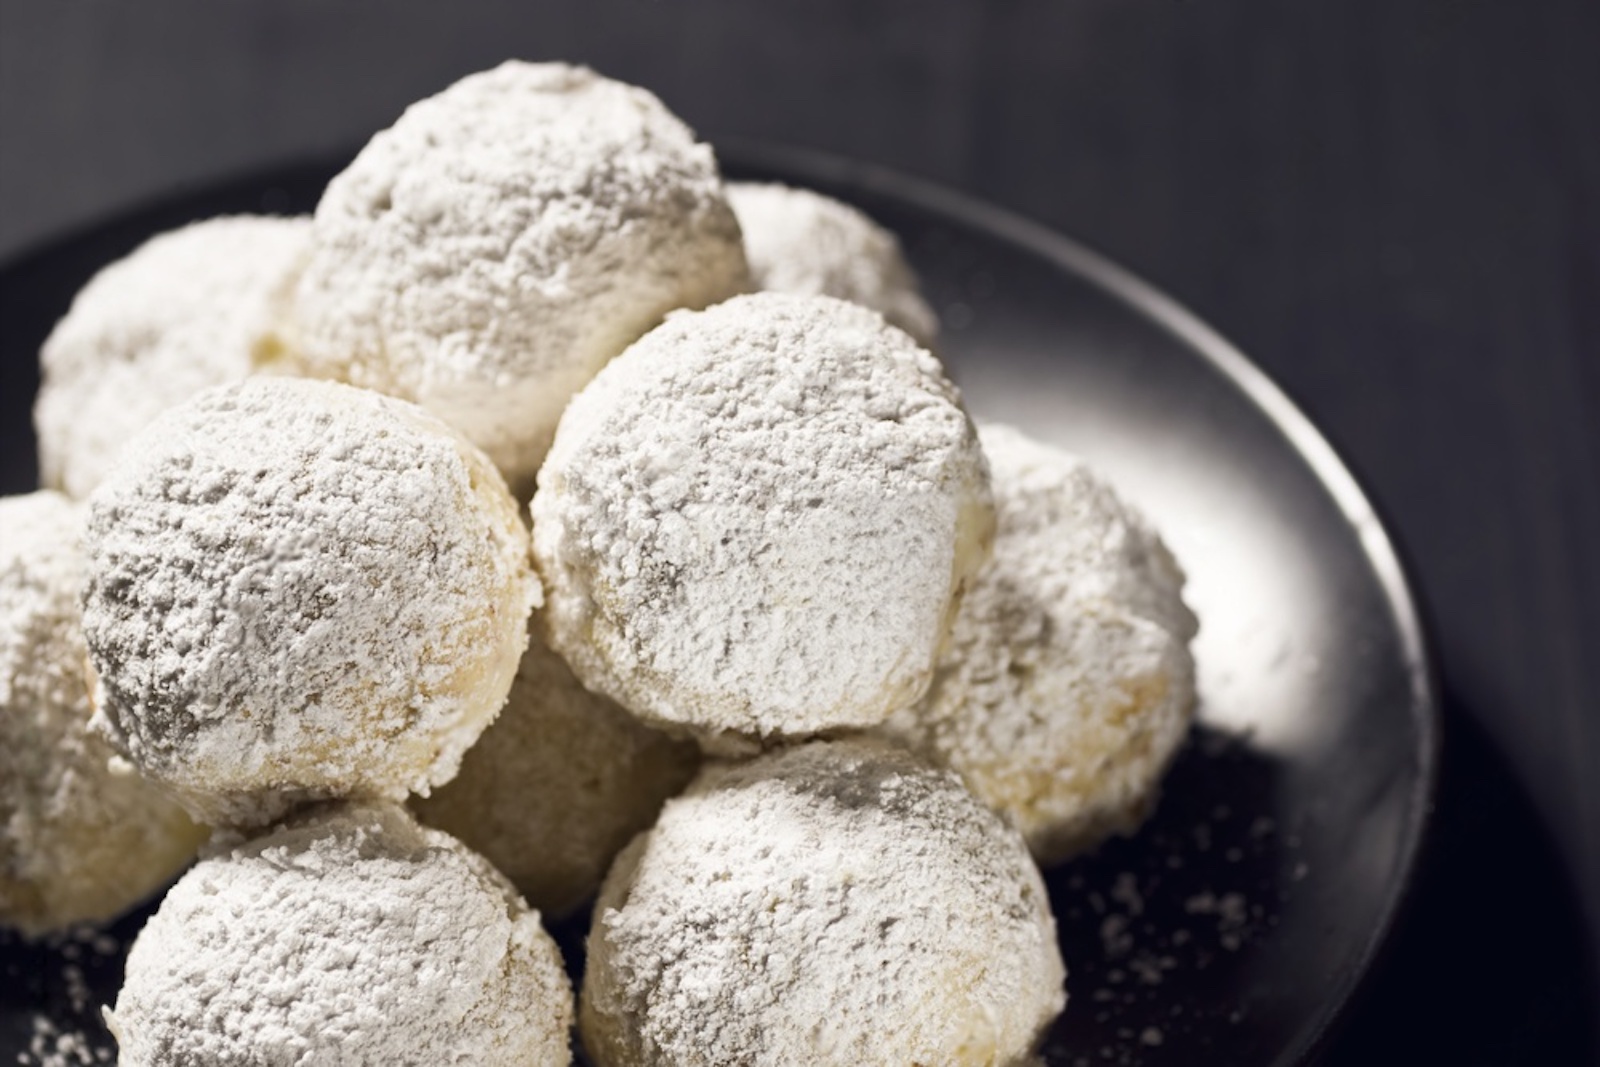
Snowball cookies, also known as Mexican wedding cookies or Russian tea cakes, are delightful treats enjoyed by many. These cookies are characterized by their delicate, melt-in-your-mouth texture and powdered sugar coating. Whether you’ve baked a surplus batch or want to plan ahead for festive occasions, freezing snowball cookies is a wonderful way to ensure you have these delectable treats on hand whenever you crave them. By following a few simple steps, you can freeze snowball cookies without compromising their taste and texture. This article outlines a comprehensive approach to freezing snowball cookies, ensuring they remain as delightful as the day you baked them.
Here’s a step-by-step guide on how to freeze snowball cookies:
Step 1: Bake and Cool Fresh Snowball Cookies
To embark on the journey of freezing snowball cookies, your first step is to indulge in the delightful process of baking a batch of these delectable treats. Whether you’re following a cherished family recipe or experimenting with a new twist, the aroma that fills your kitchen as these cookies bake is undeniably inviting. Once they’ve attained that perfect golden hue, the key lies in practicing a touch of patience as you let them cool completely on a wire rack.
Allowing the freshly baked snowball cookies to cool might seem like a simple act, but it plays a pivotal role in maintaining their quality when freezing. As cookies emerge from the oven, their internal moisture is at its peak. Placing them directly into the freezer at this point could lead to the formation of ice crystals, which might compromise their texture upon thawing. By taking the time to let them cool, you’re allowing this excess moisture to evaporate gradually.
The wire rack proves to be a crucial ally in this endeavor. Elevating the cookies enables air to circulate around them, facilitating an even cooling process. This prevents the undersides of the cookies from becoming soggy due to trapped steam. The transition from oven to wire rack also aids in preventing overcooking, as the residual heat within the cookies continues to gently bake them to perfection.
Beyond the immediate benefit of texture preservation, allowing the cookies to cool prior to freezing helps maintain their structural integrity. The cooling process allows the cookies to set, ensuring that they won’t crumble or break during the subsequent freezing, storage, and thawing phases.
So, as tempting as it might be to dive into a fresh-from-the-oven snowball cookie, remember that exercising patience and allowing them to cool completely will contribute significantly to the success of your freezing endeavor. With each cookie perfectly cooled on that wire rack, you’re one step closer to freezing these treats while preserving their irresistible flavor and delicate texture.
Should I freeze snowball cookies before or after baking?
Snowball cookies are best frozen after baking and cooling. Freezing baked cookies preserves their intended texture and flavor. Once cooled, package them properly, then freeze to enjoy the full quality upon thawing.
Step 2: Prepare a Baking Sheet
With your freshly baked snowball cookies cooled to perfection, it’s time to transition to the next step in your quest to freeze these delectable treats. This step involves a seemingly straightforward task that serves a crucial purpose: preparing a baking sheet lined with parchment paper.
At first glance, it might appear that this step is merely about ensuring a clean surface to place your cookies on. However, the parchment paper has a more significant role to play in the freezing process than meets the eye. As you embark on freezing your cookies, maintaining their individual shape and preventing them from sticking together is of paramount importance. This is where the parchment paper steps in as your trusty ally.
The parchment paper provides a non-stick surface that allows each cookie to rest comfortably without adhering to the sheet. This minimizes the risk of cookies fusing together during the initial freezing stage. As cookies freeze, they can be surprisingly sticky due to their high-fat content. Without the protective barrier of parchment paper, cookies might end up fused together, resulting in a messy and unappetizing clump that’s far from the individually frozen treats you envisioned.
Additionally, the parchment paper creates a flat and even surface on the baking sheet. This ensures that the cookies maintain their intended shape and presentation during the freezing process. A level surface prevents any uneven pressure or misshaping that might occur if cookies were placed directly on a textured baking sheet.
Are there any alternatives to parchment paper for layering the cookies?
Yes, alternatives to parchment paper for layering cookies include wax paper or silicone baking mats. These options prevent sticking and maintain individuality during freezing. Choose a material that suits your preferences and is safe for freezing.
Step 3: Arrange the Snowball Cookies
As you progress through the process of freezing your precious snowball cookies, you’re now at a step that requires a careful and deliberate touch: arranging the cooled cookies on the parchment-lined baking sheet. While this might seem like a simple task, the way you position the cookies at this stage can have a significant impact on their final frozen state.
After patiently allowing your freshly baked snowball cookies to cool, their texture and structure are at their prime. However, the inherent richness of these treats, contributed by their buttery composition, can result in a slight stickiness. Placing them directly in contact with each other during the freezing process can lead to an unwanted outcome—cookies that merge together, ultimately compromising their individuality and appearance.
This is where the strategic arrangement comes into play. As you place each cooled snowball cookie on the parchment-lined baking sheet, ensure there is sufficient space between each cookie. The goal is to prevent any physical contact between them during the freezing process. By leaving enough room, you’re effectively creating a buffer zone that inhibits the cookies from sticking together as they solidify.
The arrangement not only safeguards the distinct shape and form of each cookie but also maintains the integrity of the delicate powdered sugar coating. Cookies that touch might end up with smudged or unevenly distributed powdered sugar, diminishing their visual appeal.
By adhering to this careful placement strategy, you’re setting the stage for an optimal freezing process. The space between the cookies allows the cold air within the freezer to circulate freely around each cookie, facilitating a uniform freezing process. This, in turn, helps preserve the cookies’ texture, flavor, and overall quality.
Step 4: Freeze the Cookies
With your carefully arranged snowball cookies poised on the parchment-lined baking sheet, you’re now ready to usher them into the cool embrace of the freezer. This step marks a pivotal moment in the freezing process—one that’s essential for preserving the cookies’ distinctive texture and preventing undesirable clumping.
Placing the baking sheet laden with cookies into the freezer might appear routine, but it’s an action that sets a sequence of events in motion. The individual freezing of each cookie is not a mere formality; it’s a technique known as flash-freezing, and it carries significant benefits that ripple through the entire freezing endeavor.
Flash-freezing involves rapidly freezing each cookie on the baking sheet before they’re collectively transferred to their storage container. The term “flash” isn’t just a catchy moniker; it refers to the swift and controlled freezing process that takes place. During this phase, the moisture within the cookies begins to solidify, forming tiny ice crystals. By freezing the cookies individually, you’re minimizing the chance of these ice crystals growing excessively large. Large ice crystals can puncture cell walls within the cookies, leading to a compromised texture when thawed.
Moreover, this individual freezing prevents the cookies from adhering to one another. As they freeze on the baking sheet, they maintain their unique shape and structure. This goes a long way in avoiding the dreaded clumping scenario—where cookies fuse together due to moisture or pressure—while stored in the freezer. The last thing you want is a solid block of cookies that requires chiseling apart.
Allowing the cookies to rest in the freezer for about 1 to 2 hours might feel like an exercise in patience, but it’s an investment in their future flavor and presentation. This flash-freezing phase ensures that when you reach for a cookie from your frozen stash, it emerges as an individual treat, just as delightful and enchanting as the day it was baked.
Step 5: Package the Cookies
As your snowball cookies emerge from their individual freeze on the baking sheet, it’s time to transition them to their final frozen abode. This step involves careful packaging that plays a pivotal role in maintaining the cookies’ texture, flavor, and presentation while they await their next delightful rendezvous with your taste buds.
Once your cookies have undergone their flash-freezing phase and are solidly frozen, transferring them into an airtight container or resealable freezer bag becomes the next logical step. The choice between the two depends on your preference and the quantity of cookies you intend to store. Regardless of the container, the primary goal remains the same: preserving the cookies’ individuality and preventing them from clumping together.
The act of layering the cookies with parchment paper within the container or bag is a strategy rooted in practicality. Snowball cookies, with their buttery composition, can be susceptible to sticking together when stored in close proximity, especially in a frozen state. The parchment paper acts as a gentle barrier between each cookie, preventing direct contact and minimizing the risk of fusion.
When placing the cookies within the container or bag, ensure they are arranged in a single layer or in small stacks separated by parchment paper. This arrangement maintains the space and buffer needed to preserve their individual form and prevent any unwanted adhesion.
The choice of an airtight container or resealable freezer bag is instrumental in maintaining the cookies’ quality. Both options create a barrier against moisture and air, preventing freezer burn and flavor degradation. When sealing the container or bag, be sure to remove as much air as possible to create an optimal frozen environment.
Step 6: Remove Excess Air and Seal
As you embark on the final steps of preserving your precious snowball cookies, attention to detail becomes paramount. Properly sealing your chosen storage container ensures that your cookies remain a delectable delight when you decide to savor them. Whether you’ve opted for a sturdy airtight container or a convenient resealable freezer bag, this step is where the magic of preservation takes place.
If you’ve chosen the convenience of a resealable freezer bag, the first action to take is to gently press out any excess air trapped within the bag before sealing it shut. This seemingly small act has significant implications for the quality of your frozen cookies. Air contains moisture, and moisture within a sealed container can lead to freezer burn—a condition where the texture and flavor of frozen foods deteriorate due to dehydration and oxidation.
By expelling excess air from the bag, you’re creating a barrier against moisture infiltration. This protective measure helps maintain the cookies’ texture and flavor over time, ensuring that they emerge from the freezer as delightful as when they entered. As you seal the bag, ensure that the closure is secure to prevent any air from sneaking back in.
For those who have chosen an airtight container, the focus shifts to ensuring the lid is tightly sealed. An airtight seal forms a barrier against any external elements, be it moisture or air. These intruders can have detrimental effects on the cookies’ quality, altering their texture and potentially introducing off-flavors.
Ensuring a tight seal might require a little extra effort, but the rewards are well worth it. A securely sealed container locks in the cookies’ freshness and prevents the formation of ice crystals that can compromise their texture. As you press the lid into place, take a moment to appreciate the small but significant role it plays in preserving your culinary creations.
Step 7: Label and Date
As you finalize the preservation of your treasured snowball cookies, it’s time to introduce a touch of organization and foresight. This step involves a seemingly simple act that holds the power to enhance your future culinary experiences—labeling and dating the container or bag in which your cookies are nestled.
Using a permanent marker, inscribe the date of freezing on the container or bag. This act might appear minor, but its impact extends far beyond its simplicity. The date serves as a beacon, guiding you toward optimal enjoyment of your frozen treats.
Why is dating your frozen cookies so significant? Just as seasons change, so do the qualities of frozen foods. Over time, even with proper packaging, frozen items can experience a decline in texture, flavor, and overall quality. By affixing a clear date, you create a reference point that reminds you to indulge in your cookies at their peak.
The date serves as a gentle nudge to savor your snowball cookies within a reasonable timeframe. While these cookies are resilient and can remain frozen for several months, consuming them within the first two to three months ensures you experience them at their best. This timely consumption prevents potential freezer burn, maintains their delightful texture, and ensures you enjoy their signature flavor to the fullest.
Labeling and dating your container or bag also contribute to an organized freezer space. With a quick glance, you’ll be able to identify when the cookies were frozen, making it easier to make informed choices when selecting which treat to enjoy next.
Step 8: Store in the Freezer
As your frozen treasures, lovingly encased in their labeled container or bag, await their future rendezvous with your taste buds, the time has come to find them a secure and appropriate dwelling within your freezer. This step marks the conclusion of your freezing journey and sets the stage for the moment you’ll reach for a snowball cookie and experience its delightful flavor once more.
Placing the labeled container or bag in the freezer might seem straightforward, but there are considerations to keep in mind to ensure the continued quality of your frozen cookies. One of the key aspects is the placement of your cookies in relation to other items in the freezer.
It’s advisable to store the snowball cookies away from strong-smelling foods. Why, you might wonder? Foods with potent odors have the potential to impart their flavors onto neighboring items, particularly in the confined space of the freezer. Storing your cookies near foods with intense aromas such as garlic, onions, or heavily spiced dishes could lead to unwanted flavor transfer. Your delightful snowball cookies might end up tasting more like their aromatic neighbors than their intended buttery and powdered sugar goodness.
Creating a bit of distance between your cookies and these aromatic neighbors is a safeguard against flavor blending. Consider using the upper shelves of the freezer for your cookies, as this is generally the least fragrant area. If you have a designated dessert section, that might be an even better spot.
The placement within the freezer also contributes to ease of access. As time passes, your snowball cookies might end up sharing space with other frozen goodies. Placing them in a spot where they’re easily visible and reachable ensures you won’t forget about their existence.
How long can I store frozen snowball cookies?
Frozen snowball cookies can be stored for about 2-3 months while maintaining good quality. Beyond this timeframe, the cookies might experience degradation in texture and flavor due to potential freezer burn. Proper packaging is essential for optimal preservation.
Other related questions
How do I defrost snowball cookies?
To defrost snowball cookies, remove them from the freezer and place them on a plate or baking sheet. Allow them to thaw at room temperature for about 20-30 minutes. This gradual thawing helps preserve their texture and flavor.
What’s the best way to reheat frozen snowball cookies?
To reheat frozen snowball cookies, preheat an oven to a low temperature (about 250°F or 120°C). Place thawed cookies on a baking sheet and warm them for a few minutes until refreshed. This method helps retain their original texture and flavor.
Can I refreeze snowball cookies?
It is generally not recommended to refreeze snowball cookies once they have been thawed. Refreezing can affect their texture and taste. To maintain their quality, consume them after the initial thawing.
How do I know if the snowball cookies have gone bad after being frozen?
Signs of frozen snowball cookies going bad include odors, freezer burn (visible as discolored or dry patches), and changes in texture or taste. If cookies exhibit any of these, they may have deteriorated. Always use sensory cues and discard if quality is compromised.
Can I freeze snowball cookies with powdered sugar?
Yes, snowball cookies with powdered sugar can be frozen. However, the powdered sugar might appear less vibrant after thawing due to moisture. This doesn’t significantly impact flavor or texture.
Can I freeze different types of snowball cookies together?
Yes, different types of snowball cookies can be frozen together. To prevent flavor mixing, separate each type with parchment paper or use separate airtight containers. This ensures that the distinct flavors and aromas of each type are preserved during freezing.
Can I freeze gluten-free or vegan snowball cookies?
Yes, gluten-free or vegan snowball cookies can be frozen. Follow the same freezing process, considering specific ingredients used. Properly packaged, they retain their quality when frozen and thawed.
Are there any special considerations for high-altitude freezing?
Freezing at high altitudes might require slightly adjusted freezing times due to lower temperatures. Monitor cookies to prevent over-freezing. Proper packaging is crucial to maintain cookies’ quality.
Can I freeze snowball cookies with other baked goods?
Yes, snowball cookies can be frozen with other baked goods. However, be cautious of strong aromas that could transfer flavors. Separate packaging helps prevent flavor mixing during freezing.
Can I freeze snowball cookies with fillings like jam or chocolate?
Yes, you can freeze snowball cookies with fillings like jam or chocolate. Ensure the fillings are stable during freezing and thawing to maintain texture and flavor. Proper packaging prevents any adverse effects on the cookies

