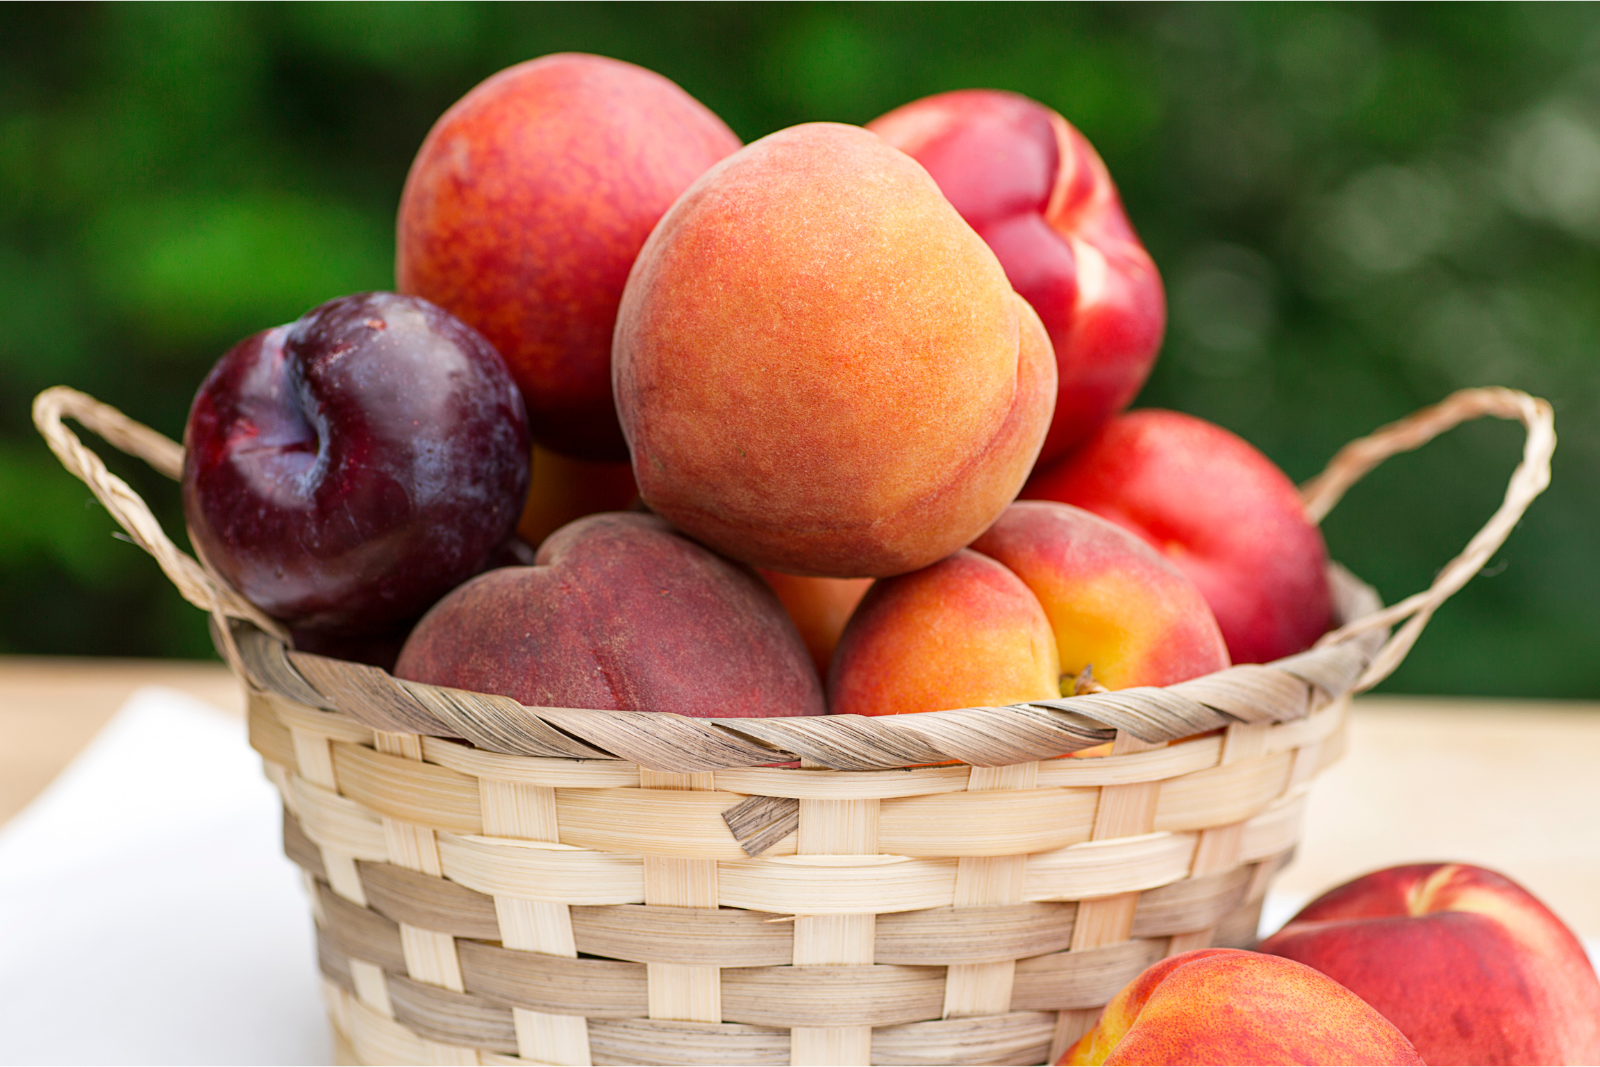
Stone fruits, a delectable category of fruit encompassing peaches, plums, nectarines, apricots, and cherries, are beloved for their juicy sweetness and luscious flavors. These fruits get their name from the large, hard seed (stone) found at their core. When the stone fruit season is in full swing and you have more ripe fruits than you can consume, freezing is an excellent way to preserve their succulent essence and enjoy their delightful taste even when the season has passed. Freezing stone fruits allows you to capture their peak ripeness and nutritional benefits, making them a versatile ingredient for smoothies, desserts, pies, and other culinary creations throughout the year. In this guide, we will delve into the art of freezing stone fruits, exploring the various methods to ensure that your frozen stash remains flavorful and ready to bring a burst of summer sweetness to your kitchen, no matter the season. Join us as we uncover the secrets to freezing stone fruits, unlocking a world of taste and convenience at your fingertips.
Here are the simple steps to freeze stone fruit:
- Step 1: Select Ripe and Fresh Stone Fruit
- Step 2: Wash and Pit the Stone Fruit
- Step 3: Prepare a Light Syrup (optional)
- Step 4: Arrange the Stone Fruit for Freezing
- Step 5: Flash-Freeze the Stone Fruit
- Step 6: Package and Seal the Stone Fruit
- Step 7: Label and Date the Packages
- Step 8: Store in the Freezer
Step 1: Select Ripe and Fresh Stone Fruit
Selecting the right stone fruit is crucial when it comes to freezing them successfully. The goal is to capture the best possible taste and texture in the frozen fruit. To achieve this, opt for high-quality, ripe stone fruits. Here’s why this step is essential:
- Optimal Flavor: Ripe stone fruits are at their peak sweetness and flavor. Choosing fully ripe but not overripe fruit ensures that you freeze them when they are most delicious. Freezing underripe fruit might result in a less sweet and enjoyable taste once thawed.
- Vibrant Colors: Ripe stone fruits exhibit vibrant colors, indicating that they have matured fully on the tree or vine. These colors are not only visually appealing but also a sign of the fruit’s readiness for consumption and preservation.
- Slightly Firm Texture: When selecting stone fruit for freezing, go for those with a slightly firm texture. This indicates that the fruit is not overly soft or mushy, which could impact the overall quality after freezing.
- Sweet Aroma: A sweet and fragrant aroma is a reliable indicator of a stone fruit’s ripeness. A ripe fruit will emit a pleasant smell, indicating that it’s ready to be enjoyed and preserved.
- Avoid Bruised or Soft Spots: Inspect the stone fruit carefully and avoid using any that have bruised areas or soft spots. Damaged fruit may not freeze well, and the affected areas could negatively impact the taste and texture of the frozen fruit.
By taking the time to choose ripe and fresh stone fruit, you set the foundation for a successful freezing process. The selected fruits will retain their delectable flavors and textures, allowing you to enjoy the essence of the season even after months in the freezer. Remember that the quality of the fruit you start with greatly influences the quality of the final frozen product, making this step a crucial one in the overall process.
Step 2: Wash and Pit the Stone Fruit
Washing and pitting the stone fruit is an essential step in the freezing process as it ensures that the fruit is clean, free from any contaminants, and ready for freezing. This step involves the following procedures:
- Thoroughly Wash the Stone Fruit: Start by placing the stone fruit under cool, running water. Gently rub the surface of the fruit with your fingers to remove any dirt, debris, or pesticide residues. Washing the fruit helps eliminate any impurities that may affect the taste and quality of the frozen fruit.
- Pat the Fruit Dry: After washing, use a clean kitchen towel to gently pat the stone fruit dry. Drying the fruit is important because excess moisture on the skin can lead to ice crystals forming on the surface during freezing, potentially affecting the texture of the fruit.
- Slice the Fruit in Half and Remove the Pit: Once the fruit is dry, carefully cut it in half along its natural seam using a sharp knife. Stone fruits such as peaches, plums, and nectarines have a central pit that needs to be removed. To do this, hold the fruit firmly and twist the two halves in opposite directions to separate them. Then, using a spoon or a fruit pitter, scoop out the pit from each half. Removing the pit not only makes the fruit more freezer-friendly but also allows for easier handling and serving when thawed.
- Consider Slicing into Smaller Pieces: If the stone fruit is particularly large, you may opt to slice it into smaller, more manageable pieces. Smaller pieces freeze faster and more evenly, which helps preserve the fruit’s quality during freezing and thawing.
By washing the stone fruit thoroughly and removing the pits, you ensure that the fruit is clean and prepared for the freezing process. This step is vital in maintaining the overall integrity of the fruit during freezing and prevents any unwanted elements from affecting its taste and texture. Properly washed and pitted stone fruit will freeze more efficiently and retain its deliciousness, allowing you to enjoy the delightful taste of the fruit long after the peak season has passed.
Step 3: Prepare a Light Syrup (optional)
Preparing a light syrup is an optional step in the process of freezing stone fruit, but it can offer several benefits in terms of both appearance and flavor. The syrup acts as a protective coating, helping to preserve the fruit’s color and taste during the freezing process. Here’s why this step can be beneficial:
- Prevents Browning: When stone fruit is exposed to air, enzymes in the fruit react with oxygen, causing it to turn brown. Coating the fruit in a light syrup before freezing creates a barrier that limits the fruit’s contact with oxygen, thus reducing the chances of browning. This ensures that the frozen fruit remains visually appealing and vibrant.
- Enhances Sweetness: The light syrup, made by combining equal parts of water and granulated sugar, adds a touch of sweetness to the stone fruit. It not only complements the natural sweetness of the fruit but also helps intensify the overall flavor when the fruit is thawed and consumed.
- Preserves Texture: The sugar in the syrup also plays a role in maintaining the fruit’s texture. It interacts with the fruit’s cell walls during freezing, creating a slight firmness that helps retain the fruit’s structure and juiciness when thawed.
Here’s how to prepare the light syrup:
- In a saucepan, combine equal parts of water and granulated sugar. For instance, you can use one cup of water and one cup of sugar for a balanced syrup.
- Heat the mixture over medium heat, stirring constantly until the sugar is completely dissolved. This will create a clear and slightly sweet liquid.
- Allow the syrup to cool to room temperature before using it to cover the stone fruit.
Keep in mind that this step is entirely optional. If you prefer to freeze the stone fruit without a syrup, you can skip this part and proceed with arranging the fruit on a baking sheet for flash-freezing. The syrup is mainly used for aesthetic purposes and to enhance sweetness, so the decision to use it depends on your personal preference and intended use of the frozen stone fruit.
Step 4: Arrange the Stone Fruit for Freezing
Properly arranging the prepared stone fruit before freezing is essential to ensure that the fruits freeze individually and do not stick together. This step is crucial for maintaining the quality and integrity of the frozen fruit. Here’s why arranging the stone fruit is important:
- Individual Freezing: Placing the stone fruit in a single layer on a baking sheet prevents the pieces from touching each other. Individual freezing is crucial because it allows each fruit piece to freeze quickly and independently. This prevents the formation of large ice crystals and helps retain the fruit’s texture and flavor during freezing.
- Prevents Clumping: If the fruit pieces freeze together in a clump, it becomes challenging to remove only the desired amount of fruit from the freezer when needed. Proper arrangement prevents this issue and allows for easy portioning.
- Organized Storage: By arranging the stone fruit neatly on a baking sheet, you create an organized and space-efficient way to store them in the freezer. The individually frozen pieces can later be transferred to airtight containers or bags without sticking together.
Here’s how to arrange the stone fruit for freezing:
- Line a Baking Sheet: Place a baking sheet with edges (rimmed) and line it with parchment paper or a silicone mat. The lining prevents the fruit from sticking to the baking sheet during freezing.
- Arrange in a Single Layer: Lay the prepared stone fruit pieces on the lined baking sheet in a single layer. Ensure that there is enough space between each piece so that they do not touch.
- Avoid Overcrowding: If you have a large quantity of stone fruit to freeze, consider using multiple baking sheets or freezing the fruit in batches. Overcrowding the baking sheet can lead to uneven freezing and may cause the fruit to stick together.
- Flash Freeze: Place the baking sheet with the arranged stone fruit in the freezer and let the fruit freeze until solid. Flash freezing ensures that the fruit freezes quickly and maintains its individual form.
After flash freezing, you can transfer the individually frozen stone fruit pieces to airtight containers or resealable plastic bags for long-term storage. This method of arranging the stone fruit guarantees that you have easy access to frozen fruit whenever you need it, without having to thaw an entire clump of fruit at once.
Step 5: Flash-Freeze the Stone Fruit
Flash freezing is a rapid freezing process that involves freezing the stone fruit pieces quickly and individually. This step is essential in the freezing process because it helps preserve the quality, texture, and flavor of the fruit. Here’s why flash freezing the stone fruit is crucial:
- Prevents Stickiness: By flash freezing the stone fruit individually on the baking sheet, the fruit pieces freeze quickly without coming into contact with one another. This prevents them from sticking together and forming a solid clump during freezing.
- Preserves Texture: Rapid freezing forms smaller ice crystals within the fruit, which helps maintain the fruit’s cell structure and texture. This means that when the fruit is thawed, it will retain much of its original texture and juiciness, closely resembling fresh fruit.
- Enables Easy Portioning: Flash freezing allows you to freeze the stone fruit pieces individually and then transfer them to airtight containers or bags. This makes it easy to take out only the desired amount of fruit when needed, without having to thaw the entire batch.
Here’s how to flash-freeze the stone fruit:
- Prepare the Stone Fruit: After arranging the stone fruit pieces on a lined baking sheet, ensure that they are evenly spaced and not touching each other.
- Transfer to the Freezer: Carefully transfer the baking sheet to the coldest part of your freezer. It’s essential to place the sheet on a flat surface to prevent any spillage or uneven freezing.
- Monitor Freezing Time: The time required for flash freezing may vary depending on the type and size of the stone fruit, as well as the temperature of your freezer. Generally, it takes a few hours for the stone fruit to freeze solid. Once the fruit is completely frozen, it’s ready for the next step of packaging.
- Package for Long-term Storage: After the stone fruit pieces are fully frozen, promptly transfer them to airtight freezer-safe containers or resealable plastic bags. Label the containers with the type of fruit and the freezing date for easy identification later.
By flash freezing the stone fruit, you ensure that each piece retains its individuality, making it easy to access and use only the required amount of fruit from the freezer. This method helps preserve the stone fruit’s taste, texture, and appearance, allowing you to enjoy the deliciousness of summer even during the colder months.
Step 6: Package and Seal the Stone Fruit
After the stone fruit pieces have been flash-frozen and are solid, it’s time to transfer them to appropriate containers for long-term storage. Proper packaging and sealing are crucial to maintain the quality of the frozen fruit and prevent freezer burn. Here’s why this step is important:
- Preserves Freshness: Placing the frozen stone fruit in airtight freezer-safe containers or resealable plastic bags helps preserve their freshness and prevents them from absorbing any unwanted odors from the freezer.
- Prevents Freezer Burn: Freezer burn is caused by air coming into contact with the frozen fruit, leading to dehydration and oxidation. Sealing the containers tightly prevents air from reaching the fruit, reducing the risk of freezer burn and ensuring the fruit remains in optimal condition.
- Syrup Addition (Optional): If you prepared a light syrup in Step 3, pouring it over the stone fruit before sealing the containers can add extra protection against freezer burn. The syrup creates a barrier around the fruit, further safeguarding its texture and flavor during freezing.
Here’s how to package and seal the stone fruit:
- Transfer to Containers: Carefully transfer the frozen stone fruit pieces from the baking sheet to airtight freezer-safe containers or resealable plastic bags. Be sure to leave some space at the top of the containers to allow for any expansion that may occur during freezing.
- Optional: Add Syrup (if prepared): If you made a light syrup, pour it over the fruit in the containers. The syrup should cover the fruit pieces, forming a protective layer.
- Remove Air and Seal: For containers with lids, press down to remove any excess air before sealing them tightly. For resealable plastic bags, carefully remove excess air from the bags and then seal them securely.
- Return to Freezer: Place the sealed containers or bags back in the coldest part of the freezer for long-term storage.
Proper packaging and sealing are the final steps to ensure that your frozen stone fruit remains in excellent condition for months to come. By taking the time to package the fruit correctly, you can enjoy the taste of summer even when the stone fruit is out of season, making it a convenient and flavorful addition to your culinary endeavors.
Step 7: Label and Date the Packages
Labeling and dating the packages of frozen stone fruit is a crucial step to maintain organization and ensure the best quality of the fruit over time. Proper labeling allows you to keep track of the contents in your freezer, making it easier to identify different fruits and use them in a timely manner. Here’s why this step is essential:
- Easy Identification: Labeling each container or bag with the type of fruit (e.g., peaches, plums, nectarines) allows you to quickly identify the contents without needing to open the package. This is especially helpful if you have multiple types of stone fruit stored in your freezer.
- Track Freezing Dates: By including the freezing date on the label, you can keep track of how long the stone fruit has been in the freezer. Using the oldest fruit first ensures that you consume them at their peak quality before any potential decline in taste or texture over time.
- Prevents Waste: Proper labeling helps prevent waste by reminding you of the contents and age of the frozen stone fruit. This way, you can plan your meals accordingly, using the frozen fruit before it reaches the end of its recommended storage period.
Here’s how to label and date the packages:
- Use Waterproof Labels: Ensure that you use labels that are resistant to moisture and won’t smudge or become unreadable in the freezer. Waterproof labels can be found in stationery or kitchen supply stores.
- Write Clearly: Use a permanent marker or a pen with bold ink to write the type of fruit and the freezing date on each label. Make sure the writing is legible and easy to read at a glance.
- Attach Labels Securely: Affix the labels to the containers or bags securely to prevent them from falling off during freezing or handling.
- Arrange Packages Neatly: Store the labeled packages in an organized manner in your freezer, with the labels facing outward for easy visibility.
By taking a moment to label and date the packages of frozen stone fruit, you create an efficient and well-managed freezer storage system. This simple yet important step ensures that you can enjoy your frozen stone fruit with confidence, knowing exactly what you have and when it’s best to use it for the most delicious results.
Step 8: Store in the Freezer
The final step in the process of freezing stone fruit is to store the labeled and properly packaged containers or bags in the coldest part of your freezer. Storing the frozen stone fruit correctly is crucial to maintaining its quality and ensuring it remains safe to consume over an extended period. Here’s why this step is important:
- Optimal Freezer Temperature: The coldest part of your freezer, typically near the back or bottom, provides a stable and consistently cold environment. This ensures that the stone fruit remains frozen solid, preventing any partial thawing that could negatively impact the fruit’s taste and texture.
- Long-term Storage: When stored in the freezer at the proper temperature, stone fruit can last for an extended period, typically between 8 to 12 months. Properly frozen fruit retains much of its original flavor and texture, allowing you to enjoy the taste of summer even during the colder months or when stone fruit is out of season.
- Convenient Access: By organizing the frozen stone fruit in labeled and dated containers or bags, you can easily access the specific type of fruit you desire without having to thaw the entire batch. This makes it convenient to use the frozen stone fruit in various recipes and dishes as needed.
Here’s how to store the frozen stone fruit in the freezer:
- Place in the Coldest Part: Locate the coldest part of your freezer, usually near the back or bottom. This area maintains a more consistent temperature, ensuring that the fruit freezes solid and remains at its best quality.
- Organize Neatly: Arrange the labeled containers or bags of frozen stone fruit neatly in the freezer. Make sure they are standing upright or stacked securely to maximize space and allow for easy retrieval.
- Avoid Frequent Opening: Try to limit unnecessary openings of the freezer door to maintain a constant temperature. Frequent opening and closing can lead to fluctuations in temperature, potentially affecting the quality of the frozen stone fruit.
By storing the frozen stone fruit in the coldest part of your freezer and following proper storage practices, you can enjoy the delightful taste of summer’s stone fruit all year round. Having these frozen fruits readily available gives you the opportunity to create a variety of delicious dishes and desserts, even when the fresh stone fruit is not in season.
Other related questions
How do you defrost stone fruit?
To defrost stone fruit, transfer the frozen fruit from the freezer to the refrigerator. Allow it to thaw slowly and evenly for several hours or overnight, depending on the size of the fruit. Avoid using heat or microwaving, as it may cause the fruit to become mushy.
Can you refreeze stone fruit?
Refreezing stone fruit is generally not recommended. Once stone fruit has been thawed, its texture and taste may be compromised, and refreezing can further deteriorate its quality. To maintain optimal flavor and texture, it’s best to consume the thawed stone fruit promptly or use it in recipes.
How do I know if the stone fruit has gone bad after being frozen?
To determine if frozen stone fruit has gone bad, look for signs of freezer burn, such as dry, discolored, or shriveled areas on the fruit’s surface. Additionally, a noticeable change in texture, such as excessive softness or sogginess, can indicate spoilage. Trust your sense of smell; if the fruit emits an off or unpleasant odor, it may have spoiled and should not be consumed. When in doubt, discard any frozen stone fruit that appears visually altered or exhibits an unusual smell to avoid the risk of consuming spoiled fruit.
Are there any recipes or meal ideas that specifically use frozen stone fruit?
Certainly! Frozen stone fruit can be used in various recipes and meal ideas. You can make delicious smoothies, fruit sorbets, and fruit crisps using frozen stone fruit. Additionally, it can be used as a topping for yogurt, oatmeal, or even as a filling for pies and pastries. The versatility of frozen stone fruit makes it a fantastic addition to both sweet and savory dishes, providing a burst of fruity flavor all year round.
What are some creative ways to incorporate frozen stone fruit into savory dishes?
Incorporating frozen stone fruit into savory dishes can add a unique and delightful twist to your meals. Consider using thawed stone fruit as a topping for salads, providing a burst of sweetness and juiciness. It can also be blended into barbecue or tomato-based sauces for a fruity tang, or used as a chutney accompaniment to grilled meats. Furthermore, sautéing thawed stone fruit with onions and spices can create a delectable compote that complements dishes like roasted chicken or pork.
Can I freeze stone fruit with other fruits or vegetables in the same container?
Yes, you can freeze stone fruit with other fruits or vegetables in the same container. However, it is important to consider the compatibility of flavors and textures to ensure the best results. Mixing fruits with similar freezing and thawing properties is recommended to maintain the quality of each ingredient. Additionally, it’s essential to leave some space for expansion within the container and seal it tightly to prevent freezer burn and cross-contamination.

