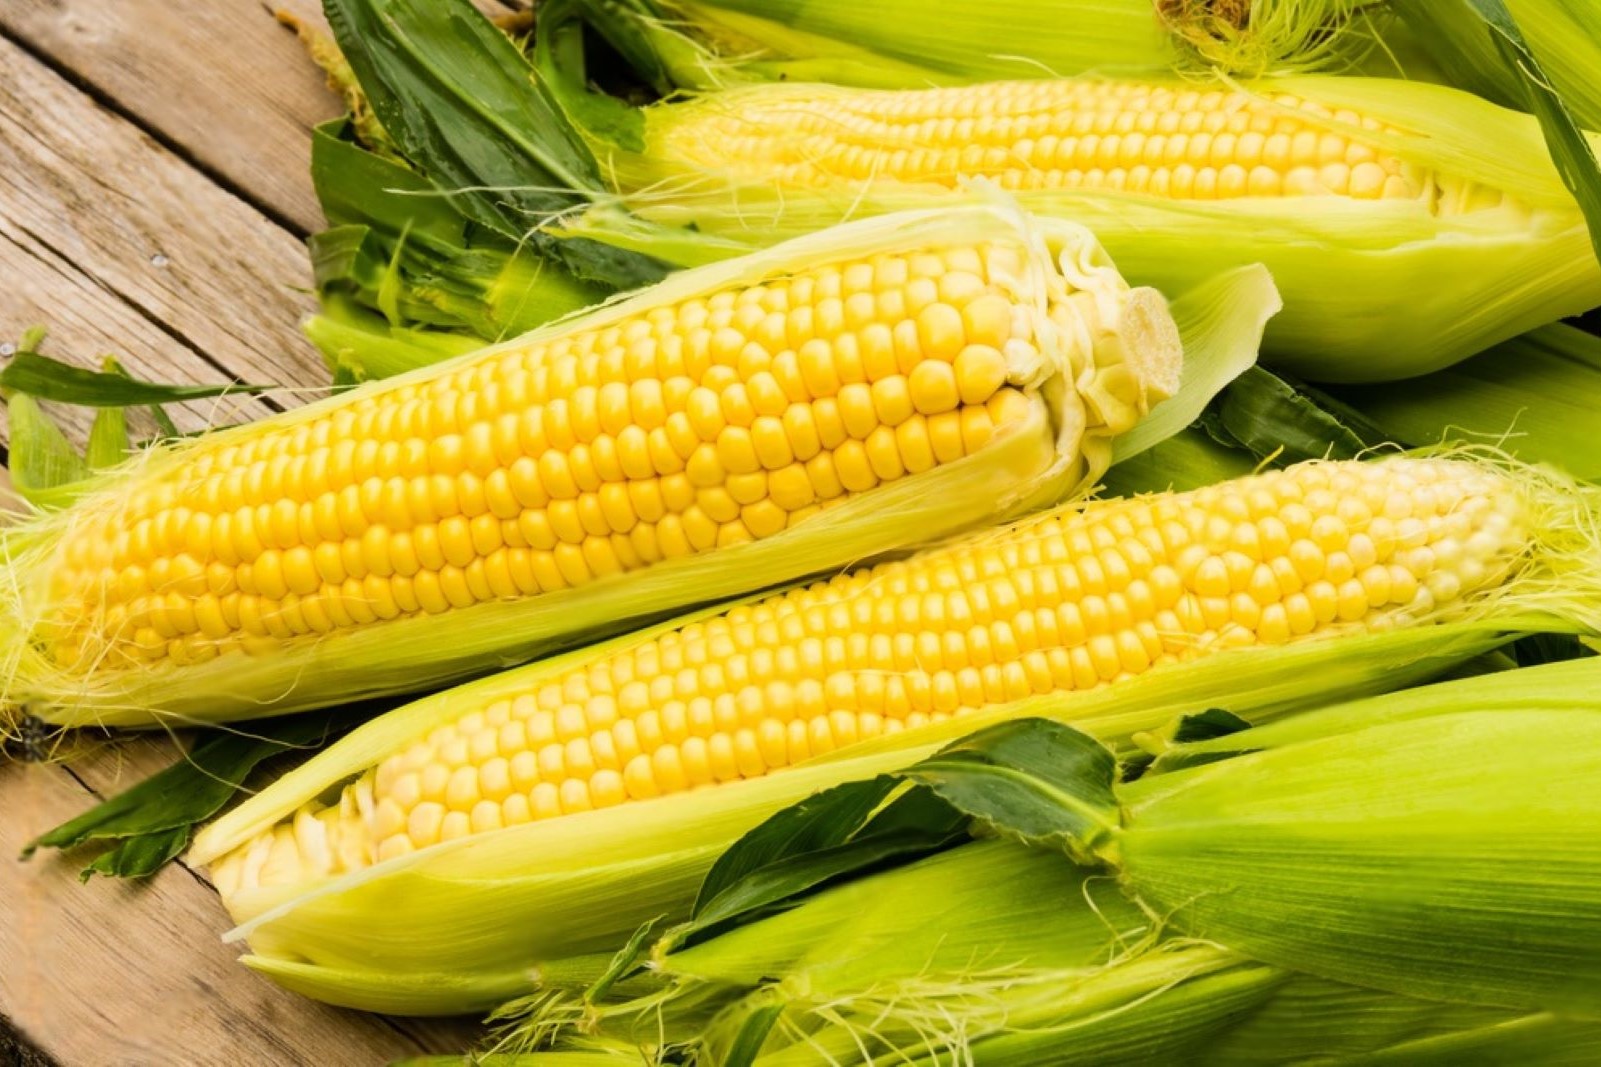
Sweet corn, with its tender kernels and natural sweetness, is a beloved and iconic vegetable that heralds the arrival of summertime. Whether enjoyed on the cob, grilled to perfection with a sprinkle of salt and butter, or incorporated into a variety of dishes like salads, soups, and casseroles, sweet corn brings a delightful burst of flavor and texture to our culinary delights. This beloved vegetable is a staple at barbecues, picnics, and family gatherings, making it a treasured part of our warm-weather traditions. However, when sweet corn is in abundance during its peak season or when purchased in larger quantities, it may be challenging to consume it all before it starts to lose its freshness. Freezing sweet corn becomes a practical and efficient method to preserve its natural sweetness and tender texture, ensuring that each kernel retains its delectable taste and vibrant color, ready to elevate your meals with the essence of summertime sweetness, even when fresh sweet corn is not readily available or when you wish to enjoy this delightful vegetable at your convenience. In this guide, we will explore the best practices for freezing sweet corn, allowing you to savor its seasonal goodness and elevate your culinary creations with the essence of this delightful vegetable, whenever you desire, without the need for a fresh purchase or harvest from your garden or local market.
Here are the simple steps to freeze sweet corn:
Step 1: Select Fresh Sweet Corn
Selecting fresh sweet corn is a crucial step in the process of freezing corn. The quality of the corn you choose at this stage directly impacts the taste and texture of the frozen corn later on. Here’s why it’s essential to pick the right corn:
- Flavor and Sweetness: Fresh sweet corn is known for its naturally sweet flavor, which comes from the sugars in the kernels. As corn ages, the sugars start converting into starch, resulting in a less sweet and less flavorful taste. By selecting fresh corn, you ensure that the kernels are at their sweetest, giving you a more enjoyable eating experience after freezing.
- Texture: The texture of sweet corn is also influenced by its freshness. Plump, well-formed kernels in fresh corn are juicy and tender, providing a satisfying crunch when you bite into them. On the other hand, older corn may have dried-out kernels that can become tough and chewy after freezing.
- Vibrant Green Husks: Vibrant green husks are a sign of freshness in sweet corn. The husks protect the kernels from drying out and losing moisture. If you notice discolored or wilted husks, it might indicate that the corn has been sitting for too long and may not retain its quality during freezing.
- Nutrition: Fresh sweet corn is more nutritious compared to older corn. Corn is a good source of vitamins, minerals, and dietary fiber, and these nutrients are best preserved in fresh corn. Opting for fresh corn ensures you get the most nutritional value from your frozen corn.
By carefully selecting fresh sweet corn with plump kernels and vibrant green husks, you set a solid foundation for successfully freezing corn. The freshness of the corn at this stage guarantees that you’ll end up with a flavorful and tender product when it’s time to enjoy your frozen sweet corn. So, take the time to choose the best corn available, and you’ll be rewarded with delicious corn on the cob or mouthwatering kernels in your dishes even during the off-season.
Step 2: Shuck and Clean the Corn
Shucking and cleaning the sweet corn is a crucial preparation step before freezing. Shucking refers to the process of removing the outer husks and silks, while cleaning involves rinsing off any remaining debris. This step is essential for several reasons:
- Hygiene: Corn on the cob is typically grown outdoors, and during its growth, it can accumulate dust, dirt, and other debris on its husks. By shucking the corn and rinsing it under cool running water, you ensure that any impurities and contaminants are washed away, making the corn safe for consumption.
- Silks Removal: The silks are the fine, thread-like structures found between the corn kernels and the husks. They are not only unappetizing but can also be somewhat challenging to remove once the corn is cooked. By cleaning the corn and removing the silks before freezing, you save yourself from the hassle of dealing with them later when you cook or eat the corn.
- Preventing Mold: Husks that are not properly removed can trap moisture, leading to the growth of mold on the corn ears. By shucking the corn, you eliminate the potential for mold development, ensuring that your frozen corn stays fresh and mold-free during storage.
- Better Freezing: Removing the husks and silks allows for better freezing of the corn. When the corn is exposed to the freezer without the husks, it freezes more evenly and quickly, preserving its taste and texture effectively.
By taking the time to shuck and clean the sweet corn properly, you ensure that the corn is safe, clean, and ready for freezing. This step sets the stage for maintaining the corn’s quality and taste throughout the freezing and thawing process, allowing you to enjoy delicious, fresh-tasting corn when you decide to use it later on.
Step 3: Blanch the Sweet Corn
Blanching the sweet corn is a vital step in the process of freezing, as it plays a significant role in preserving the corn’s flavor, texture, and nutrients. Blanching involves briefly cooking the corn in boiling water, followed by rapid cooling, and here’s why it’s crucial:
- Enzyme Inactivation: Sweet corn contains enzymes that can cause changes in color, texture, and flavor over time, even when frozen. By blanching the corn, you subject it to a brief period of high heat, which effectively inactivates these enzymes. This process helps retain the natural sweetness and taste of the corn, ensuring it remains delicious after freezing.
- Retaining Color: The blanching process also helps preserve the vibrant color of the sweet corn. Enzymes and other compounds that lead to discoloration are neutralized during blanching, keeping the corn kernels bright and appetizing even after extended periods of freezing.
- Improving Freezing Efficiency: Blanching quickly cooks the corn and partially softens the kernels. This helps the corn freeze more efficiently and prevents the formation of large ice crystals, which could negatively affect the corn’s texture during freezing.
To blanch sweet corn, follow these steps:
- Bring a large pot of water to a rolling boil. Ensure that there’s enough water in the pot to submerge the corn ears completely.
- Carefully add the corn ears to the boiling water. Depending on the size of the ears, blanch them for 3 to 5 minutes. Larger ears may need a bit more time than smaller ones.
- Use a timer to ensure accurate blanching time. Overcooking the corn can lead to loss of flavor and texture, while undercooking may not effectively inactivate the enzymes.
- After blanching, promptly remove the corn ears from the boiling water and transfer them to a bowl of ice water. The ice water bath halts the cooking process and quickly cools down the corn.
Blanching is a critical step that prepares the sweet corn for freezing. It helps maintain the corn’s quality, ensuring that it retains its taste, color, and nutrients throughout its time in the freezer. With properly blanched sweet corn, you can enjoy the taste of fresh corn even when it’s out of season.
Step 4: Cool and Dry the Corn
Cooling and drying the sweet corn after blanching is an essential step in the freezing process to ensure that the corn retains its quality and texture during freezing. Here’s why cooling and drying the corn are crucial:
- Halting the Cooking Process: After blanching, the sweet corn continues to retain heat, and the internal cooking process can still progress if not stopped promptly. Placing the corn ears in an ice water bath rapidly cools them down, effectively halting any further cooking. This step is crucial in maintaining the desired tenderness and taste of the corn, as overcooking can lead to a loss of flavor and texture.
- Preserving Texture: Rapidly cooling the corn in ice water helps preserve its texture. The quick temperature change helps set the structure of the corn kernels, ensuring they stay firm and retain their crunchiness after freezing.
- Preventing Waterlogging: Drying the corn after blanching removes excess moisture from the surface of the corn ears. Excessive moisture can lead to ice crystal formation during freezing, which may result in freezer burn and negatively impact the corn’s quality. By patting the corn dry with paper towels, you reduce the likelihood of freezer burn and improve the overall freezing efficiency.
To cool and dry the sweet corn after blanching, follow these steps:
- Prepare a bowl of ice water before blanching the corn.
- Once the corn has been blanched for the appropriate amount of time, immediately remove it from the boiling water using tongs or a slotted spoon.
- Submerge the hot corn ears in the bowl of ice water. Make sure the corn is fully immersed to cool it down quickly.
- Allow the corn to sit in the ice water for a few minutes until it is completely cooled.
- Once cooled, take the corn ears out of the ice water and place them on a clean surface or a stack of paper towels.
- Gently pat the corn ears dry with paper towels to remove any excess water.
After cooling and drying, the sweet corn is now ready for the next steps in the freezing process, such as cutting the kernels off the cob and packaging them for storage. Properly cooled and dried corn ensures that it freezes efficiently and maintains its quality, flavor, and texture for an extended period, allowing you to enjoy the delicious taste of sweet corn even during its off-season.
Step 5: Cut the Kernels off the Cob
Cutting the kernels off the cob is a crucial step in preparing sweet corn for freezing. By removing the kernels from the cob, you create smaller, bite-sized pieces that are easier to handle and cook with. Here’s why this step is essential:
- Size and Convenience: Cutting the kernels off the cob creates individual pieces that are more manageable and convenient to use in various dishes. Whether you want to add corn to soups, salads, casseroles, or simply enjoy it as a side dish, having the kernels separated allows for better portion control and even cooking.
- Improved Freezing: Corn kernels freeze more effectively than whole corn ears. By cutting the kernels off the cob, you increase the surface area exposed to the freezing temperature, which results in quicker freezing and better preservation of flavor and texture.
- Versatility in Cooking: Once the kernels are separated, you can use sweet corn in a variety of recipes without the need to thaw and cook a whole ear. This versatility makes it easier to incorporate corn into your meals, enhancing the overall dining experience.
To cut the kernels off the cob, follow these steps:
- Place the cooked corn ear vertically on a stable cutting board, holding it firmly with one hand to keep it steady.
- With the other hand, take a sharp knife and carefully cut downwards along the length of the cob, close to the base of the kernels.
- Try to cut the kernels off in a single downward motion, if possible, to keep them intact and whole.
- Repeat the process for all the corn ears until all the kernels have been separated.
Once the kernels are cut off, they are now ready to be packaged and sealed for freezing. Properly cut and prepared sweet corn ensures that it freezes well and remains easy to use in a variety of recipes, making it a convenient addition to your culinary endeavors even during the off-season.
Step 6: Package the Corn for Freezing
Packaging the corn for freezing is a crucial step in the process to ensure that the sweet corn remains fresh and free from freezer burn. Proper packaging helps retain the corn’s flavor, texture, and quality during storage. Here’s why this step is important:
- Portion Control: Dividing the corn kernels into portion sizes that suit your needs allows for easy and efficient use. When the corn is frozen in appropriate serving sizes, you can thaw and use only the amount required for a specific recipe or meal, minimizing food waste.
- Freezer-Safe Containers: Using freezer-safe bags or airtight containers is essential for preventing freezer burn and maintaining the corn’s freshness. Freezer-safe materials are designed to withstand low temperatures and protect the corn from exposure to air and moisture.
- Preventing Freezer Burn: Freezer burn occurs when the surface of frozen food becomes dehydrated due to exposure to air. This can negatively affect the corn’s taste, texture, and overall quality. Removing as much air as possible from the bags or containers creates a vacuum seal that helps prevent freezer burn.
To package the corn for freezing, follow these steps:
- Divide the cut corn kernels into portion sizes that suit your needs. You can separate them into small bags or containers, depending on how you plan to use the corn later.
- If using freezer-safe bags, fill each bag with the appropriate portion of corn, leaving some space at the top to allow for expansion during freezing. Seal the bags tightly, ensuring there are no gaps or openings.
- If using airtight containers, fill each container with the desired amount of corn, leaving some space at the top to accommodate expansion. Seal the containers securely to create an airtight seal.
- To remove air from the bags, press gently on the top of the bag while sealing it to push out excess air. For containers, make sure the lids are securely fastened to prevent any air from entering.
- Consider labeling each bag or container with the contents and date of freezing. This helps you keep track of the corn’s storage time and makes it easier to locate specific portions later on.
By properly packaging the sweet corn, you ensure that it stays in optimal condition during freezing. The absence of excess air and the use of freezer-safe materials play a key role in preserving the corn’s flavor and texture, allowing you to enjoy delicious sweet corn in your dishes throughout the year.
Step 7: Label and Date the Packages
Labeling and dating the packages of frozen sweet corn is a crucial organizational step to keep track of the corn’s storage time and ensure that you consume it within the recommended time frame for the best quality. Here’s why this step is important:
- Tracking Storage Time: By labeling each package with the date of freezing, you have a clear record of how long the sweet corn has been in the freezer. This helps you avoid keeping the corn in the freezer for too long, as extended storage can affect its taste and texture.
- Ensuring Optimal Quality: Sweet corn is best consumed within a specific time frame to retain its optimal flavor and texture. Labeling and dating the packages allows you to easily identify and prioritize the oldest packages, encouraging you to use them first and enjoy the corn at its best quality.
- Avoiding Food Waste: Knowing the freezing date helps prevent unnecessary food waste. If you have sweet corn packages that are approaching their maximum recommended storage time, you can plan to use them in your meals before their quality declines.
To label and date the packages of frozen sweet corn, follow these steps:
- Use a waterproof marker or labels to write the contents (sweet corn) on each bag or container. This ensures you can easily identify the packages even after an extended period in the freezer.
- Write the date of freezing on each package. You can use the day/month/year format for clarity.
- If using labels, affix them securely to the bags or containers.
- Consider arranging the packages in the freezer in order of their freezing dates, placing the oldest ones towards the front for easier access.
- Keep in mind the recommended storage time for sweet corn, which is typically 8 to 12 months. Plan your meals accordingly to use the corn within this time frame for the best taste and quality.
By labeling and dating the packages of frozen sweet corn, you ensure that you make the most of your frozen corn while it’s at its peak quality. Properly organized and tracked frozen corn helps you maintain an efficient freezer inventory and enjoy delicious sweet corn throughout the recommended storage period.
Step 8: Store in the Freezer
Properly storing the labeled packages of sweet corn in the freezer is crucial for maintaining the corn’s quality and ensuring it stays safe for consumption. Here’s why this step is important:
- Maintaining Quality: Storing the sweet corn at the correct temperature in the freezer is essential for preserving its flavor, texture, and nutritional value. Freezing at 0°F (-18°C) or lower prevents the growth of bacteria and other microorganisms, which can cause food spoilage and deterioration.
- Preventing Freezer Burn: A consistently low freezer temperature helps prevent freezer burn, which occurs when food is exposed to air. Freezer burn can affect the taste and texture of the corn, leading to a less enjoyable eating experience.
- Efficient Use of Space: Organizing the labeled packages in an orderly manner maximizes the use of freezer space. It allows you to stack the packages or arrange them in a way that minimizes air gaps, ensuring you can store more sweet corn and other frozen items efficiently.
To store the sweet corn in the freezer, follow these steps:
- Place the labeled and dated packages of sweet corn in the freezer.
- Organize the packages in a way that allows for efficient use of space. You can stack them or arrange them in rows to make the most of the available freezer area.
- Ensure that the freezer temperature is consistently at 0°F (-18°C) or lower. Use a freezer thermometer to monitor and verify the temperature regularly.
- Avoid frequent fluctuations in freezer temperature by keeping the freezer door closed as much as possible. Rapid temperature changes can impact the quality of the frozen corn.
- Avoid overloading the freezer, as this may impede airflow and lead to uneven freezing. Leave enough space between packages to allow for proper air circulation.
By storing the sweet corn correctly in the freezer, you maintain the corn’s freshness and quality for an extended period, allowing you to enjoy the delicious taste of sweet corn throughout the recommended storage time. Proper freezer management ensures that the sweet corn remains safe and tasty, providing you with a convenient and versatile ingredient for various dishes even when fresh sweet corn is not in season.
How long can sweet corn last in the freezer?
Sweet corn can last in the freezer for approximately 8 to 12 months when properly stored at 0°F (-18°C) or lower. Beyond this period, the corn may still be safe to eat, but its quality, taste, and texture may decline. It is advisable to consume the frozen sweet corn within the recommended storage time for the best results.
Other related questions
How do you defrost sweet corn?
To defrost sweet corn, transfer the frozen kernels from the freezer to the refrigerator and let them thaw overnight. Alternatively, you can place the frozen corn in a resealable plastic bag and immerse it in cold water for quicker thawing. Avoid using hot water or microwave defrosting methods to prevent the corn from becoming overcooked.
Can you refreeze sweet corn?
Refreezing sweet corn is generally not recommended as it can lead to a loss of quality, taste, and texture. When food is thawed, bacteria and other microorganisms can start to grow, and refreezing can increase the risk of foodborne illnesses. To maintain the best quality, it’s best to only thaw the amount of sweet corn needed for immediate use and avoid refreezing any leftovers.
How do I know if the sweet corn has gone bad after being frozen?
You can identify if sweet corn has gone bad after being frozen by looking for signs of freezer burn, such as dry, discolored, or shriveled kernels. Bad corn may also have an off smell or taste. If you notice any of these indications, it’s best to discard the sweet corn, as it may have lost its quality and become unsafe for consumption.
Can you freeze different varieties of sweet corn, like yellow or white corn?
Yes, you can freeze different varieties of sweet corn, including yellow or white corn. Freezing sweet corn helps preserve its taste and texture, regardless of the corn variety. Ensure the corn is fully cooled before freezing, and store it in airtight containers or freezer-safe bags to maintain its freshness and prevent freezer burn. Thaw the frozen sweet corn in the refrigerator when needed, and use it in various recipes like soups, salads, or side dishes for a delightful and nutritious addition to your meals.
Can frozen sweet corn be used for making cornbread or corn muffins?
Yes, frozen sweet corn can be used for making cornbread or corn muffins. Thaw the frozen corn in the refrigerator before incorporating it into the recipe. Drain any excess moisture from the thawed corn to prevent the batter from becoming too wet, then follow the cornbread or corn muffin recipe as usual for a delicious and flavorful result.
Can frozen sweet corn be used in salsa or other condiments?
Yes, frozen sweet corn can be used in salsa or other condiments. Thaw the frozen corn in the refrigerator before using it in the recipe. Incorporate the thawed sweet corn into your salsa or condiment mixture, along with other ingredients, to add a sweet and crunchy element to the dish.

