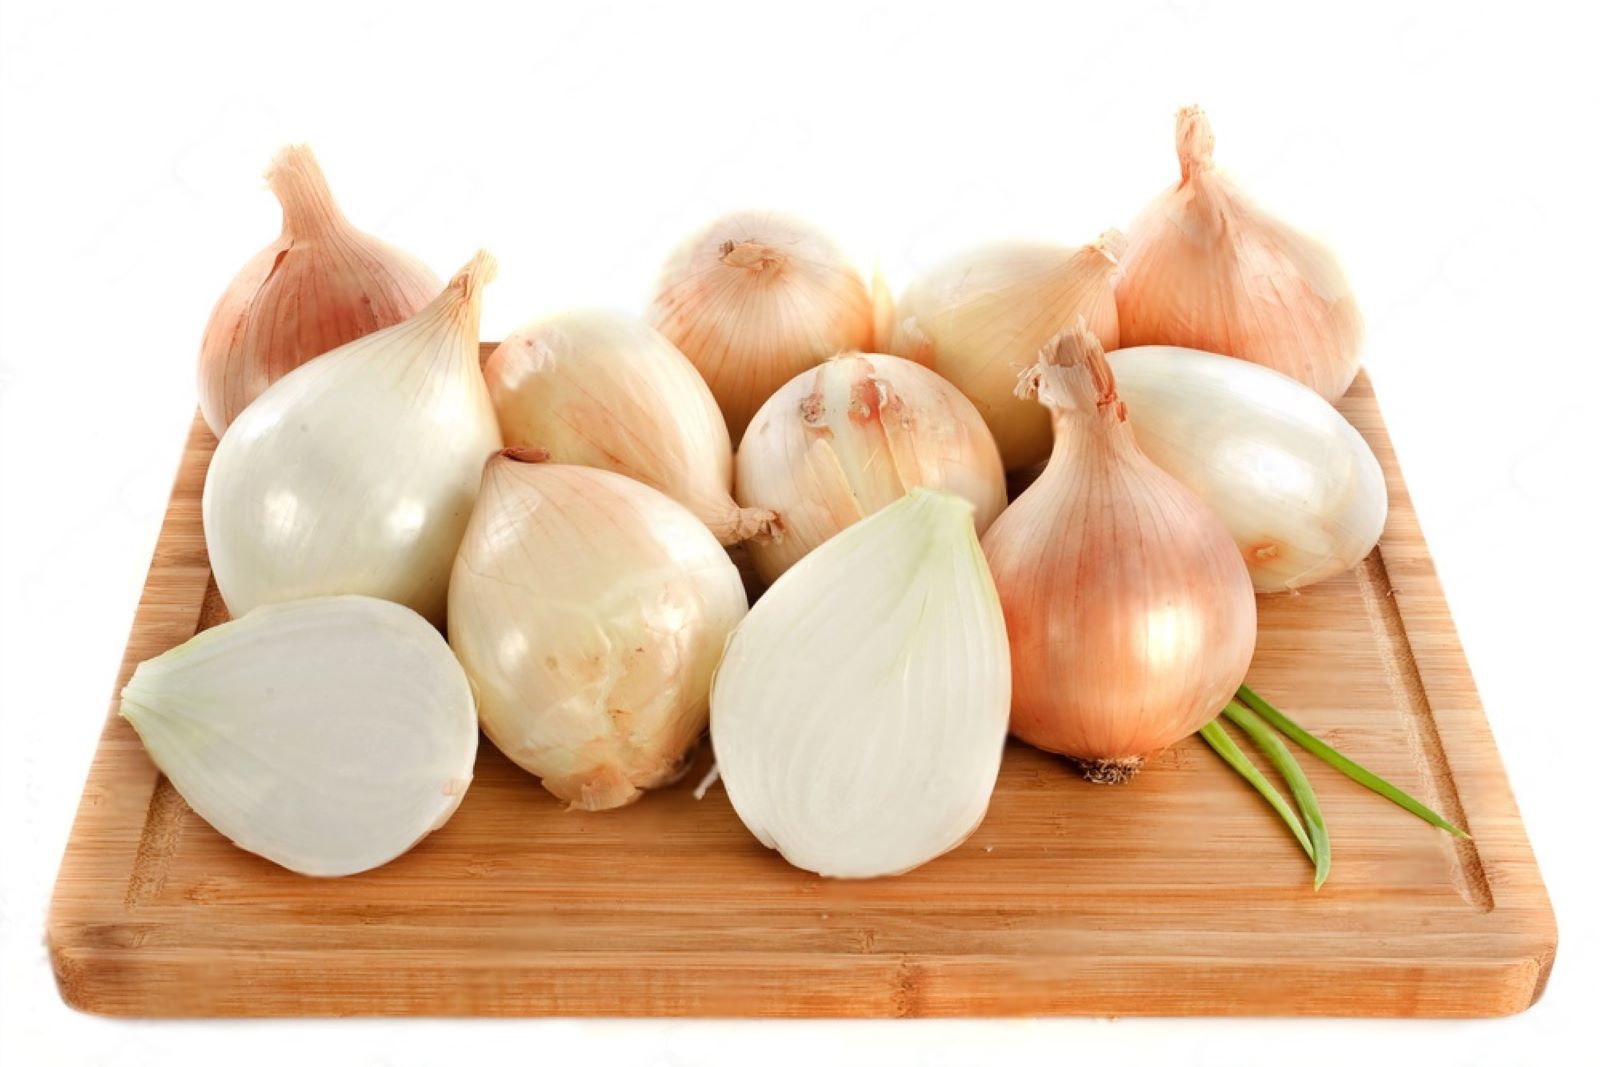
Sweet onions are a delightful addition to various culinary creations due to their mild and slightly sugary flavor. These onions, often available in varieties like Vidalia, Walla Walla, and Maui, are distinct from their more pungent relatives and are particularly enjoyable when used in raw dishes or recipes where a gentle onion taste is desired. However, their availability might be limited to specific seasons. Freezing sweet onions can be an excellent way to preserve their flavor and ensure they are accessible for your cooking ventures throughout the year. This guide outlines a step-by-step approach to freezing sweet onions while maintaining their texture and sweetness.
Below is a comprehensive procedure for freezing sweet onions:
Step 1: Choose Fresh Sweet Onions
When selecting sweet onions for freezing, it’s essential to opt for those that are in optimal condition. The quality of the onions you choose at this stage will significantly impact the final result of your frozen product. Here’s why choosing fresh sweet onions is crucial:
- Firmness: Look for sweet onions that feel firm when gently squeezed. A firm texture indicates that the onion is still relatively young and hasn’t started to soften or develop any undesirable textures.
- Blemish-Free: Inspect the onions for any visible blemishes, bruises, or soft spots. Avoid onions with cuts, cracks, or signs of decay, as these imperfections can affect the quality of the frozen product.
- Prime Condition: Sweet onions are at their best when they are harvested at the right time. Choosing onions that are in their prime ensures that they have the ideal balance of flavors and nutrients, contributing to a more enjoyable eating experience after freezing.
- Flavor and Aroma: Fresh sweet onions have a more vibrant and pronounced flavor compared to onions that have been stored for extended periods. Freezing can slightly mellow the taste of onions, so starting with onions that are already flavorful will result in a more satisfying end product.
- Texture Retention: Sweet onions chosen at their peak freshness are more likely to maintain their desirable texture after freezing and thawing. They’ll hold up better in dishes where texture matters, such as salads, salsas, and relishes.
- Overall Quality: By selecting the best sweet onions, you’re setting the foundation for a successful freezing process. The flavors, textures, and nutrients present in the fresh onions will translate into a high-quality frozen product that can be used in a variety of dishes even when sweet onions are out of season.
Step 2: Clean and Trim the Onions
Properly cleaning and trimming sweet onions is an essential step before freezing. This process ensures that the onions are free from dirt, debris, and any potential contaminants. Here’s why cleaning and trimming are important, along with an explanation of each step:
- Gentle Washing: Washing sweet onions under cool running water helps remove any dirt, dust, or residue that might be present on the outer layers. Even though you’ll be peeling off the outer skin, washing the onions prevents any unwanted particles from transferring to the inner layers during the peeling and cutting process.
- Peeling the Outer Skin: Peeling off the outer skin of sweet onions is crucial for two reasons. Firstly, it eliminates any potential dirt or contaminants that might be clinging to the outer layer. Secondly, the outer skin can sometimes become dry or damaged, and removing it reveals the fresher layers underneath. This contributes to a better texture and taste of the frozen onions.
- Trimming the Root End: The root end of an onion can often be dry, tough, or slightly damaged. Trimming it ensures that you’re working with the freshest and most desirable parts of the onion. It also helps the onion maintain its structural integrity during the freezing process.
- Maintaining Integrity During Freezing: Sweet onions have a delicate texture, and excess moisture can lead to issues like freezer burn or loss of flavor and quality. By cleaning and trimming the onions before freezing, you’re reducing the chances of excess moisture being trapped in the layers, which can affect the overall integrity of the onion during freezing and thawing.
- Enhancing Flavor: Removing the outer skin and trimming the root end contributes to a sweeter and milder flavor in the final product. The outer layers might have a slightly bitter taste, and by discarding them, you’re ensuring that the frozen onions retain the pleasant sweetness they’re known for.
- Uniformity in Cutting: Once cleaned and trimmed, the onions will be in a more consistent and manageable state for slicing or dicing. This uniformity makes it easier to blanch and freeze the onions evenly, which is essential for maintaining a consistent texture when they’re used in various dishes later on.
Step 3: Slice or Dice the Onions
Choosing how to cut your sweet onions before freezing is a key decision that affects their usability and versatility in future culinary endeavors. This step allows you to tailor the onions to your preferred cooking methods and recipes. Here’s why this choice matters, along with an explanation of the options:
- Slicing and Dicing Options: When preparing sweet onions for freezing, you have the choice of slicing them into thin rings or dicing them into smaller pieces. Both options offer distinct advantages based on the types of dishes you plan to create.
- Versatility in Recipes: Sliced sweet onions are perfect for recipes where you want distinct rings or larger pieces, such as using them as a topping for burgers, sandwiches, or salads. The slices add a delightful crunch and flavor to these dishes.
- Enhanced Distribution: Diced sweet onions, on the other hand, distribute more evenly throughout recipes. Their smaller size allows them to mix seamlessly into sauces, soups, casseroles, and stir-fries, imparting a consistent onion flavor to every bite.
- Convenience in Handling: Smaller pieces, like diced onions, are often more convenient to work with when you’re using the frozen onions directly from the freezer. They thaw more quickly and can be added to dishes without the need for further chopping.
- Frozen Texture Considerations: It’s essential to consider how the texture of the onions might change during freezing. Sliced onions tend to maintain their structural integrity better than diced onions, which can sometimes become slightly softer. This is important if you prefer a specific texture in your dishes.
- Cooking Time and Flavor Release: The size of the onion pieces also affects how quickly they cook and release flavor. Smaller pieces, like diced onions, tend to cook faster and release their flavors more readily, which can be advantageous in dishes where you want the onion flavor to be pronounced.
- Personal Preference: Ultimately, the decision between slicing and dicing sweet onions comes down to your personal cooking style, the types of dishes you often prepare, and your convenience preferences.
- Planning for Future Use: Keep in mind the types of recipes you frequently make and how you prefer to incorporate onions. If you’re uncertain, consider dividing your sweet onions into both sliced and diced portions to have a versatile supply for various culinary creations.
Can I freeze whole sweet onions?
Freezing whole sweet onions is possible, but it’s best to peel, slice, or dice them before freezing for better results. Whole onions may become mushy upon thawing. Sliced or diced onions freeze more successfully, maintaining their texture and flavor.
Step 4: Blanch the Onion Slices or Dices
Blanching is a vital technique when preparing sweet onions for freezing, as it plays a significant role in preserving the texture, flavor, and overall quality of the onions during their time in the freezer. This step involves a process of briefly cooking the onions in boiling water and then rapidly cooling them down. Here’s why blanching is essential, along with an explanation of the blanching process:
- Preserving Texture: Sweet onions have a delicate texture that can be altered by the freezing process. Blanching helps inactivating enzymes that could cause the onions to become mushy or lose their crispness when frozen. By blanching, you maintain the onions’ appealing texture when they are thawed and used in various dishes.
- Retaining Color: Blanching helps preserve the natural vibrant color of the onions. Enzymes present in the onions can lead to color changes when exposed to air and freezing. Blanching deactivates these enzymes, keeping the onions visually appealing even after they’ve been frozen.
- Reducing Bitterness: Some varieties of onions can have a slightly bitter taste. Blanching helps mitigate this bitterness by breaking down compounds that contribute to the bitter flavor, resulting in a milder and more pleasant taste.
Blanching Process:
- Boiling Water: Begin by bringing a pot of water to a rolling boil. The pot should be large enough to comfortably accommodate the amount of onion slices or dices you intend to blanch.
- Ice Water Bath: While the water is boiling, prepare a bowl of ice water. This ice water bath is essential for rapidly cooling down the blanched onions and stopping the cooking process. The ice water preserves the onions’ color, flavor, and texture.
- Immersing the Onions: Carefully add the onion slices or dices to the boiling water. Allow them to blanch for about 1-2 minutes. This brief cooking time is sufficient to achieve the desired enzyme deactivation without overcooking the onions.
- Ice Water Submersion: After blanching, quickly remove the onions from the boiling water using a slotted spoon or strainer and transfer them immediately to the bowl of ice water. This rapid cooling halts the cooking process, ensuring that the onions retain their crispness and color.
Blanching Benefits: Blanching offers a dual advantage of improving the quality of the frozen onions and preparing them for safe freezing. The combination of enzyme deactivation and rapid cooling contributes to a successful freezing process, allowing you to enjoy flavorful and texturally pleasing onions even after they’ve been stored in the freezer.
Can I Freeze Onions Without Blanching?
Blanching is recommended to preserve texture and flavor. It inactivates enzymes that can lead to quality loss during freezing. While you can freeze onions without blanching, the results might not be as optimal.
Step 5: Drain and Dry
After blanching sweet onion slices or dices, it’s essential to take a moment to drain and dry them thoroughly. This step might seem small, but it plays a significant role in ensuring the quality of the frozen onions and their performance in various dishes. Here’s why draining and drying is important, along with an explanation of the process:
- Excess Moisture and Freezer Burn: Excess moisture on the surface of the blanched onions can lead to freezer burn. Freezer burn occurs when moisture on the food’s surface evaporates, forms ice crystals, and then sublimates back into the dry freezer air. This process can result in undesirable changes in flavor, texture, and appearance. By draining and drying the onions, you’re minimizing the potential for moisture-related issues.
- Texture Preservation: Onions with excess moisture can become mushy when frozen. Properly draining and drying the blanched onions help maintain their desired texture after freezing. When you’re ready to use the frozen onions, you’ll find that they retain a crisper and more appealing consistency.
- Flavor and Quality: Moisture can also lead to a loss of flavor and quality over time. Damp onions are more prone to absorbing odors from the freezer, which can alter their taste. By ensuring the onions are thoroughly drained and dried, you’re protecting their natural flavor and ensuring they stay as delicious as when they were fresh.
- Preventing Clumping: Wet onion slices or dices can freeze together in clumps, making it challenging to portion out the desired amount for your recipes. Properly drying the onions before freezing minimizes the likelihood of clumping, allowing you to conveniently use only the amount you need.
Draining and Drying Process:
- Draining: After blanching, use a slotted spoon or strainer to lift the blanched onions out of the ice water bath. Allow the excess water to drain away. You can gently shake the strainer to facilitate drainage.
- Patting Dry: Place the drained onions on a clean kitchen towel or a layer of paper towels. Gently pat them dry to remove any remaining moisture on the surface. Avoid pressing too hard, as you want to prevent damaging the onions.
Taking Extra Care:
It’s important to handle the blanched onions delicately during this step. Being gentle helps prevent any unnecessary damage to the onions, which could lead to texture changes during freezing.
Step 6: Arrange the Onions for Flash-Freezing
After blanching and drying the sweet onion slices or dices, the next important step is arranging them for flash-freezing. This process involves spreading the onions on a baking sheet in a single layer before placing them in the freezer. Here’s why arranging for flash-freezing is essential, along with an explanation of the process:
- Preventing Clumping: By spreading the blanched and dried onion slices or dices in a single layer on a baking sheet, you’re preventing them from sticking together and forming clumps during freezing. This ensures that the individual pieces remain separate and easy to work with when you’re ready to use them in recipes.
- Facilitating Quick Freezing: Placing the onions in a single layer allows for better air circulation around each piece. This accelerates the freezing process, which is crucial for preventing the formation of large ice crystals.
Flash-Freezing Benefits:
- Texture Preservation: Flash-freezing is a rapid freezing process that prevents the formation of large ice crystals within the cells of the onions. Large ice crystals can rupture cell walls and lead to a loss of texture when the onions are thawed. Flash-freezing preserves the cellular structure of the onions, resulting in a more desirable texture upon thawing.
- Flavor Retention: The quick freezing process minimizes the amount of damage to the onion’s cell structure. This helps preserve the natural flavors of the onions, ensuring that they taste as close to fresh as possible when used in your recipes.
- Uniformity and Quality: Flash-freezing ensures that the onions freeze quickly and uniformly. This consistency contributes to the overall quality of the frozen product. When you grab a portion of the frozen onions for a recipe, you can be confident that each piece will have the same texture and flavor.
- Minimizing Freezer Burn: Rapid freezing reduces the exposure of the onions to the dry air in the freezer, which can cause freezer burn. Freezer burn occurs when moisture on the surface of the food sublimates directly into the freezer air. Flash-freezing helps minimize this risk by sealing moisture within the onion pieces.
Flash-Freezing Process:
- Arrange on Baking Sheet: Spread the blanched and dried onion slices or dices in a single layer on a baking sheet. Make sure they’re not touching each other to ensure even freezing.
- Place in Freezer: Put the baking sheet with the arranged onions into the freezer. Make sure it’s placed on a flat surface to keep the onions from sliding around.
- Flash-Freeze: Allow the onions to remain in the freezer for a few hours or until they are solid. The rapid freezing process ensures that the onions freeze quickly and uniformly.
Step 7: Package and Seal
Once your sweet onion slices or dices have been flash-frozen and are ready for long-term storage, the next critical step is to package and seal them properly. This step involves transferring the frozen onions into airtight freezer-safe containers or resealable freezer bags. Here’s why packaging and sealing are important, along with an explanation of the process:
- Protection from Freezer Burn: Freezer burn is a common issue that occurs when frozen food is exposed to dry air in the freezer. This can lead to changes in flavor, texture, and appearance. Proper packaging and sealing help minimize the risk of freezer burn by creating a barrier that prevents the onions from coming into direct contact with the dry air.
- Airtight Containers: Using airtight containers or resealable freezer bags ensures that the onions are enclosed in an environment with minimal air exposure. Air contains moisture, which can contribute to the development of ice crystals and freezer burn on the surface of the food.
- Preserving Quality: Airtight packaging not only prevents freezer burn but also preserves the overall quality of the frozen onions. It helps maintain the natural flavors and textures, allowing you to enjoy the onions as if they were freshly prepared.
- Excess Air Removal: While transferring the frozen onions to containers or bags, it’s important to remove excess air. Excess air trapped in the packaging can lead to the formation of ice crystals and freezer burn. Removing the air minimizes these risks and ensures that the onions remain in optimal condition.
Package and Seal Process:
- Select Containers or Bags: Choose airtight containers specifically designed for freezer use. Alternatively, use high-quality resealable freezer bags that are thick and durable.
- Portion the Onions: If you prefer, divide the frozen onion slices or dices into smaller portions that are convenient for your recipes. This way, you can thaw only the amount you need each time.
- Transfer to Containers or Bags: Carefully transfer the frozen onions into the containers or bags. Fill them to the desired level, leaving a small amount of space at the top to allow for expansion during freezing.
- Remove Excess Air: For containers, press down on the food slightly to remove any trapped air before sealing the container. For bags, gently press out as much air as possible before sealing the bag.
- Seal Securely: Ensure that the containers or bags are sealed tightly to prevent any air or moisture from entering. This helps maintain the onions’ quality during storage.
How Do I Prevent Onion Odor in the Freezer?
To prevent onion odor from affecting other frozen foods, ensure your onion slices or dices are well-sealed in airtight containers or bags. You can also double-bag them for extra protection.
Step 8: Label and Date
After packaging and sealing your frozen sweet onion slices or dices, it’s essential to take a moment to label the containers or bags with pertinent information. This step might seem straightforward, but it plays a crucial role in maintaining organization and ensuring you can make the most of your frozen onions. Here’s why labeling and dating are important, along with an explanation of the process:
- Organizational Clarity: Freezers can quickly become filled with various frozen items, and it’s easy to lose track of what’s inside each container or bag. Labeling the packages with the contents (sliced or diced sweet onions) ensures that you can identify the contents at a glance without having to open every container.
- Freshness Tracking: By including the date of freezing on the label, you create a reference point for how long the onions have been in the freezer. This helps you prioritize using the older packages first to ensure you’re enjoying the onions at their best quality.
- Recipe Planning: Knowing the type of onion (sliced or diced) can also be beneficial when planning your recipes. Different dishes may require specific onion cuts, and labeling helps you quickly select the appropriate package.
- Quality Assurance: The date on the label allows you to monitor how long the onions have been in the freezer. Over time, frozen food can experience flavor and texture changes, even when properly stored. Being aware of the freezing date helps you manage your supply and use the onions while they’re still at their peak quality.
Labeling and Dating Process:
- Label the Packages: Use adhesive labels or freezer-safe tape to label the airtight containers or bags. Write “Sliced Sweet Onions” or “Diced Sweet Onions” clearly on the label.
- Include the Date: Beneath the onion description, write down the date you froze the onions. Use a format like “Month/Day/Year” to ensure accurate tracking.
- Be Clear and Legible: Write the information clearly and legibly to ensure you can read it easily later on. Use a permanent marker or a pen that won’t smudge or fade over time.
- Easy Access and Use: Proper labeling allows you to quickly locate the specific package you need for your recipes without unnecessary guesswork. It streamlines your cooking process and makes meal planning more efficient.
Step 9: Store in the Freezer
After you’ve gone through the careful process of blanching, drying, flash-freezing, packaging, labeling, and dating your sweet onion slices or dices, the final step is to store them properly in the freezer. Proper storage ensures that your frozen onions maintain their quality, flavor, and texture for an extended period. Here’s why storing in the freezer is crucial, along with an explanation of the process:
- Maintaining Quality: Freezing is an effective method for preserving the freshness of foods, including sweet onions. The low temperatures in the freezer slow down the enzymatic processes that lead to flavor and texture deterioration. By storing the onions in the freezer, you’re essentially hitting the “pause” button on the aging process.
- Preventing Freezer Burn: Freezer burn occurs when the surface of frozen food is exposed to air, causing moisture to evaporate and ice crystals to form. Properly sealed and labeled packages, stored in the freezer, reduce the risk of freezer burn, ensuring that the onions remain in optimal condition.
- Temperature Control: The temperature at which you store the frozen onions matters. The ideal temperature for a home freezer is 0°F (-18°C) or lower. At this temperature, bacterial growth is halted, and the risk of food spoilage is minimized. Storing your sweet onion packages at the recommended temperature helps maintain their quality and safety.
- Minimizing Temperature Fluctuations: While modern freezers are designed to maintain consistent temperatures, it’s important to minimize temperature fluctuations. Opening and closing the freezer frequently or storing it in a location with temperature variations can impact the quality of the frozen onions over time.
- Longevity and Usability: Sweet onions that are properly blanched, dried, and stored at the correct freezer temperature can last for several months to a year without significant loss of quality. By adhering to proper storage practices, you ensure that your frozen onions are ready to enhance your dishes whenever you need them.
Freezer Storage Process:
- Place in Freezer: Carefully place the labeled and dated sweet onion packages in the freezer. Ensure they are positioned in a way that allows air to circulate around them. Avoid overcrowding the freezer, as this can impact air circulation and lead to uneven freezing.
- Maintain Consistent Temperature: Set your freezer to a temperature of 0°F (-18°C) or lower. Check the temperature periodically to ensure it remains within the recommended range.
- Avoid Frequent Door Opening: Minimize the frequency of opening the freezer door to prevent temperature fluctuations. This helps maintain a stable environment for your frozen items.
- Use FIFO Principle: When using the frozen onions, follow the “First In, First Out” (FIFO) principle. This means using the oldest packages first to ensure that none of the onions go to waste.
Other related questions
How do I defrost sweet onions?
Defrost sweet onions by transferring the frozen slices/dices to a sealed container/bag. Place in the fridge for gradual thawing, maintaining texture and flavor. Alternatively, use the defrost function on a microwave for quicker thawing.
Can I refreeze sweet onions?
Refreezing sweet onions is not recommended due to potential quality loss. Once thawed, cell structure breaks, affecting texture and taste. For optimal results, use onions directly after thawing and avoid repeated freezing.
How do I know if the sweet onions have gone bad after being frozen?
Signs of frozen sweet onions going bad include off-smell, discoloration, mushy texture, or freezer burn. Quality deteriorates over time, affecting taste. Thawed onions should be used promptly; any noticeable changes may indicate spoilage.
Can I Freeze Onion Rings for Frying Later?
Yes, you can freeze onion rings for frying. After blanching and drying, arrange them on a baking sheet, freeze, and then transfer to an airtight container or bag. This method helps maintain their crispness for frying.
What Dishes Can I Use Frozen Sweet Onions In?
Frozen sweet onions are versatile additions to a range of dishes. Use them in soups, stews, stir-fries, casseroles, and sautés. They maintain flavor and texture when properly prepared, enhancing both cooked and uncooked recipes.
Can I Freeze Cooked Dishes with Sweet Onions?
Yes, you can freeze dishes cooked with sweet onions. Ensure proper cooling before freezing. Cooked dishes may have slightly softer onions after thawing.
Do Frozen Sweet Onions Lose Their Nutritional Value?
Freezing may cause minor nutrient loss in sweet onions, but they retain much of their nutritional value. Vitamins and minerals may degrade slightly, yet frozen onions remain a source of dietary benefits. Proper storage and usage help preserve their healthful qualities.
What’s the Difference Between Sweet Onions and Regular Onions for Freezing?
The freezing process is similar for both sweet onions and regular onions. However, sweet onions are preferred for their milder taste and less pungent aroma when used in dishes. Freezing preserves their distinct flavor, making them a flavorful addition to various recipes, similar to regular onions but with a sweeter profile.

