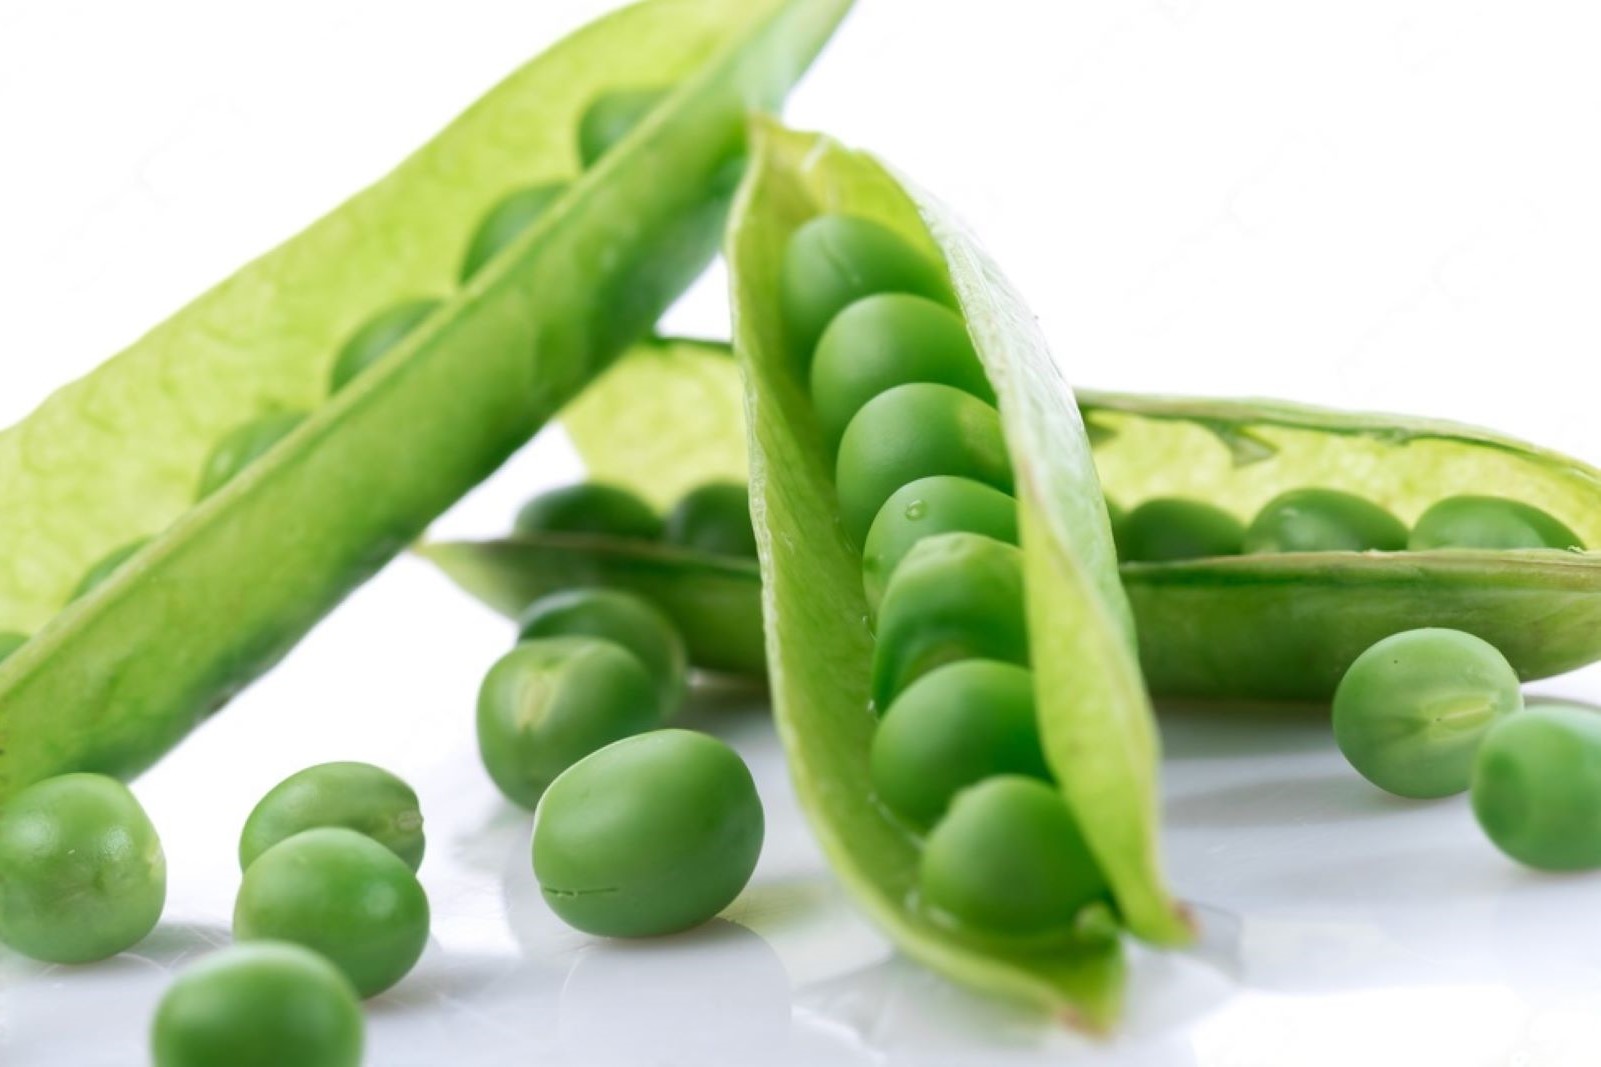
Sweet peas are delightful and vibrant green pods filled with tender peas. These legumes are cherished for their delicate sweetness and are a popular addition to various dishes. Whether you’ve harvested an abundance of sweet peas from your garden or found a great deal at the farmers’ market, freezing them can help you enjoy their flavors all year round. Preserving the goodness of sweet peas through freezing is a simple process that maintains their texture and taste. In this article, we present a comprehensive guide to freezing sweet peas while ensuring they remain as delicious as when freshly picked.
Follow these steps to freeze sweet peas:
Step 1: Choose Fresh Sweet Peas
When embarking on the journey of freezing sweet peas, the quality of the initial selection sets the foundation for a successful outcome. Opting for the freshest sweet pea pods is not just a matter of preference; it directly impacts the taste, texture, and overall appeal of the frozen peas you’ll enjoy in the months to come.
Plumpness and vibrancy are key indicators of the sweet pea pods’ freshness. A plump pod suggests that the peas inside are likely to be full and succulent. These pods are a treasure trove of the tender, flavorful peas that sweet peas are known for. Vibrant hues in the pod’s coloration indicate that the peas are still at their prime, bursting with natural sweetness and nutrients.
It’s crucial to avoid pods showing any signs of wilting or damage. Wilting can be a sign that the peas within are starting to lose moisture and become less crisp. Damaged pods could mean that the peas are exposed to air and contaminants, compromising their taste and texture. By choosing pods free from such imperfections, you’re ensuring that your frozen sweet peas retain their optimum quality.
Step 2: Wash and Shell the Peas
Turning fresh sweet pea pods into perfectly frozen peas involves more than just their outer appearance. Properly washing and shelling the peas is a meticulous process that ensures you’re working with clean and prime-quality peas, setting the stage for a delectable frozen treat.
Commence by washing the sweet pea pods diligently under cold running water. This step might seem straightforward, but its significance should not be underestimated. Sweet peas, like any produce, can harbor dirt, debris, or potential contaminants from their journey to your kitchen. Rinsing them under water dislodges any impurities, safeguarding the purity and integrity of the peas.
Once the pods are clean, it’s time to embrace the art of shelling. Gently, yet purposefully, open each pod to reveal the tender peas nestled within. This process requires a delicate touch, as you want to avoid damaging the peas in the process. Shelling is akin to unwrapping a gift – each pod holds the promise of the vibrant green gems inside.
As you open the pods, an attentive eye is your greatest ally. Any peas that appear discolored or overripe should be promptly removed and set aside for disposal. These peas may have started to lose their sweetness or texture, which can affect the overall quality of your frozen batch.
Can I freeze sweet peas in their pods if they are still young?
Yes, freezing young sweet pea pods is possible. However, shelling before freezing is recommended for better quality. Frozen pods can become tough and less desirable upon thawing and cooking.
Step 3: Blanch the Peas
In the journey of freezing sweet peas, blanching emerges as a pivotal technique that serves as a guardian of color, texture, and flavor. This step involves a careful dance of hot and cold, bringing out the best in these delicate green gems.
Blanching is like a brief yet impactful spa treatment for sweet peas. Its primary purpose is to halt the enzyme activity that can cause deterioration, while also locking in the peas’ vibrant hue and natural goodness. The process involves a sequence of precise actions that transforms sweet peas into prime candidates for freezing.
To initiate blanching, you’ll need a large pot of water brought to a vigorous rolling boil. This pot of boiling water acts as a gateway to preserving the peas’ intrinsic qualities. Concurrently, you’ll want to prepare a bowl of ice water – an oasis of chill that will serve as the peas’ sanctuary after their momentary plunge into the hot water.
Gently place the shelled peas into the boiling water, allowing them to bathe in its warmth for a mere 1-2 minutes. This short stint in boiling water is adequate to inactivate the enzymes that could otherwise lead to loss of color and flavor. The peas undergo a transformation – their vibrant green shade intensifies, and their nutritional potential is locked in.
However, as swiftly as they were introduced, the peas must be rescued from the boiling water. Using a slotted spoon or a sieve, scoop out the peas and immediately submerge them in the awaiting ice water. This rapid transition from heat to cold serves as a shock to the peas, preventing them from overcooking. The process, known as “shocking,” halts the cooking process promptly and preserves the peas’ firmness and texture.
Can I skip blanching before freezing sweet peas?
Blanching is essential to halt enzyme activity, preserve color, and maintain texture. Skipping it may result in flavor and texture degradation over time.
Step 4: Drain and Dry the Peas
The transition from blanching to freezing sweet peas involves a vital interlude known as draining and drying – a phase where moisture management takes center stage. Ensuring that your blanched sweet peas are well-drained and properly dried is the key to preventing freezer burn and preserving their pristine quality.
Once the blanching process is complete and the peas have emerged from their ice water plunge, it’s important to bid farewell to any lingering water droplets. Water, although essential for life, becomes an unwelcome guest when it comes to freezing. Excess moisture in your frozen goods can lead to the dreaded freezer burn – that unappetizing phenomenon characterized by dehydration and the deterioration of texture and taste.
Draining the peas involves giving them a gentle shake or placing them in a colander to let any excess water escape. This simple act allows you to bid adieu to water that might otherwise accumulate as ice crystals during freezing, causing damage to the peas’ cell structure.
But the journey doesn’t end with drainage; it continues with a moment of intimacy – a gentle pat-down with paper towels. Each pea, lovingly nestled in the folds of the towel, is tenderly dried, ensuring no residual moisture remains. This careful drying process is akin to the final flourish of a masterpiece, adding the finishing touch that elevates your peas from good to exceptional.
Step 5: Arrange the Peas for Freezing
As you tread further on the path to freezing sweet peas, a pivotal act awaits: arranging the blanched and dried peas in a single layer on a baking sheet. This seemingly simple action serves as a guardian of individuality and uniformity, ensuring that each pea is granted the space it deserves and preserving their quality during freezing.
Imagine the baking sheet as a canvas and the peas as tiny, vibrant brushstrokes. Each pea, a distinct entity, has a story to tell in terms of flavor and texture. By placing them in a single layer, you’re allowing each pea to maintain its independence – they won’t fuse into a solid mass that’s hard to separate later on.
This strategic arrangement prevents the peas from sticking together like old friends, avoiding the formation of clumps that could hinder your culinary creativity when you’re ready to use them. The individuality of each pea is safeguarded, preserving the essence of your hard work in selecting, blanching, and drying them.
But there’s more to this arrangement than meets the eye. A single layer of peas promotes even freezing. Just as a teacher divides attention equally among all students, the freezer works its magic uniformly on each pea when they are spread out. This equanimity in freezing ensures that each pea remains intact and retains its unique attributes.
Step 6: Flash-Freeze the Peas
As your sweet pea transformation journey continues, the concept of flash-freezing comes into play – a technique that’s akin to capturing a moment in time. Flash-freezing is the bridge between arrangement and solidity, ensuring that the peas retain their distinctiveness and remain steadfastly independent even in the cold embrace of the freezer.
Imagine your baking sheet as a portal to the future, a conduit between your efforts and the pleasures that await you down the line. Placing the arranged peas on the baking sheet is like positioning them for a snapshot, each pea finding its place in the ensemble. But it’s not just a photograph – it’s a preservation of texture, color, and flavor.
The term “flash” in flash-freezing alludes to the speed with which the peas are exposed to freezing temperatures. This rapid cooling process is designed to minimize the formation of large ice crystals within the peas. Large ice crystals can rupture cell walls, potentially altering the peas’ texture upon thawing. By contrast, flash-freezing generates smaller, more manageable ice crystals, maintaining the peas’ integrity.
Once the baking sheet enters the freezer, the countdown to preservation begins. The peas are surrounded by an atmosphere of intense cold, gradually transforming from tender pods to resilient nuggets of frozen delight. The act of flash-freezing accomplishes two essential goals: it prevents the peas from clumping together, preserving their individuality, and it expedites the process, locking in the peas’ freshness and taste.
The recommended freezing time of about 1-2 hours is a nod to precision – long enough for the peas to solidify while avoiding overexposure to the freezer’s chill. Like an artist stepping back to admire their canvas, you’ll return to find peas that are no longer just raw ingredients but have taken on a new state of being.
Step 7: Package and Seal the Peas
As your sweet peas emerge from their frozen reverie, it’s time to orchestrate their grand entrance into the world of long-term preservation. Packaging and sealing these little green treasures is a delicate choreography that involves safeguarding their essence and guarding against the uninvited guest known as freezer burn.
Think of packaging as building a fortress for your sweet peas. They’ve journeyed through cultivation, harvesting, blanching, and flash-freezing to arrive at this moment. Now, you’ll provide them with a snug home that defends against the elements and preserves their integrity.
Airtight freezer-safe containers and resealable freezer bags are your chosen vessels for this noble task. These containers are designed to fend off the chilly air that could compromise your peas’ quality over time. Choose containers that accommodate the quantity you intend to use in a single sitting – this minimizes the need to repeatedly expose the peas to air and fluctuating temperatures.
As you transfer the frozen peas into their new homes, take care to eliminate any trapped air. Air pockets can be your peas’ adversaries, causing freezer burn and altering their texture. To prevent this, press gently on the container or bag to release excess air before sealing. Visualize this as creating a vacuum seal that will keep your peas safely nestled in their frozen cocoon.
Sealing is like sealing a promise – you’re guaranteeing the future availability of those sweet peas in all their glory. It’s a commitment to savoring their vibrant flavors and delightful crunch whenever you please.
Step 8: Label and Date the Packages
As you conclude the process of packaging and sealing your frozen sweet peas, a final touch of organization and foresight is required. This step involves the art of labeling and dating – a practice that serves as both a roadmap and a reminder of your culinary treasures.
Imagine your frozen peas as time travelers, embarking on a journey through the cold expanse of your freezer. Labeling each container or bag with the date of freezing is akin to giving them a passport that records their origin. This simple act becomes your guiding star when you dive into your freezer months later, searching for that burst of flavor and freshness.
Beyond just knowing when your sweet peas were preserved, understanding their best quality window is also essential. Like any natural delight, sweet peas have a prime period of freshness that you’ll want to capture. By noting that they can maintain their best quality for about 8-12 months, you’re essentially providing yourself with a guideline for consumption.
As you retrieve your frozen peas in the future, the date and duration become your allies in decision-making. You can choose to incorporate them into your culinary creations while they’re still at their peak, ensuring that the taste and texture are unaltered by time. It’s a way of honoring the effort you’ve put into preserving them and savoring the essence of each season’s bounty.
Step 9: Store in the Freezer
As your journey of freezing sweet peas reaches its final destination, a moment of placement and consideration awaits. Storing your diligently prepared packages in the freezer is the culmination of your efforts, and where you choose to house them within this chilly sanctuary makes all the difference.
Imagine your freezer as a symphony hall, each section contributing to the harmony of preservation. When you place your labeled packages within its confines, you’re selecting the perfect seats for your frozen orchestra. Your sweet peas, carefully packaged and labeled, are the star performers in this icy ensemble.
The coldest part of your freezer is akin to the prime seats in a concert hall – it’s where the temperature remains the most consistent and the risk of temperature fluctuations is minimized. This area is your assurance that the peas will remain frozen without experiencing the stress of thawing and refreezing cycles. In other words, it’s the sweet spot for maintaining their quality over time.
On the other hand, the freezer door, while convenient for quick access, is a realm of temperature variability. Every time the door swings open, it introduces a rush of relatively warmer air, causing temperature fluctuations that can compromise the integrity of your frozen treasures. By avoiding this area, you’re safeguarding your peas against the ups and downs of temperature, ensuring that they remain as delicious as the day they were frozen.
Other related questions
How do I defrost sweet peas?
To defrost sweet peas, transfer them from the freezer to the refrigerator and let them thaw slowly for several hours or overnight. Alternatively, place them in a sealed plastic bag and immerse in cold water, changing the water every 30 minutes until thawed. Avoid using heat to expedite thawing, as it can compromise texture and flavor.
Can I thaw frozen sweet peas quickly using a microwave?
While possible, gradual thawing in the refrigerator is recommended to maintain texture. Microwaving can lead to uneven thawing and potential overcooking. Preserve quality by opting for gentle, controlled thawing methods.
Can I refreeze sweet peas?
Refreezing sweet peas is generally not recommended due to potential quality loss. Once thawed, the peas’ texture and flavor may degrade. If refreezing is necessary, cook them first, cool rapidly, and then store in airtight containers with proper labeling.
How do I know if the sweet peas have gone bad after being frozen?
Inspect frozen sweet peas for signs of freezer burn: excessive ice crystals, dried or discolored spots. Off odors or flavors suggest spoilage. Properly stored, they should maintain quality for 8-12 months; discard if textures or flavors are significantly altered.
Are there any creative uses for frozen sweet peas other than cooking?
Yes, frozen sweet peas can be versatile beyond traditional cooking. They’re great for adding a pop of color and nutrients to smoothies or blended soups. Thawed peas can enhance salads with their natural sweetness and vibrant hue, offering creative options for culinary experimentation.
Can I add seasonings or butter before freezing sweet peas?
It’s advisable to avoid adding seasonings or butter before freezing sweet peas. These ingredients may affect taste and texture during freezing and thawing. Add them when reheating or using in recipes for best results.

